
Bottle Chili Pepper Growing: Unleash your inner gardener and ignite your passion for homegrown spice! Have you ever dreamed of harvesting fiery chili peppers right from your windowsill, even without a sprawling garden? I’m here to tell you, it’s absolutely possible, and surprisingly easy, with a clever DIY trick that transforms ordinary plastic bottles into miniature chili pepper paradises.
For centuries, cultivating chili peppers has been a vibrant tradition across cultures, from the ancient civilizations of South America to the bustling markets of Asia. These fiery fruits have not only added zest to our cuisines but also held medicinal and symbolic significance. Now, you can participate in this rich history, even in a small apartment, by embracing the art of bottle chili pepper growing.
In today’s fast-paced world, finding moments of connection with nature can be a challenge. That’s where this DIY project comes in. It’s more than just a gardening hack; it’s a way to de-stress, learn new skills, and enjoy the satisfaction of nurturing life from seed to harvest. Plus, imagine the bragging rights when you serve up a dish seasoned with chili peppers you grew yourself! This guide will provide you with the knowledge and confidence to start your own thriving bottle chili pepper garden, regardless of your experience level. Let’s get started!

DIY Bottle Chili Pepper Garden: From Trash to Table!
Hey there, fellow gardening enthusiasts! Ever thought about turning your empty plastic bottles into a thriving chili pepper garden? It’s a fantastic way to recycle, save space, and enjoy fresh, spicy goodness right at your fingertips. I’ve been doing this for a while now, and trust me, it’s easier than you think! Let’s dive into how you can create your own bottle chili pepper paradise.
What You’ll Need: The Chili Pepper Gardener’s Toolkit
Before we get our hands dirty, let’s gather all the necessary supplies. This will make the process smooth and enjoyable.
* Plastic Bottles: The stars of our show! Look for sturdy bottles, preferably 2-liter soda bottles or similar. Clear or slightly tinted bottles work best. Avoid dark-colored bottles as they can overheat the soil.
* Chili Pepper Seeds: Choose your favorite varieties! Jalapeños, habaneros, serranos – the spicier, the better (in my opinion!). You can buy seeds online, at your local garden center, or even harvest them from existing chili peppers.
* Potting Soil: A good quality potting mix is crucial for healthy chili pepper growth. Avoid using garden soil, as it can be too dense and may contain pests or diseases.
* Scissors or Utility Knife: For cutting the plastic bottles. Be careful!
* Drill or Nail and Hammer: To create drainage holes.
* Watering Can or Spray Bottle: For watering your chili pepper plants.
* Optional: Twine or Wire: For hanging your bottle planters.
* Optional: Small Pebbles or Gravel: To improve drainage.
* Optional: Seed Starting Tray and Dome: If you’re starting your seeds indoors.
* Optional: Plant Labels: To keep track of your chili pepper varieties.
Step-by-Step Guide: Creating Your Bottle Chili Pepper Garden
Alright, let’s get started! Follow these steps, and you’ll have your bottle chili pepper garden up and running in no time.
1. Prepare the Bottles:
* Rinse the plastic bottles thoroughly with soap and water to remove any residue.
* Remove the labels. Soaking them in warm, soapy water can help.
* Decide how you want to orient your bottle planter. You can cut the bottle horizontally to create a pot-like container, or you can cut it vertically to create a hanging planter. I personally prefer the horizontal cut for stability.
* Using scissors or a utility knife, carefully cut the bottle according to your chosen orientation. If cutting horizontally, cut the bottle in half. If cutting vertically, cut a large rectangular opening on one side of the bottle, leaving the bottom intact.
* Smooth out any sharp edges with sandpaper or a file to prevent injury.
2. Create Drainage Holes:
* Drainage is essential to prevent root rot.
* Using a drill or a nail and hammer, create several drainage holes in the bottom of the bottle. I usually make about 4-5 holes, depending on the size of the bottle.
* If you’re using a hanging planter, make sure the holes are positioned so that water doesn’t drip directly onto anything below.
3. Add Drainage Layer (Optional):
* This step is optional but highly recommended.
* Place a layer of small pebbles or gravel at the bottom of the bottle. This will help improve drainage and prevent the soil from becoming waterlogged.
4. Fill with Potting Soil:
* Now it’s time to fill the bottle with potting soil.
* Leave about an inch or two of space at the top of the bottle.
* Gently pat down the soil to remove any air pockets.
5. Sowing the Seeds (or Transplanting Seedlings):
* Starting from Seeds:
* Make small indentations in the soil, about ¼ inch deep.
* Place 2-3 chili pepper seeds in each indentation.
* Cover the seeds with a thin layer of potting soil.
* Gently water the soil using a spray bottle.
* If you’re starting your seeds indoors, place the bottle planter in a seed starting tray with a dome to create a humid environment.
* Keep the soil moist but not soggy.
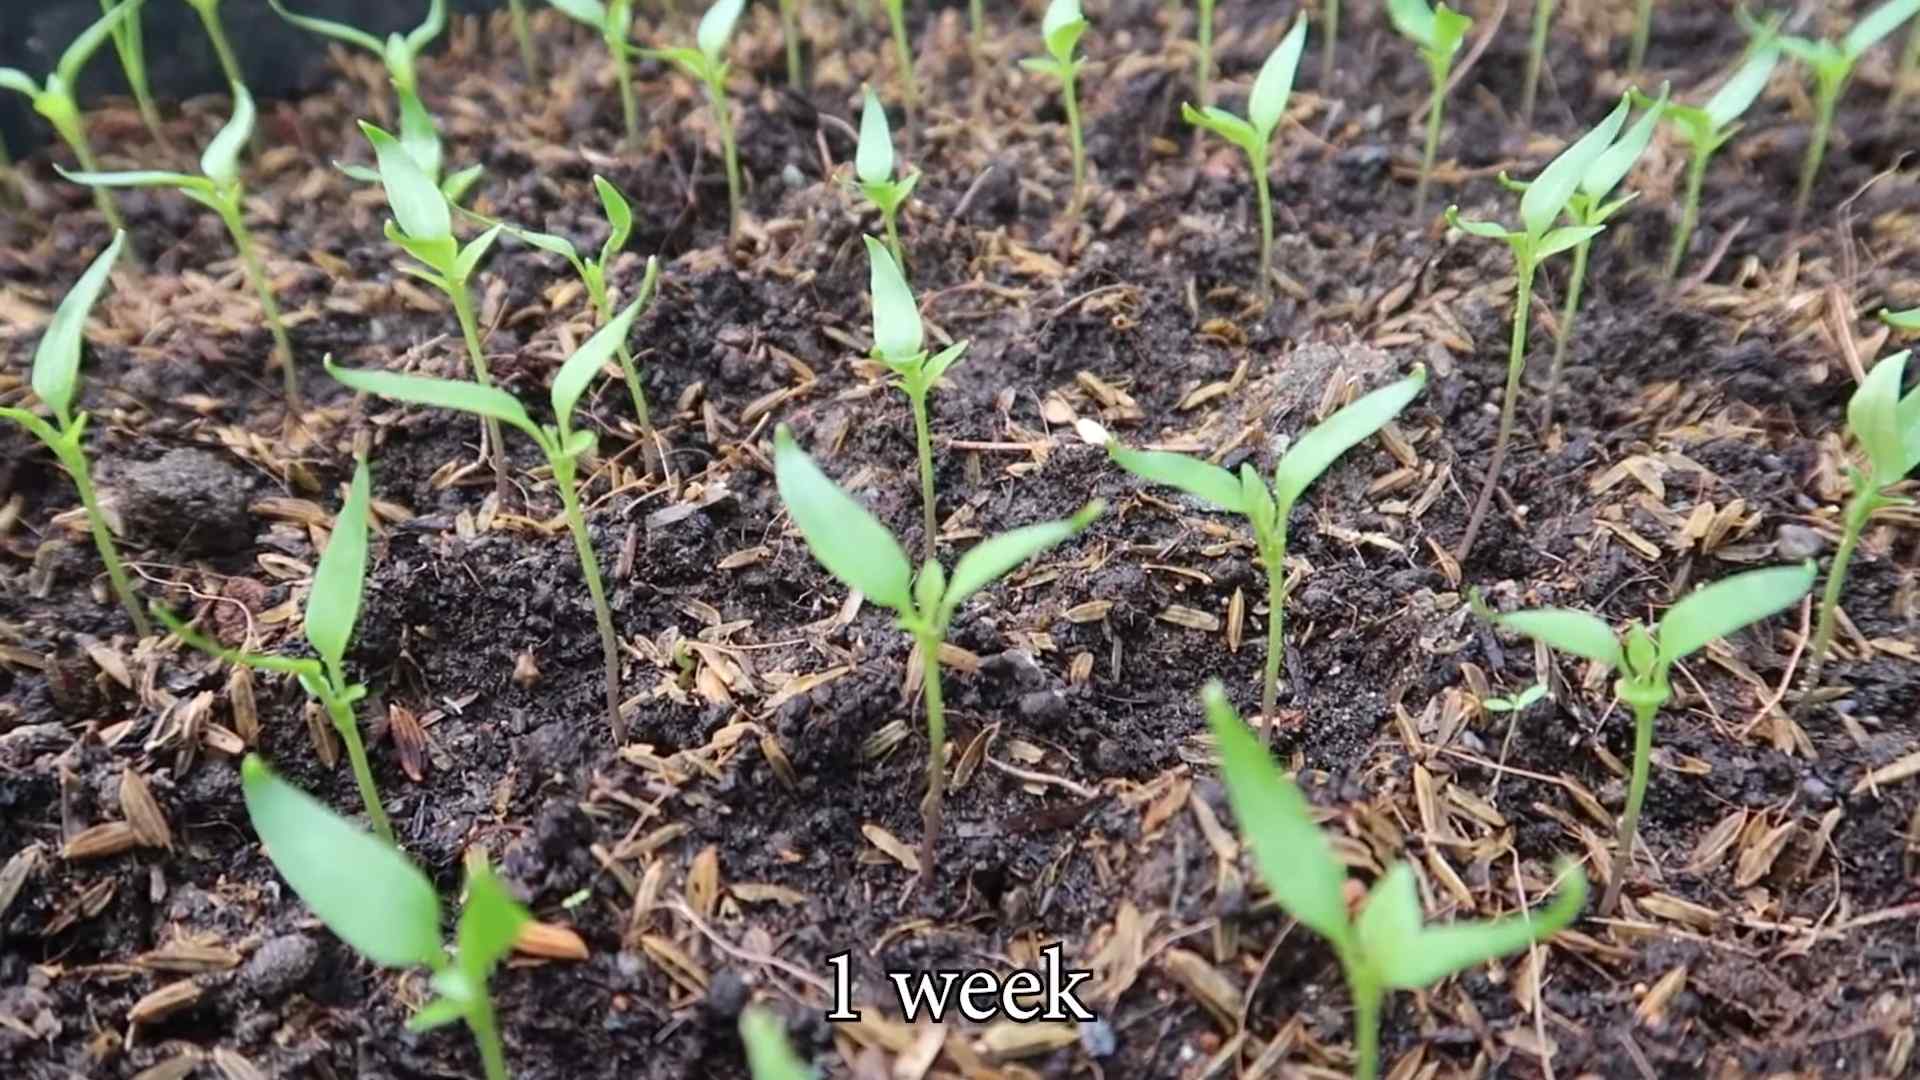
* Once the seedlings emerge (usually within 7-14 days), remove the dome and provide them with plenty of light.
* Thin the seedlings to one plant per bottle once they have a few sets of true leaves.
* Transplanting Seedlings:
* If you’re using seedlings that you purchased or started indoors, gently remove them from their containers.
* Make a hole in the soil in the bottle planter that is large enough to accommodate the seedling’s root ball.
* Place the seedling in the hole and gently backfill with potting soil.
* Water the seedling thoroughly.
6. Watering:
* Water your chili pepper plants regularly, especially during hot weather.
* Check the soil moisture by sticking your finger into the soil. If the top inch of soil feels dry, it’s time to water.
* Avoid overwatering, as this can lead to root rot.
* Water in the morning to allow the foliage to dry before nightfall, which can help prevent fungal diseases.
7. Sunlight:
* Chili peppers need plenty of sunlight to thrive.
* Place your bottle planters in a location that receives at least 6-8 hours of direct sunlight per day.
* If you’re growing your chili peppers indoors, you may need to supplement with artificial lighting.
8. Fertilizing:
* Chili peppers are heavy feeders, so they need regular fertilization.
* Use a balanced fertilizer, such as a 10-10-10 or a fertilizer specifically formulated for vegetables.
* Follow the instructions on the fertilizer label.
* I like to use a liquid fertilizer diluted in water every 2-3 weeks.
9. Support (Optional):
* As your chili pepper plants grow, they may need support to prevent them from falling over.
* You can use stakes, trellises, or cages to provide support.
* I often use bamboo stakes and twine to support my chili pepper plants.
10. Pest and Disease Control:
* Keep an eye out for pests and diseases.
* Common chili pepper pests include aphids, spider mites, and whiteflies.
* Common chili pepper diseases include powdery mildew and blossom end rot.
* Treat pests and diseases promptly to prevent them from spreading.
* I prefer to use organic pest control methods, such as insecticidal soap or neem oil.
11. Harvesting:
* Your chili peppers will be ready to harvest when they reach their mature color and size.
* Use scissors or pruning shears to cut the peppers from the plant.
* Be careful not to damage the plant when harvesting.
* Enjoy your homegrown chili peppers!
Hanging Your Bottle Chili Pepper Garden (Optional)
If you opted for the vertical cut, you can easily hang your bottle planters.
1. Drill Hanging Holes: Carefully drill two holes near the top of the bottle, on opposite sides. Make sure they are large enough to thread your twine or wire through.
2. Thread Twine or Wire: Thread twine or wire through the holes, creating a loop for hanging. Make sure the loop is strong enough to support the weight of the bottle, soil, and plant.
3. Hang Your Planter: Find a suitable location to hang your planter. A sunny balcony, patio, or even a sturdy branch in your garden will work.
Troubleshooting: Common Chili Pepper Growing Problems
Even with the best care, you might encounter some challenges. Here are a few common problems and how to address them:
* Yellowing Leaves: This can be caused by overwatering, underwatering, nutrient deficiencies, or pest infestations. Check the soil moisture, fertilize regularly, and inspect for pests.
* Blossom End Rot: This is caused by a calcium deficiency. Ensure your soil has adequate calcium and water consistently. You can also use a calcium supplement.
* Lack of Fruit: This can be caused by insufficient sunlight, poor pollination, or extreme temperatures. Ensure your plants get enough sunlight, hand-pollinate the flowers if necessary, and protect them from extreme temperatures.
* Pest Infestations: Treat pests promptly with insecticidal soap, neem oil, or other appropriate methods.
Tips and Tricks for a Bountiful Harvest
Here are a few extra tips to help you maximize your chili pepper harvest:
* Pinch off early flowers: This encourages
Conclusion
So, there you have it! Transforming a simple plastic bottle into a thriving chili pepper garden is not just a fun project; it’s a sustainable, space-saving, and incredibly rewarding way to enjoy fresh, fiery flavors right at your fingertips. We’ve walked you through the process, from selecting the right bottle and preparing the soil to planting your seeds and providing the necessary care.
Why is this DIY trick a must-try? Because it democratizes gardening. You don’t need acres of land or expensive equipment to cultivate your own food. This method is perfect for apartment dwellers, balcony gardeners, or anyone looking to add a touch of green to their lives without a significant investment. It’s also a fantastic way to recycle plastic bottles, turning potential waste into something beautiful and productive. Plus, imagine the satisfaction of harvesting your own homegrown chili peppers, knowing you nurtured them from tiny seeds to vibrant, flavorful fruits.
But the beauty of this project lies in its adaptability. Feel free to experiment with different varieties of chili peppers. From the mild Anaheim to the scorching Habanero, the choice is yours! Consider using different types of soil mixes to see what works best in your climate. You can even get creative with the bottle itself. Paint it, decorate it, or create a vertical garden by stacking multiple bottle planters. The possibilities are endless!
For those looking to take their bottle chili pepper growing to the next level, consider adding a small amount of slow-release fertilizer to the soil mix. This will provide your plants with a steady stream of nutrients throughout the growing season. You can also experiment with different watering techniques. Some gardeners prefer to water from the bottom, allowing the soil to absorb moisture through the drainage holes. Others prefer to water from the top, ensuring that the entire root system is thoroughly hydrated.
Remember to monitor your plants regularly for signs of pests or diseases. Aphids, spider mites, and whiteflies are common culprits, but they can usually be controlled with organic solutions like neem oil or insecticidal soap. Proper ventilation and drainage are also crucial for preventing fungal diseases.
Ultimately, the key to successful bottle chili pepper growing is patience and observation. Pay attention to your plants’ needs, and they will reward you with a bountiful harvest.
We are confident that you’ll find this DIY project both enjoyable and rewarding. So, gather your supplies, get your hands dirty, and embark on your own bottle chili pepper growing adventure! Don’t forget to share your experiences with us! We’d love to see your creations and hear about your successes (and even your challenges). Post photos of your bottle gardens on social media using #BottleChiliPeppers and tag us so we can celebrate your green thumb. Let’s create a community of bottle gardeners and inspire others to grow their own food, one bottle at a time. We can’t wait to see what you grow!
Frequently Asked Questions (FAQ)
What type of plastic bottle is best for growing chili peppers?
Ideally, you should use a sturdy, food-grade plastic bottle. Two-liter soda bottles or larger water bottles work well. Avoid bottles that have contained harsh chemicals or cleaning products, as these could contaminate the soil and harm your plants. Clear or translucent bottles are preferable, as they allow you to monitor the soil moisture levels. Make sure to thoroughly clean the bottle with soap and water before using it.
What kind of soil should I use for bottle chili pepper growing?
A well-draining potting mix is essential. You can purchase a pre-made potting mix from your local garden center, or you can create your own by combining equal parts of garden soil, peat moss, and perlite or vermiculite. The key is to ensure that the soil retains enough moisture to support the plants but also allows excess water to drain away freely. This will prevent root rot, a common problem in container gardening. Adding some compost to the mix will also provide your plants with valuable nutrients.
How often should I water my bottle chili pepper plants?
Watering frequency depends on several factors, including the size of the bottle, the type of soil, the climate, and the stage of growth of the plants. Generally, you should water your plants when the top inch of soil feels dry to the touch. Avoid overwatering, as this can lead to root rot. During hot, dry weather, you may need to water your plants more frequently. Check the soil moisture levels regularly and adjust your watering schedule accordingly. A good rule of thumb is to water deeply and thoroughly, allowing excess water to drain out of the drainage holes.
How much sunlight do chili pepper plants need?
Chili pepper plants thrive in full sun, which means they need at least 6-8 hours of direct sunlight per day. If you are growing your plants indoors, you may need to supplement natural sunlight with artificial grow lights. Place your bottle planters in a sunny location, such as a south-facing window or a balcony that receives plenty of sunlight. If your plants are not getting enough sunlight, they may become leggy and produce fewer peppers.
How do I fertilize my bottle chili pepper plants?
Chili pepper plants are heavy feeders and require regular fertilization to produce a bountiful harvest. You can use a balanced liquid fertilizer, such as a 10-10-10 or a 20-20-20 formula, diluted to half strength. Fertilize your plants every 2-3 weeks during the growing season. You can also add slow-release fertilizer granules to the soil mix at the time of planting. Avoid over-fertilizing, as this can burn the roots and damage the plants.
How long does it take for chili peppers to grow in a bottle?
The time it takes for chili peppers to grow depends on the variety of pepper, the growing conditions, and the climate. Generally, it takes about 60-90 days from planting to harvest. Some varieties may mature faster, while others may take longer. Be patient and provide your plants with the necessary care, and you will eventually be rewarded with a delicious harvest.
What are some common pests and diseases that affect chili pepper plants?
Common pests that affect chili pepper plants include aphids, spider mites, whiteflies, and thrips. These pests can suck the sap from the leaves and stems, weakening the plants and reducing their yield. Common diseases include fungal diseases like powdery mildew and root rot. To prevent pests and diseases, provide your plants with proper ventilation, drainage, and sunlight. Monitor your plants regularly for signs of infestation or disease, and take action promptly if you notice any problems. Organic solutions like neem oil, insecticidal soap, and copper fungicide can be effective in controlling pests and diseases.
Can I grow different varieties of chili peppers in the same bottle?
While it’s technically possible to grow different varieties of chili peppers in the same bottle, it’s generally not recommended. Different varieties may have different growth habits, nutrient requirements, and susceptibility to pests and diseases. This can make it difficult to provide each plant with the optimal growing conditions. It’s best to grow each variety in its own separate bottle.
How do I harvest chili peppers from my bottle garden?
Harvest chili peppers when they have reached their mature color and size. Use a sharp knife or scissors to cut the peppers from the plant, leaving a small stem attached. Be careful not to damage the plant when harvesting. Wear gloves when handling hot peppers, as the capsaicin (the compound that makes peppers spicy) can irritate the skin.
What can I do with my harvested chili peppers?
The possibilities are endless! You can use your harvested chili peppers fresh in salsas, sauces, and other dishes. You can also dry them, pickle them, or make chili oil. Chili peppers can be stored in the refrigerator for several weeks or frozen for longer storage. You can also share your harvest with friends and neighbors!
Leave a Comment