
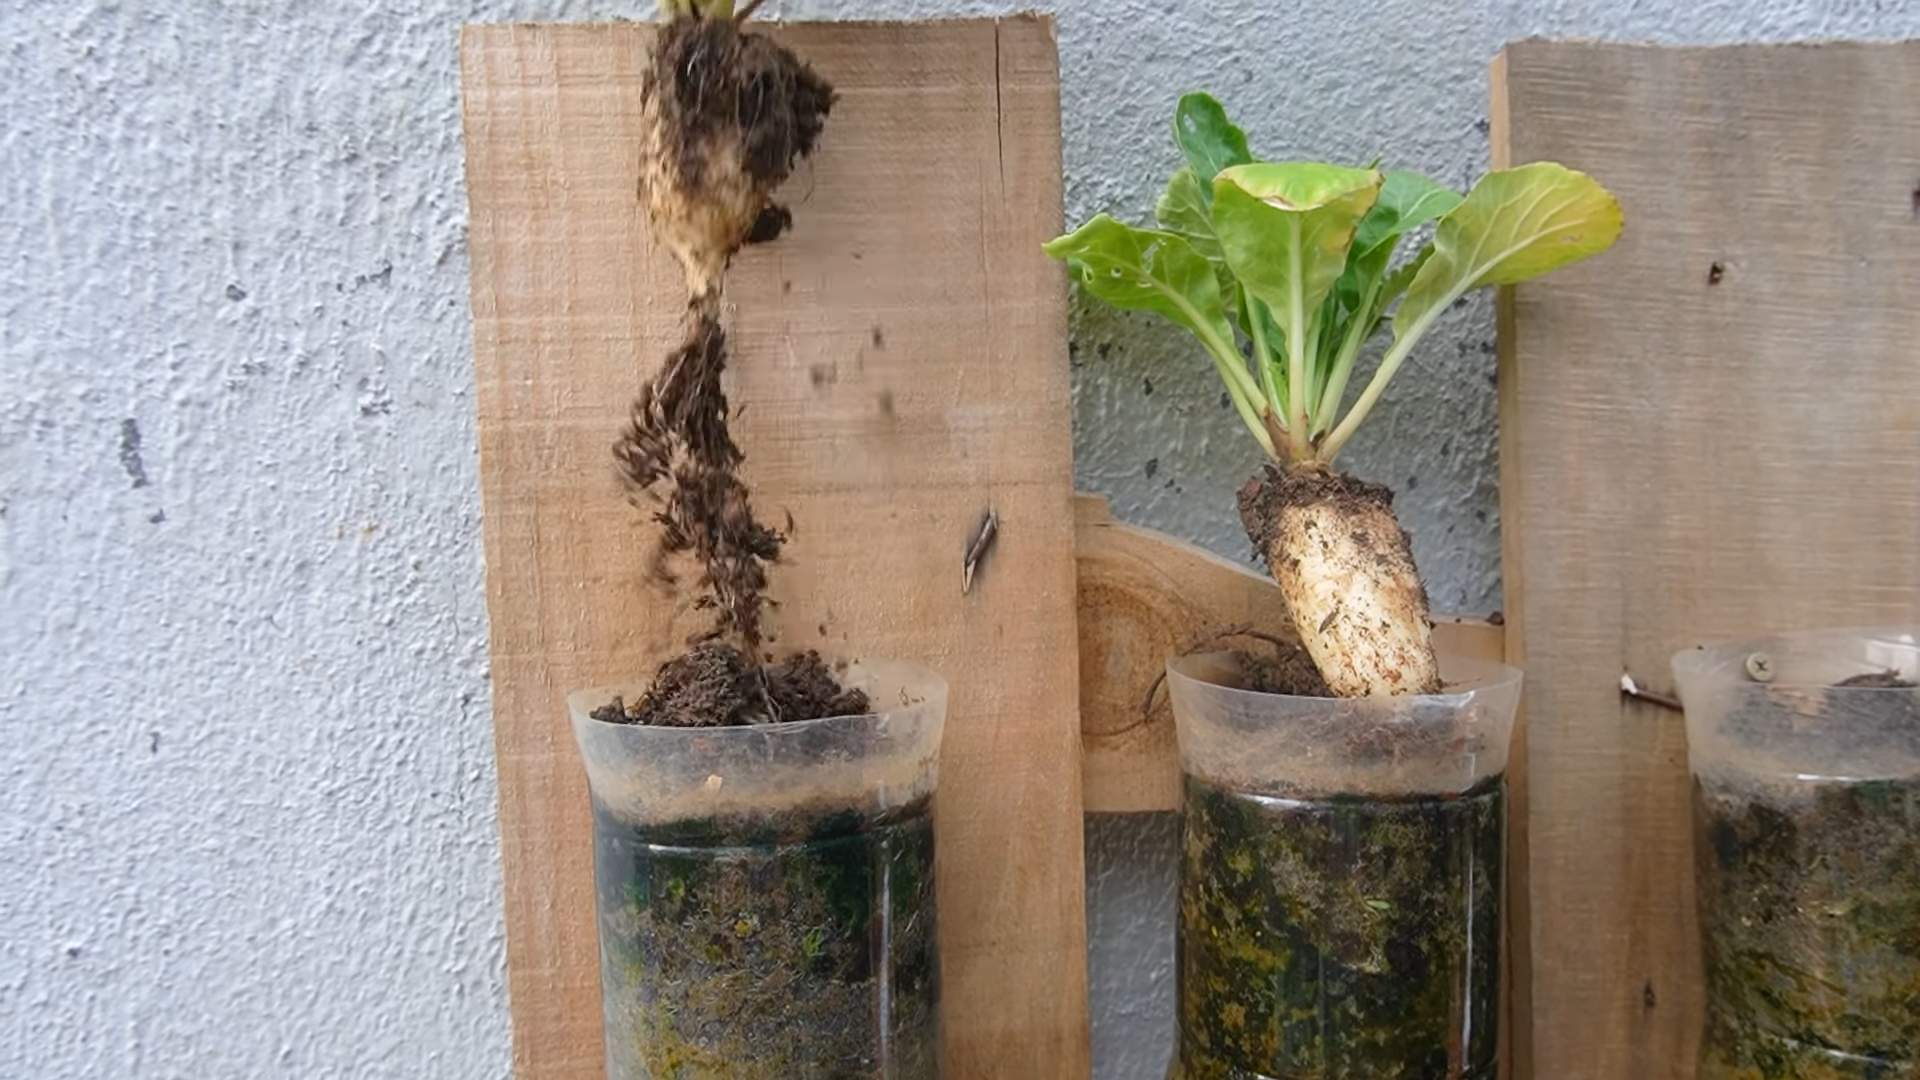
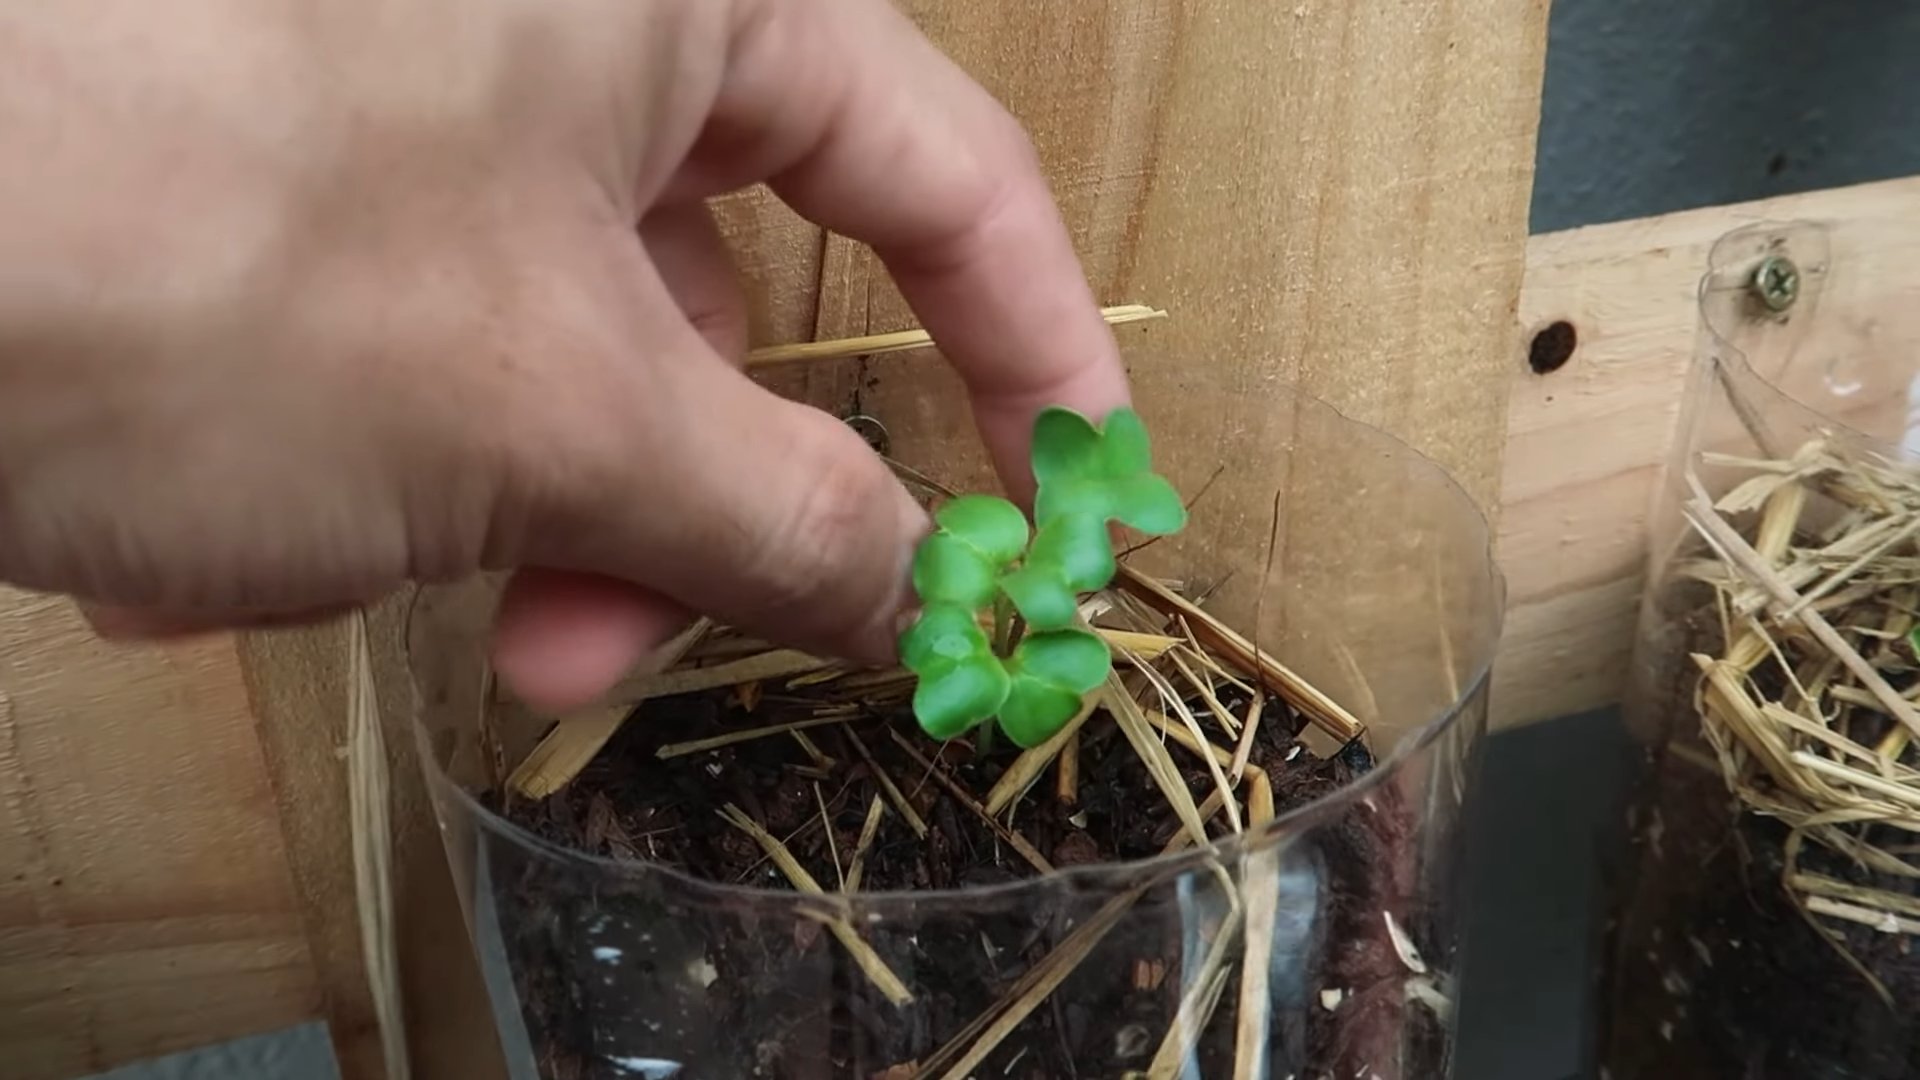
Growing White Radish at home might sound intimidating, but trust me, it’s surprisingly simple and incredibly rewarding! Have you ever dreamt of plucking crisp, peppery radishes straight from your own garden, ready to add a zesty kick to your salads or a crunchy bite to your snacks? This DIY guide will transform that dream into a delicious reality.
Radishes have a rich history, dating back to ancient times. They were cultivated in Egypt even before the pyramids were built! Throughout history, they’ve been valued not only for their unique flavor but also for their medicinal properties. From humble beginnings, the radish has become a global staple, and now, you can easily cultivate your own supply.
In today’s fast-paced world, knowing where your food comes from is more important than ever. Growing White Radish yourself allows you to control what goes into your food, avoiding harmful pesticides and ensuring maximum freshness. Plus, it’s a fantastic way to connect with nature, relieve stress, and enjoy the satisfaction of nurturing something from seed to harvest. This DIY guide will provide you with easy-to-follow steps and clever hacks to ensure a bountiful radish crop, even if you’re a complete beginner. Let’s get started!
How to Grow Sweet Potatoes in Containers and Harvest a Monthly Bounty!
Okay, friends, let’s talk sweet potatoes! I know, I know, you might be thinking, “Sweet potatoes? In containers? That sounds complicated!” But trust me, it’s totally doable, and with a little planning, you can be enjoying fresh, homegrown sweet potatoes practically every month. I’ve been doing this for a few years now, and I’m excited to share my secrets with you.
Choosing the Right Sweet Potato Variety
First things first, not all sweet potato varieties are created equal, especially when it comes to container gardening. You want to choose varieties that are more compact and bush-like, rather than those that produce long, sprawling vines. Here are a few of my favorites:
* ‘Bush Porto Rico’: This is a classic choice, known for its delicious flavor and relatively compact growth habit. It matures in about 90-100 days.
* ‘Georgia Jet’: If you’re looking for a faster-maturing variety, ‘Georgia Jet’ is a great option. It’s ready to harvest in just 90 days and produces large, reddish-skinned potatoes.
* ‘Beauregard’: This is a widely popular variety that’s known for its high yields and disease resistance. It matures in about 100 days.
* ‘Centennial’: Another reliable choice, ‘Centennial’ produces orange-fleshed potatoes with a sweet, nutty flavor. It matures in about 90-100 days.
Getting Started: Sprouting Your Sweet Potatoes (Creating Slips)
The key to a successful sweet potato harvest is starting with healthy “slips.” Slips are basically the sprouts that grow from a sweet potato. You can buy slips online or at your local garden center, but it’s much more fun (and cheaper!) to grow your own. Here’s how I do it:
1. Choose Your Sweet Potatoes: Select organic sweet potatoes from the grocery store or use some from your previous harvest. Make sure they are firm and free from any blemishes or soft spots.
2. Prepare the Sprouting Container: You have a couple of options here. You can either suspend the sweet potato in a jar of water or bury it in a container of moist potting mix.
* Water Method: For the water method, find a jar or glass that’s wide enough to hold the sweet potato but narrow enough to keep most of it submerged. Insert toothpicks around the middle of the sweet potato to suspend it in the jar, with the bottom half submerged in water.
* Soil Method: For the soil method, fill a container with moist potting mix. Bury the sweet potato about halfway in the soil, leaving the top half exposed.
3. Provide Warmth and Light: Place the jar or container in a warm, sunny location. A windowsill or a spot near a heat source works well.
4. Maintain Moisture: If you’re using the water method, change the water every few days to prevent it from getting cloudy. If you’re using the soil method, keep the soil consistently moist but not soggy.
5. Wait for Slips to Grow: Be patient! It can take several weeks for slips to start growing. You’ll see small sprouts emerging from the sweet potato.
6. Harvesting the Slips: Once the slips are about 6-8 inches long, they’re ready to be harvested. Gently twist or cut them off the sweet potato.
7. Rooting the Slips: Place the slips in a jar of water, making sure the bottom inch or two is submerged. Within a few days, you should see roots starting to grow.
Preparing Your Containers and Soil
Now that you have your sweet potato slips, it’s time to prepare your containers. Sweet potatoes need plenty of room to grow, so choose large containers that are at least 20 gallons in size. I prefer using fabric pots because they allow for good drainage and aeration.
1. Choose the Right Container: As I mentioned, go big! A 20-gallon container is a good starting point. You can even use larger containers if you have the space.
2. Ensure Proper Drainage: Make sure your containers have drainage holes to prevent waterlogging.
3. Use a Well-Draining Soil Mix: Sweet potatoes prefer a well-draining soil mix that’s rich in organic matter. I like to use a mix of equal parts compost, potting soil, and perlite.
4. Amend the Soil: Add some slow-release fertilizer to the soil mix to provide your sweet potatoes with the nutrients they need. You can also add some bone meal to promote root growth.
Planting Your Sweet Potato Slips
Once your containers are ready, it’s time to plant your sweet potato slips.
1. Dig a Hole: Dig a hole in the soil that’s deep enough to accommodate the roots of the slip.
2. Plant the Slip: Gently place the slip in the hole and cover the roots with soil.
3. Water Thoroughly: Water the newly planted slip thoroughly to help it settle in.
4. Space Your Plants: If you’re planting multiple slips in the same container, space them about 12-18 inches apart.
Caring for Your Sweet Potato Plants
Sweet potatoes are relatively easy to care for, but there are a few things you need to keep in mind.
1. Watering: Water your sweet potato plants regularly, especially during hot, dry weather. Aim to keep the soil consistently moist but not soggy.
2. Fertilizing: Fertilize your sweet potato plants every few weeks with a balanced fertilizer. You can also use a liquid seaweed fertilizer to give them a boost.
3. Sunlight: Sweet potatoes need at least 6-8 hours of sunlight per day.
4. Weeding: Keep your containers free of weeds, as they can compete with your sweet potato plants for nutrients and water.
5. Pest Control: Sweet potatoes are generally pest-resistant, but they can be susceptible to aphids and other common garden pests. If you notice any pests, treat them with an insecticidal soap or neem oil.
6. Vine Management: While you’re using bush varieties, some vining will still occur. You can prune the vines to keep them under control and encourage the plant to focus its energy on producing potatoes.
The Secret to Monthly Harvesting: Staggered Planting
Here’s the trick to harvesting sweet potatoes monthly: staggered planting! Instead of planting all your slips at once, plant them in batches every few weeks. This way, you’ll have a continuous supply of sweet potatoes throughout the growing season.
1. Plan Your Planting Schedule: Determine how many sweet potatoes you want to harvest each month and plan your planting schedule accordingly. For example, if you want to harvest a few sweet potatoes every month, you could plant a batch of slips every 2-3 weeks.
2. Keep Track of Planting Dates: Keep a record of when you planted each batch of slips so you know when to expect them to be ready for harvest.
3. Adjust as Needed: Depending on your climate and growing conditions, you may need to adjust your planting schedule.
Harvesting Your Sweet Potatoes
The moment you’ve been waiting for! Sweet potatoes are typically ready to harvest about 90-120 days after planting, depending on the variety.
1. Check for Maturity: You can check for maturity by digging up a test potato. If the potato is a good size and has a firm skin, it’s likely ready to harvest.
2. Harvest Carefully: Gently dig around the base of the plant, being careful not to damage the potatoes.
3. Cure Your Sweet Potatoes: Curing is an important step that helps to improve the flavor and storage life of your sweet potatoes. To cure them, place them in a warm, humid location (80-85°F and 85-90% humidity) for about a week.
4. Store Your Sweet Potatoes: After curing, store your sweet potatoes in a cool, dry, and dark place. They should last for several months.
Troubleshooting Common Problems
Even with the best planning, you might encounter a few challenges along the way. Here are some common problems and how to fix them:
* Yellowing Leaves: This could be a sign of nutrient deficiency. Fertilize your plants with a balanced fertilizer.
* Slow Growth: Make sure your plants are getting enough sunlight and water. You may also need to amend the soil with more organic matter.
* Pest Infestations: Treat any pest infestations promptly with insecticidal soap or neem oil.
* Rotting Potatoes: This could be caused by overwatering or poor drainage. Make sure your containers have drainage holes and avoid overwatering.
Enjoying Your Homegrown Sweet Potatoes
Now for the best part: enjoying the fruits (or
Conclusion
So, there you have it! Growing white radish at home, while it might seem daunting at first, is surprisingly achievable and incredibly rewarding. We’ve walked you through the process, highlighting the key steps to ensure a bountiful harvest of crisp, flavorful radishes right from your own backyard (or even your balcony!).
Why is this DIY trick a must-try? Because it puts you in control. You know exactly what goes into your food – no pesticides, no hidden chemicals, just pure, homegrown goodness. Plus, the taste of a freshly harvested radish, bursting with peppery zest, is simply unmatched by anything you can buy in a store. It’s a flavor explosion that will elevate your salads, stir-fries, and even your snacking game.
Beyond the superior taste and control, growing your own white radish is also a fantastic way to connect with nature, learn about the growing process, and even save some money on your grocery bill. It’s a sustainable and fulfilling activity that the whole family can enjoy. Imagine the pride of serving a dish featuring radishes you nurtured from tiny seeds!
But the fun doesn’t stop there! Feel free to experiment with different varieties of white radish. There’s the classic Daikon, known for its long, slender shape and mild flavor, perfect for pickling or grating into salads. Or, try the Mino Early, a shorter, rounder variety with a slightly spicier kick. You can even explore different planting times to extend your harvest season. Consider companion planting with carrots or lettuce to maximize your garden space and deter pests naturally.
Another variation to consider is growing radishes in containers. If you’re short on space, a large pot or even a repurposed container can provide the perfect environment for your radishes to thrive. Just make sure the container has adequate drainage and is filled with a well-draining potting mix.
We encourage you to embrace the challenge and embark on your own white radish growing adventure. Don’t be afraid to get your hands dirty, experiment with different techniques, and learn from your mistakes. Gardening is a journey, not a destination, and every radish you harvest is a victory.
And most importantly, we want to hear about your experience! Share your photos, tips, and stories with us in the comments below. Let us know what worked for you, what challenges you faced, and what delicious dishes you created with your homegrown radishes. Together, we can build a community of radish-loving gardeners and inspire others to discover the joys of growing their own food. So, grab your seeds, prepare your soil, and get ready to experience the satisfaction of growing your very own white radish! Happy gardening!
Frequently Asked Questions (FAQ)
What is the best time of year to plant white radish?
The best time to plant white radish depends on your climate. Generally, white radishes are cool-season crops, meaning they thrive in cooler temperatures. For most regions, the ideal planting times are early spring or late summer/early fall. In spring, plant as soon as the soil can be worked, typically a few weeks before the last expected frost. For a fall harvest, plant about 4-6 weeks before the first expected frost. This allows the radishes enough time to mature before the weather gets too cold. In warmer climates, you can often grow radishes throughout the winter. Check your local climate data for specific frost dates to determine the optimal planting window for your area.
How much sunlight do white radishes need?
White radishes need at least 6 hours of direct sunlight per day to grow properly. While they can tolerate some partial shade, especially in hotter climates, insufficient sunlight can lead to leggy growth, smaller radishes, and a less flavorful harvest. Choose a planting location that receives ample sunlight throughout the day. If you’re growing radishes in containers, you can easily move them to a sunnier spot if needed.
What kind of soil is best for growing white radish?
White radishes prefer loose, well-draining soil that is rich in organic matter. Heavy clay soil can hinder root development and result in misshapen radishes. Amend heavy soil with compost, well-rotted manure, or other organic materials to improve drainage and aeration. The ideal soil pH for radishes is between 6.0 and 7.0. You can test your soil pH using a soil testing kit and amend it accordingly with lime (to raise pH) or sulfur (to lower pH).
How often should I water my white radishes?
White radishes need consistent moisture to grow quickly and develop plump, juicy roots. Water deeply and regularly, especially during dry periods. Aim to keep the soil consistently moist but not waterlogged. Overwatering can lead to root rot, while underwatering can cause the radishes to become tough and bitter. A good rule of thumb is to water when the top inch of soil feels dry to the touch. Mulching around the plants can help retain moisture and suppress weeds.
How long does it take for white radishes to mature?
White radishes are known for their quick growth. Most varieties mature in just 3-6 weeks from planting. The exact time will depend on the specific variety, growing conditions, and weather. Check the seed packet for the estimated maturity date for your chosen variety. You can start harvesting radishes as soon as they reach a usable size. Don’t let them get too large, as they can become tough and pithy.
What are some common pests and diseases that affect white radishes?
White radishes can be susceptible to a few common pests and diseases, including flea beetles, root maggots, and fungal diseases. Flea beetles are small, jumping insects that can chew holes in the leaves. Cover young plants with row covers to protect them from flea beetles. Root maggots are fly larvae that feed on the roots of radishes, causing them to become tunneled and damaged. Rotate your crops to prevent root maggots from building up in the soil. Fungal diseases, such as damping-off, can affect seedlings in cool, damp conditions. Ensure good air circulation and avoid overwatering to prevent fungal diseases.
Can I eat the radish greens?
Yes, radish greens are edible and nutritious! They have a peppery flavor similar to the radish root. You can use them in salads, stir-fries, soups, or as a cooked green vegetable. Harvest the greens when they are young and tender for the best flavor. Avoid eating greens from radishes that have been treated with pesticides.
How do I store harvested white radishes?
To store harvested white radishes, remove the greens and wash the radishes thoroughly. Store them in a plastic bag or container in the refrigerator. They will typically keep for 1-2 weeks. You can also store radishes in a root cellar or other cool, humid environment for longer periods.
My radishes are cracking. What am I doing wrong?
Cracking in radishes is often caused by inconsistent watering. If the soil dries out and then is suddenly flooded with water, the radishes can grow too quickly and crack. Ensure consistent moisture levels by watering regularly, especially during dry spells. Mulching can also help retain moisture in the soil.
Can I grow white radishes in containers?
Yes, you can absolutely grow white radishes in containers! Choose a container that is at least 6-8 inches deep and has good drainage. Fill the container with a well-draining potting mix. Sow the seeds directly into the container and water regularly. Place the container in a sunny location that receives at least 6 hours of direct sunlight per day. Container-grown radishes may need more frequent watering than those grown in the ground.

Leave a Comment