
Grow Rutabaga and Swede like a pro, even if you’ve never touched a trowel before! Have you ever dreamt of harvesting your own vibrant, earthy root vegetables, bursting with flavor and packed with nutrients? I know I have! There’s something incredibly satisfying about nurturing a tiny seed into a hearty, homegrown meal. This isn’t just about gardening; it’s about connecting with nature, reducing your carbon footprint, and enjoying the freshest produce imaginable.
Rutabagas and Swedes, often used interchangeably, have a rich history, particularly in Northern Europe where they were a staple during times of scarcity. They represent resilience and resourcefulness, qualities we can all appreciate in today’s world. But beyond their historical significance, these root vegetables offer a unique, slightly sweet, and peppery flavor that elevates soups, stews, and roasted dishes.
So, why do you need these DIY tricks and hacks for growing rutabaga and swede? Well, let’s be honest, sometimes gardening can feel a little daunting. Pests, soil conditions, and timing can all seem like hurdles. But fear not! I’m here to share simple, effective, and budget-friendly techniques that will empower you to grow rutabaga and swede successfully, no matter your experience level. We’ll tackle everything from seed starting to harvesting, ensuring you enjoy a bountiful crop. Let’s get our hands dirty and unlock the secrets to a thriving rutabaga and swede garden!
Growing Rutabaga and Swede: A DIY Guide to Root Vegetable Success
Okay, let’s dive into the wonderful world of growing rutabaga (also known as swede in some parts of the world)! These root vegetables are incredibly rewarding to grow, providing delicious and nutritious harvests throughout the cooler months. I’m going to walk you through everything you need to know, from seed to table.
Understanding Rutabaga and Swede
First things first, let’s clear up any confusion. Rutabaga and swede are essentially the same vegetable. The name “swede” is more common in the UK, Australia, and some other Commonwealth countries, while “rutabaga” is the preferred term in North America. They’re a cross between a cabbage and a turnip, resulting in a slightly sweeter and milder flavor than turnips. They’re also packed with vitamins and fiber, making them a healthy addition to your diet.
Planning Your Rutabaga Garden
Before you even think about planting, a little planning goes a long way. Here’s what you need to consider:
* Timing is Key: Rutabagas are cool-season crops, meaning they thrive in cooler temperatures. The best time to plant is typically in mid-summer, about 90-100 days before your first expected frost. This allows them to mature fully before the ground freezes. I usually aim for late June or early July in my garden.
* Sunlight Requirements: Rutabagas need at least 6 hours of sunlight per day to grow well. Choose a location in your garden that receives plenty of sunshine.
* Soil Preparation: Rutabagas prefer well-drained soil that is rich in organic matter. Before planting, amend your soil with compost or well-rotted manure. This will improve drainage, fertility, and overall soil structure.
* Soil pH: The ideal soil pH for rutabagas is between 6.0 and 7.0. You can test your soil pH using a soil testing kit, which you can find at most garden centers. If your soil is too acidic, you can add lime to raise the pH.
* Space Considerations: Rutabagas need plenty of space to grow. Allow at least 6-8 inches between plants and 18-24 inches between rows. This will give them enough room to develop their large roots.
Step-by-Step Planting Guide
Now for the fun part – getting those seeds in the ground!
1. Prepare the Soil: Start by loosening the soil in your chosen planting area. Remove any rocks, weeds, or debris. Incorporate compost or well-rotted manure into the soil to improve its fertility and drainage. I like to use a garden fork to turn the soil and then rake it smooth.
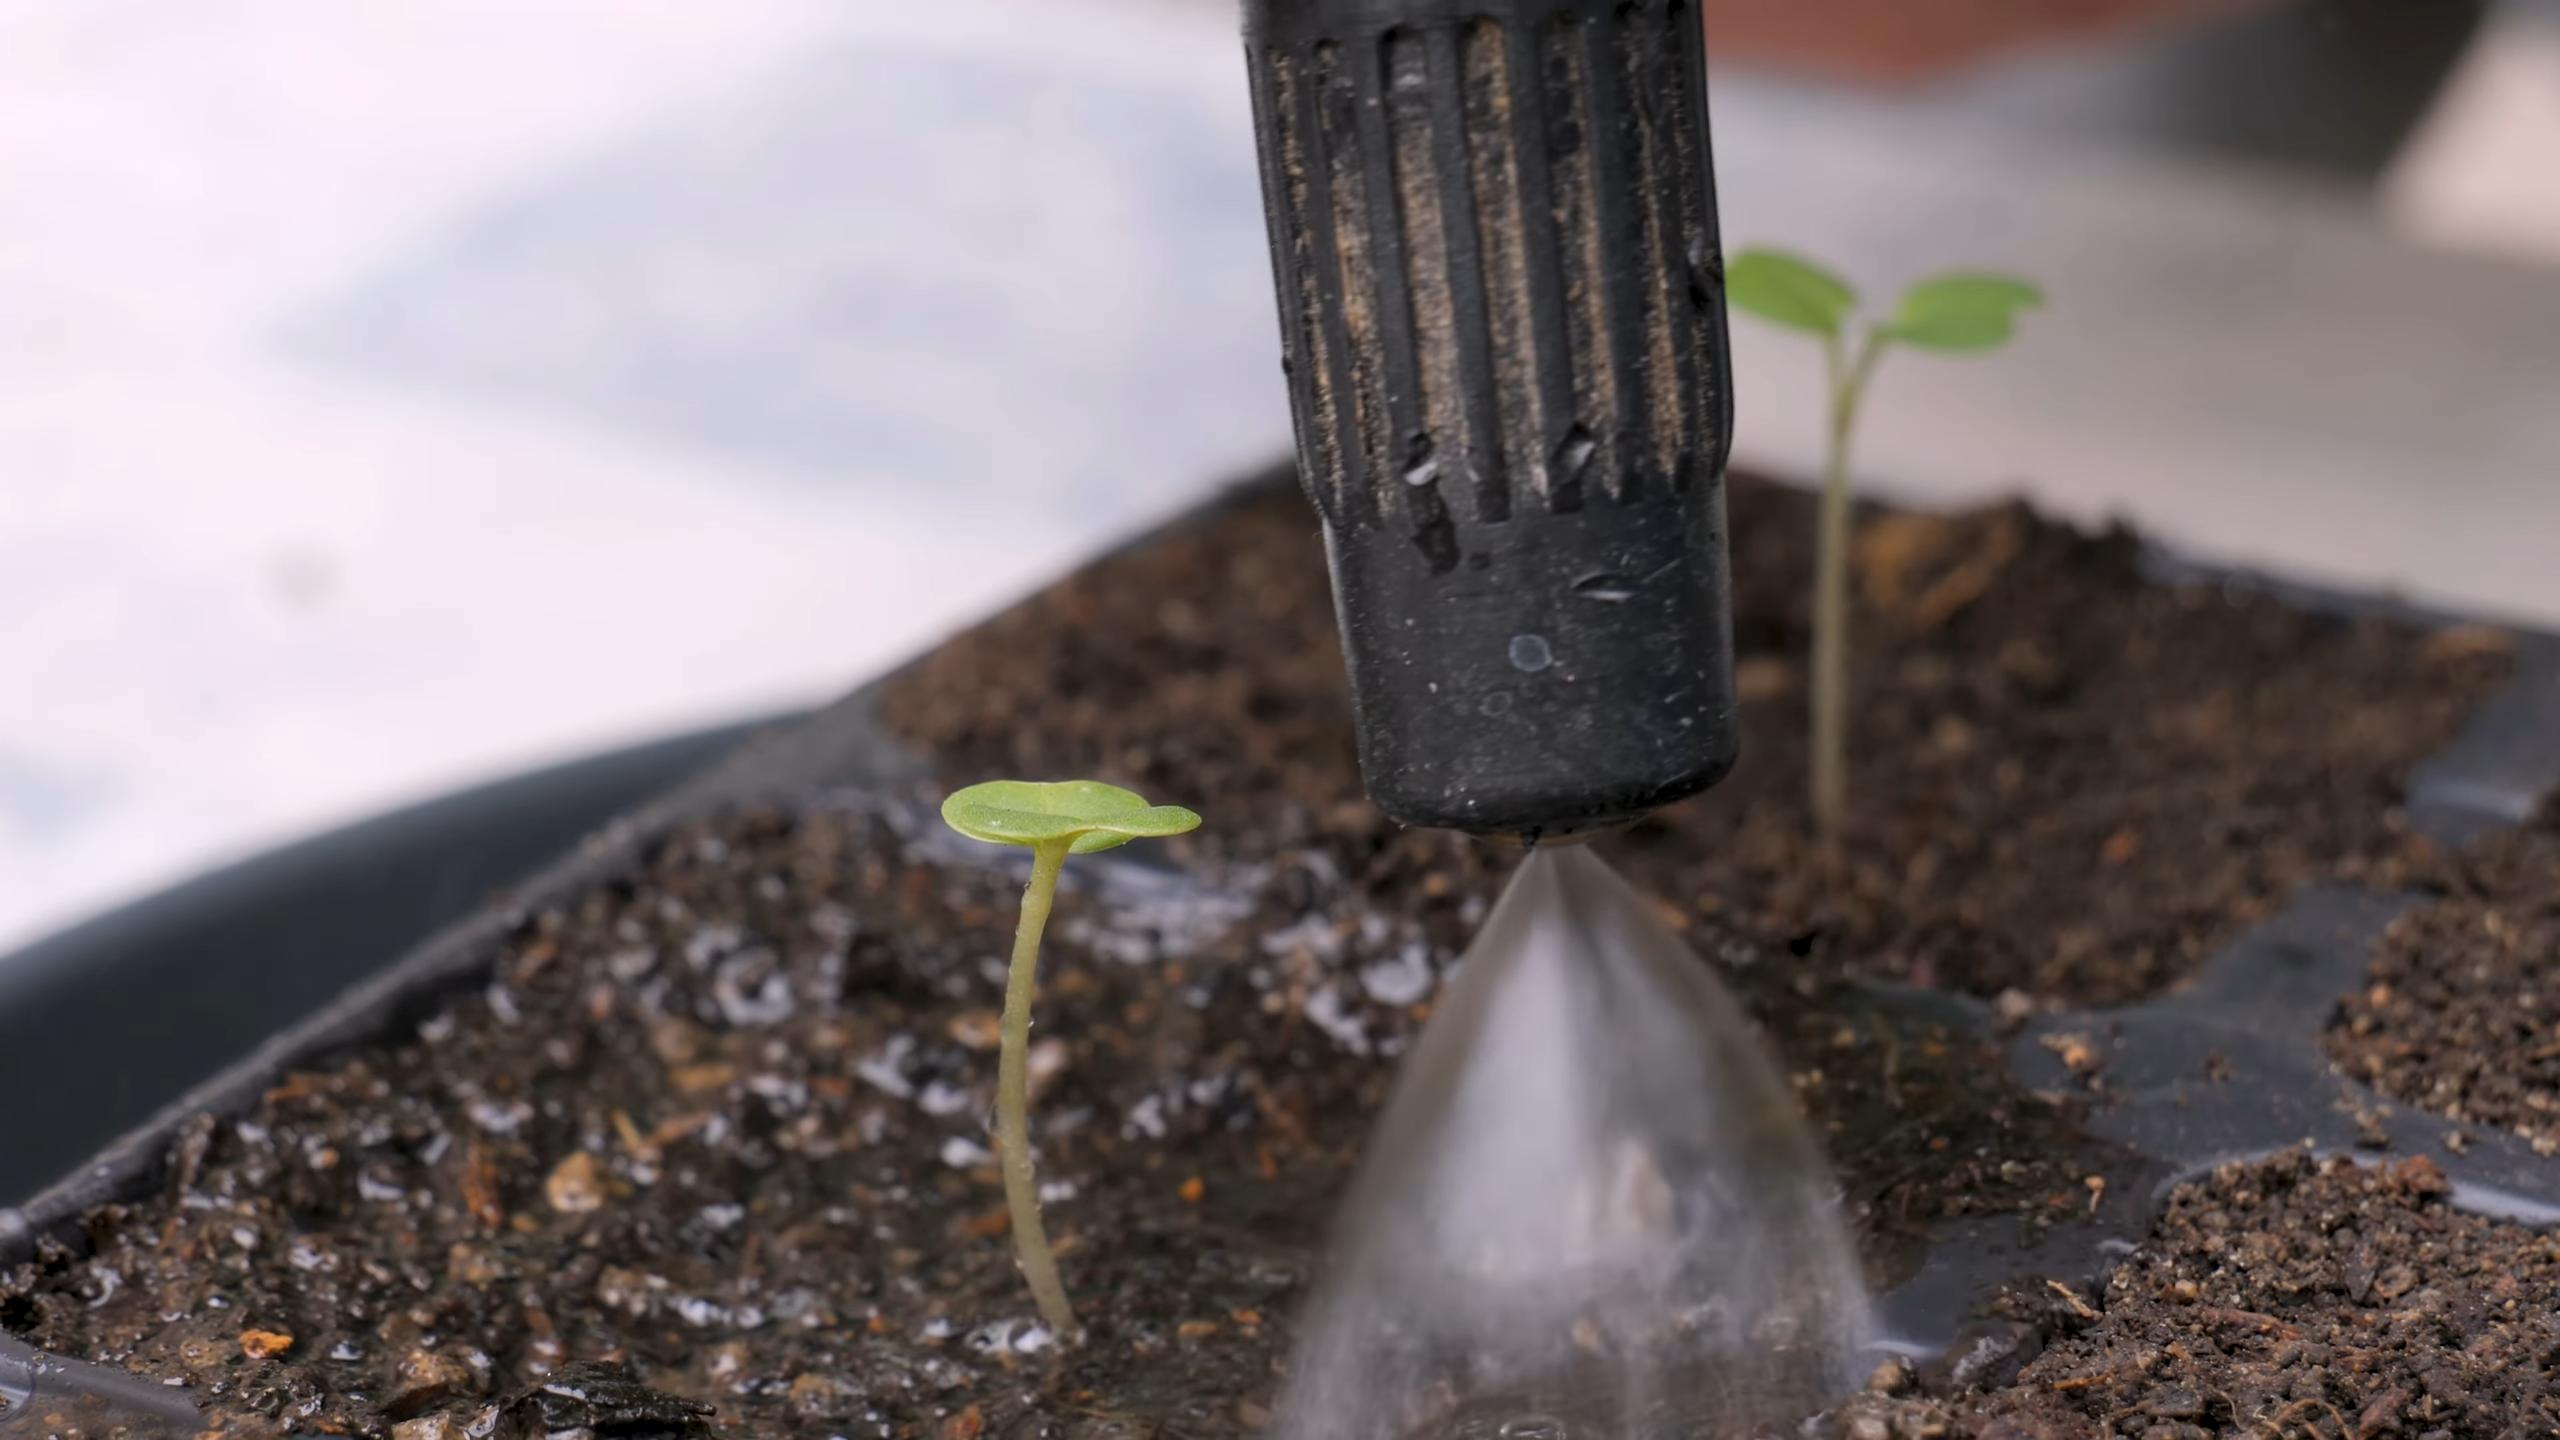
2. Sow the Seeds: Rutabaga seeds are small, so sow them thinly. You can either direct sow them in the garden or start them indoors. I prefer direct sowing because it avoids the risk of transplant shock. To direct sow, create shallow furrows about ½ inch deep and 6-8 inches apart. Sprinkle the seeds evenly along the furrows and then cover them lightly with soil.
3. Water Gently: After sowing the seeds, water the soil gently to moisten it. Be careful not to wash away the seeds. I use a watering can with a rose head to provide a gentle shower.
4. Thin the Seedlings: Once the seedlings emerge, thin them to about 6-8 inches apart. This will give them enough room to grow and develop their roots. I know it’s hard to thin out seedlings, but it’s essential for getting a good harvest.
5. Mulch the Area: Apply a layer of mulch around the plants to help retain moisture, suppress weeds, and regulate soil temperature. I like to use straw or shredded leaves as mulch.
Caring for Your Rutabaga Plants
Once your rutabaga plants are established, they’ll need regular care to thrive.
1. Watering: Rutabagas need consistent moisture, especially during dry periods. Water them deeply once or twice a week, or more often if the soil is dry to the touch. Avoid overwatering, as this can lead to root rot.
2. Weeding: Keep the area around your rutabaga plants free of weeds. Weeds compete with the plants for nutrients and water, so it’s important to remove them regularly. I like to hand-weed, but you can also use a hoe or cultivator.
3. Fertilizing: Rutabagas benefit from regular fertilization. You can use a balanced fertilizer or a fertilizer that is high in phosphorus and potassium. Apply the fertilizer according to the package directions. I often use a liquid seaweed fertilizer, which is a great source of micronutrients.
4. Pest Control: Rutabagas can be susceptible to certain pests, such as flea beetles, aphids, and cabbage worms. Monitor your plants regularly for signs of pests and take action if necessary. You can use insecticidal soap, neem oil, or other organic pest control methods. I’ve found that covering the plants with row covers can help prevent pest infestations.
5. Disease Prevention: Rutabagas can also be susceptible to certain diseases, such as clubroot and powdery mildew. To prevent diseases, choose disease-resistant varieties, practice crop rotation, and avoid overwatering. If you notice signs of disease, remove the affected plants immediately.
Harvesting Your Rutabaga
The moment you’ve been waiting for! Harvesting your rutabaga is the culmination of all your hard work.
1. When to Harvest: Rutabagas are typically ready to harvest about 90-100 days after planting. The roots should be about 4-6 inches in diameter. You can also harvest them earlier if you prefer smaller, more tender roots. I usually start checking them around late fall.
2. How to Harvest: To harvest rutabagas, loosen the soil around the roots with a garden fork. Then, gently pull the plants out of the ground. If the roots are large, you may need to use a knife to cut them free from the soil.
3. Cleaning and Storing: After harvesting, remove the tops and roots from the rutabagas. Wash the roots thoroughly and allow them to dry completely. Store the rutabagas in a cool, dark, and humid place, such as a root cellar or refrigerator. They can be stored for several months if stored properly. I like to store mine in a plastic bag in the crisper drawer of my refrigerator.
Troubleshooting Common Problems
Even with the best planning and care, you may encounter some problems while growing rutabagas. Here are some common issues and how to address them:
* Poor Germination: If your rutabaga seeds don’t germinate well, it could be due to several factors, such as poor-quality seeds, cold soil, or dry soil. Make sure to use fresh seeds and sow them in warm, moist soil.
* Slow Growth: If your rutabaga plants are growing slowly, it could be due to lack of sunlight, poor soil, or nutrient deficiencies. Make sure to provide them with at least 6 hours of sunlight per day and amend the soil with compost or fertilizer.
* Pest Infestations: As mentioned earlier, rutabagas can be susceptible to various pests. Monitor your plants regularly and take action if necessary.
* Disease Problems: Rutabagas can also be susceptible to certain diseases. Choose disease-resistant varieties, practice crop rotation, and avoid overwatering.
* Splitting Roots: Splitting roots can be caused by inconsistent watering or nutrient deficiencies. Make sure to water your plants regularly and fertilize them as needed.
Delicious Ways to Enjoy Your Rutabaga Harvest
Now that you’ve harvested your rutabagas, it’s time to enjoy them! These versatile root vegetables can be used in a variety of dishes.
* Roasted Rutabaga: Roasting rutabaga brings out its natural sweetness. Simply peel and chop the rutabaga, toss it with olive oil, salt, and pepper, and roast it in the oven until tender.
* Mashed Rutabaga: Mashed rutabaga is a delicious and healthy alternative to mashed potatoes. Peel and boil the rutabaga until tender, then mash it with butter, milk, and seasonings.
* Rutabaga Soup: Rutabaga soup is a hearty and flavorful soup that is perfect for cold weather. Combine rutabaga with other vegetables, such as carrots, onions, and celery, and simmer in broth until tender.
* Rutabaga Fries: Rutabaga fries are a healthy and delicious alternative to potato fries. Peel and cut the rutabaga into fries, toss them with olive oil and seasonings, and bake them in the oven until crispy.
* Rutabaga in Stews and Casseroles: Rutabaga adds a unique flavor and texture to stews and casseroles. Simply chop the rutabaga and add it to your favorite recipes.
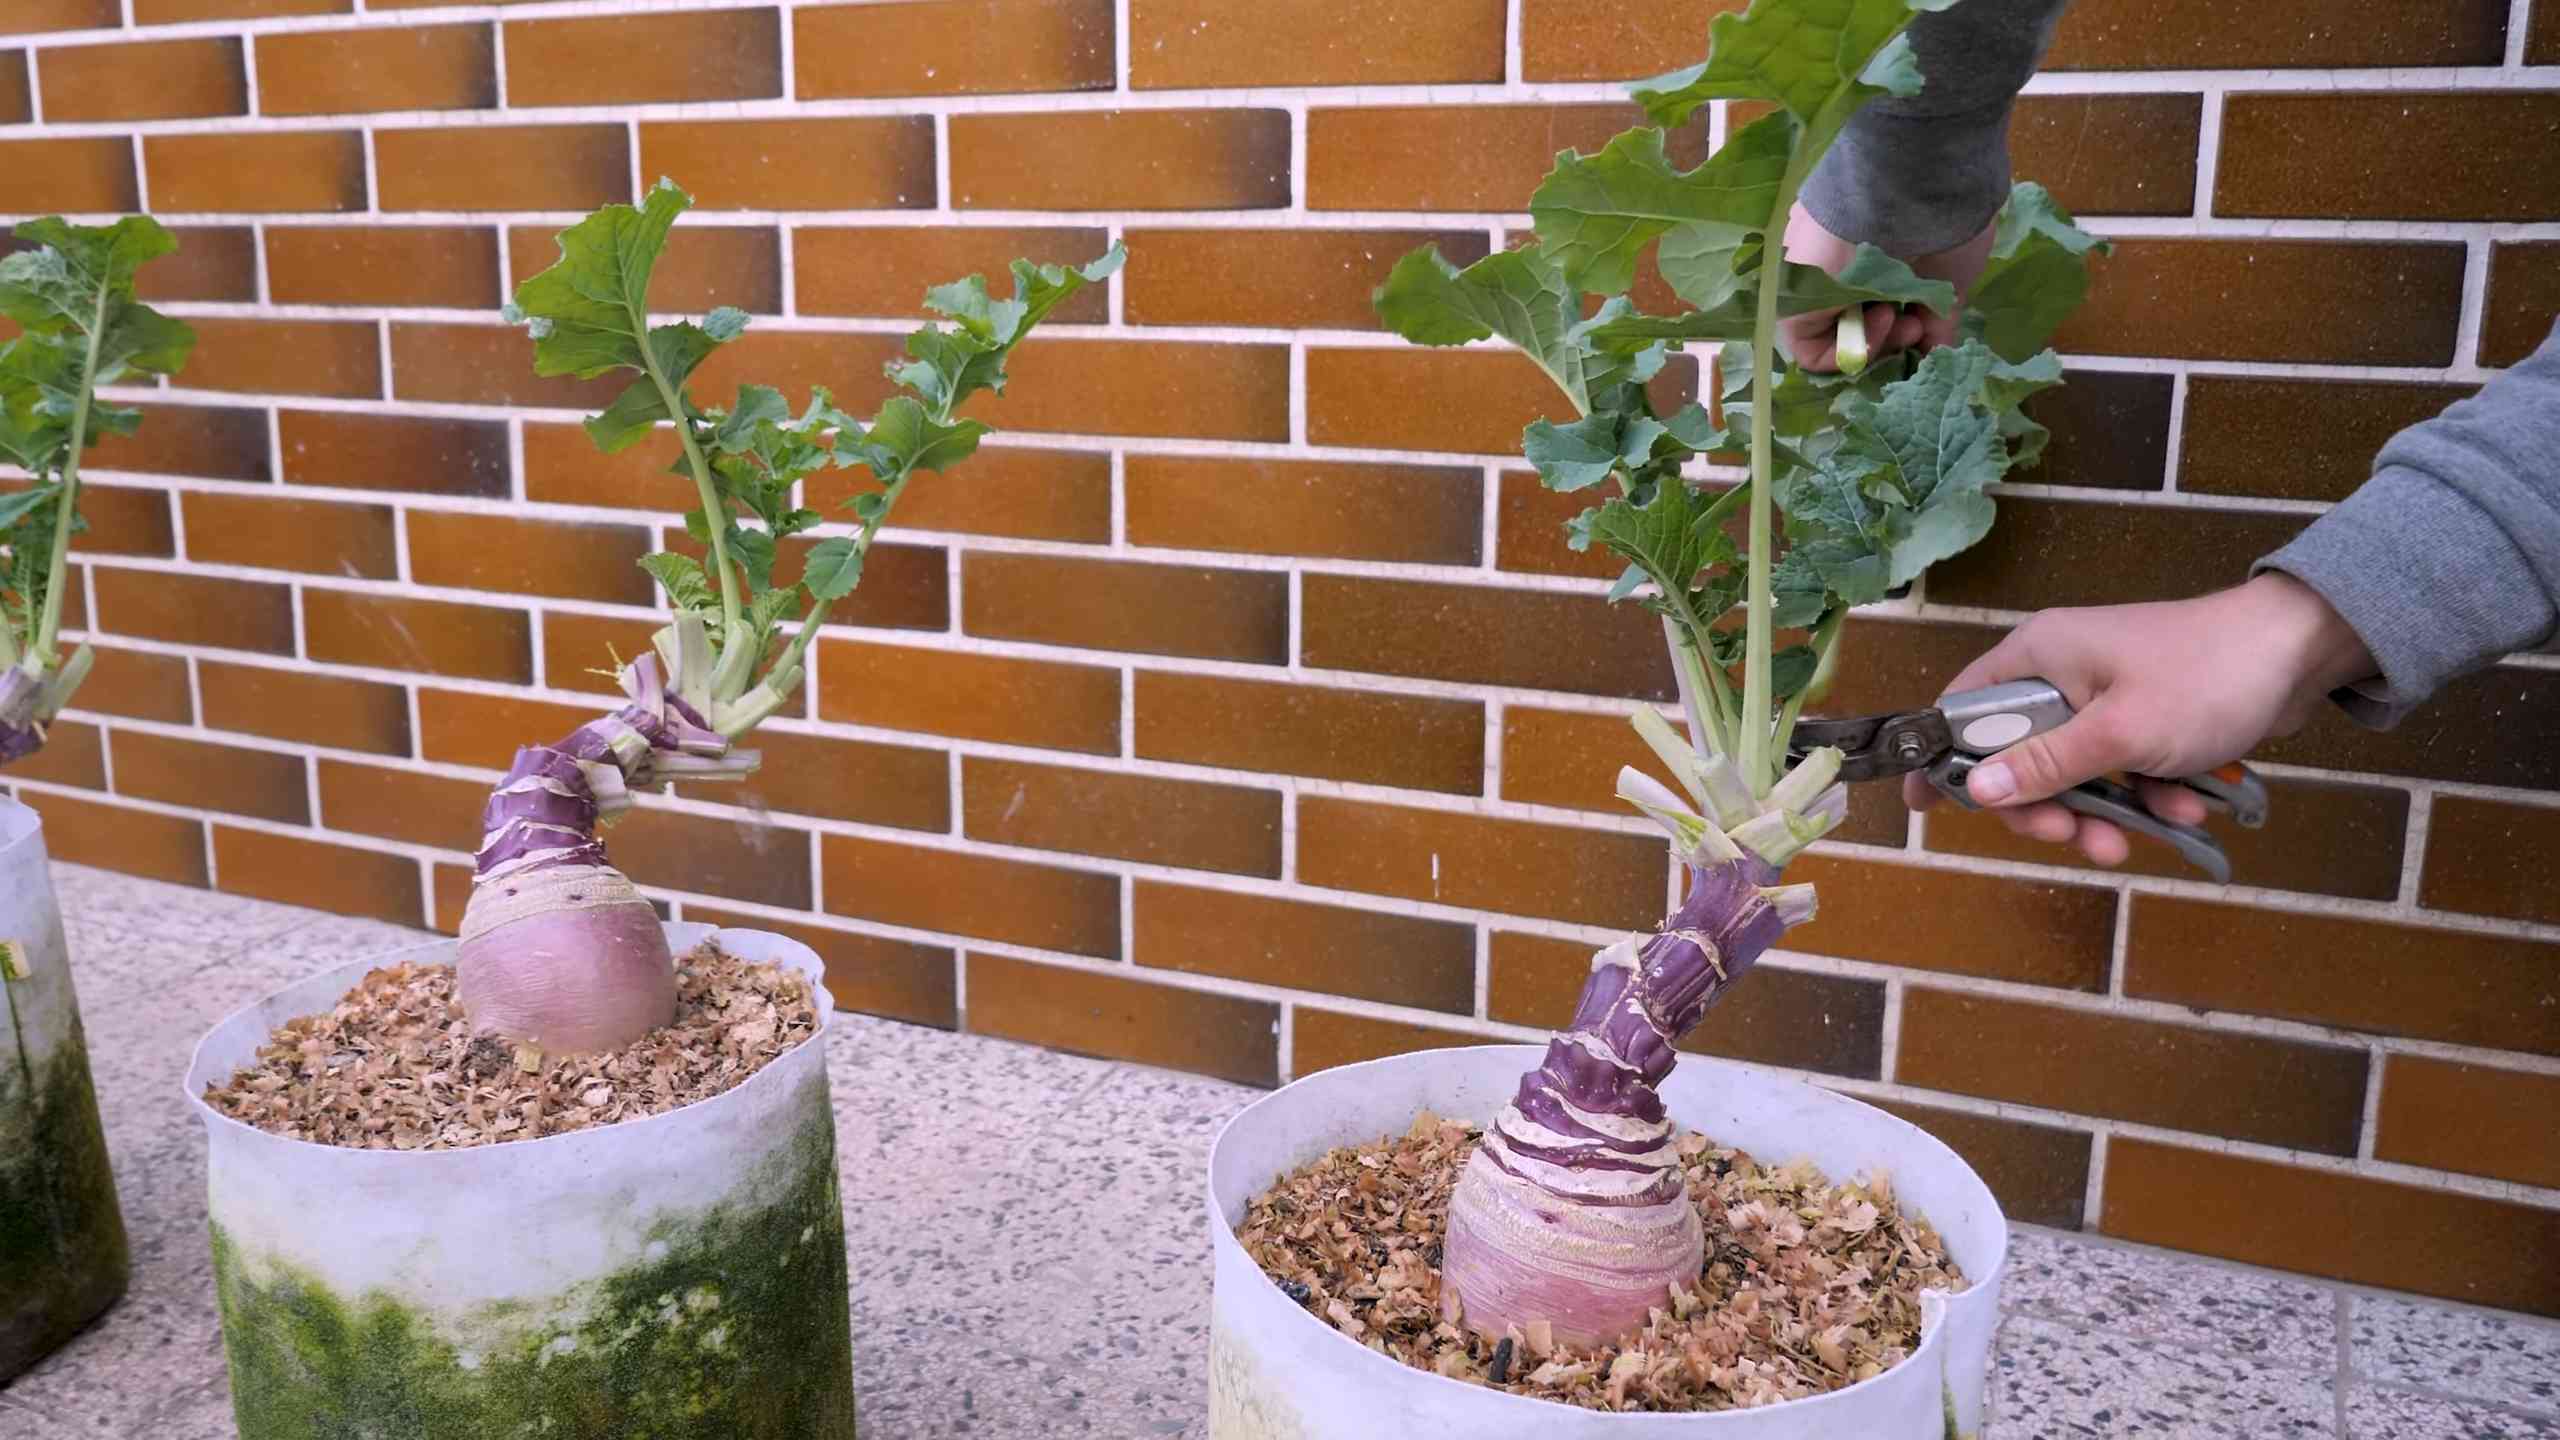
Saving Rutabaga Seeds (For the Advanced Gardener)
If you’re feeling
Conclusion
So, there you have it! Mastering the art of growing your own rutabaga and swede is not only achievable but incredibly rewarding. We’ve walked you through the entire process, from seed selection to harvesting, and hopefully, you’re now feeling confident and ready to get your hands dirty.
Why is this DIY trick a must-try? Because store-bought rutabagas and swedes simply can’t compare to the flavor and freshness of those you’ve nurtured yourself. Imagine the satisfaction of serving a roasted root vegetable medley featuring your very own, organically grown produce. The taste difference is undeniable – a richer, earthier flavor that elevates any dish. Plus, knowing exactly where your food comes from and how it was grown provides peace of mind. You control the pesticides, the fertilizers, and the overall quality.
Beyond the superior taste and quality, growing your own rutabaga and swede is also a fantastic way to connect with nature and learn about the growing process. It’s a therapeutic activity that can reduce stress and provide a sense of accomplishment. And let’s not forget the cost savings! Over time, you’ll be amazed at how much money you can save by growing your own vegetables.
Looking for variations? Consider experimenting with different varieties of rutabaga and swede. Some are sweeter, some are more robust, and some are better suited for specific climates. You can also try companion planting to improve your yields and deter pests. Marigolds, for example, are known to repel nematodes, which can damage root vegetables. Another fun variation is to try growing them in raised beds or containers if you have limited space. This can also help with drainage and soil control.
Don’t be afraid to experiment with different harvesting times as well. Younger rutabagas and swedes tend to be sweeter and more tender, while older ones have a more intense flavor and are better suited for storage. The key is to find what works best for your taste and your growing conditions.
We wholeheartedly encourage you to give this DIY trick a try. Growing your own rutabaga and swede is an investment in your health, your well-being, and your culinary adventures. It’s a skill that will serve you well for years to come.
Once you’ve harvested your first crop, we’d love to hear about your experience! Share your photos, tips, and recipes with us in the comments below. Let’s build a community of passionate gardeners who are dedicated to growing their own delicious and nutritious food. Your insights could inspire others to take the plunge and discover the joys of growing their own rutabaga and swede. Happy gardening! Remember, the secret to success is patience, persistence, and a little bit of love. With these ingredients, you’re sure to have a bountiful harvest.
Frequently Asked Questions (FAQ)
What is the best time of year to plant rutabaga and swede?
The ideal time to plant rutabaga and swede is in late spring or early summer, about 90-100 days before the first expected frost. This allows them ample time to mature before the cold weather sets in. In regions with mild winters, you may be able to plant a fall crop for a winter harvest. Check your local frost dates to determine the best planting time for your area.
How much space do rutabaga and swede need to grow?
Rutabaga and swede plants need adequate space to develop their large roots. A general guideline is to space them about 6-8 inches apart in rows that are 18-24 inches apart. This allows for good air circulation and prevents overcrowding, which can lead to disease. If you’re growing them in containers, choose pots that are at least 12 inches in diameter and depth.
What kind of soil is best for growing rutabaga and swede?
Rutabaga and swede thrive in well-drained, fertile soil that is rich in organic matter. The ideal soil pH is between 6.0 and 7.0. Before planting, amend the soil with compost or well-rotted manure to improve its fertility and drainage. Avoid soils that are heavy clay or prone to waterlogging, as this can cause the roots to rot.
How often should I water rutabaga and swede?
Rutabaga and swede need consistent moisture, especially during germination and early growth. Water deeply and regularly, aiming for about 1 inch of water per week. Avoid overwatering, as this can lead to root rot. Mulching around the plants can help retain moisture and suppress weeds. During hot, dry periods, you may need to water more frequently.
What are some common pests and diseases that affect rutabaga and swede?
Some common pests that can affect rutabaga and swede include aphids, flea beetles, cabbage root flies, and nematodes. Diseases include clubroot, powdery mildew, and downy mildew. To prevent pest and disease problems, practice crop rotation, choose disease-resistant varieties, and maintain good garden hygiene. Use organic pest control methods, such as insecticidal soap or neem oil, if necessary.
How do I know when rutabaga and swede are ready to harvest?
Rutabaga and swede are typically ready to harvest when the roots reach a diameter of 3-5 inches. The exact size will depend on the variety and your personal preference. You can also check the maturity date on the seed packet as a general guideline. To harvest, gently loosen the soil around the root and pull it up.
How do I store rutabaga and swede after harvesting?
Rutabaga and swede can be stored for several months in a cool, dark, and humid place, such as a root cellar or refrigerator. Before storing, remove the tops, leaving about 1 inch of stem. Brush off any excess soil, but do not wash them. Store them in perforated plastic bags or containers to prevent them from drying out. Check them periodically and remove any that show signs of spoilage.
Can I eat the greens of rutabaga and swede?
Yes, the greens of rutabaga and swede are edible and nutritious. They can be cooked like spinach or other leafy greens. Harvest the greens while they are young and tender, as they can become bitter as they mature. Be sure to wash them thoroughly before cooking.
What are some ways to use rutabaga and swede in cooking?
Rutabaga and swede are versatile root vegetables that can be used in a variety of dishes. They can be roasted, mashed, boiled, steamed, or added to soups and stews. They pair well with other root vegetables, such as carrots, potatoes, and parsnips. They can also be used in gratins, pies, and even desserts. Experiment with different recipes and find your favorite ways to enjoy these delicious vegetables.
Is growing rutabaga and swede organically difficult?
Growing rutabaga and swede organically is definitely achievable with the right practices. Focus on building healthy soil through composting and cover cropping. Use organic fertilizers and pest control methods. Choose disease-resistant varieties and practice crop rotation. Regularly monitor your plants for pests and diseases and take action promptly. While it may require a bit more effort, the reward of harvesting your own organically grown rutabaga and swede is well worth it.
Leave a Comment