
Grow Microgreens at Home Easy? Absolutely! Imagine adding a burst of fresh, vibrant flavor and a nutritional powerhouse to your meals, all from your own kitchen windowsill. Forget those bland, store-bought greens – we’re diving into the wonderful world of microgreens, and I’m going to show you how incredibly simple it is to cultivate these tiny wonders yourself.
For centuries, cultures around the globe have recognized the value of young, sprouted plants. From ancient Chinese medicine utilizing sprouted grains to modern chefs embracing microgreens for their intense flavors and textures, these little greens have a rich history. But you don’t need to be a seasoned gardener or a culinary expert to enjoy them.
In today’s fast-paced world, we’re all looking for ways to eat healthier and connect with our food sources. Grow Microgreens at Home Easy is the perfect solution! They’re packed with vitamins and minerals, ready in just a week or two, and require minimal space and effort. Plus, it’s incredibly satisfying to watch them sprout and flourish. This DIY guide will provide you with all the essential tricks and hacks you need to successfully grow microgreens at home, even if you have a black thumb. Let’s get started and transform your kitchen into a mini-farm!
Growing Butternut Squash: A Comprehensive DIY Guide
Hey there, fellow gardening enthusiasts! I’m so excited to share my tried-and-true method for growing beautiful, delicious butternut squash right in your own backyard. It’s easier than you might think, and the satisfaction of harvesting your own homegrown squash is truly rewarding. Let’s dive in!
Choosing the Right Butternut Squash Variety
Before we even think about planting, let’s talk varieties. While “Waltham” is a classic and reliable choice, don’t be afraid to experiment! Some other great options include:
* ‘Butterscotch PMR’: This variety is known for its powdery mildew resistance, a common issue with squash.
* ‘Early Butternut’: Perfect if you have a shorter growing season, as it matures faster.
* ‘Honey Nut’: A smaller, sweeter variety that’s great for single servings.
Consider your climate, growing space, and personal preferences when making your selection. I personally love ‘Waltham’ for its consistent yield and flavor.
Preparing Your Garden Bed
Butternut squash are hungry plants, so soil preparation is key! They need plenty of sunshine and well-drained soil that’s rich in organic matter.
* Sunlight: Aim for at least 6-8 hours of direct sunlight per day.
* Soil: Butternut squash thrives in well-drained soil with a pH between 6.0 and 7.0.
* Nutrients: These plants are heavy feeders, so amend your soil generously with compost, aged manure, or other organic matter.
Starting Your Seeds (Indoors or Outdoors?)
You have two options here: starting seeds indoors or directly sowing them in your garden.
* Starting Indoors: This gives you a head start, especially in cooler climates. Start seeds about 3-4 weeks before the last expected frost.
* Direct Sowing: If you live in a warmer climate with a long growing season, you can sow seeds directly into the garden after the last frost.
I usually start my seeds indoors to get a jump on the season. Here’s how I do it:
Starting Butternut Squash Seeds Indoors
1. Gather Your Supplies: You’ll need seed starting trays or small pots, seed starting mix, butternut squash seeds, and a spray bottle.
2. Fill the Trays/Pots: Fill your seed starting trays or pots with seed starting mix. Gently tap them to settle the soil.
3. Sow the Seeds: Plant 1-2 seeds per cell or pot, about 1 inch deep.
4. Water Gently: Use a spray bottle to moisten the soil. Avoid overwatering, which can lead to rot.
5. Provide Warmth and Light: Place the trays or pots in a warm location (around 70-75°F) and provide plenty of light. A heat mat can be helpful. If you don’t have a sunny window, use a grow light.
6. Keep the Soil Moist: Check the soil daily and water as needed to keep it consistently moist, but not soggy.
7. Harden Off Seedlings: About a week before transplanting, gradually acclimate the seedlings to outdoor conditions. Start by placing them outside for an hour or two each day, increasing the time each day. This process is called “hardening off.”
Direct Sowing Butternut Squash Seeds
1. Prepare the Soil: Make sure the soil is warm (at least 60°F) and well-drained. Amend with compost or other organic matter.
2. Create Mounds: Butternut squash plants like to sprawl, so create small mounds of soil about 2-3 feet apart.
3. Sow the Seeds: Plant 2-3 seeds per mound, about 1 inch deep.
4. Water Gently: Water the mounds gently to moisten the soil.
5. Thin Seedlings: Once the seedlings emerge, thin them to one strong plant per mound.
Transplanting Your Seedlings
Once your seedlings have developed a few sets of true leaves and the danger of frost has passed, it’s time to transplant them into the garden.
1. Choose a Cloudy Day: Transplanting on a cloudy day will help reduce stress on the seedlings.
2. Prepare the Planting Holes: Dig holes that are slightly larger than the root balls of the seedlings, spacing them 2-3 feet apart.
3. Gently Remove Seedlings: Carefully remove the seedlings from their trays or pots, being careful not to damage the roots.
4. Plant the Seedlings: Place the seedlings in the planting holes and gently backfill with soil.
5. Water Thoroughly: Water the seedlings thoroughly after planting.
6. Mulch: Apply a layer of mulch around the plants to help retain moisture, suppress weeds, and regulate soil temperature. I like to use straw or shredded leaves.
Caring for Your Butternut Squash Plants
Now that your plants are in the ground, it’s time to provide them with the care they need to thrive.
* Watering: Butternut squash plants need consistent watering, especially during hot, dry weather. Water deeply at the base of the plants, avoiding wetting the foliage, which can promote disease.
* Fertilizing: Feed your plants regularly with a balanced fertilizer or compost tea. I like to use a liquid seaweed fertilizer every few weeks.
* Weeding: Keep the area around your plants free of weeds, which can compete for nutrients and water.
* Pest Control: Keep an eye out for common squash pests like squash bugs, squash vine borers, and cucumber beetles. Handpicking pests, using row covers, or applying organic insecticides can help control infestations.
* Pollination: Butternut squash plants have separate male and female flowers. Bees are essential for pollination. If you’re not seeing many bees in your garden, you may need to hand-pollinate the flowers.
Hand-Pollinating Butternut Squash
1. Identify Male and Female Flowers: Male flowers have a long, thin stem, while female flowers have a small, immature squash at the base.
2. Collect Pollen: In the early morning, use a small paintbrush or cotton swab to collect pollen from the male flower.
3. Transfer Pollen: Gently transfer the pollen to the stigma (the center part) of the female flower.
4. Repeat: Repeat this process for several female flowers.
Dealing with Common Problems
Even with the best care, you may encounter some problems while growing butternut squash. Here are a few common issues and how to address them:
* Powdery Mildew: This fungal disease appears as a white, powdery coating on the leaves. Improve air circulation, avoid overhead watering, and apply a fungicide if necessary.
* Squash Bugs: These pests suck the sap from the leaves, causing them to wilt and die. Handpick bugs and egg masses, use row covers, or apply an insecticide.
* Squash Vine Borers: These pests bore into the stems of the plants, causing them to wilt and die. Wrap the stems with foil or netting to prevent borers from entering. You can also inject Bacillus thuringiensis (Bt) into the stems to kill the borers.
* Blossom End Rot: This condition causes the blossom end of the squash to rot. It’s usually caused by calcium deficiency or inconsistent watering. Ensure consistent watering and amend the soil with calcium if necessary.
Harvesting Your Butternut Squash
The moment you’ve been waiting for! Butternut squash are typically ready to harvest in the fall, about 90-100 days after planting.
* Check for Maturity: The squash should have a deep tan color and a hard rind that you can’t easily pierce with your fingernail. The stem should be dry and corky.
* Harvest Carefully: Use a sharp knife or pruners to cut the squash from the vine, leaving about 2-3 inches of stem attached.
* Cure the Squash: Cure the squash in a warm, dry place (around 80-85°F) for 1-2 weeks. This will help harden the rind and improve storage life.
Storing Your Butternut Squash
Proper storage is essential for enjoying your butternut squash throughout the winter.
* Choose a Cool, Dry Place: Store the squash in a cool, dry place (around 50-60°F) with good ventilation. A basement or root cellar is ideal.
* Avoid Bruising: Handle the squash carefully to avoid bruising, which can lead to rot.
* Check Regularly: Check the squash regularly for signs of spoilage. Discard any squash that are soft, moldy, or have bruises.
With proper storage, butternut squash can last for several months. I’ve had some last all the way until
Conclusion
So, there you have it! Growing microgreens at home is not only achievable, but it’s also surprisingly simple, rewarding, and incredibly beneficial for your health and your wallet. We’ve walked you through the process, demystifying each step and providing you with the knowledge to cultivate your own miniature garden of nutritious greens.
Why is this DIY trick a must-try? Because it puts you in control of your food source. You know exactly what you’re eating, free from pesticides and herbicides, and bursting with fresh, vibrant flavor. Store-bought microgreens can be expensive and often lack the same level of freshness. By growing your own, you’re saving money, reducing your environmental impact, and enjoying a superior product.
Beyond the basic method we’ve outlined, there’s a whole world of microgreen possibilities to explore. Experiment with different seed varieties! Radish, broccoli, sunflower, pea shoots, and kale are all popular choices, each offering a unique flavor profile and nutrient composition. You can even create your own custom blends to suit your taste preferences.
Consider using different growing mediums. While soil is a classic choice, you can also try coco coir, hemp mats, or even hydroponic systems for a soilless approach. Each medium offers its own set of advantages and disadvantages, so do some research and see what works best for you.
For those looking to streamline the process, consider investing in a dedicated microgreen growing tray with drainage holes and a humidity dome. These trays can help maintain optimal growing conditions and make harvesting easier. You can also explore using grow lights, especially if you live in an area with limited sunlight. Grow lights can provide consistent and reliable light, ensuring healthy and vigorous growth.
Don’t be afraid to experiment with different harvesting techniques. Some people prefer to snip the microgreens with scissors, while others prefer to gently pull them from the growing medium. Find the method that works best for you and minimizes damage to the plants.
Growing microgreens at home is a journey of discovery. There will be successes and failures along the way, but each experience will teach you something new. The most important thing is to have fun and enjoy the process.
We are confident that with a little patience and effort, you’ll be enjoying a steady supply of fresh, delicious microgreens in no time. So, grab your seeds, gather your supplies, and get growing!
We encourage you to try this DIY trick and share your experiences with us. Let us know what varieties you’re growing, what challenges you’ve faced, and what tips you’ve discovered. Share your photos and videos on social media using [Your Hashtag Here] and inspire others to join the microgreen revolution. We can’t wait to see what you create!
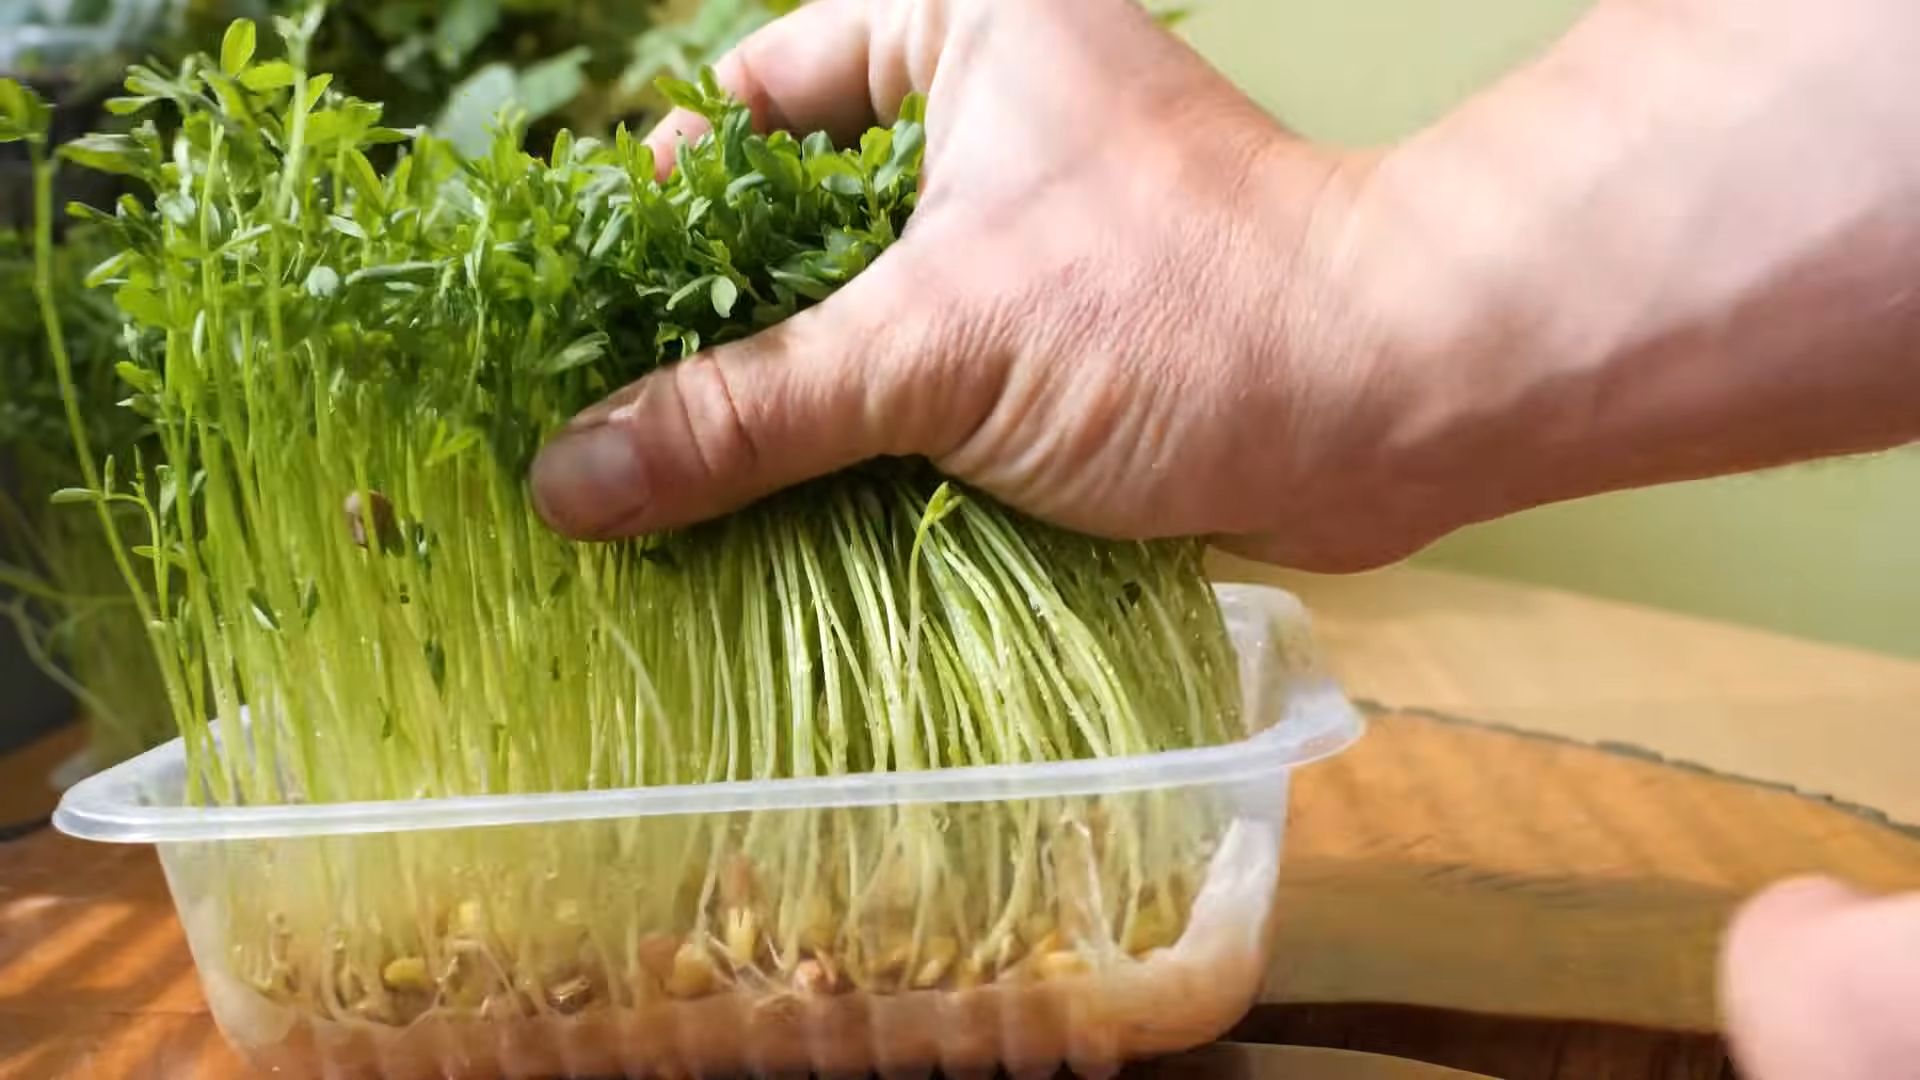
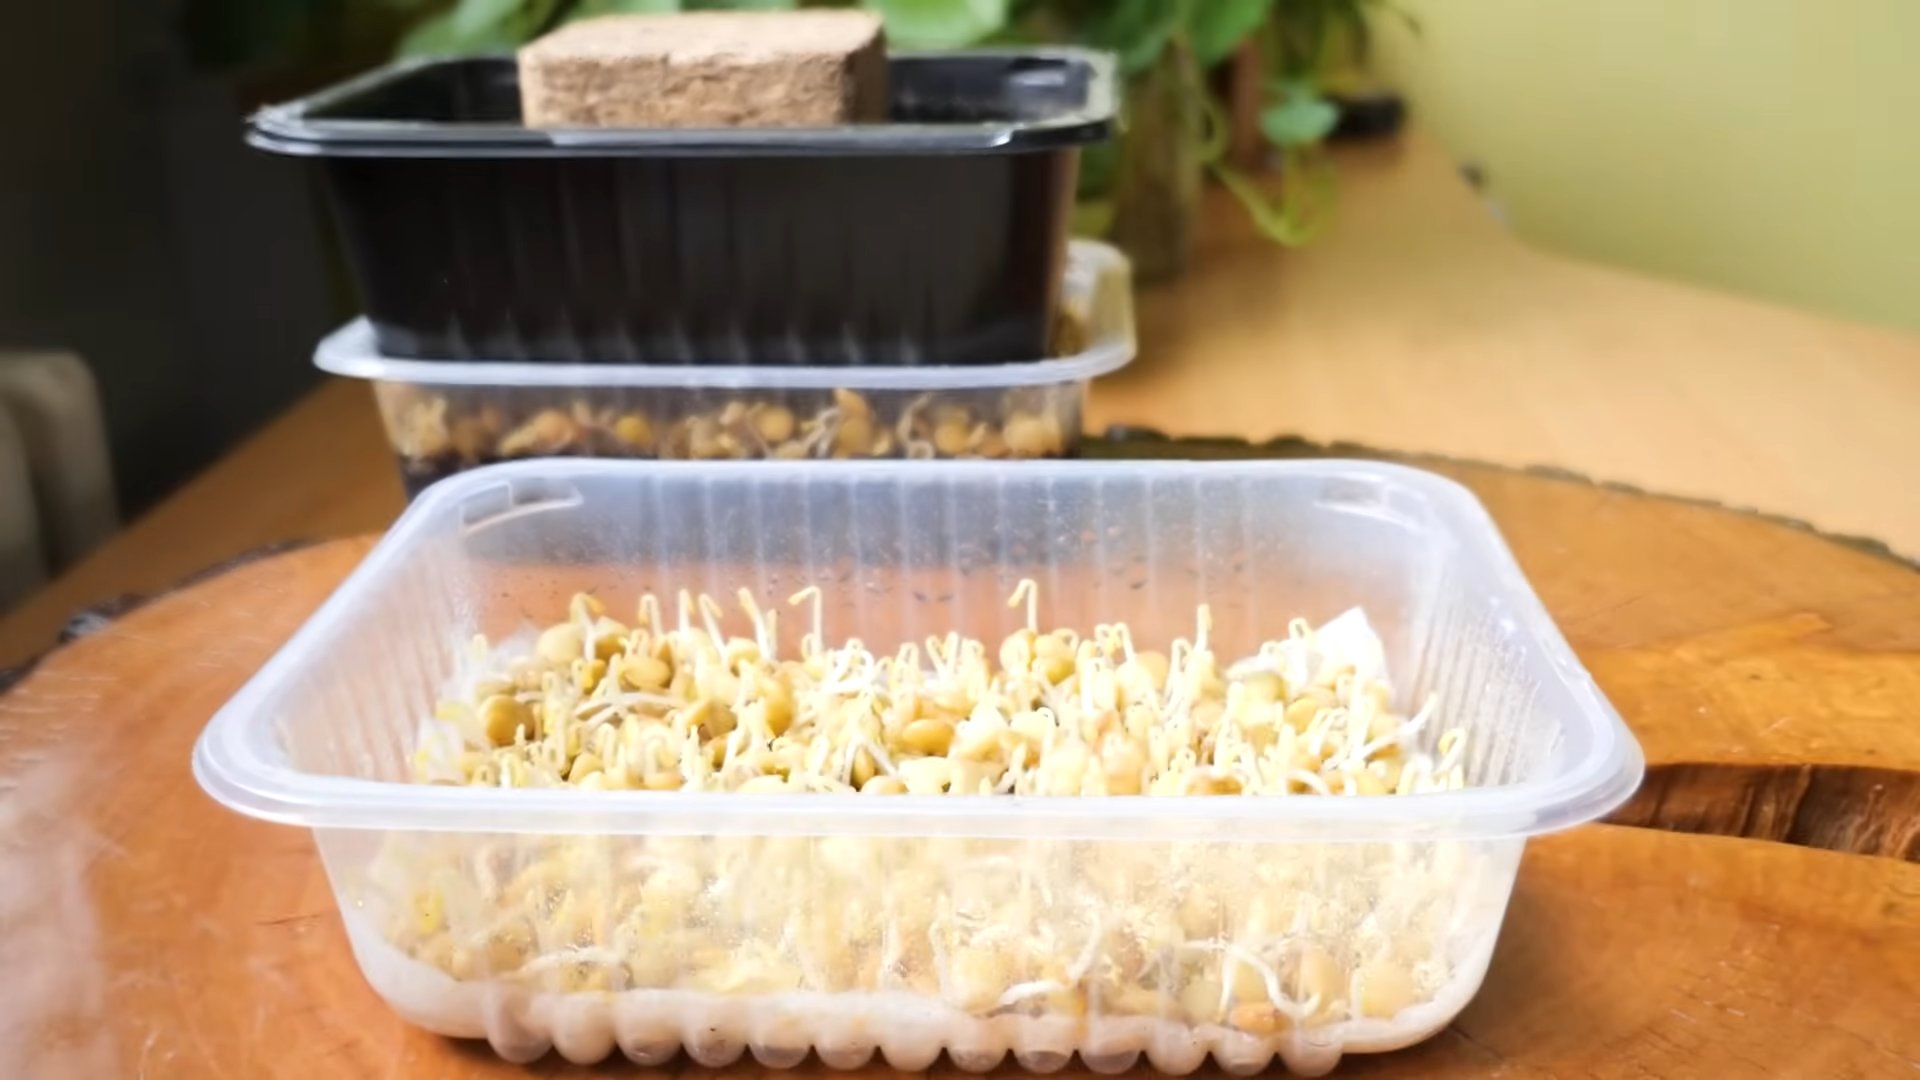
Growing microgreens at home is a simple way to add nutrients to your diet.
Frequently Asked Questions (FAQ)
What exactly are microgreens?
Microgreens are young vegetable greens that are harvested shortly after germination, typically when the first true leaves have emerged. They are larger than sprouts but smaller than baby greens, and they are packed with nutrients and flavor. They are essentially baby versions of mature vegetables and herbs.
Why should I grow microgreens instead of buying them?
There are several compelling reasons to grow your own microgreens. First, it’s significantly cheaper than buying them from the store. Second, you have complete control over the growing process, ensuring that your microgreens are free from pesticides and herbicides. Third, homegrown microgreens are often fresher and more flavorful than store-bought ones, as they haven’t been sitting on a shelf for days. Finally, growing microgreens is a fun and rewarding hobby that can connect you with your food source.
What kind of seeds can I use to grow microgreens?
A wide variety of seeds can be used to grow microgreens, including vegetables, herbs, and even some flowers. Popular choices include radish, broccoli, kale, sunflower, pea shoots, mustard, arugula, basil, cilantro, and amaranth. Avoid using seeds that have been treated with fungicides or other chemicals, as these can be harmful to your health. Look for seeds specifically labeled for sprouting or microgreen production.
How much light do microgreens need?
Microgreens need adequate light to thrive. While they can germinate in the dark, they require light once the seedlings emerge. Natural sunlight is ideal, but if you don’t have access to enough sunlight, you can use grow lights. Aim for at least 6-8 hours of light per day. If using grow lights, position them a few inches above the microgreens.
How often should I water my microgreens?
Microgreens need to be kept consistently moist, but not waterlogged. Water them gently using a spray bottle or watering can, making sure to moisten the entire growing medium. Check the moisture level daily and water as needed. The frequency of watering will depend on the humidity, temperature, and type of growing medium.
How long does it take for microgreens to grow?
The growing time for microgreens varies depending on the variety, but most microgreens are ready to harvest in 7-14 days. Radish and mustard greens tend to grow quickly, while sunflower and pea shoots may take a bit longer.
How do I know when my microgreens are ready to harvest?
Microgreens are typically ready to harvest when the first true leaves have emerged. The true leaves are the second set of leaves that appear after the cotyledons (seed leaves). The microgreens should be about 1-3 inches tall.
How do I harvest microgreens?
Harvest microgreens by snipping them off at the base of the stem with scissors or a sharp knife. You can also gently pull them from the growing medium. Harvest only what you need, as microgreens are best consumed fresh.
How do I store microgreens?
Store harvested microgreens in the refrigerator in an airtight container lined with a paper towel. They will typically last for 5-7 days.
Can I reuse the growing medium?
It’s generally not recommended to reuse the growing medium for microgreens, as it can harbor bacteria and fungi. It’s best to start with fresh growing medium each time.
What if my microgreens get moldy?
Mold can be a common problem when growing microgreens, especially in humid environments. To prevent mold, ensure good air circulation, avoid overwatering, and use a clean growing medium. If you see mold, remove the affected area immediately. If the mold is widespread, it’s best to discard the entire batch.
Are there any microgreens I should avoid growing?
Avoid growing microgreens from the nightshade family (tomatoes, peppers, eggplants), as their leaves can contain toxic alkaloids. Also, avoid growing microgreens from beans, as they can be difficult to digest.
Can I grow microgreens indoors without soil?
Yes, you can grow microgreens indoors without soil using hydroponic methods. This involves growing the microgreens in a nutrient-rich water solution. There are various hydroponic systems available, ranging from simple DIY setups to more sophisticated commercial systems.
What are the nutritional benefits of microgreens?
Microgreens are packed with nutrients, including vitamins, minerals, and antioxidants. Studies have shown that microgreens can contain significantly higher levels of nutrients than their mature counterparts. They are a great way to boost your intake of essential vitamins and minerals.
Can I eat the roots of microgreens?
While the roots of some microgreens are edible, it’s generally not recommended to eat them, as they can be bitter and may contain soil particles. It’s best to stick to the stems and leaves.

Leave a Comment