
Planting Sweet Potatoes might seem daunting, but trust me, it’s one of the most rewarding experiences a home gardener can have! Imagine pulling vibrant, orange treasures from your own backyard – the taste of homegrown sweet potatoes is simply unmatched. For centuries, sweet potatoes have been a staple in diets around the world, from their origins in Central and South America to becoming a beloved comfort food in the Southern United States. They’re not just delicious; they’re packed with nutrients, making them a healthy and satisfying addition to any meal.
But why should you bother with planting sweet potatoes yourself? Well, store-bought sweet potatoes often lack the freshness and flavor of homegrown varieties. Plus, growing your own allows you to choose from a wider range of unique and heirloom types that you won’t find in your local grocery store. More importantly, in today’s world, knowing how to grow your own food offers a sense of self-sufficiency and connection to nature that’s incredibly valuable. This DIY guide will walk you through every step, from sprouting slips to harvesting your bountiful crop. Get ready to roll up your sleeves and discover the joy of growing your own sweet potatoes – it’s easier than you think!
Planting Sweet Potatoes: A Beginner’s Guide to Bountiful Harvests
Hey there, fellow gardening enthusiasts! I’m so excited to share my experience with growing sweet potatoes. These vibrant, delicious tubers are surprisingly easy to cultivate, and the satisfaction of harvesting your own homegrown sweet potatoes is truly rewarding. This guide will walk you through every step, from sprouting slips to harvesting your sweet potato bounty. Let’s get our hands dirty!
Preparing Sweet Potato Slips
Sweet potatoes don’t grow directly from seeds. Instead, we use “slips,” which are sprouts that grow from the sweet potato itself. You can buy slips from a nursery, but it’s much more fun (and cost-effective!) to grow your own.
Here’s how:
* Choosing Your Sweet Potatoes: Select organic sweet potatoes from your local grocery store or farmer’s market. Organic is key here, as non-organic potatoes may be treated to prevent sprouting. Look for firm, healthy potatoes without any soft spots or blemishes. I personally love using Beauregard or Jewel varieties for their reliable yields and delicious flavor.
* The Water Method: This is my preferred method, as it’s super simple and allows you to monitor root development.
1. Gather Your Supplies: You’ll need sweet potatoes, a wide-mouthed jar or glass, toothpicks, and water.
2. Insert Toothpicks: Insert 3-4 toothpicks around the middle of the sweet potato, spacing them evenly. These will act as supports to suspend the potato in the jar.
3. Suspend the Potato: Fill the jar with water, ensuring that the bottom half of the sweet potato is submerged. The toothpicks should rest on the rim of the jar, holding the potato in place.
4. Find a Sunny Spot: Place the jar in a warm, sunny location. A windowsill is perfect!
5. Change the Water Regularly: Change the water every 2-3 days to prevent mold and keep the water fresh.
6. Wait for Sprouts: Be patient! It can take several weeks for sprouts (slips) to emerge from the sweet potato. You’ll first see roots developing at the bottom, followed by green shoots appearing on the top.
7. Harvesting the Slips: Once the slips are 6-8 inches long, they’re ready to be removed. Gently twist or cut the slips off the sweet potato, being careful not to damage the roots. I like to soak the slips in water for a few hours before planting to help them rehydrate.
* The Soil Method: This method is a bit messier, but some gardeners swear by it.
1. Gather Your Supplies: You’ll need sweet potatoes, a container (like a seed tray or pot), potting soil, and water.
2. Prepare the Container: Fill the container with moist potting soil.
3. Bury the Potato: Partially bury the sweet potato in the soil, leaving the top third exposed.
4. Water Regularly: Keep the soil consistently moist, but not soggy.
5. Find a Warm Spot: Place the container in a warm location.
6. Wait for Sprouts: As with the water method, it will take several weeks for slips to emerge.
7. Harvesting the Slips: Once the slips are 6-8 inches long, carefully dig them up, trying to get as many roots as possible.
Preparing Your Garden Bed
Sweet potatoes thrive in warm weather and well-drained soil. Proper soil preparation is crucial for a successful harvest.
* Timing is Key: Plant your sweet potato slips after the last frost, when the soil temperature has warmed to at least 65°F (18°C). I usually aim for late spring or early summer.
* Choosing the Right Location: Select a location that receives at least 6-8 hours of direct sunlight per day. Sweet potatoes need plenty of sunshine to produce those delicious tubers.
* Soil Preparation: Sweet potatoes prefer loose, sandy loam soil. If your soil is heavy clay, amend it with plenty of organic matter, such as compost or well-rotted manure. This will improve drainage and aeration.
1. Clear the Area: Remove any weeds, rocks, or debris from the planting area.
2. Till the Soil: Till the soil to a depth of at least 12 inches. This will loosen the soil and make it easier for the sweet potato roots to grow.
3. Amend the Soil: Incorporate compost or well-rotted manure into the soil. I usually add a generous layer, about 2-3 inches thick.
4. Create Ridges: Sweet potatoes grow best on raised ridges or hills. This improves drainage and allows the tubers to expand. Create ridges that are about 8-12 inches high and 3-4 feet apart.
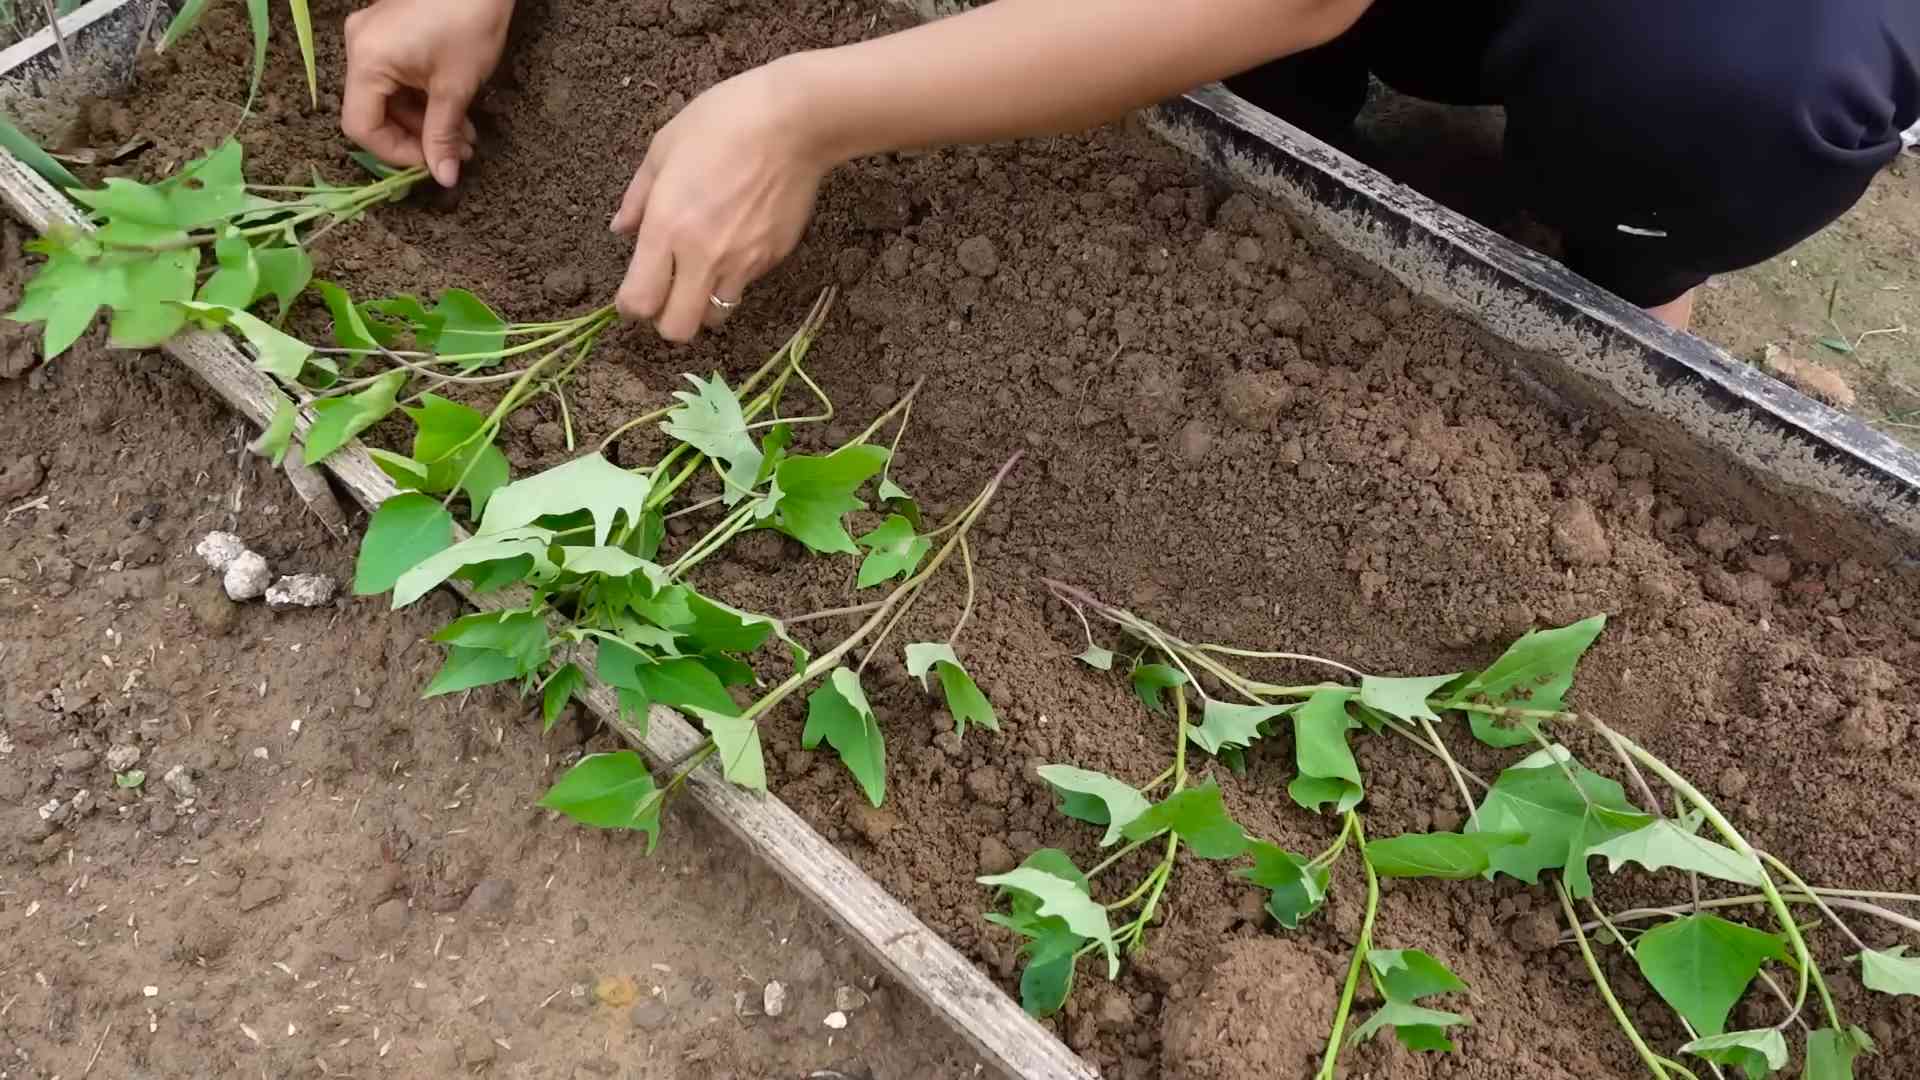
Planting Your Sweet Potato Slips
Now comes the fun part – planting your sweet potato slips!
* Spacing: Space the slips 12-18 inches apart along the ridges. This will give them enough room to grow and develop.
* Planting Technique:
1. Dig a Hole: Dig a small hole in the top of the ridge, deep enough to accommodate the roots of the slip.
2. Plant the Slip: Gently place the slip in the hole, covering the roots with soil. Leave the top leaves exposed.
3. Water Thoroughly: Water the newly planted slips thoroughly to help them establish.
* Protecting Your Plants:
* Row Covers: If you’re planting early in the season, you can use row covers to protect the slips from cool temperatures and pests.
* Mulch: Mulching around the plants with straw or hay will help retain moisture, suppress weeds, and regulate soil temperature.
Caring for Your Sweet Potato Plants
Sweet potatoes are relatively low-maintenance, but they do require some care to thrive.
* Watering: Water regularly, especially during dry periods. Sweet potatoes need consistent moisture to develop their tubers. Aim for about 1 inch of water per week.
* Weeding: Keep the garden bed free of weeds, as they can compete with the sweet potatoes for nutrients and water. Hand-pull weeds regularly or use a hoe to cultivate the soil.
* Fertilizing: Sweet potatoes don’t require a lot of fertilizer. In fact, too much nitrogen can lead to excessive vine growth and fewer tubers. If your soil is poor, you can apply a balanced fertilizer (like 10-10-10) at planting time, following the instructions on the package. I prefer using a side dressing of compost tea every few weeks.
* Pest and Disease Control: Sweet potatoes are generally resistant to pests and diseases. However, keep an eye out for common garden pests like aphids, flea beetles, and sweet potato weevils. You can control these pests with organic insecticides like neem oil or insecticidal soap.
* Vine Management: Sweet potato vines can grow quite long and sprawling. You can prune them back to encourage tuber development. Just be careful not to damage the tubers when pruning. I usually just redirect the vines to keep them from spreading too far.
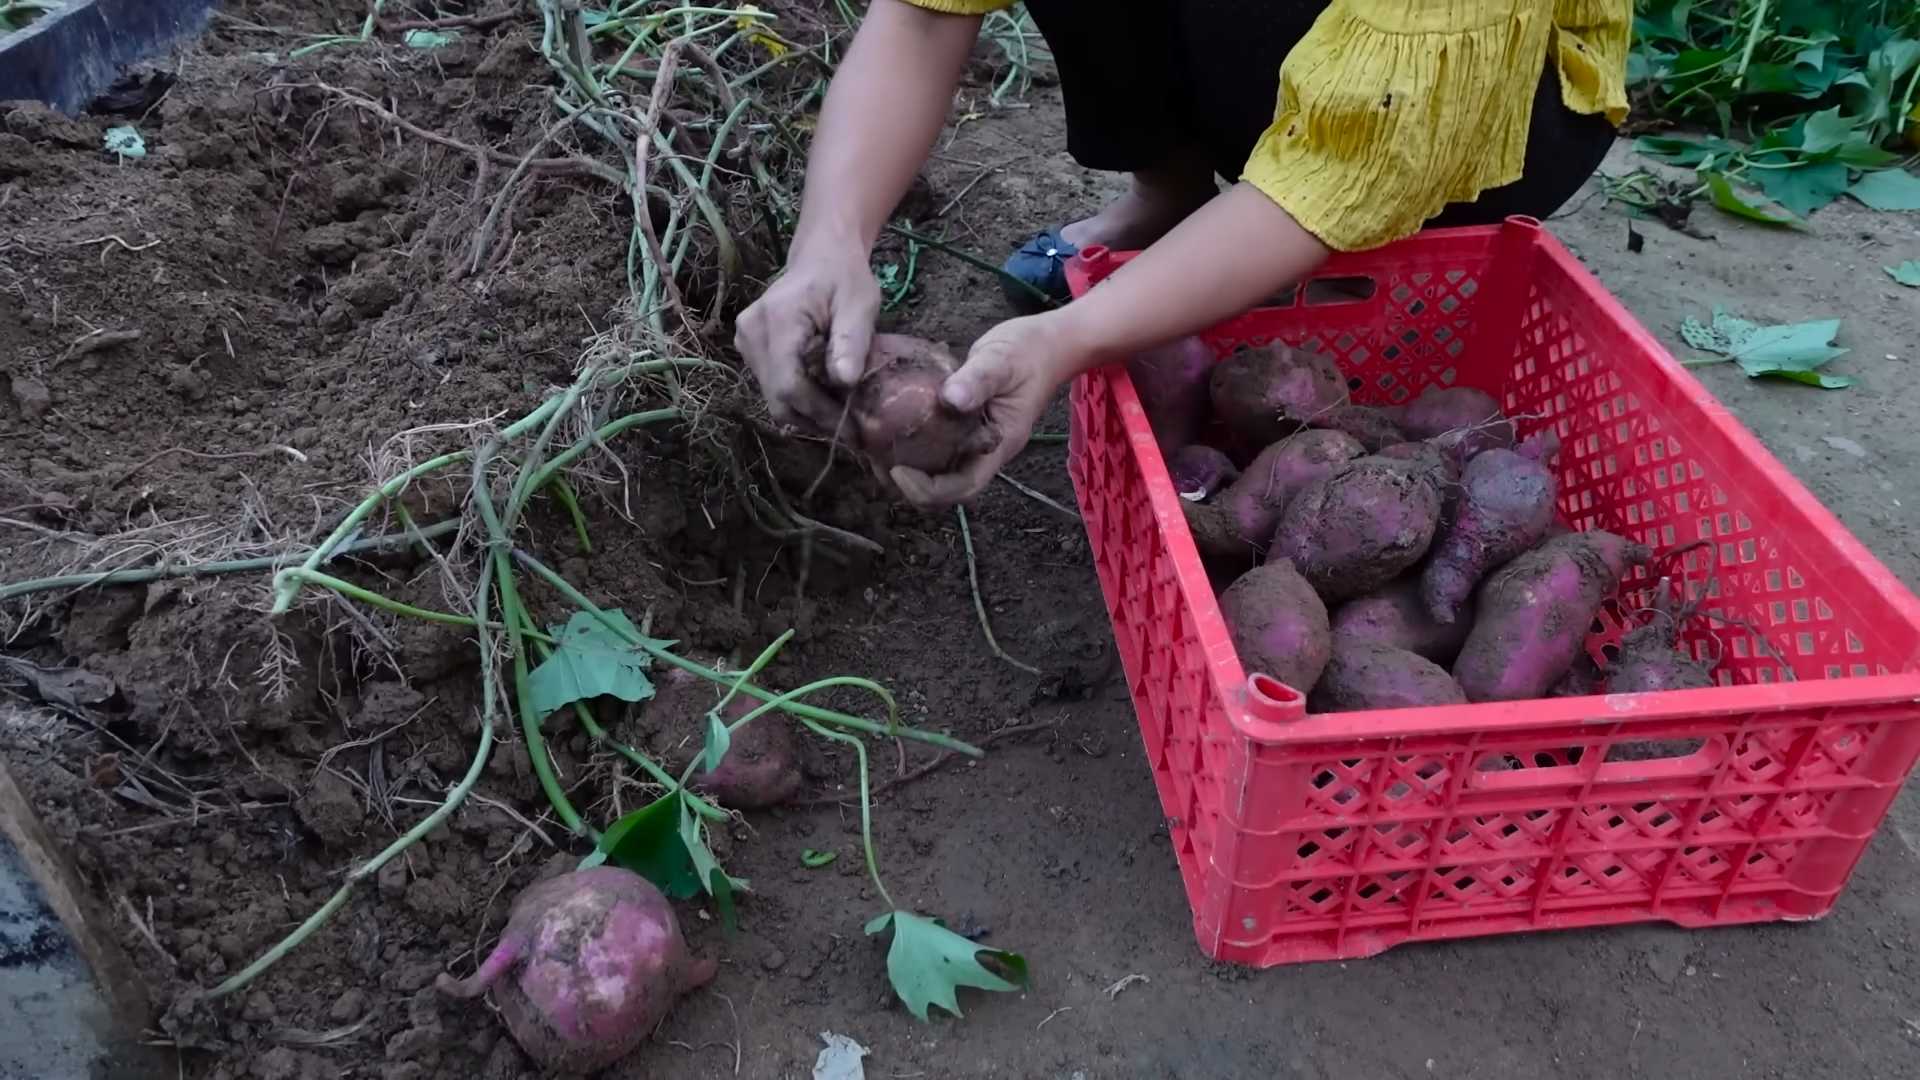
Harvesting Your Sweet Potatoes
The moment we’ve all been waiting for – harvesting!
* Timing: Sweet potatoes are typically ready to harvest about 90-120 days after planting. The leaves will start to turn yellow and the vines will begin to die back.
* Weather Considerations: Harvest your sweet potatoes on a dry day. Avoid harvesting after a heavy rain, as the tubers will be more susceptible to rot.
* Harvesting Technique:
1. Loosen the Soil: Use a garden fork or shovel to carefully loosen the soil around the plants. Be careful not to damage the tubers.
2. Dig Up the Tubers: Gently lift the plants from the soil, being careful not to bruise or cut the sweet potatoes.
3. Brush Off the Soil: Brush off any excess soil from the tubers.
* Curing Your Sweet Potatoes: Curing is essential for developing the sweet flavor and improving the storage life of your sweet potatoes.
1. Gather Your Supplies: You’ll need a warm, humid place to cure your sweet potatoes. A garage, shed, or enclosed porch works well. You’ll also need cardboard boxes or crates.
2. Arrange the Tubers: Arrange the sweet potatoes in a single layer in the boxes or crates, making sure they don’t touch each other.
3. Cure for 7-10 Days: Cure the sweet potatoes at a temperature of 80-85°F (27-29°C) and a humidity of 85-90% for 7-10 days
Conclusion
So, there you have it! Planting sweet potatoes doesn’t have to be a daunting task reserved for seasoned gardeners. With this simple DIY trick, you can transform ordinary sweet potatoes into a thriving source of slips, setting you on the path to a bountiful harvest of these delicious and nutritious root vegetables. This method is a game-changer because it bypasses the often unreliable process of direct planting and gives you a head start on the growing season. You’re essentially creating your own sweet potato nursery, ensuring that you have healthy and vigorous starts ready to go when the weather is just right.
Why is this a must-try? Because it’s efficient, cost-effective, and incredibly rewarding. Think about it: instead of purchasing slips from a nursery (which can be expensive and may not always be the variety you desire), you’re utilizing sweet potatoes you likely already have on hand. You’re also gaining complete control over the process, from selecting the healthiest potatoes to nurturing the slips until they’re ready for transplanting. This DIY approach empowers you to become a more self-sufficient gardener and connect with the natural world in a meaningful way.
But the beauty of this method lies not only in its practicality but also in its adaptability. Feel free to experiment with different varieties of sweet potatoes to discover which ones thrive best in your local climate. You can also try different sprouting mediums, such as vermiculite or perlite, to see if they yield better results. Consider using a heat mat to accelerate the sprouting process, especially if you live in a cooler region. And don’t be afraid to get creative with your container choices – repurposed plastic containers, glass jars, or even decorative planters can all work well.
Variations to Consider:
* Water vs. Soil Sprouting: While we focused on water sprouting, some gardeners prefer to partially bury the sweet potato in moist soil. This method can sometimes result in more robust root development. Experiment with both to see which works best for you.
* Vertical Sprouting: If space is limited, try suspending the sweet potato vertically in a jar, ensuring that only the bottom portion is submerged in water. This can maximize the number of slips you can grow in a small area.
* Successive Sprouting: Don’t discard the sweet potato after harvesting the first batch of slips! You can often get multiple harvests of slips from a single potato. Simply refresh the water and continue to provide warmth and light.
We are confident that this DIY trick will revolutionize your sweet potato growing experience. It’s a simple, effective, and enjoyable way to cultivate your own supply of these versatile vegetables. So, grab a sweet potato, gather your supplies, and get ready to embark on a rewarding gardening adventure.
Now, we want to hear from you! Have you tried this method before? What tips and tricks have you discovered along the way? Share your experiences, successes, and even your challenges in the comments below. Let’s create a community of sweet potato enthusiasts and learn from each other. Your insights could be invaluable to other gardeners who are just starting out. Happy planting!
Frequently Asked Questions (FAQ)
Q: What kind of sweet potato should I use for sprouting slips?
A: Ideally, use organic sweet potatoes that haven’t been treated with sprout inhibitors. These are more likely to produce healthy slips. However, if you can’t find organic, conventional sweet potatoes can still work. Just be sure to scrub them thoroughly before placing them in water. Choose sweet potatoes that are firm, free from blemishes, and show no signs of rot. Older sweet potatoes that have started to sprout eyes are excellent candidates. The variety of sweet potato you choose will determine the variety of slips you get, so select one you enjoy eating!
Q: How long does it take for sweet potato slips to grow?
A: The time it takes for slips to grow varies depending on factors such as temperature, light, and the variety of sweet potato. Generally, you can expect to see slips emerging within 2-4 weeks. Keep the sweet potato in a warm, well-lit location to encourage faster growth. Once the slips are 6-8 inches long and have several leaves, they are ready to be harvested and planted.
Q: How do I harvest the sweet potato slips?
A: Gently twist or cut the slips from the sweet potato, being careful not to damage the remaining sprouts. You can either root the slips in water before planting them in soil, or plant them directly into the ground. To root them in water, place the cut ends of the slips in a jar of water, ensuring that the leaves remain above the waterline. Roots should develop within a few days.
Q: Can I reuse the sweet potato after harvesting the slips?
A: Yes, you can often get multiple harvests of slips from a single sweet potato. After harvesting the first batch of slips, refresh the water and continue to provide warmth and light. The sweet potato will likely produce more slips over time. However, the number of slips and their vigor may decrease with each subsequent harvest.
Q: What kind of soil is best for planting sweet potato slips?
A: Sweet potatoes prefer well-drained, sandy loam soil that is rich in organic matter. Avoid heavy clay soils, as they can impede root development. Before planting, amend the soil with compost or other organic matter to improve drainage and fertility. Sweet potatoes also prefer slightly acidic soil with a pH between 5.5 and 6.5.
Q: How much sun do sweet potato plants need?
A: Sweet potatoes require at least 6-8 hours of direct sunlight per day to thrive. Choose a planting location that receives ample sunlight throughout the growing season. Insufficient sunlight can result in leggy growth, reduced yields, and smaller sweet potatoes.
Q: How often should I water sweet potato plants?
A: Water sweet potato plants regularly, especially during dry periods. Keep the soil consistently moist, but avoid overwatering, which can lead to root rot. Water deeply and less frequently, rather than shallowly and more often. Mulching around the plants can help retain moisture in the soil.
Q: What are some common pests and diseases that affect sweet potato plants?
A: Common pests that can affect sweet potato plants include sweet potato weevils, flea beetles, and aphids. Diseases include stem rot, black rot, and scurf. Monitor your plants regularly for signs of pests or diseases and take appropriate action if necessary. Organic pest control methods, such as neem oil or insecticidal soap, can be effective for managing pests. Crop rotation and using disease-resistant varieties can help prevent diseases.
Q: When is the best time to harvest sweet potatoes?
A: Sweet potatoes are typically ready to harvest in the fall, about 90-120 days after planting. The leaves will begin to turn yellow and the vines will start to die back. Before the first frost, carefully dig up the sweet potatoes, being careful not to damage them. Cure the sweet potatoes for 10-14 days in a warm, humid location to allow the skins to harden and the starches to convert to sugars. This will improve their flavor and storage life.
Q: How do I store sweet potatoes after harvesting?
A: After curing, store sweet potatoes in a cool, dry, and well-ventilated location. The ideal storage temperature is between 55-60°F (13-16°C). Avoid storing sweet potatoes in the refrigerator, as this can cause them to develop a hard core and lose their flavor. Properly cured and stored sweet potatoes can last for several months.

Leave a Comment