
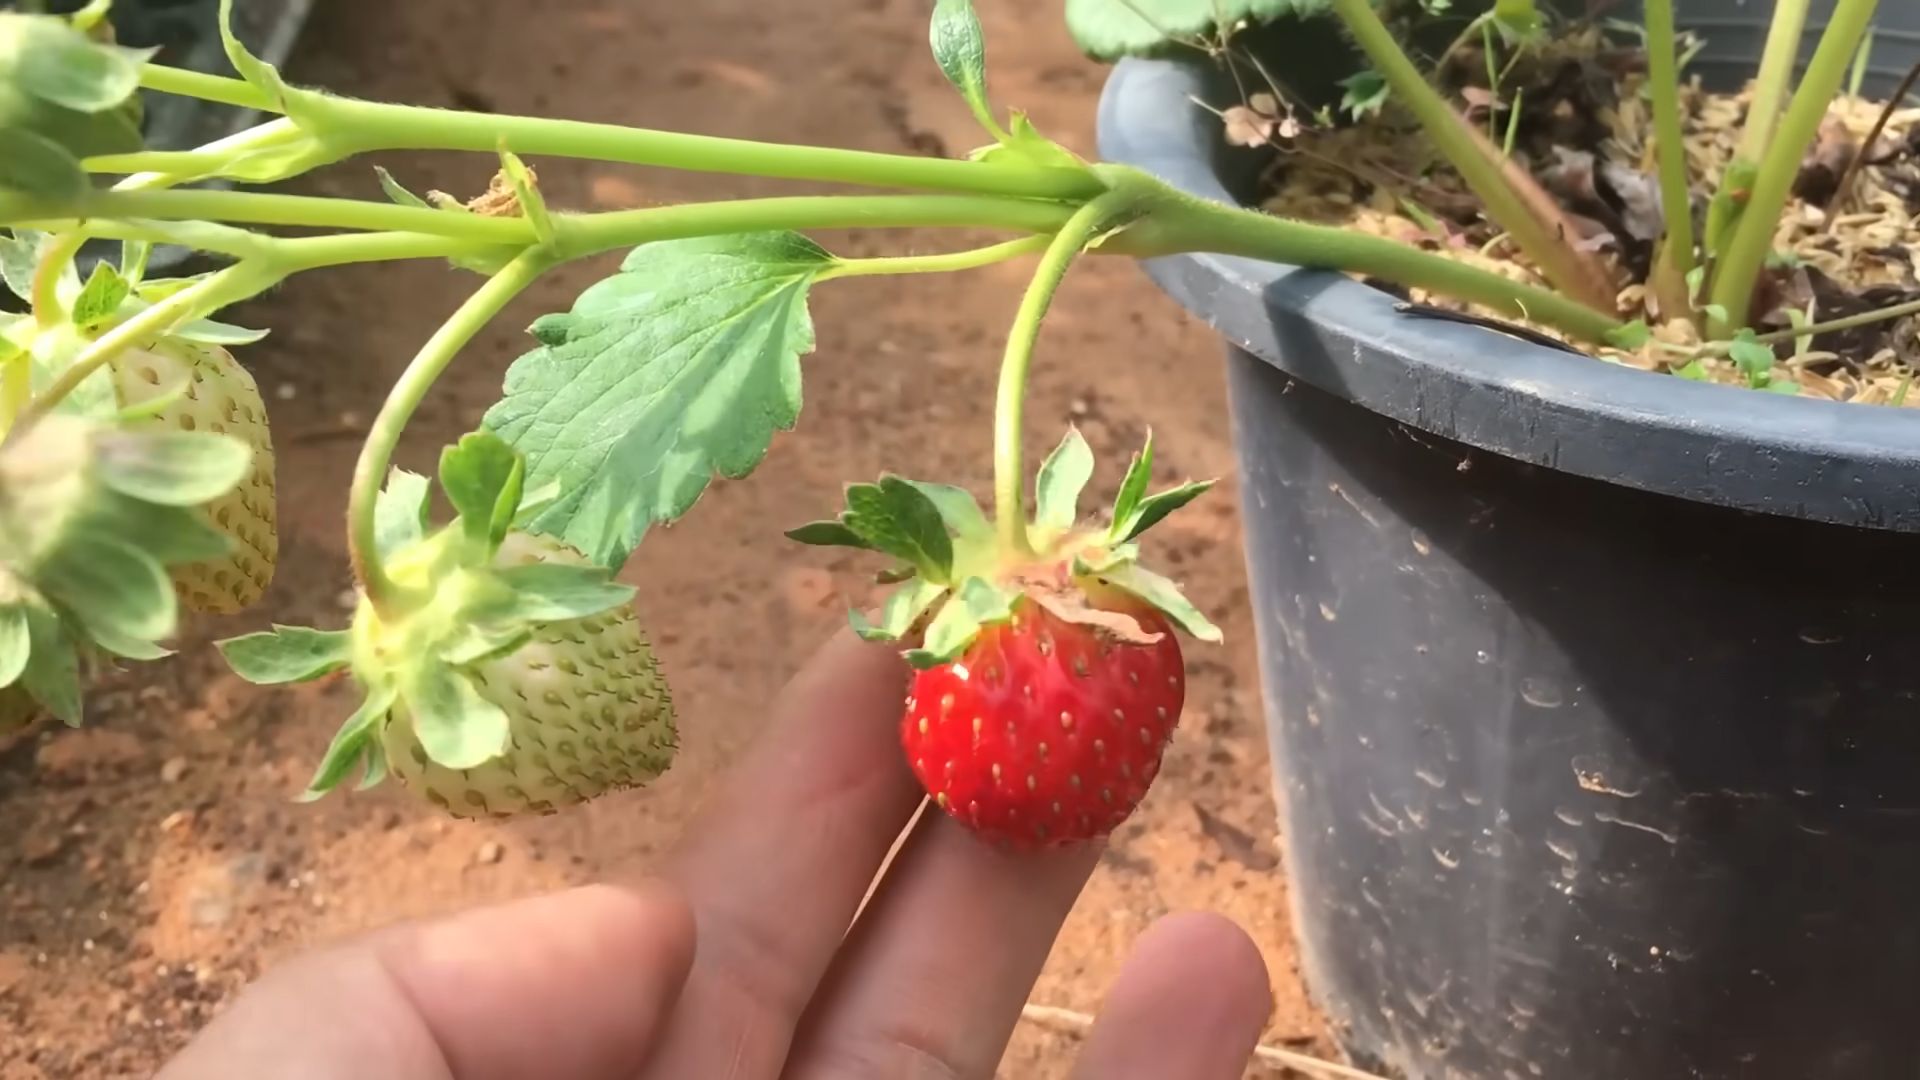
Growing Strawberries From Seed might seem like a daunting task, but trust me, the reward of plucking your own sun-ripened, juicy berries straight from your garden is absolutely worth the effort! For centuries, strawberries have been cherished not just for their delicious taste, but also for their vibrant color and the joy they bring to gardens around the world. From ancient Roman gardens to modern-day backyard patches, these little red gems have captured our hearts (and taste buds!).
But let’s be honest, buying strawberry plants can sometimes be expensive, and you might not always find the exact variety you’re looking for. That’s where the magic of DIY comes in! I’m going to show you some simple, yet effective tricks and hacks to successfully growing strawberries from seed. Imagine the satisfaction of nurturing a tiny seed into a thriving plant, bursting with sweet, homegrown strawberries.
This article is your ultimate guide to unlocking the secrets of strawberry propagation. Whether you’re a seasoned gardener or just starting out, these tips will empower you to cultivate your own strawberry paradise, save money, and enjoy the freshest, most flavorful berries imaginable. So, grab your gardening gloves, and let’s get started on this exciting journey together!
DIY Floating Shelves: A Simple Guide to Stylish Storage
Hey there, fellow DIY enthusiasts! I’m so excited to share this project with you – building your own floating shelves! They’re a fantastic way to add storage and style to any room, and honestly, they’re much easier to make than you might think. I’ve broken down the process into easy-to-follow steps, so let’s get started!
Materials You’ll Need
Before we dive in, let’s gather our supplies. Having everything on hand will make the process smooth and enjoyable.
* **Lumber:** This is the heart of your shelves! I recommend using hardwood like oak, maple, or walnut for a beautiful and durable finish. Pine is a more budget-friendly option, but it’s softer and may require more care. Decide on the dimensions of your shelves beforehand (length, width, and thickness) and purchase your lumber accordingly. For this guide, I’m assuming you’re making shelves that are about 36 inches long, 10 inches deep, and 1.5 inches thick.
* **Metal Shelf Brackets (Hidden):** These are what make the shelves “float.” Make sure you choose brackets that are strong enough to support the weight you plan to put on your shelves. Consider the length of the bracket rod; it should be at least half the depth of your shelf for good stability.
* **Wood Screws:** You’ll need these to attach the brackets to the wall studs. Choose screws that are long enough to penetrate the stud deeply (at least 2.5 inches) but not so long that they go all the way through the wall.
* **Wood Glue:** For a stronger bond when assembling the shelf box.
* **Wood Filler:** To fill any nail holes or imperfections.
* **Sandpaper:** Various grits (80, 120, 220) for smoothing the wood.
* **Wood Stain or Paint:** To finish the shelves to your liking. Choose a stain or paint that complements your decor.
* **Polyurethane or Varnish:** To protect the finish and make the shelves more durable.
* **Safety Glasses:** Always protect your eyes!
* **Dust Mask:** To avoid inhaling sawdust.
* **Gloves:** To protect your hands from stain or paint.
Tools You’ll Need
Having the right tools makes all the difference. If you don’t own some of these, consider borrowing them from a friend or renting them.
* **Stud Finder:** Absolutely essential for finding the wall studs to securely mount your shelves.
* **Level:** To ensure your shelves are perfectly straight.
* **Drill:** With various drill bits for pilot holes and driving screws.
* **Screwdriver:** To tighten the screws.
* **Measuring Tape:** For accurate measurements.
* **Pencil:** For marking measurements.
* **Saw:** To cut the lumber to size. A miter saw is ideal for accurate cuts, but a circular saw or even a hand saw will work.
* **Clamps:** To hold the wood pieces together while the glue dries.
* **Sanding Block or Orbital Sander:** For sanding the wood.
* **Paintbrushes or Rags:** For applying stain or paint.
* **Putty Knife:** For applying wood filler.
Building the Shelf Box
This is where we create the main structure of the floating shelf. I like to build a box around the bracket for extra strength and a cleaner look.
1. **Cut the Lumber:** Using your saw, cut the lumber into the following pieces:
* **Top Piece:** The length and width you decided on (e.g., 36″ x 10″).
* **Bottom Piece:** Same dimensions as the top piece (e.g., 36″ x 10″).
* **Side Pieces (2):** The height of your shelf minus the thickness of the top and bottom pieces. For example, if you want a 2″ thick shelf and your lumber is 0.75″ thick, the side pieces would be 2″ – 0.75″ – 0.75″ = 0.5″ high and 10″ deep.
* **Front Piece:** Same length as the top and bottom pieces (e.g., 36″) and the same height as the side pieces (e.g., 0.5″).
2. **Assemble the Box:**
* Apply wood glue to the edges of the side pieces.
* Clamp the side pieces to the top piece, ensuring they are flush.
* Pre-drill pilot holes through the top piece into the side pieces. This prevents the wood from splitting.
* Drive screws through the pilot holes to secure the side pieces to the top piece.
* Repeat the process for the bottom piece.
* Apply wood glue to the edges of the front piece.
* Clamp the front piece to the top, bottom, and side pieces, ensuring it is flush.
* Pre-drill pilot holes and drive screws to secure the front piece.
3. **Let the Glue Dry:** Allow the glue to dry completely according to the manufacturer’s instructions (usually 24 hours). This is crucial for a strong and durable shelf.
Preparing the Shelf for Mounting
Now, let’s get the shelf ready to be mounted on the wall.
1. **Sanding:** Once the glue is dry, sand the entire shelf box with 80-grit sandpaper to remove any imperfections and smooth out the edges. Then, move on to 120-grit sandpaper and finally 220-grit sandpaper for a super smooth finish. Remember to sand with the grain of the wood.
2. **Filling Holes:** Use wood filler to fill any nail holes, screw holes, or imperfections in the wood. Let the wood filler dry completely according to the manufacturer’s instructions.
3. **Sanding Again:** Once the wood filler is dry, sand it smooth with 220-grit sandpaper.
4. **Test Fit the Brackets:** Before finishing, test fit the metal shelf brackets inside the shelf box. You may need to chisel out some wood to make them fit snugly. The goal is for the brackets to be hidden inside the shelf.
Finishing the Shelf
This is where you can really personalize your shelves!
1. **Staining or Painting:** Choose your desired stain or paint color. Apply the stain or paint evenly to the entire shelf box, following the manufacturer’s instructions. If you’re using stain, wipe off the excess with a clean rag. Allow the stain or paint to dry completely.
2. **Applying a Second Coat (Optional):** For a richer color or more durable finish, apply a second coat of stain or paint. Allow it to dry completely.
3. **Applying a Protective Finish:** Apply a coat of polyurethane or varnish to protect the finish and make the shelves more durable. This will also make them easier to clean. Allow the finish to dry completely. You can apply multiple coats for extra protection, sanding lightly between coats with 320-grit sandpaper.
Mounting the Shelves
This is the most important part – making sure your shelves are securely attached to the wall.
1. **Locate the Wall Studs:** Use your stud finder to locate the wall studs where you want to mount your shelves. Mark the location of the studs with a pencil.
2. **Mark Bracket Placement:** Hold the shelf up to the wall and mark the location of the bracket rods on the wall, using your stud markings as a guide. Make sure the shelf is level!
3. **Drill Pilot Holes:** Drill pilot holes into the wall studs at the marked locations. The pilot holes should be slightly smaller than the diameter of your wood screws.
4. **Attach the Brackets:** Insert the metal shelf brackets into the shelf box.
5. **Mount the Shelf:** Carefully align the shelf with the pilot holes in the wall studs. Drive the wood screws through the brackets and into the pilot holes, securing the shelf to the wall. Make sure the screws are tight, but don’t overtighten them, as this could strip the wood.
6. **Check for Level:** Use your level to ensure the shelf is perfectly level. If it’s not, you may need to adjust the screws slightly.
Final Touches
Almost there!
1. **Conceal the Brackets (If Necessary):** If the brackets are slightly visible, you can use wood filler to conceal them. Apply the wood filler to the gaps around the brackets and sand it smooth once it’s dry.
2. **Touch-Up Paint or Stain:** If necessary, touch up any areas where the paint or stain has been scratched or damaged during the mounting process.
3. **Load Up Your Shelves!** Once everything is dry and secure, you can start decorating your new floating shelves! Remember to distribute the weight evenly to avoid overloading them.
And that’s it! You’ve successfully built and installed your own floating shelves. I hope you enjoyed this project as much as I did.
Conclusion
So, there you have it – a comprehensive guide to growing strawberries from seed! While it might seem daunting at first, the reward of nurturing these tiny seeds into vibrant, fruit-bearing plants is truly unparalleled. Forget relying solely on store-bought seedlings; this method empowers you to cultivate unique varieties and enjoy the satisfaction of a truly homegrown harvest.
Why is this DIY trick a must-try? Because it unlocks a world of strawberry possibilities beyond what you typically find at your local nursery. You gain complete control over the entire process, from seed selection to soil composition, ensuring your plants are healthy and thriving from the very beginning. Plus, starting from seed is often more economical than purchasing established plants, especially if you’re looking to grow a large strawberry patch.
But the benefits don’t stop there. Growing strawberries from seed allows you to select heirloom varieties, disease-resistant cultivars, or even alpine strawberries, which offer a distinct flavor profile. Imagine the delight of biting into a tiny, intensely flavored alpine strawberry, knowing you nurtured it from a minuscule seed!
Ready to take your strawberry game to the next level?
Don’t be afraid to experiment! Consider these variations to personalize your strawberry-growing journey:
* Hydroponic Strawberries: Once your seedlings are strong enough, you can transplant them into a hydroponic system for faster growth and potentially higher yields.
* Vertical Strawberry Garden: Maximize space by creating a vertical strawberry garden using stacked planters or hanging baskets. This is perfect for small balconies or patios.
* Companion Planting: Enhance your strawberry patch by planting companion plants like basil, thyme, or marigolds, which can deter pests and improve the overall health of your plants.
* Different Varieties: Explore different strawberry varieties like June-bearing, everbearing, or day-neutral to extend your harvest season.
The key to success with growing strawberries from seed is patience and attention to detail. Remember to provide adequate light, maintain consistent moisture, and protect your seedlings from extreme temperatures. With a little care and dedication, you’ll be rewarded with a bountiful harvest of delicious, homegrown strawberries.
We encourage you to embark on this rewarding journey and share your experiences with us! Post pictures of your seedlings, share your tips and tricks, and let us know which varieties you’re growing. Together, we can create a community of passionate strawberry growers and unlock the full potential of this delightful fruit. So, grab your seeds, prepare your soil, and get ready to experience the joy of growing your own strawberries from seed!
Frequently Asked Questions (FAQ)
What is the best time of year to start strawberry seeds indoors?
The ideal time to start strawberry seeds indoors is typically 8-10 weeks before the last expected frost in your area. This usually falls around late winter or early spring. Starting early allows the seedlings to develop a strong root system before being transplanted outdoors. Check your local frost dates to determine the optimal starting time for your region. If you live in a warmer climate with mild winters, you may be able to start seeds later in the season.
What type of soil is best for starting strawberry seeds?
A fine-textured, well-draining seed starting mix is crucial for successful germination. Avoid using garden soil, as it can be too heavy and may contain pathogens that can harm delicate seedlings. Look for a commercially available seed starting mix that is specifically formulated for starting seeds. You can also create your own mix by combining equal parts peat moss, perlite, and vermiculite. Ensure the mix is sterile to prevent fungal diseases.
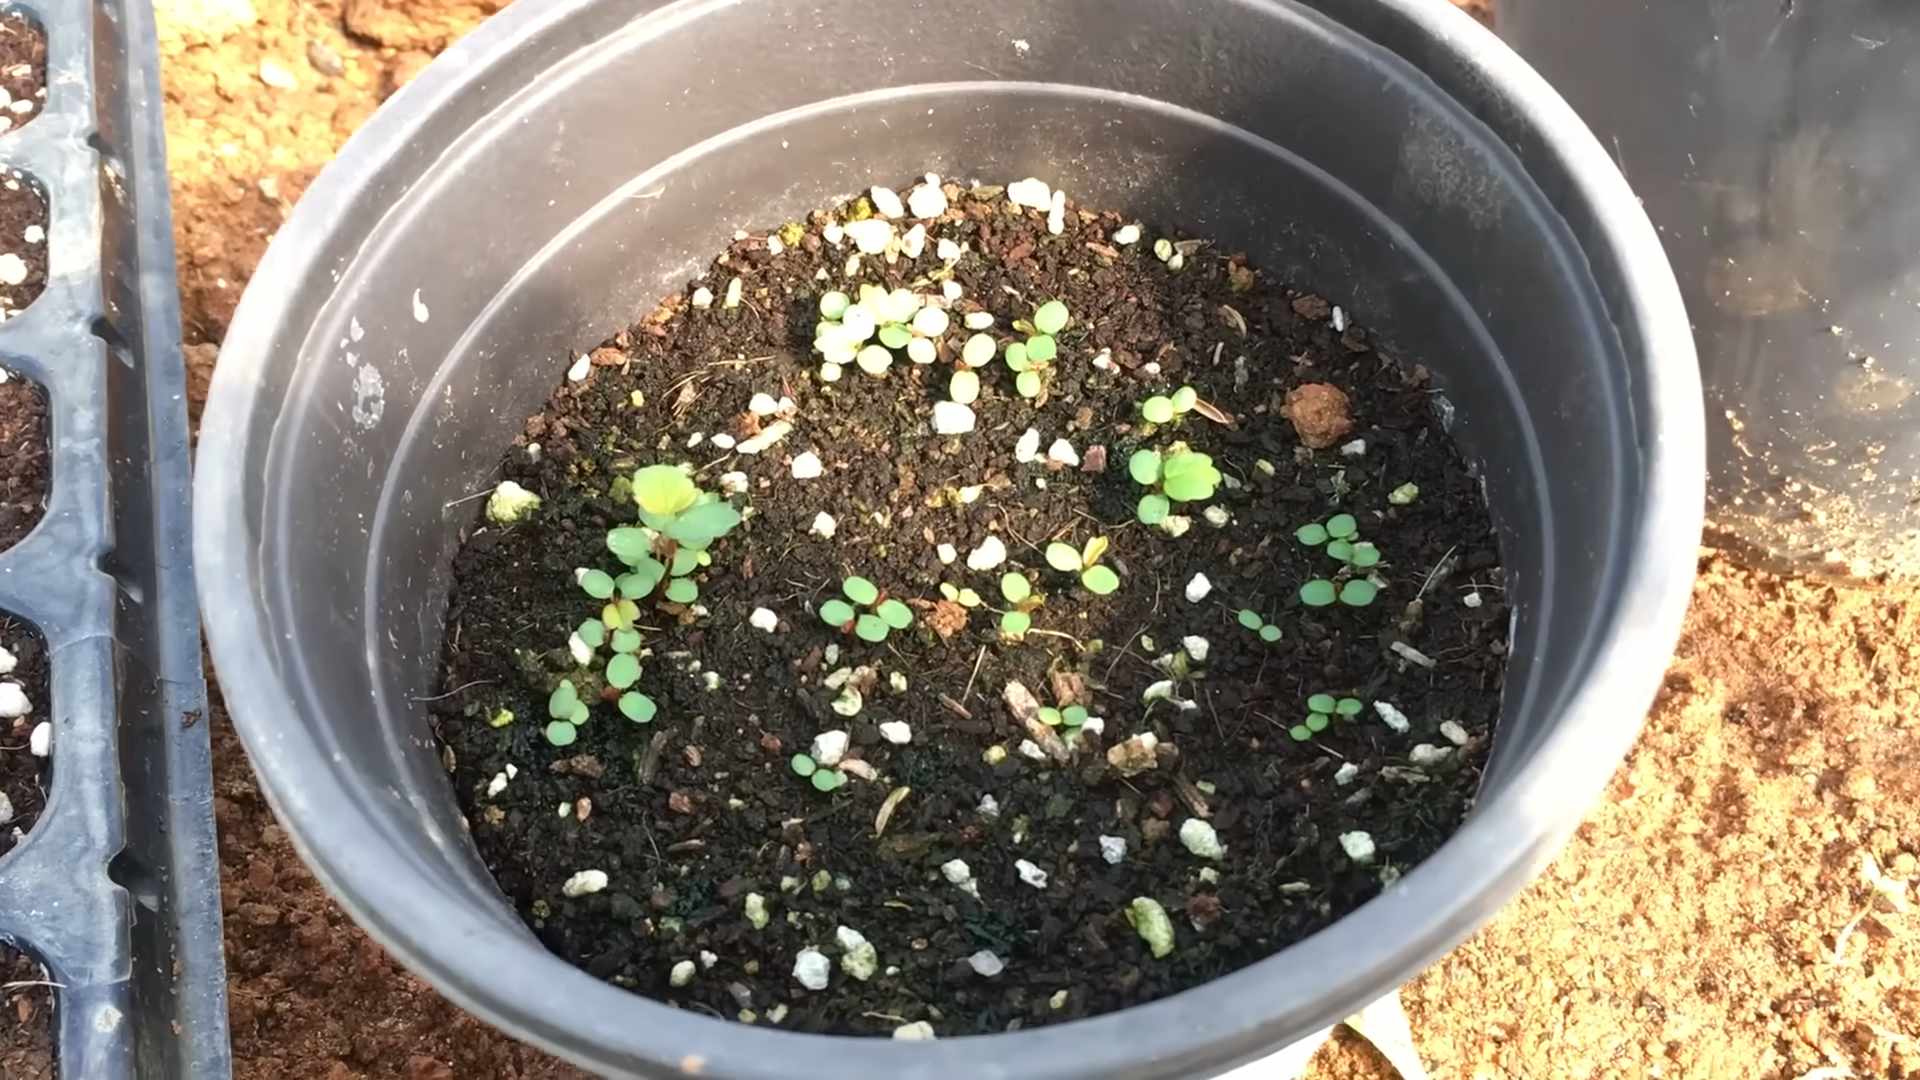
How long does it take for strawberry seeds to germinate?
Strawberry seeds can be notoriously slow to germinate. It typically takes anywhere from 2 to 6 weeks for seedlings to emerge. Patience is key! Maintaining consistent moisture and warmth is essential during this period. Covering the seed tray with a humidity dome or plastic wrap can help retain moisture. Once the seedlings emerge, provide adequate light to prevent them from becoming leggy.
What is the best way to water strawberry seedlings?
Water strawberry seedlings gently to avoid disturbing the delicate roots. A spray bottle or a watering can with a fine rose is ideal. Water when the top of the soil feels dry to the touch. Avoid overwatering, as this can lead to fungal diseases. Bottom watering is another effective method. Simply place the seed tray in a shallow dish of water and allow the soil to absorb the moisture from the bottom.
How much light do strawberry seedlings need?
Strawberry seedlings require plenty of light to thrive. Aim for at least 12-16 hours of light per day. If you don’t have a sunny windowsill, consider using grow lights. Position the lights a few inches above the seedlings and adjust the height as they grow. Insufficient light can result in weak, leggy seedlings.
When can I transplant my strawberry seedlings outdoors?
Transplant your strawberry seedlings outdoors after the last expected frost and when the soil has warmed up to at least 60°F (15°C). Harden off the seedlings gradually by exposing them to outdoor conditions for a few hours each day over the course of a week. Choose a sunny location with well-draining soil. Space the plants about 12-18 inches apart.
What kind of fertilizer should I use for strawberry plants?
Use a balanced fertilizer that is specifically formulated for strawberries or fruits and vegetables. A fertilizer with an NPK ratio of 10-10-10 or 12-12-12 is a good starting point. Follow the instructions on the fertilizer package carefully. Avoid over-fertilizing, as this can burn the roots. You can also amend the soil with compost or other organic matter to provide essential nutrients.
How do I protect my strawberry plants from pests and diseases?
Monitor your strawberry plants regularly for signs of pests and diseases. Common pests include aphids, spider mites, and slugs. Diseases include powdery mildew, gray mold, and leaf spot. Use organic pest control methods whenever possible, such as insecticidal soap or neem oil. Ensure good air circulation around the plants to prevent fungal diseases. Remove any infected leaves or fruit promptly.
How long does it take for strawberry plants to produce fruit?
Strawberry plants typically start producing fruit in their second year. However, some everbearing and day-neutral varieties may produce a small crop in their first year. Proper care and maintenance, including adequate watering, fertilization, and pest control, can help ensure a bountiful harvest.
Can I grow strawberries in containers?
Yes, strawberries can be successfully grown in containers. Choose a container that is at least 12 inches in diameter and has good drainage. Use a high-quality potting mix and provide regular watering and fertilization. Container-grown strawberries may require more frequent watering than those grown in the ground. Consider using a self-watering container to simplify the watering process.

Leave a Comment