
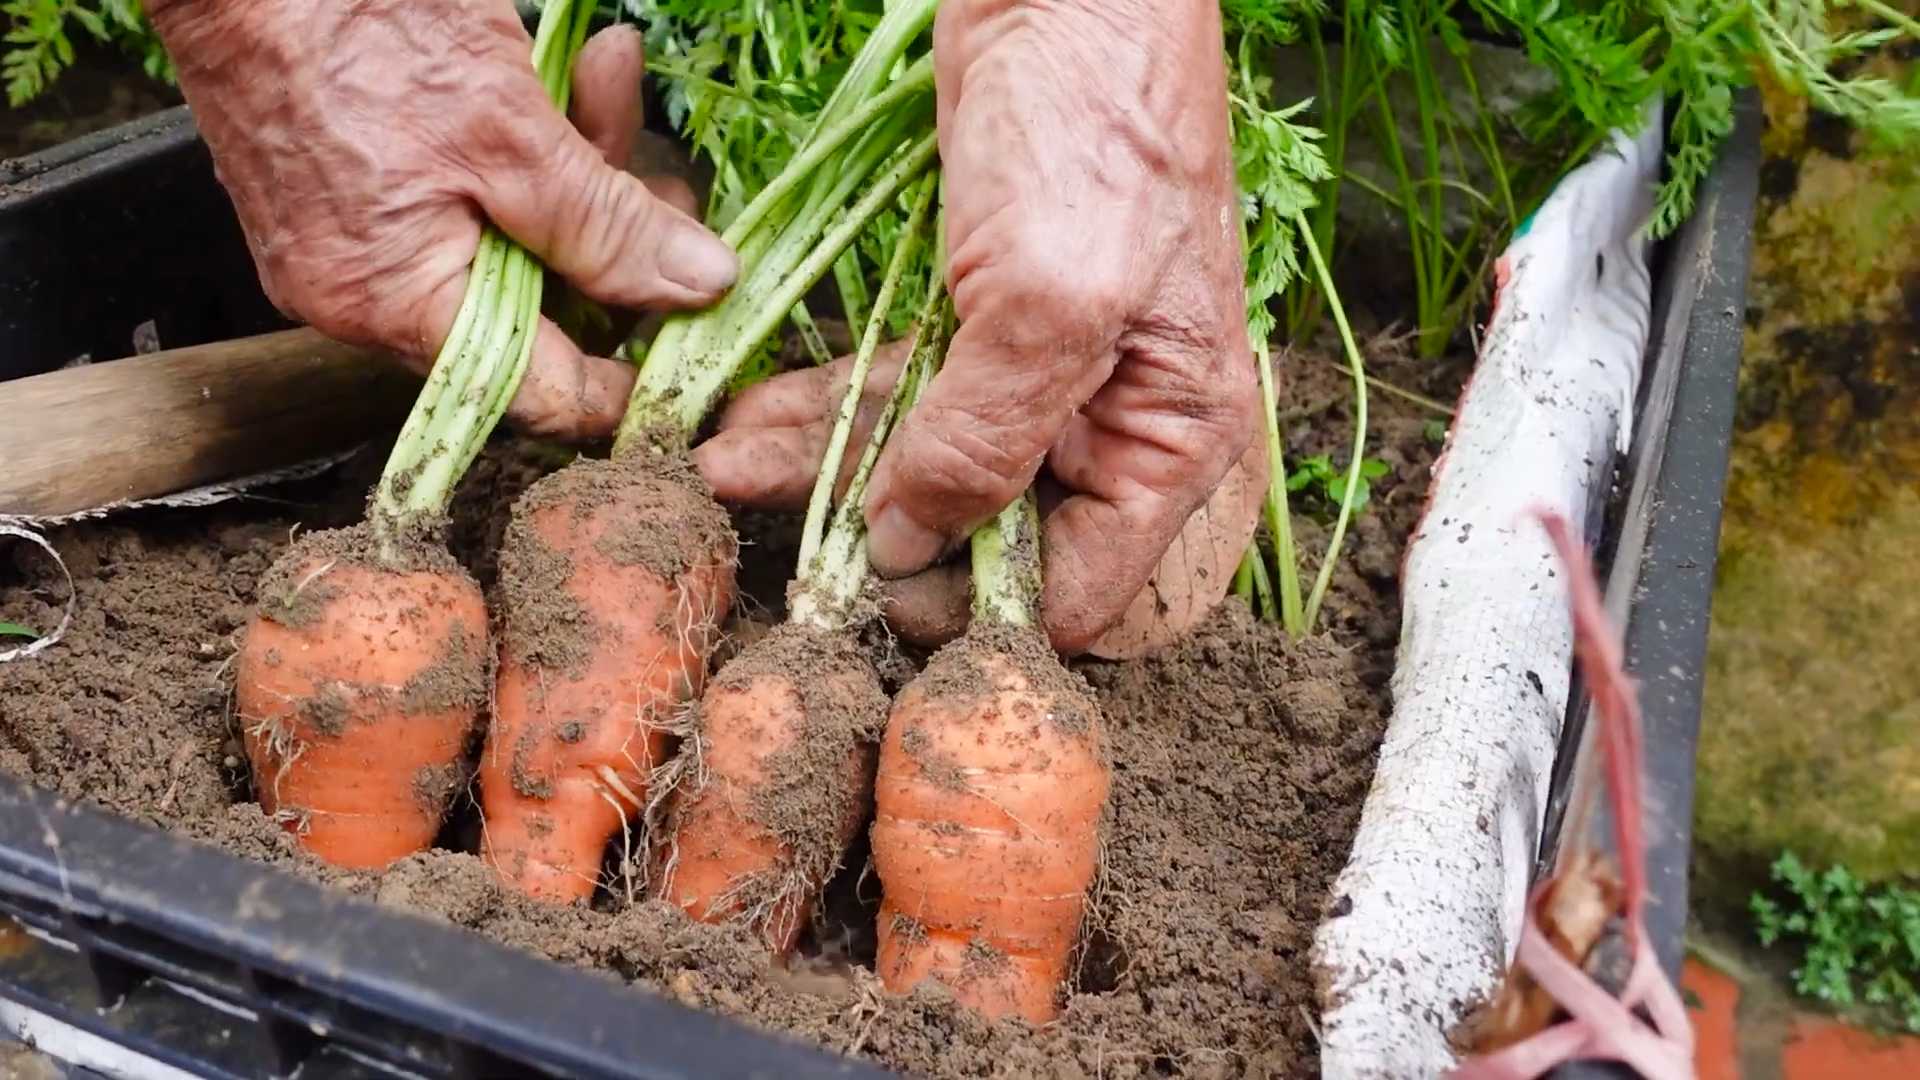
Harvesting backyard carrots can feel like unearthing buried treasure! There’s nothing quite like the satisfaction of pulling a vibrant, orange carrot straight from the earth, especially one you’ve nurtured yourself. But are you tired of guessing when your carrots are ready, or worse, accidentally damaging them in the process?
For centuries, cultures around the globe have cultivated carrots, from their humble beginnings as wild, spindly roots to the sweet, crunchy delights we enjoy today. The ancient Greeks and Romans even believed carrots possessed medicinal properties! But even with all that history, the simple act of harvesting backyard carrots can still be a source of anxiety for the modern home gardener.
That’s where these DIY tricks come in! I’m going to share some simple, effective methods to ensure you harvest your carrots at their peak flavor and size, minimizing waste and maximizing your yield. No more guessing games or broken carrots! With these tips, you’ll be enjoying the fruits (or rather, vegetables!) of your labor in no time. Let’s get digging!
Harvesting Backyard Carrots: A Beginner’s Guide
Okay, so you’ve nurtured your carrot patch, patiently waited, and now it’s time for the grand finale: harvesting those beautiful, homegrown carrots! It might seem straightforward, but there are a few tricks to ensure you get the best possible yield and avoid snapping those precious roots. Let’s dive in!
Knowing When to Harvest
The biggest question is, of course, *when*? You don’t want to pull them too early and end up with tiny, underdeveloped carrots, or leave them too long and risk them becoming woody or splitting. Here’s what I look for:
* Days to Maturity: Check your seed packet! This is your best initial guide. Most carrot varieties take between 60 and 80 days to mature. Mark your planting date on a calendar and count forward.
* Shoulder Size: The “shoulder” of the carrot (the top part that’s visible above the soil) is a great indicator. Look for carrots that are at least ½ to ¾ inch in diameter at the top. This means they’ve likely reached a good size below ground.
* Soil Cracking: Sometimes, as the carrots grow, they’ll push against the soil, causing small cracks to appear around the base of the plant. This is another sign they’re getting bigger and ready to be harvested.
* Test Pull: Don’t be afraid to sacrifice one! Gently loosen the soil around a carrot and pull it up. If it’s the size and shape you’re hoping for, then the rest are probably ready too. If it’s still small, give them another week or two.
* Variety Matters: Different carrot varieties mature at different rates and to different sizes. Nantes types tend to be ready earlier than Imperator types, for example. Keep this in mind when checking for readiness.
Tools You’ll Need
You don’t need a ton of fancy equipment to harvest carrots, but having a few key tools on hand will make the process much easier and less likely to damage your crop.
* Garden Fork or Trowel: This is essential for loosening the soil around the carrots, especially if you have heavy or compacted soil. A garden fork is great for larger areas, while a trowel is better for smaller, more delicate work.
* Gloves: Gardening gloves will protect your hands from dirt and any potential irritants in the soil.
* Watering Can or Hose: Watering the soil before harvesting makes it easier to pull the carrots and reduces the risk of breakage.
* Bucket or Basket: You’ll need something to collect your harvested carrots in.
* Knife or Scissors (Optional): For trimming the carrot tops after harvesting.
* Wheelbarrow (Optional): If you have a large carrot patch, a wheelbarrow can be helpful for transporting your harvest.
The Harvesting Process: Step-by-Step
Alright, let’s get down to the nitty-gritty! Here’s how I harvest my carrots:
1. Water the Soil: The day before you plan to harvest, give your carrot patch a good watering. This will soften the soil and make it much easier to pull the carrots without breaking them. If the soil is already moist from recent rain, you can skip this step.
2. Loosen the Soil: Using your garden fork or trowel, carefully loosen the soil around the carrots. Insert the fork or trowel a few inches away from the base of the plant and gently lift the soil. Work your way around the carrot, being careful not to damage the root. If you have very loose soil, you might be able to skip this step.
3. Grasp the Carrot: Grab the carrot as close to the base of the leaves as possible. A firm grip is essential, but avoid squeezing too hard, as this could damage the carrot.
4. Pull Gently and Twist: With a firm grip, gently pull the carrot straight up. At the same time, give it a slight twisting motion. This will help to break the carrot free from the soil. If the carrot is particularly stubborn, don’t force it! Loosen the soil a bit more and try again.
5. Dealing with Stubborn Carrots: If a carrot refuses to budge, even after loosening the soil, don’t panic! Use your trowel to carefully dig around the carrot, exposing more of the root. This will give you a better grip and make it easier to pull it out. You can also try using a small hand shovel to dig underneath the carrot and lift it up.
6. Inspect for Damage: Once you’ve pulled the carrot, inspect it for any damage. Small cracks or blemishes are usually nothing to worry about, but if the carrot is severely damaged or rotten, discard it.
7. Trim the Tops: Using a knife or scissors, trim the carrot tops about ½ inch above the shoulder. This will prevent the leaves from drawing moisture and nutrients away from the carrot during storage. You can compost the carrot tops or use them in soups or stews.
8. Clean the Carrots: Gently brush off any excess soil from the carrots. You can also rinse them with water, but be sure to dry them thoroughly before storing them.
9. Repeat: Continue loosening, pulling, trimming, and cleaning until you’ve harvested all the carrots you need.
Harvesting in Different Soil Types
The type of soil you have will significantly impact how you harvest your carrots. Here’s what I’ve learned from my own experience:
* Loose, Sandy Soil: Lucky you! Harvesting carrots in loose, sandy soil is usually a breeze. You might not even need to loosen the soil beforehand. Just grab the carrot and pull!
* Heavy Clay Soil: Clay soil can be challenging. It tends to be compacted and can make it difficult to pull the carrots without breaking them. Be sure to loosen the soil thoroughly before harvesting, and consider using a garden fork instead of a trowel. Adding compost to your soil can improve its drainage and make it easier to work with.
* Rocky Soil: Rocky soil can also be problematic, as the rocks can obstruct the growth of the carrots and make them difficult to pull. Carefully loosen the soil around the carrots, and remove any rocks that you find. You might need to use a trowel to dig around the carrots and free them from the rocks.
Storing Your Harvested Carrots
Proper storage is key to keeping your harvested carrots fresh and delicious for as long as possible. Here’s what I do:
* Don’t Wash Immediately: Unless your carrots are caked in mud, avoid washing them right after harvesting. Excess moisture can promote rot. Just brush off the loose dirt.
* Cool and Dry: Store your carrots in a cool, dry place. The ideal temperature is between 32°F and 40°F (0°C and 4°C). A refrigerator is perfect.
* Humidity is Key: Carrots need humidity to prevent them from drying out. The best way to achieve this is to store them in a plastic bag or container with a damp paper towel. Make sure the paper towel doesn’t directly touch the carrots, as this can cause them to rot.
* Sand Storage (Long-Term): For long-term storage (several months), you can pack your carrots in a container filled with slightly damp sand or sawdust. This will help to maintain the humidity and prevent them from drying out. Store the container in a cool, dark place, such as a root cellar or basement.
* Check Regularly: Check your stored carrots regularly for any signs of rot or spoilage. Remove any damaged carrots to prevent them from affecting the rest.
Troubleshooting Common Harvesting Problems
Even with the best preparation, you might encounter a few snags along the way. Here are some common problems and how to fix them:
* Carrots Breaking: This is usually caused by dry, compacted soil. Make sure to water the soil thoroughly before harvesting and loosen it carefully.
* Small, Underdeveloped Carrots: This could be due to several factors, including overcrowding, poor soil, or insufficient sunlight. Thin your carrot seedlings to give them more space to grow, and amend your soil with compost or fertilizer.
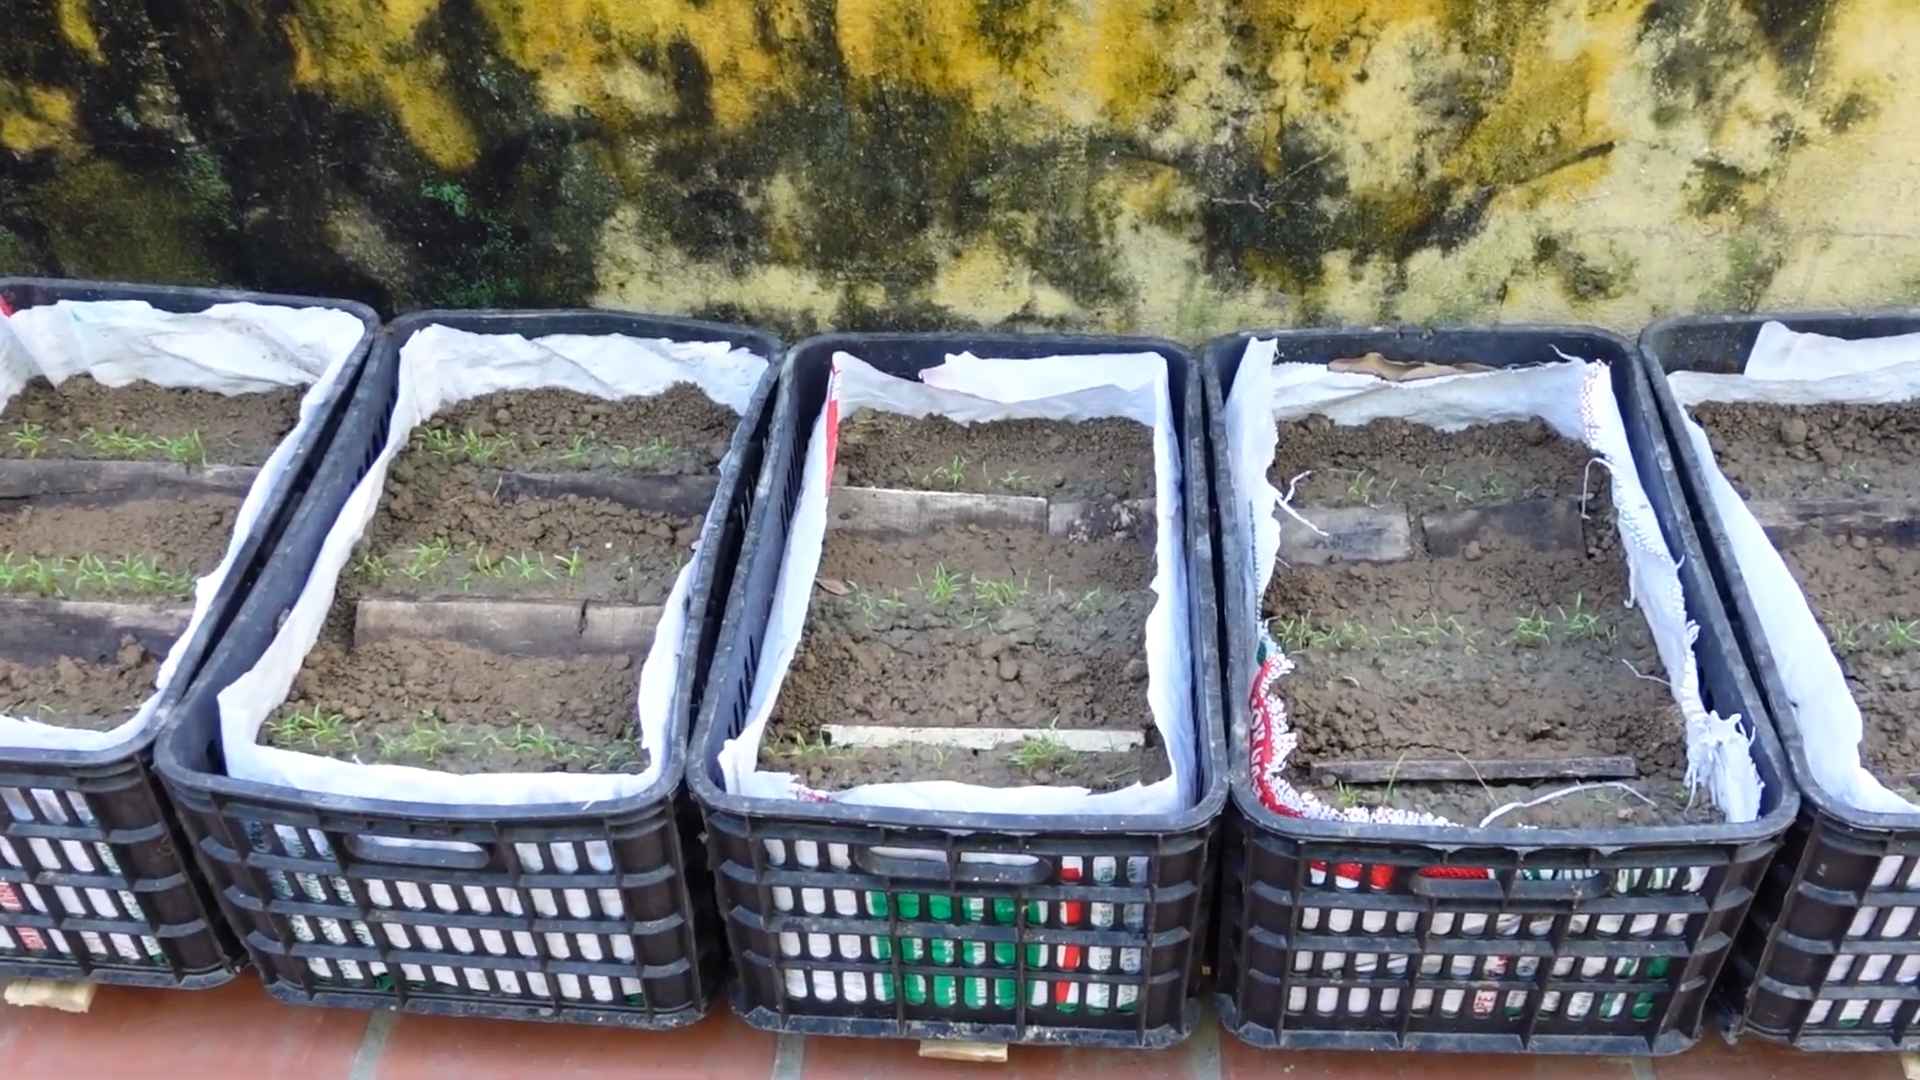
* Forked or Twisted Carrots: This is often caused by rocks or other obstructions in the soil. Remove any rocks that you find, and consider growing your carrots in raised beds or containers if you have very rocky soil.
* Carrots Splitting: This can be caused by inconsistent watering. Try to water your carrots regularly and evenly, especially during dry spells.
Enjoying Your Homegrown Carrots
Now for the best part: enjoying the fruits (or rather, roots!) of your labor! Homegrown carrots are so much sweeter and more flavorful than store-bought ones. Here are a few of my favorite ways to use them:
* Raw: Simply wash and peel your carrots and enjoy them as a healthy snack. They’re great with hummus or other dips.
* Roasted: Roasting carrots brings out their natural
Conclusion
So, there you have it! Harvesting backyard carrots doesn’t have to be a guessing game or a back-breaking chore. By following these simple steps and understanding the subtle cues your carrot plants provide, you can ensure a bountiful and satisfying harvest every time. This DIY trick, focusing on observation and gentle extraction, is a must-try for any home gardener looking to maximize their yield and minimize damage to their precious root vegetables.
Why is this method so crucial? Because it goes beyond simply yanking carrots out of the ground. It’s about understanding the plant’s life cycle, respecting the soil, and ensuring that you’re harvesting at the peak of flavor and nutritional value. Imagine biting into a freshly harvested carrot, bursting with sweetness and earthy goodness – that’s the reward for your patience and careful technique.
But the beauty of gardening lies in its adaptability. Feel free to experiment with variations on this method. For instance, if you’re dealing with particularly compacted soil, consider using a garden fork to gently loosen the earth around the carrots before attempting to pull them. This will minimize the risk of breakage and make the extraction process much smoother. Another variation involves using a watering can to thoroughly soak the soil a few hours before harvesting. This will soften the ground and make it easier to pull the carrots out.
For those growing different varieties of carrots, such as the shorter, round Nantes carrots or the long, slender Imperator carrots, you might need to adjust your harvesting technique slightly. Nantes carrots, being shorter, might be easier to pull directly, while Imperator carrots might benefit more from the loosening-the-soil method due to their length.
Don’t be afraid to get your hands dirty and learn from your experiences. Each harvest will teach you something new about your soil, your plants, and your own gardening skills. And remember, even if you encounter a few broken carrots along the way, don’t despair! They’re still perfectly edible and delicious.
We wholeheartedly encourage you to try this DIY trick for harvesting backyard carrots. It’s a simple, effective, and rewarding way to enjoy the fruits (or rather, vegetables) of your labor. Once you’ve given it a go, we’d love to hear about your experience! Share your tips, tricks, and any variations you’ve discovered in the comments below. Let’s build a community of carrot-harvesting experts and help each other grow the best carrots possible! Happy harvesting!
Frequently Asked Questions (FAQs)
Q: How do I know when my carrots are ready to harvest?
A: This is one of the most common questions! The best way to determine if your carrots are ready for harvesting backyard carrots is to check the seed packet or plant tag for the estimated “days to maturity.” This will give you a general timeframe. However, visual cues are also important. Look for the carrot shoulders (the top part of the carrot that’s visible above the soil) to be the size you desire. You can also gently brush away some soil around the base of a carrot to get a better look at its size and color. Remember that smaller carrots tend to be sweeter and more tender, while larger carrots can be more fibrous.
Q: What if the soil is really hard and compacted?
A: Compacted soil can definitely make harvesting difficult. As mentioned in the conclusion, using a garden fork is a great solution. Gently insert the fork a few inches away from the carrots and wiggle it back and forth to loosen the soil. Be careful not to damage the carrots themselves. You can also try watering the area thoroughly a day or two before harvesting to soften the soil. Adding organic matter like compost to your soil can also improve its structure and drainage over time, making future harvests easier.
Q: Can I harvest carrots in stages, or do I have to harvest them all at once?
A: Absolutely! You can definitely harvest carrots in stages. This is one of the great advantages of growing your own. Simply harvest the largest carrots as you need them, leaving the smaller ones to continue growing. This allows you to enjoy a continuous supply of fresh carrots over a longer period.
Q: What’s the best time of day to harvest carrots?
A: While there’s no strict rule, harvesting in the morning, after the dew has dried, is generally a good idea. The carrots will be turgid (full of water) and less likely to wilt. Avoid harvesting during the hottest part of the day, as the carrots may be stressed and more prone to damage.
Q: How should I store my harvested carrots?
A: To store your harvested carrots properly, first remove any excess soil by gently brushing them off. Do not wash them unless you plan to use them immediately. Cut off the green tops, leaving about an inch of stem. Store the carrots in a plastic bag or container in the refrigerator. You can also layer them in a container with damp sand or sawdust to help maintain their moisture. Properly stored carrots can last for several weeks in the refrigerator.
Q: What if I accidentally break a carrot while harvesting?
A: Don’t worry! Broken carrots are still perfectly edible. Simply wash them and use them as you normally would. They might not store as well as whole carrots, so it’s best to use them within a few days.
Q: My carrot tops are wilting, but the carrots seem small. What should I do?
A: Wilting carrot tops can indicate a few things, such as insufficient watering, pest infestation, or disease. Check the soil moisture and water deeply if the soil is dry. Inspect the plants for any signs of pests or diseases. If the carrots are still small, it’s likely that they need more time to mature. Be patient and continue to provide them with adequate water and nutrients.
Q: Can I leave carrots in the ground over winter?
A: In many climates, you can leave carrots in the ground over winter, especially if you provide them with a layer of mulch for insulation. This can actually improve their flavor, as the cold temperatures convert starches into sugars. However, be sure to harvest them before the ground freezes solid, as this can make them impossible to dig up. Also, be aware that rodents may be attracted to the carrots, so you may need to take precautions to protect them.
Q: What kind of soil is best for growing carrots?
A: Carrots thrive in loose, well-drained soil that is free of rocks and debris. Rocky soil can cause the carrots to fork or become misshapen. Amend heavy clay soil with organic matter like compost or aged manure to improve its drainage and structure. A slightly acidic soil pH (around 6.0 to 6.8) is ideal for carrot growth.
Q: Are there any companion plants that are beneficial for carrots?
A: Yes! Several companion plants can benefit carrots. Onions and garlic can help deter carrot root flies, while rosemary and sage can repel other pests. Marigolds are also known to be beneficial for carrots. Planting these companion plants alongside your carrots can help improve their growth and protect them from pests.

Leave a Comment