
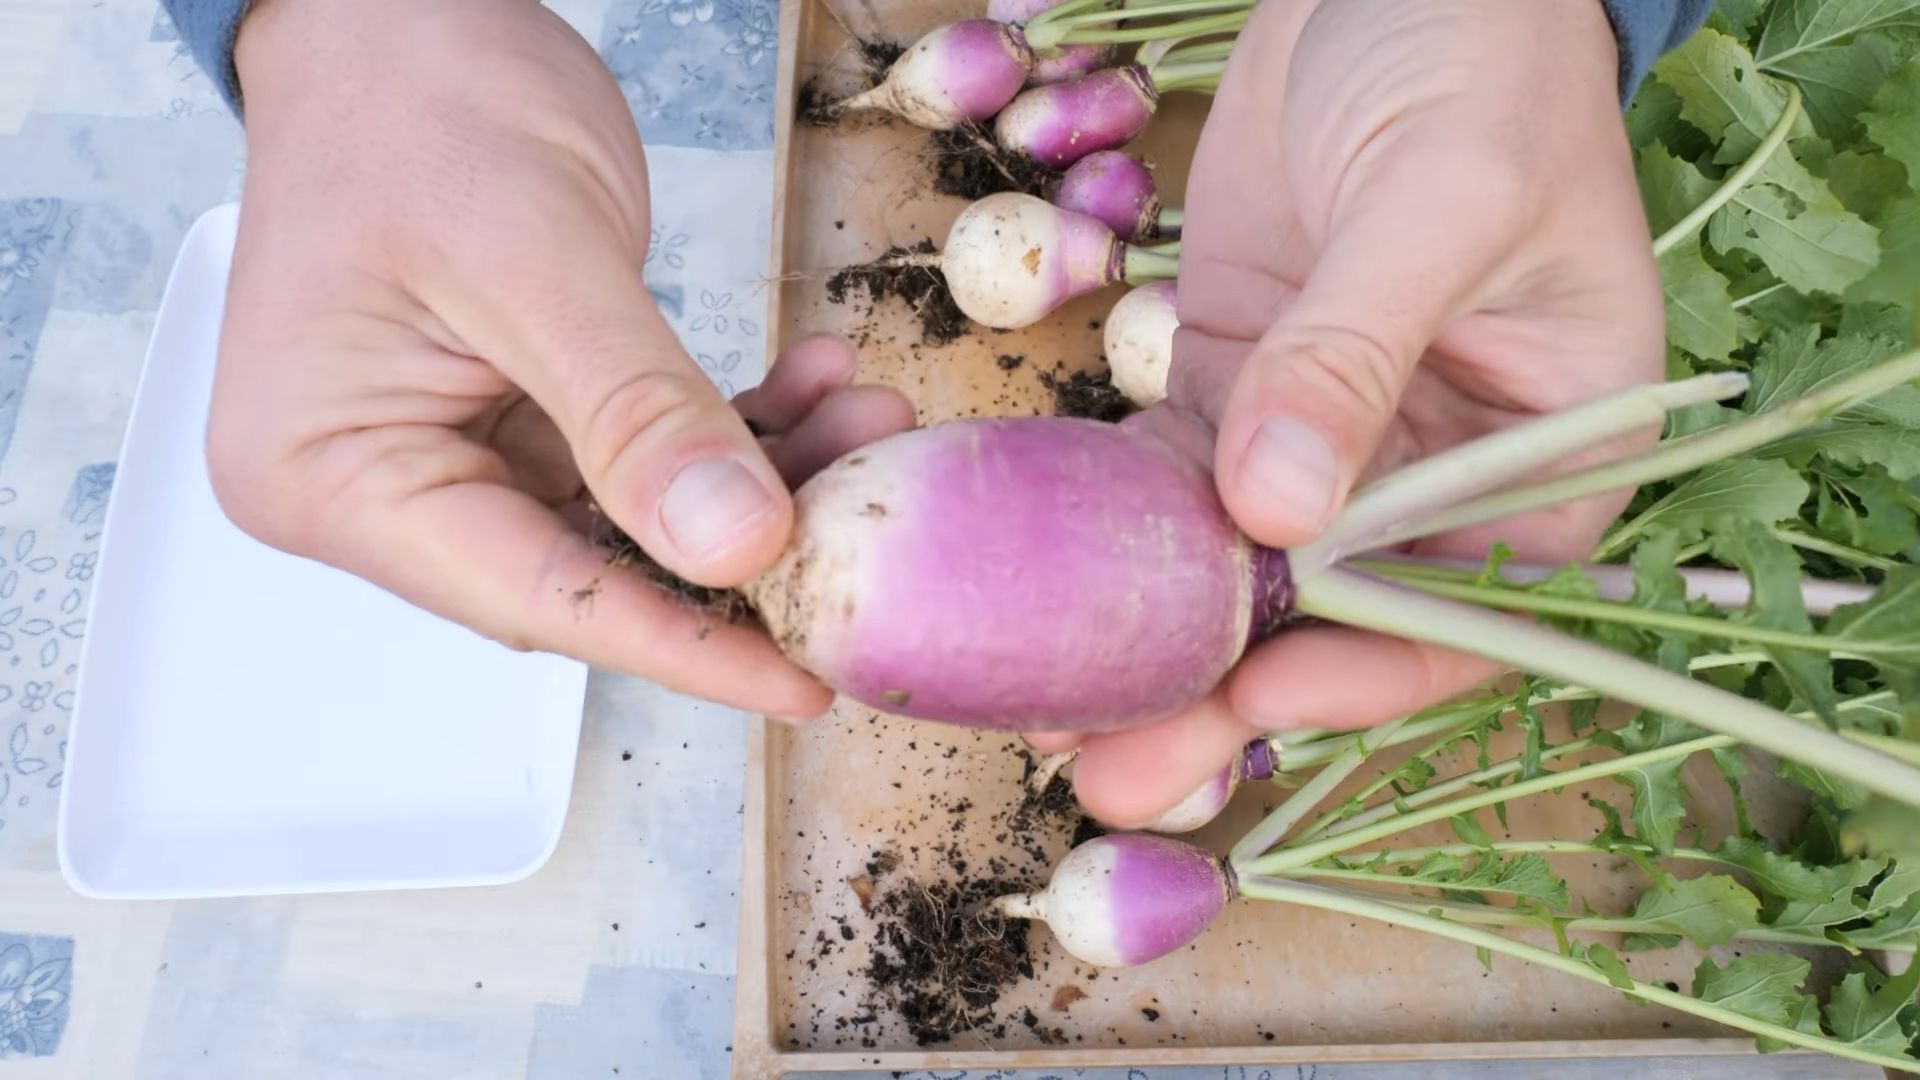
Growing Turnips for Beginners might seem daunting, but trust me, it’s easier than you think! Imagine harvesting your own crisp, slightly peppery turnips straight from your backyard – perfect for roasting, pickling, or adding a unique flavor to your soups and stews. For centuries, turnips have been a staple crop, feeding families and livestock alike. Their resilience and adaptability have made them a vital part of culinary traditions across the globe, from hearty Irish stews to vibrant Asian stir-fries.
But why should you bother growing turnips? In today’s world, where fresh, locally sourced produce is increasingly valued, having the knowledge to cultivate your own food is incredibly empowering. Plus, store-bought turnips often lack the vibrant flavor and freshness of homegrown ones. This DIY guide will equip you with all the essential tips and tricks to successfully growing turnips for beginners, even if you’ve never touched a trowel before. We’ll cover everything from seed selection and soil preparation to pest control and harvesting, ensuring you enjoy a bountiful and delicious crop. So, grab your gardening gloves, and let’s get started on this rewarding journey!
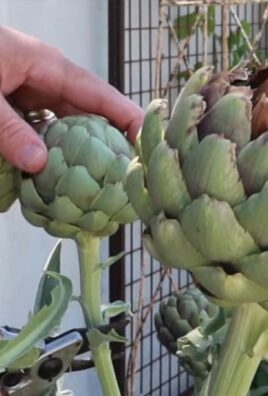
Growing Artichokes: A Beginner’s Guide to Bountiful Harvests
Okay, artichoke lovers, listen up! I’m going to walk you through everything you need to know to grow your own delicious artichokes right in your backyard. It might seem intimidating, but trust me, with a little patience and the right know-how, you’ll be enjoying homegrown artichokes in no time.
Choosing Your Artichoke Variety
First things first, let’s talk about varieties. Not all artichokes are created equal! Some are better suited for certain climates, and some produce larger or more tender hearts. Here are a few popular choices:
* Green Globe: This is probably the most common variety, known for its large, round, green heads and excellent flavor. It’s a reliable choice for many regions.
* Violetta: If you’re looking for something a little different, Violetta artichokes have beautiful purple-tinged heads. They’re also known for their tender hearts.
* Imperial Star: This variety is a good choice for warmer climates, as it’s more heat-tolerant than some others. It produces smaller, but still delicious, artichokes.
* Big Heart: As the name suggests, this variety is all about the heart! It produces large, meaty hearts with a mild flavor.
Consider your local climate and personal preferences when choosing your artichoke variety. Your local nursery can also offer great advice on what grows best in your area.
Preparing Your Garden Bed
Artichokes are hungry plants, so preparing your garden bed properly is crucial for success. They need plenty of sunlight and well-drained soil.
* Sunlight: Artichokes need at least 6-8 hours of direct sunlight per day. Choose a location in your garden that gets plenty of sun.
* Soil: Artichokes prefer well-drained soil that is rich in organic matter. Amend your soil with compost or well-rotted manure before planting. This will improve drainage and provide essential nutrients.
* pH: Artichokes prefer a slightly acidic to neutral soil pH, ideally between 6.0 and 7.0. You can test your soil pH with a simple soil testing kit.
* Space: Artichokes can get quite large, so give them plenty of space. Allow at least 3-4 feet between plants and 4-6 feet between rows.
Starting Artichokes from Seed (Optional, but Rewarding!)
While you can buy artichoke starts from a nursery, starting them from seed is a fun and rewarding experience. It does require a bit more patience, but it’s definitely worth it!
* Timing: Start your artichoke seeds indoors 8-10 weeks before the last expected frost.
* Sowing: Sow the seeds about 1/2 inch deep in seed-starting trays or small pots filled with seed-starting mix.
* Germination: Keep the soil moist and warm (around 70-75°F). The seeds should germinate in about 1-2 weeks.
* Hardening Off: Once the seedlings have developed a few sets of true leaves, gradually acclimate them to outdoor conditions by hardening them off. This involves exposing them to increasing amounts of sunlight and fresh air over a period of 1-2 weeks.
Planting Artichoke Starts or Seedlings
Whether you’re using starts from a nursery or seedlings you’ve grown yourself, the planting process is the same.
Step-by-Step Planting Guide:
1. Dig the Hole: Dig a hole that is slightly larger than the root ball of the artichoke start or seedling.
2. Amend the Soil: Mix some compost or well-rotted manure into the soil at the bottom of the hole.
3. Plant Carefully: Gently remove the artichoke from its container and loosen the roots slightly. Place the plant in the hole, making sure the top of the root ball is level with the surrounding soil.
4. Backfill: Backfill the hole with soil, gently firming it around the plant.
5. Water Thoroughly: Water the newly planted artichoke thoroughly to help settle the soil.
6. Mulch: Apply a layer of mulch around the plant to help retain moisture and suppress weeds. I like to use straw or wood chips.
Caring for Your Artichoke Plants
Once your artichokes are planted, it’s important to provide them with the care they need to thrive.
* Watering: Artichokes need consistent moisture, especially during hot, dry weather. Water deeply and regularly, especially when the plants are young and establishing themselves. Aim for about 1-2 inches of water per week.
* Fertilizing: Artichokes are heavy feeders, so fertilize them regularly with a balanced fertilizer. I like to use a slow-release fertilizer in the spring and then supplement with liquid fertilizer every few weeks during the growing season.
* Weeding: Keep the area around your artichoke plants free of weeds. Weeds compete with the artichokes for nutrients and water.
* Pest Control: Keep an eye out for pests such as aphids, slugs, and snails. You can control these pests with organic methods such as hand-picking, insecticidal soap, or diatomaceous earth.
* Pruning: After harvesting the main artichoke head, you can encourage the plant to produce more side shoots by cutting back the stem. Remove any dead or damaged leaves regularly.
Overwintering Artichokes
Artichokes are perennial plants, meaning they can live for several years. However, in colder climates, they need some protection during the winter.
* Cutting Back: In late fall, after the first frost, cut back the artichoke plant to about 12 inches above the ground.
* Mulching: Apply a thick layer of mulch around the base of the plant to protect the roots from freezing. I use a combination of straw and leaves.
* Covering (Optional): In very cold climates, you may want to cover the plant with a burlap sack or other protective covering.
* Spring Awakening: In the spring, remove the mulch and any dead or damaged growth. The plant should start to sprout new growth as the weather warms up.
Harvesting Your Artichokes
The moment you’ve been waiting for! Harvesting your own homegrown artichokes is incredibly satisfying.
* Timing: Artichokes are typically ready to harvest in the spring or early summer, depending on your climate and the variety you’re growing.
* Signs of Ripeness: Look for artichokes that are firm and plump, with tightly closed bracts (the leaves that make up the head). The bracts should be a deep green or purple color, depending on the variety.
* Harvesting Technique: Use a sharp knife to cut the artichoke stem about 2-3 inches below the base of the head.
* Side Shoots: After harvesting the main head, the plant will produce smaller side shoots. These can also be harvested when they are ready.
Enjoying Your Harvest
Now for the best part – eating your delicious homegrown artichokes! There are so many ways to enjoy them.
* Steaming: Steaming is a classic way to cook artichokes. Simply steam them for about 20-30 minutes, or until the bracts are tender and easily pulled off. Serve with melted butter or your favorite dipping sauce.
* Grilling: Grilling artichokes gives them a smoky flavor that is absolutely delicious. Cut the artichokes in half, brush them with olive oil, and grill them over medium heat for about 15-20 minutes, or until tender.
* Roasting: Roasting artichokes brings out their sweetness. Cut the artichokes in half, toss them with olive oil, garlic, and herbs, and roast them in a preheated oven at 400°F for about 30-40 minutes, or until tender.
* Artichoke Hearts: Don’t forget about the heart! The artichoke heart is the most prized part of the plant. You can eat it raw, grilled, roasted, or added to salads, pasta dishes, and other recipes.
Troubleshooting Common Artichoke Problems
Even with the best care, you might encounter some problems when growing artichokes. Here are a few common issues and how to address them:
* Aphids: These tiny pests can suck the sap from artichoke leaves, causing them to become yellow and distorted. Control aphids with insecticidal soap or by introducing beneficial insects like ladybugs.
* Slugs and Snails: These slimy creatures can feast on artichoke leaves, especially young seedlings. Control slugs and snails with beer traps, copper tape, or by hand-picking them off the plants.
* Artichoke Plume Moth: The larvae of this moth can bore into artichoke heads, causing damage and making them unmarketable. Control artichoke plume moth with pheromone traps

Conclusion
So, there you have it! Mastering the art of growing turnips, even for beginners, is entirely within your reach. This isn’t just about adding another vegetable to your garden; it’s about embracing a fast-growing, nutrient-rich crop that can provide both delicious roots and greens. The DIY trick we’ve explored – focusing on soil preparation, strategic planting, and consistent watering – is a game-changer. It’s the key to unlocking a bountiful harvest of sweet, tender turnips that will elevate your culinary creations.
Why is this DIY trick a must-try? Because it simplifies the process, maximizes your yield, and minimizes common problems like woody roots or pest infestations. By paying close attention to soil drainage and pH levels, you’re setting the stage for healthy root development. Strategic planting, especially succession planting, ensures a continuous supply of turnips throughout the growing season. And consistent watering, particularly during dry spells, prevents stress and promotes rapid growth.
But don’t stop there! Feel free to experiment with different varieties of turnips. For a milder flavor, try ‘Tokyo Cross’ or ‘Hakurei.’ If you prefer a more robust taste, ‘Purple Top White Globe’ is a classic choice. You can also explore different planting times based on your local climate. In warmer regions, you might be able to squeeze in two crops per year. Consider companion planting as well. Planting turnips alongside carrots can deter root flies, while planting them with legumes can improve soil fertility.
Furthermore, don’t limit yourself to just the roots. Turnip greens are incredibly nutritious and versatile. They can be steamed, sautéed, or added to soups and stews. For a unique twist, try pickling your turnip roots or fermenting them into a delicious probiotic-rich snack. The possibilities are endless!
We’re confident that with a little bit of effort and the right approach, you’ll be harvesting your own delicious turnips in no time. Remember, gardening is a journey of learning and experimentation. Don’t be afraid to make mistakes and adapt your techniques as you go. The most important thing is to get your hands dirty and enjoy the process.
So, what are you waiting for? Grab your gardening tools, prepare your soil, and start planting! We encourage you to try this DIY trick for growing turnips and share your experience with us. Let us know what worked well for you, what challenges you faced, and any tips or tricks you discovered along the way. Your feedback will help other beginners succeed in their turnip-growing endeavors. Share your photos and stories on our social media pages using #HomeGrownTurnips. Let’s build a community of passionate gardeners and celebrate the joy of growing our own food! Happy gardening!
Frequently Asked Questions (FAQ)
What is the best time to plant turnips?
The best time to plant turnips depends on your climate. Turnips are a cool-season crop, so they thrive in temperatures between 60°F and 65°F (15°C and 18°C). In most regions, the ideal planting times are early spring (as soon as the soil can be worked) and late summer/early fall. For a spring crop, plant 4-6 weeks before the last expected frost. For a fall crop, plant 6-8 weeks before the first expected frost. Succession planting, where you sow seeds every 2-3 weeks, will ensure a continuous harvest throughout the growing season. Check your local extension office for specific planting recommendations for your area.
What kind of soil is best for growing turnips?
Turnips prefer well-drained, loose soil that is rich in organic matter. The ideal soil pH is between 6.0 and 6.8. Before planting, amend your soil with compost or well-rotted manure to improve drainage and fertility. Avoid heavy clay soils, as they can restrict root growth and lead to misshapen turnips. If you have clay soil, consider adding sand or other amendments to improve drainage. A soil test can help you determine the pH and nutrient levels of your soil and guide you in making necessary amendments.
How much sun do turnips need?
Turnips need at least 6 hours of sunlight per day to thrive. While they can tolerate some shade, especially in hotter climates, insufficient sunlight can result in smaller roots and less flavorful greens. Choose a planting location that receives full sun for the majority of the day. If you are growing turnips indoors under grow lights, provide at least 12-14 hours of light per day.
How often should I water my turnips?
Turnips need consistent moisture to grow quickly and develop tender roots. Water deeply and regularly, especially during dry spells. Aim to keep the soil consistently moist but not waterlogged. Overwatering can lead to root rot, while underwatering can cause the roots to become woody and bitter. A good rule of thumb is to water when the top inch of soil feels dry to the touch. Mulching around the plants can help retain moisture and suppress weeds.
What are some common pests and diseases that affect turnips?
Turnips can be susceptible to several pests and diseases, including aphids, flea beetles, root maggots, and clubroot. Aphids and flea beetles can be controlled with insecticidal soap or neem oil. Root maggots can be prevented by using row covers or by applying beneficial nematodes to the soil. Clubroot is a soilborne disease that causes swollen and distorted roots. To prevent clubroot, practice crop rotation, maintain a soil pH above 7.0, and use disease-resistant varieties. Regularly inspect your plants for signs of pests or diseases and take action promptly to prevent them from spreading.
When and how should I harvest my turnips?
Turnips are typically ready to harvest 50-60 days after planting. The roots should be about 2-3 inches in diameter. You can harvest the greens at any time, but they are most tender when they are young. To harvest the roots, gently loosen the soil around the plant and pull it up by the greens. If the soil is dry, water it thoroughly before harvesting to make it easier to pull the turnips. Store the roots in a cool, dry place for up to several weeks. The greens should be used within a few days of harvesting.
Can I eat turnip greens?
Yes, turnip greens are edible and highly nutritious. They are a good source of vitamins A, C, and K, as well as calcium and fiber. Turnip greens can be steamed, sautéed, or added to soups and stews. They have a slightly peppery flavor that pairs well with garlic, onions, and bacon. To prepare turnip greens, wash them thoroughly and remove any tough stems. You can also blanch them briefly in boiling water to reduce their bitterness.
Are there different varieties of turnips?
Yes, there are many different varieties of turnips, each with its own unique characteristics. Some popular varieties include ‘Tokyo Cross,’ which is known for its mild flavor and rapid growth; ‘Hakurei,’ which is a Japanese turnip with a sweet, crisp texture; and ‘Purple Top White Globe,’ which is a classic variety with a slightly pungent flavor. Experiment with different varieties to find the ones that you like best. Consider factors such as flavor, size, and disease resistance when choosing a variety.
Can I grow turnips in containers?
Yes, turnips can be grown in containers, making them a great option for gardeners with limited space. Choose a container that is at least 12 inches deep and wide to allow the roots to develop properly. Use a well-draining potting mix and water regularly. Place the container in a location that receives at least 6 hours of sunlight per day. Container-grown turnips may need to be fertilized more frequently than those grown in the ground.
How can I prevent turnips from becoming woody or bitter?
Several factors can contribute to woody or bitter turnips, including inconsistent watering, poor soil, and overcrowding. To prevent these problems, water your turnips regularly, especially during dry spells. Amend your soil with compost or well-rotted manure to improve drainage and fertility. Thin your seedlings to ensure that they have enough space to grow. Harvest your turnips when they are young and tender.
Leave a Comment