
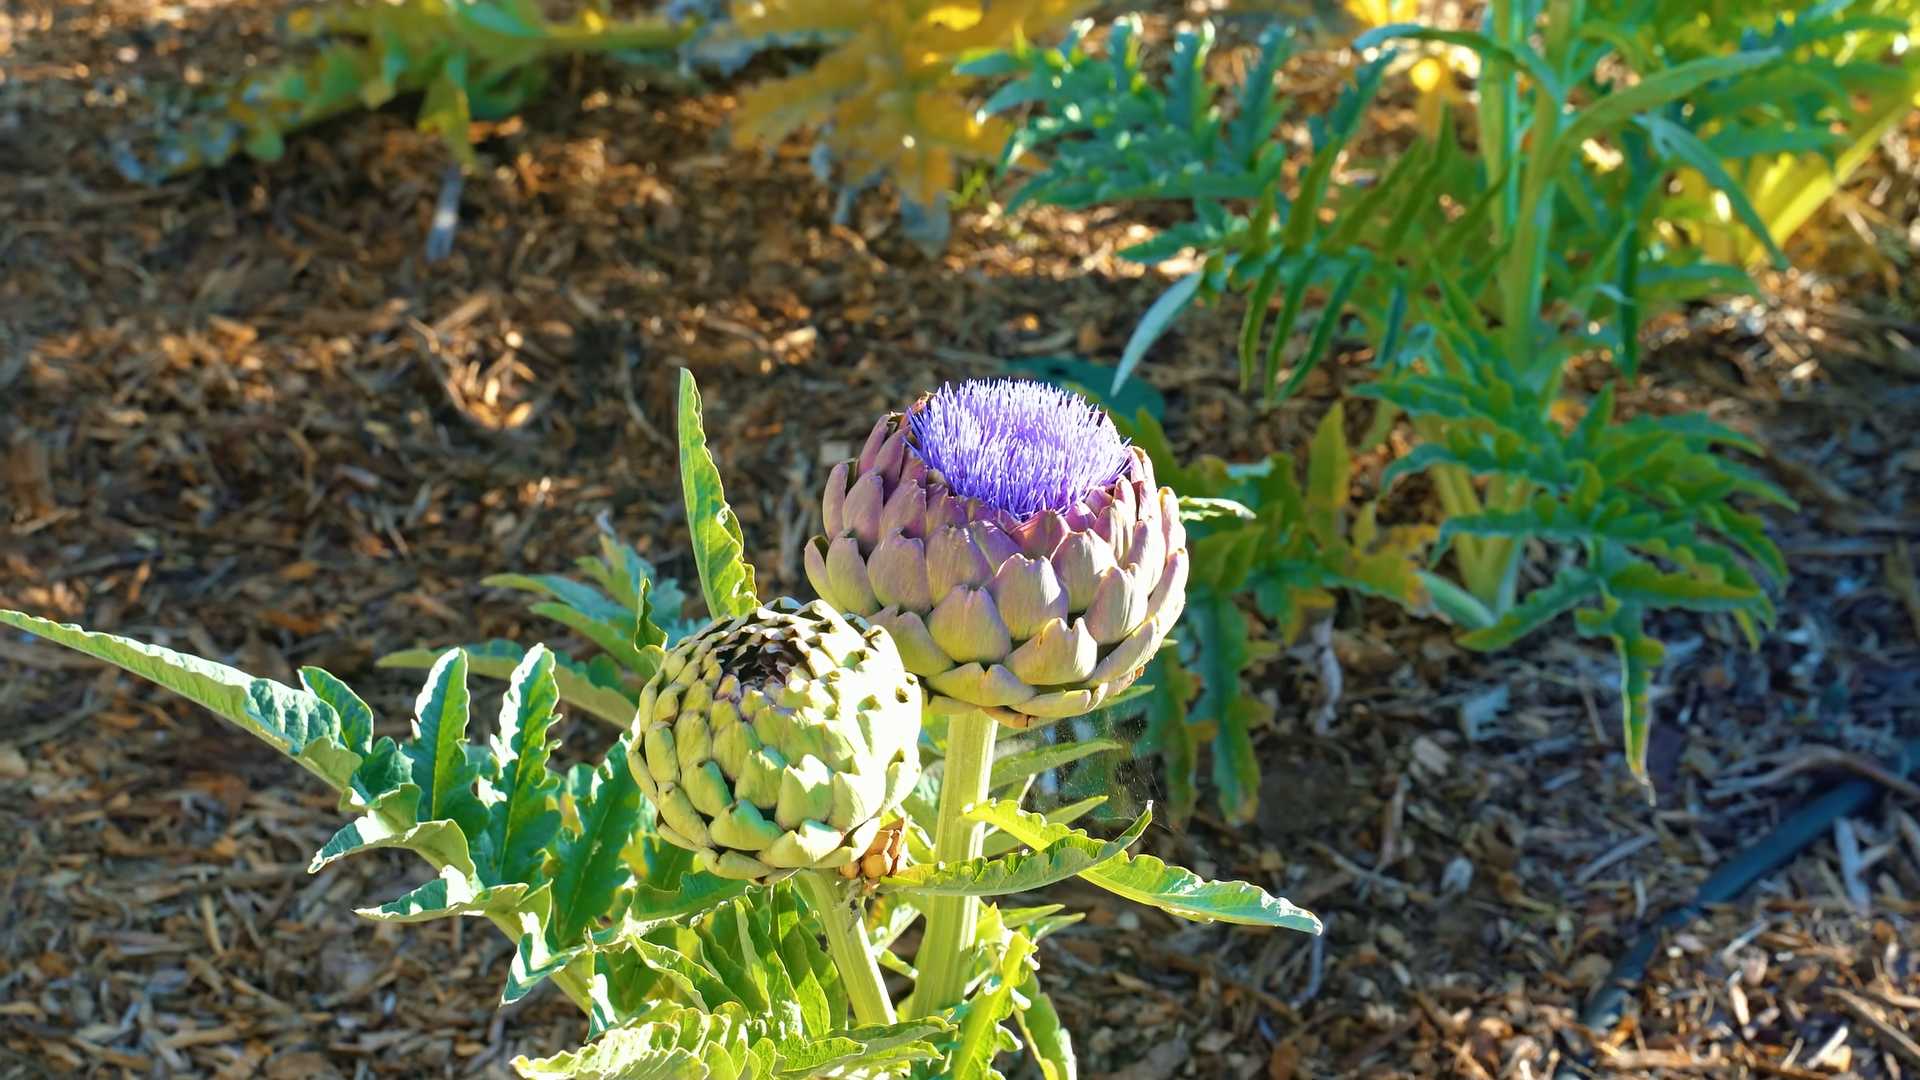
Grow Artichokes Easily, you say? Absolutely! Imagine strolling through your own backyard, casually plucking a plump, vibrant artichoke straight from the plant – ready to be steamed, grilled, or transformed into a delectable dip. Sounds like a dream, right? Well, it doesn’t have to be! For centuries, artichokes have been prized for their unique flavor and nutritional benefits, gracing tables from the Mediterranean to modern-day kitchens. Their cultivation dates back to ancient times, with roots deeply embedded in Italian and North African culinary traditions.
But let’s be honest, the thought of growing artichokes can seem a little intimidating. Many gardeners shy away, assuming they require expert knowledge or acres of land. That’s where this DIY guide comes in! I’m here to show you that you can grow artichokes easily, even if you’re a beginner with limited space. We’ll break down the process into simple, manageable steps, revealing insider tricks and hacks that will have you harvesting your own artichokes in no time.
Why do you need this DIY trick, you ask? Because fresh, homegrown artichokes taste infinitely better than anything you’ll find at the grocery store! Plus, you’ll have the satisfaction of knowing you nurtured these beauties from start to finish. So, ditch the intimidation and get ready to embark on a rewarding gardening adventure. Let’s unlock the secrets to successfully growing artichokes easily, together!
DIY Cleaning Hacks for Effortless Chores
Okay, let’s face it, cleaning isn’t exactly anyone’s favorite pastime. But what if I told you there were some super simple, budget-friendly hacks that could make your chores a whole lot easier and even, dare I say, a little bit fun? I’ve compiled some of my go-to cleaning tricks that use everyday items you probably already have in your pantry. Get ready to revolutionize your cleaning routine!
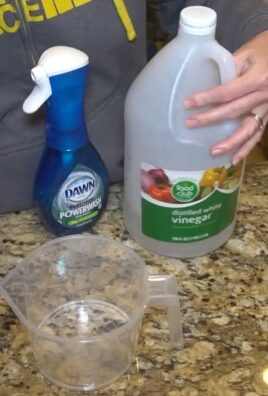
Cleaning with Vinegar: The All-Purpose Wonder
Vinegar is my absolute favorite cleaning agent. It’s cheap, effective, and environmentally friendly. Plus, that slightly pungent smell dissipates quickly, leaving behind a fresh, clean scent.
Cleaning Your Microwave with Vinegar
Burnt-on food splatters in the microwave? Don’t sweat it! This hack is a game-changer.
1. Prepare the Solution: In a microwave-safe bowl, mix equal parts white vinegar and water (about 1 cup of each should do).
2. Microwave the Mixture: Place the bowl in the microwave and heat on high for 5-7 minutes. The mixture should boil and create steam.
3. Let it Sit: Don’t open the microwave immediately! Let the steam work its magic for another 5-10 minutes. This will loosen all the grime.
4. Wipe Clean: Carefully remove the bowl (it will be hot!). Use a damp cloth or sponge to easily wipe away all the loosened food particles. You’ll be amazed at how easily everything comes off!
5. Final Touches: For any stubborn spots, you can dip your cloth in the vinegar solution and scrub gently.
Deodorizing Your Dishwasher with Vinegar
A smelly dishwasher is a common problem, but vinegar can fix it!
1. Empty the Dishwasher: Make sure your dishwasher is completely empty.
2. Vinegar Bath: Place a dishwasher-safe cup or bowl filled with 1 cup of white vinegar on the top rack of your dishwasher.
3. Run a Hot Cycle: Run a normal hot water cycle without any detergent.
4. Enjoy the Freshness: The vinegar will neutralize odors and help to dissolve any buildup. Your dishwasher will smell fresh and clean! I usually do this once a month to keep things smelling good.
Cleaning Showerheads with Vinegar
Hard water buildup can clog your showerhead and reduce water pressure. Vinegar to the rescue!
1. Prepare the Bag: Fill a plastic bag (a sandwich bag works well for smaller showerheads, a gallon bag for larger ones) with white vinegar.
2. Secure the Bag: Place the bag over the showerhead, ensuring the showerhead is fully submerged in the vinegar. Secure the bag with a rubber band or twist tie.
3. Soak Overnight: Let the showerhead soak in the vinegar overnight (or for at least a few hours).
4. Remove and Rinse: Remove the bag and discard the vinegar. Run the shower for a few minutes to flush out any remaining vinegar and loosened mineral deposits.
5. Wipe Clean: Wipe the showerhead with a clean cloth to remove any remaining residue. Your showerhead should now be sparkling clean and have improved water pressure!
Baking Soda: The Gentle Abrasive
Baking soda is another cleaning superstar. It’s a mild abrasive, making it perfect for scrubbing away grime without scratching surfaces.
Cleaning Your Oven with Baking Soda
Oven cleaning is notoriously dreaded, but this baking soda paste makes it much easier.
1. Prepare the Paste: In a bowl, mix 1/2 cup of baking soda with enough water to form a thick paste.
2. Coat the Oven: Spread the paste all over the inside of your oven, avoiding the heating elements. Be generous with the application, especially on stubborn stains.
3. Let it Sit: Let the paste sit for at least 12 hours, or even overnight. The longer it sits, the easier it will be to remove the grime.
4. Scrub and Wipe: After the soaking time, use a damp sponge or cloth to scrub away the baking soda paste. You may need to use a little elbow grease for tougher spots.
5. Rinse Thoroughly: Rinse the oven with clean water to remove any remaining baking soda residue. You can use a spray bottle filled with water to make rinsing easier.
6. Final Wipe: Wipe the oven dry with a clean cloth. Your oven should now be much cleaner and ready for your next baking adventure!
Unclogging Drains with Baking Soda and Vinegar
This is a classic combination for a reason! It’s a natural and effective way to unclog drains.
1. Pour Baking Soda: Pour about 1/2 cup of baking soda down the drain.
2. Add Vinegar: Follow with 1 cup of white vinegar.
3. Let it Fizz: Let the mixture fizz and bubble for about 30 minutes. The chemical reaction between the baking soda and vinegar will help to break down the clog.
4. Flush with Hot Water: After 30 minutes, flush the drain with a pot of boiling water.
5. Repeat if Necessary: If the drain is still clogged, repeat the process. For really stubborn clogs, you may need to use a plunger after the baking soda and vinegar treatment.
Cleaning Grout with Baking Soda Paste
Dirty grout can make your tiles look dingy. This baking soda paste will brighten them right up.
1. Prepare the Paste: Mix baking soda with a little water to form a thick paste.
2. Apply to Grout: Apply the paste to the grout lines using your finger or an old toothbrush.
3. Scrub: Scrub the grout lines with the toothbrush. You’ll see the dirt and grime start to lift.
4. Rinse: Rinse the grout lines with clean water.
5. Dry: Wipe the tiles and grout dry with a clean cloth. Your grout will look noticeably cleaner and brighter!
Lemon Juice: The Natural Deodorizer and Cleaner
Lemon juice is a fantastic natural cleaner and deodorizer. Its acidity helps to cut through grease and grime, and its fresh scent leaves everything smelling wonderful.
Cleaning Cutting Boards with Lemon
Cutting boards can harbor bacteria and odors. Lemon juice is a natural disinfectant and deodorizer.
1. Cut a Lemon: Cut a lemon in half.
2. Rub the Lemon: Rub the cut side of the lemon all over the surface of the cutting board, squeezing gently to release the juice.
3. Let it Sit: Let the lemon juice sit on the cutting board for about 10 minutes.
4. Rinse and Dry: Rinse the cutting board with warm water and dry it with a clean cloth. Your cutting board will be clean, fresh, and free of odors!
Polishing Chrome with Lemon
Lemon juice can help to remove water spots and tarnish from chrome fixtures.
1. Apply Lemon Juice: Apply lemon juice to a clean cloth.
2. Rub the Chrome: Rub the cloth over the chrome fixtures, focusing on areas with water spots or tarnish.
3. Rinse and Dry: Rinse the fixtures with water and dry them with a clean cloth. Your chrome will be shiny and sparkling!
Freshening Your Garbage Disposal with Lemon Peels
A smelly garbage disposal is never pleasant. Lemon peels can help to freshen it up.
1. Collect Lemon Peels: Save your lemon peels after using lemons for other purposes.
2. Grind the Peels: Place a few lemon peels into the garbage disposal.
3. Run the Disposal: Run the garbage disposal with cold water for about 30 seconds. The lemon peels will help to clean the disposal blades and leave a fresh, citrusy scent.
Other Handy Cleaning Hacks
Here are a few more of my favorite cleaning hacks that don’t quite fit into the categories above, but are equally useful!
Cleaning Blinds with a Sock
Cleaning blinds can be tedious, but this hack makes it much easier.
1. Prepare the Sock: Put an old sock on your hand. You can dampen the sock slightly with water or a cleaning solution if desired.
2. Wipe the Blinds: Use the sock-covered hand to wipe each slat of the blinds. The sock will pick up dust and dirt easily.
3. Wash the Sock: When the sock gets dirty, remove it and wash it. You can then reuse it for future cleaning sessions.
Removing Water Rings from Wood Furniture with a Hair Dryer
Ugly water rings on your wood furniture? Don’t panic! A hair dryer can often remove them.
1. Use a Hair Dryer: Set your hair dryer to a low heat setting.
2. Apply Heat: Hold the hair dryer a few inches away from the water ring and move it back and
Conclusion
So, there you have it! Growing artichokes easily, right in your own backyard, is not only achievable but also incredibly rewarding. Forget the expensive grocery store prices and often less-than-fresh produce. With a little patience and the right approach, you can enjoy the unique, nutty flavor of homegrown artichokes, bursting with freshness and packed with nutrients.
This DIY method, focusing on [mention specific method from article, e.g., starting from seed indoors or using root divisions], offers a significant advantage over [mention alternative method and its drawbacks, e.g., direct sowing, which can be unreliable due to unpredictable weather]. It allows you to control the growing environment, giving your artichoke plants a head start and maximizing your chances of a bountiful harvest.
But the beauty of gardening lies in experimentation! Feel free to explore variations to suit your specific climate and preferences. For instance, if you live in a particularly hot region, consider providing afternoon shade to protect your artichoke plants from scorching. Alternatively, if you’re short on space, you can even try growing artichokes in large containers, ensuring they have adequate drainage and nutrient-rich soil. You could also experiment with different artichoke varieties, such as ‘Green Globe’ for its classic flavor or ‘Violetta’ for its beautiful purple hue. Don’t be afraid to add companion plants like marigolds to deter pests naturally.
This DIY artichoke growing trick is a game-changer for any home gardener looking to add a touch of gourmet to their table. The satisfaction of harvesting your own artichokes, knowing you nurtured them from seedling to full bloom, is simply unparalleled. Plus, you’ll have a constant supply of this delicious and healthy vegetable, perfect for grilling, steaming, or adding to your favorite recipes.
We wholeheartedly encourage you to give this method a try. It’s simpler than you might think, and the results are well worth the effort. Remember to document your progress, take photos, and most importantly, share your experiences with us! We’d love to hear about your successes, challenges, and any unique variations you discover along the way. Let’s build a community of artichoke enthusiasts, sharing tips and tricks to help everyone enjoy the bounty of their own gardens. So, grab your gardening gloves, prepare your soil, and get ready to embark on your artichoke-growing adventure! Happy gardening!
Frequently Asked Questions (FAQ)
What is the best time of year to start growing artichokes?
The ideal time to start growing artichokes depends largely on your climate. In regions with mild winters, you can plant artichoke crowns or seedlings in the fall for a spring harvest. However, in colder climates with harsh winters, it’s best to start seeds indoors 8-10 weeks before the last expected frost. This allows the plants to develop a strong root system before being transplanted outdoors in the spring. Starting indoors gives you a significant advantage, especially if you’re aiming for a harvest in the first year. Remember that artichokes need a period of vernalization (exposure to cold temperatures) to induce bud formation, so plan accordingly based on your local climate.
How much space do artichoke plants need?
Artichoke plants are quite large and require ample space to thrive. Each plant can easily spread to 3-4 feet in diameter, so it’s crucial to provide adequate spacing. We recommend planting artichokes at least 4 feet apart in rows that are 6-8 feet apart. This allows for proper air circulation, which helps prevent fungal diseases, and ensures that each plant receives sufficient sunlight. If you’re growing artichokes in containers, choose a large pot that is at least 24 inches in diameter and depth.
What kind of soil is best for growing artichokes?
Artichokes prefer well-drained, fertile soil that is rich in organic matter. The ideal soil pH is between 6.0 and 7.0. Before planting, amend your soil with compost, aged manure, or other organic materials to improve its drainage and fertility. Artichokes are heavy feeders, so it’s also beneficial to incorporate a slow-release fertilizer into the soil at planting time. Avoid soils that are heavy clay or prone to waterlogging, as these can lead to root rot.
How often should I water my artichoke plants?
Artichokes need consistent moisture, especially during hot, dry weather. Water deeply and regularly, ensuring that the soil remains consistently moist but not waterlogged. A good rule of thumb is to water when the top inch of soil feels dry to the touch. Mulching around the base of the plants can help retain moisture and suppress weeds. During periods of heavy rainfall, you may need to reduce watering to prevent overwatering.
What are some common pests and diseases that affect artichokes?
Artichokes can be susceptible to several pests and diseases, including aphids, spider mites, snails, slugs, and powdery mildew. Regularly inspect your plants for signs of infestation or disease. Aphids and spider mites can be controlled with insecticidal soap or neem oil. Snails and slugs can be handpicked or trapped. Powdery mildew can be prevented by ensuring good air circulation and avoiding overhead watering. If powdery mildew does occur, treat it with a fungicide specifically labeled for use on vegetables.
How do I know when my artichokes are ready to harvest?
Artichokes are typically ready to harvest when the buds are plump and firm, and the bracts (the outer leaves) are still tightly closed. The size of the bud will vary depending on the variety, but generally, you should harvest them when they are about 3-4 inches in diameter. To harvest, use a sharp knife to cut the stem about 2-3 inches below the bud. It’s better to harvest slightly early than too late, as the buds will become tough and less flavorful if they are allowed to open fully.
Can I grow artichokes in containers?
Yes, you can successfully grow artichokes in containers, especially if you have limited garden space. Choose a large container that is at least 24 inches in diameter and depth. Use a high-quality potting mix that is well-draining and rich in organic matter. Water regularly and fertilize every few weeks with a balanced fertilizer. Container-grown artichokes may need more frequent watering and fertilization than those grown in the ground. Also, be aware that container plants are more susceptible to temperature fluctuations, so you may need to provide extra protection during extreme weather.
How do I overwinter artichoke plants in cold climates?
In regions with harsh winters, artichokes need protection to survive. After the first frost, cut back the foliage to about 6 inches above the ground. Mulch heavily around the base of the plants with straw, leaves, or other organic materials. In very cold climates, you may need to dig up the plants and store them in a cool, dark, and frost-free location, such as a garage or basement. Replant them in the spring after the last frost. Alternatively, you can treat artichokes as annuals and replant them each year.
Are artichokes a perennial or annual plant?
Artichokes are technically perennials, meaning they can live for more than two years. However, in colder climates, they are often grown as annuals because they may not survive the winter. With proper care and protection, artichokes can thrive as perennials in milder climates, producing a harvest for several years.
What are some delicious ways to prepare and eat artichokes?
Artichokes are incredibly versatile and can be prepared in many different ways. They can be steamed, grilled, baked, or even fried. Steaming is a classic method that allows you to enjoy the pure flavor of the artichoke. Grilled artichokes have a smoky, charred flavor that is perfect for summer barbecues. Baked artichokes can be stuffed with breadcrumbs, cheese, and herbs for a hearty and flavorful dish. The heart of the artichoke is considered the most prized part, but the fleshy base of the bracts is also edible. Artichokes are often served with a dipping sauce, such as melted butter, aioli, or vinaigrette.

Leave a Comment