
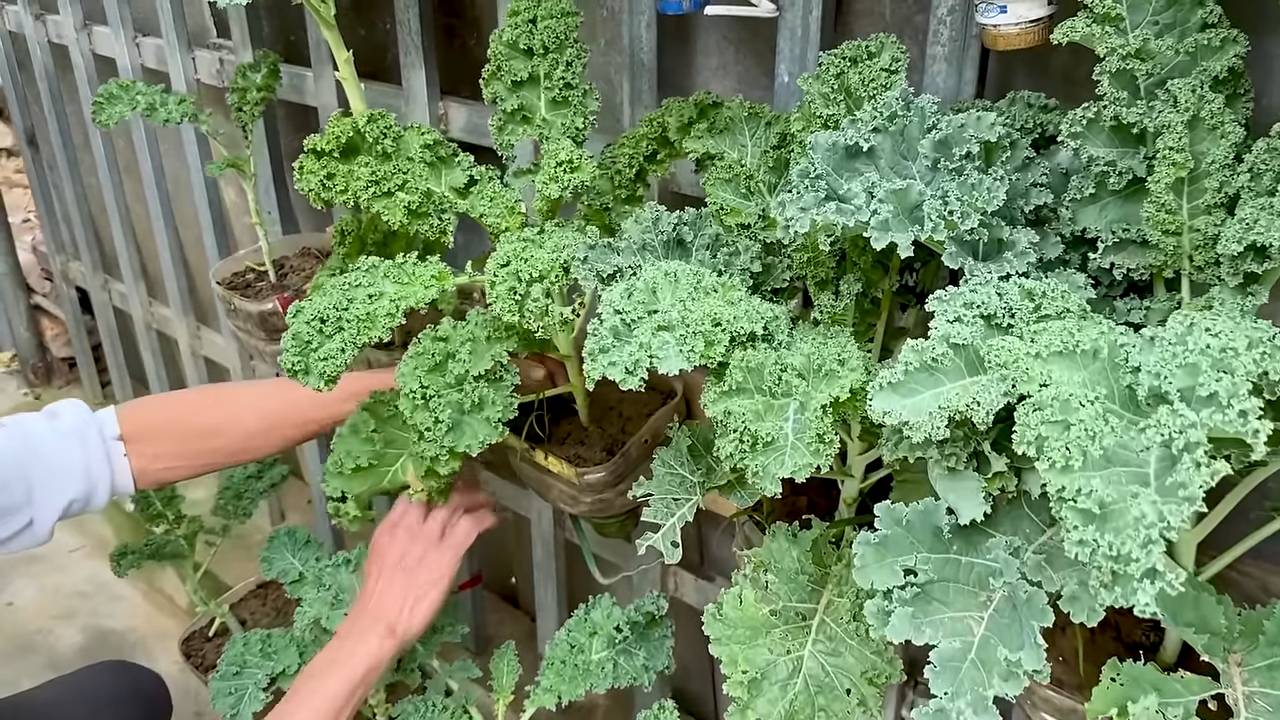
Plastic bottle kale growing – sounds a little unconventional, right? But trust me, it’s a game-changer! Have you ever dreamed of having fresh, vibrant kale right outside your kitchen door, even if you’re short on space or dealing with less-than-ideal soil? Well, you’re in the right place. For centuries, humans have sought innovative ways to cultivate food, from ancient terraced gardens to modern hydroponics. Now, we’re bringing that spirit of ingenuity to your backyard (or balcony!) with a super simple, budget-friendly method.
Kale, a nutritional powerhouse, has been a staple in diets around the world for ages, prized for its health benefits and versatility. But let’s face it, buying organic kale from the store can get expensive, and sometimes it’s just not as fresh as you’d like. That’s where this DIY trick comes in. I’m going to show you how to transform ordinary plastic bottles into mini kale gardens, giving you a constant supply of this leafy green goodness. This method is perfect for urban dwellers, beginner gardeners, or anyone looking for a sustainable and creative way to grow their own food. Plus, it’s a fantastic way to recycle those plastic bottles and reduce waste! So, let’s dive into the wonderful world of plastic bottle kale growing and unlock the secrets to a thriving, homegrown harvest.
DIY Vertical Kale Garden from Plastic Bottles
Hey there, fellow gardening enthusiasts! Are you short on space but craving fresh, homegrown kale? Well, I’ve got the perfect solution for you: a vertical kale garden made entirely from recycled plastic bottles! This project is not only eco-friendly but also incredibly easy and rewarding. Let’s dive in!
Materials You’ll Need
Before we get started, gather these supplies:
* Plastic Bottles: Lots of them! The number depends on how tall you want your garden to be. Aim for bottles that are relatively the same size and shape for a uniform look. I prefer using 2-liter soda bottles, but any sturdy plastic bottle will work.
* Scissors or Utility Knife: For cutting the plastic bottles. Be careful!
* Drill or Awl: To create drainage holes and hanging points.
* Rope or Strong Twine: To connect and hang the bottles. I recommend using something weather-resistant.
* Potting Soil: A good quality potting mix is essential for healthy kale growth.
* Kale Seedlings or Seeds: You can start from seeds or buy small seedlings from your local nursery. Seedlings will give you a head start.
* Measuring Tape or Ruler: To ensure consistent spacing.
* Gloves: To protect your hands.
* Watering Can or Hose: For watering your kale.
* Optional: Spray Paint: If you want to give your garden a more polished look, you can spray paint the bottles.
Preparing the Bottles
This is where the magic begins! We’ll transform those discarded plastic bottles into mini kale planters.
1. Clean the Bottles: Thoroughly wash each bottle with soap and water to remove any residue. This is crucial for preventing contamination of your soil. Let them dry completely before moving on.
2. Cut the Bottles: This is the most important step. You have two options here, depending on the look you’re going for:
* Option 1: Stacked Planters: Cut off the top third of each bottle. You’ll be nesting the top portion inside the bottom portion of the bottle below it. This creates a tiered effect.
* Option 2: Side-by-Side Planters: Cut a large rectangular opening on one side of each bottle, leaving the rest of the bottle intact. This creates a trough-like planter.
I personally prefer the stacked planter method because it maximizes space and looks really cool. But feel free to experiment!
3. Create Drainage Holes: Using your drill or awl, carefully create several drainage holes in the bottom of each bottle. This is absolutely essential to prevent waterlogging, which can kill your kale. I usually make about 4-5 holes per bottle.
4. Create Hanging Points: Now, we need to create points for the rope to pass through. For the stacked planter method, drill two holes on opposite sides of the top portion of the bottle (the part you cut off). These holes should be near the cut edge. For the side-by-side method, drill two holes near the top of the bottle, on either side of the rectangular opening.
5. (Optional) Paint the Bottles: If you want to add a pop of color or create a more uniform look, now’s the time to spray paint the bottles. Choose a paint that’s safe for outdoor use and let them dry completely before proceeding. I like using a matte finish for a more natural look.
Assembling the Vertical Garden
Now comes the fun part: putting it all together!
1. Thread the Rope: Take your rope or twine and thread it through the hanging holes you created in the first bottle. Make sure you leave enough rope at the top to hang the entire structure.
2. Add the First Bottle: Tie a knot below the first bottle to secure it in place. Make sure the knot is strong enough to support the weight of the soil and plants.
3. Add the Second Bottle: For the stacked planter method, nest the top portion of the second bottle inside the bottom portion of the first bottle. Thread the rope through the hanging holes of the second bottle and tie another knot below it. For the side-by-side method, simply position the second bottle below the first and thread the rope through its hanging holes, securing it with a knot.
4. Repeat: Continue adding bottles in this manner until you reach your desired height. Remember to space the bottles evenly and ensure that each knot is secure.
5. Secure the Bottom: At the bottom of the structure, tie a final knot to prevent the bottles from sliding off. You can also add a weight to the bottom to provide extra stability.
Planting the Kale
Almost there! Now it’s time to bring your vertical garden to life with some vibrant kale.
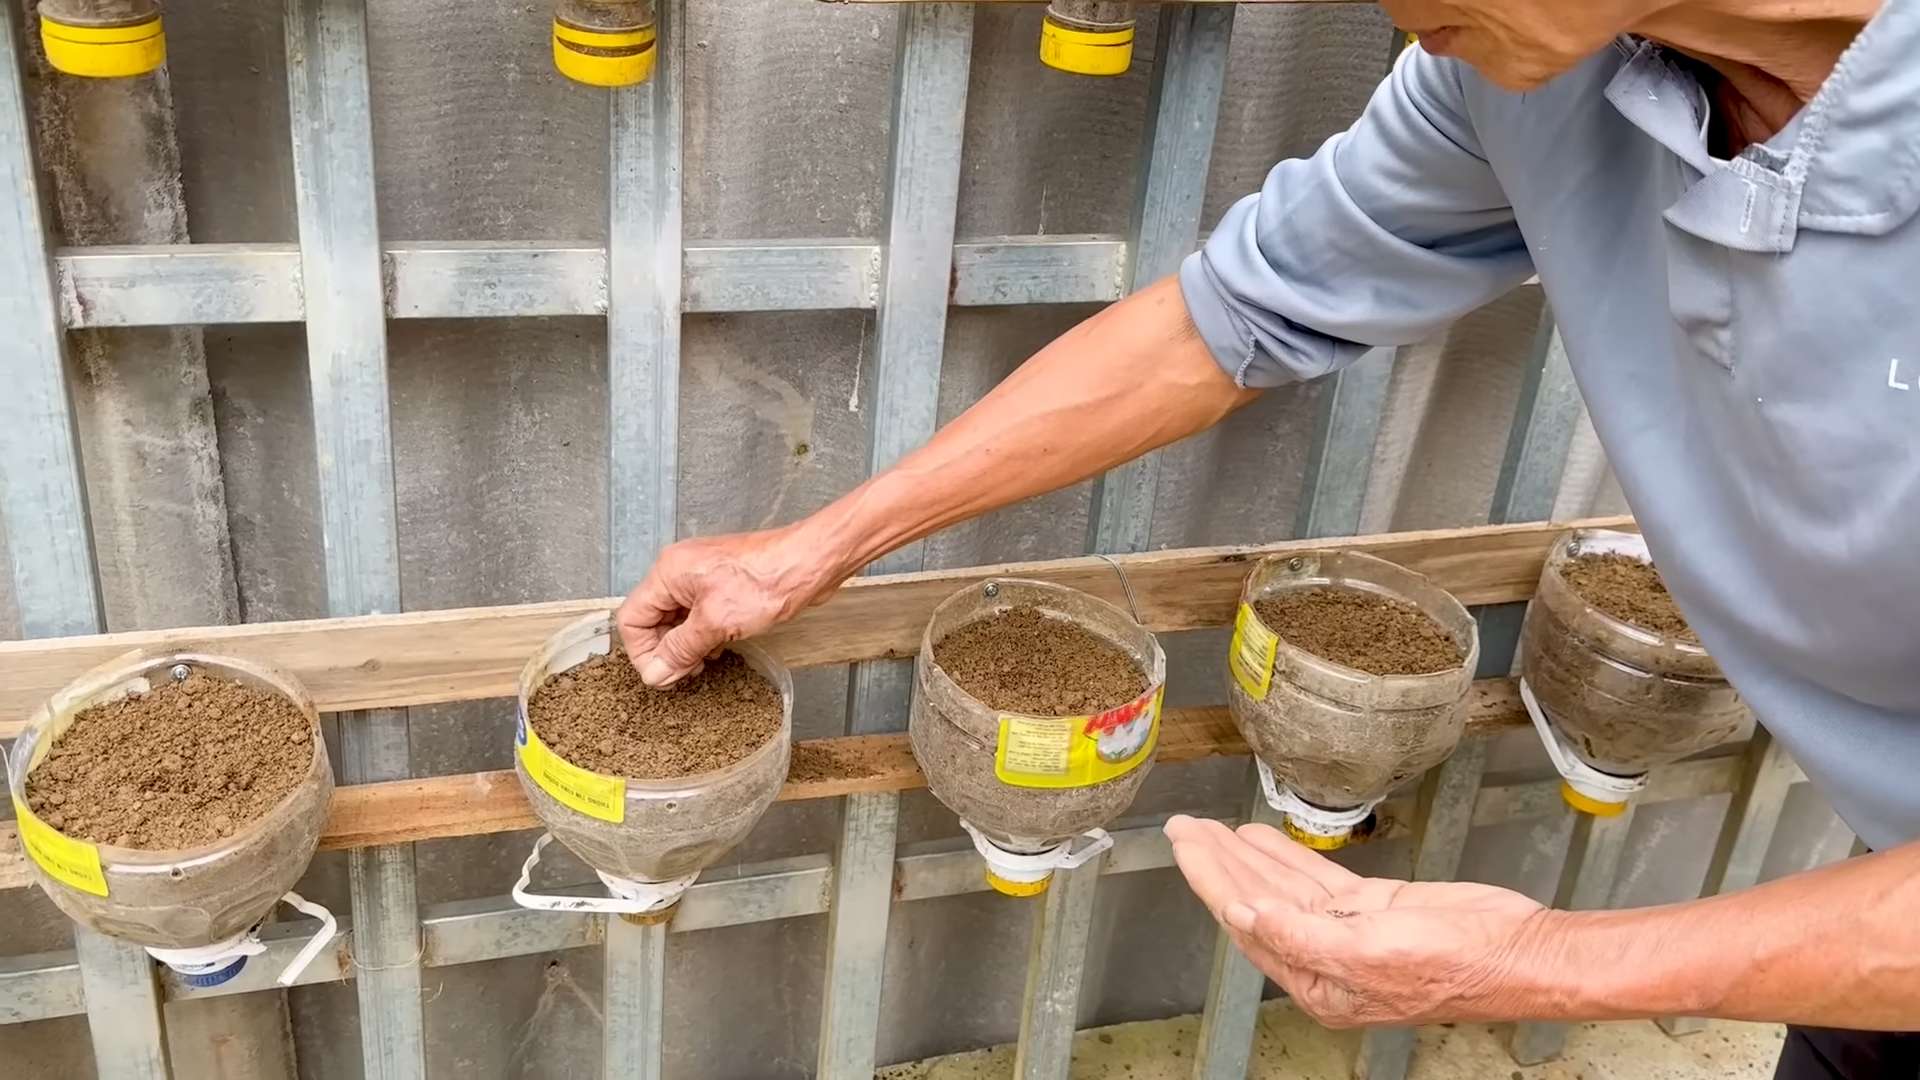
1. Fill with Potting Soil: Carefully fill each bottle with potting soil, leaving about an inch of space at the top. Gently pat down the soil to remove any air pockets.
2. Plant the Seedlings or Seeds: If you’re using seedlings, gently remove them from their containers and plant them in the center of each bottle. If you’re starting from seeds, sow them according to the package instructions. I usually plant a few seeds per bottle and then thin them out later, keeping the strongest seedling.
3. Water Thoroughly: After planting, water the kale thoroughly until the water drains out of the drainage holes. This will help settle the soil and encourage root growth.
Caring for Your Vertical Kale Garden
Congratulations! You’ve successfully created a vertical kale garden from recycled plastic bottles. Now, let’s talk about how to keep your kale happy and healthy.
1. Sunlight: Kale needs at least 6 hours of sunlight per day. Choose a location that receives plenty of sunshine. If you don’t have a sunny spot, you can supplement with grow lights.
2. Watering: Water your kale regularly, especially during hot, dry weather. Check the soil moisture by sticking your finger into the soil. If it feels dry, it’s time to water. Avoid overwatering, as this can lead to root rot.
3. Fertilizing: Kale is a heavy feeder, so it’s important to fertilize it regularly. Use a balanced fertilizer or compost tea every few weeks.
4. Pest Control: Keep an eye out for pests such as aphids, cabbage worms, and slugs. You can control these pests with organic methods such as insecticidal soap, neem oil, or handpicking.
5. Harvesting: You can start harvesting kale leaves when they are about 6-8 inches long. Simply cut off the outer leaves, leaving the inner leaves to continue growing. This will encourage continuous production.
Troubleshooting
Even with the best care, you might encounter some challenges along the way. Here are a few common problems and how to fix them:
* Yellowing Leaves: This could be a sign of overwatering, underwatering, or nutrient deficiency. Check the soil moisture and adjust your watering schedule accordingly. Fertilize with a balanced fertilizer.
* Stunted Growth: This could be due to lack of sunlight, poor soil, or pest infestation. Move your garden to a sunnier location, amend the soil with compost, and treat any pests.
* Root Rot: This is caused by overwatering and poor drainage. Make sure your bottles have adequate drainage holes and avoid overwatering.
Tips and Tricks
Here are a few extra tips to help you succeed with your vertical kale garden:
* Rotate the Bottles: To ensure even sunlight exposure, rotate the bottles regularly.
* Use Different Varieties of Kale: Experiment with different varieties of kale, such as curly kale, lacinato kale, and red Russian kale.
* Add Companion Plants: Plant companion plants such as marigolds or basil to deter pests.
* Winter Protection: In colder climates, protect your kale from frost by covering it with a blanket or moving it indoors.
I hope you found this guide helpful! Building a vertical kale garden from plastic bottles is a fun, rewarding, and sustainable way to grow your own fresh produce. Happy gardening!
Conclusion
So, there you have it! Transforming a humble plastic bottle into a thriving kale garden is not just a quirky DIY project; it’s a sustainable, space-saving, and incredibly rewarding way to enjoy fresh, homegrown greens. We’ve walked you through the simple steps, highlighting the ease and accessibility of this method. Forget expensive gardening equipment or sprawling plots of land. With a few repurposed plastic bottles, some soil, and a little sunshine, you can cultivate a vibrant patch of nutrient-rich kale right on your balcony, windowsill, or even in your kitchen.
This DIY trick is a must-try for several compelling reasons. First and foremost, it’s an eco-conscious choice. By repurposing plastic bottles, you’re actively reducing waste and giving these materials a new lease on life. Secondly, it’s incredibly budget-friendly. The cost of setting up your plastic bottle kale garden is minimal, especially if you already have some potting soil and kale seeds on hand. Thirdly, it’s a fantastic way to introduce gardening to children or those with limited mobility. The manageable size and accessibility of the bottles make it easy for anyone to participate and enjoy the process. Finally, and perhaps most importantly, it provides you with a constant supply of fresh, organic kale, free from harmful pesticides and herbicides.
But the beauty of this project lies in its adaptability. Feel free to experiment with different types of plastic bottles. Larger bottles can accommodate more kale plants, while smaller bottles are perfect for starting seeds or growing baby kale. You can also get creative with the design of your vertical garden. Stack the bottles in a pyramid shape, hang them from a railing, or create a living wall. The possibilities are endless!
Consider adding companion plants like marigolds or basil to your plastic bottle kale garden. These plants can help deter pests and attract beneficial insects, creating a healthier and more productive growing environment. You can also experiment with different types of soil mixes to find what works best for your local climate and kale variety. Remember to monitor the moisture levels in the bottles and adjust your watering schedule accordingly.
Don’t be afraid to get your hands dirty and embrace the learning process. Gardening is all about experimentation and observation. You might encounter challenges along the way, but each challenge is an opportunity to learn and improve your skills.
We are confident that you’ll find this DIY plastic bottle kale growing method to be both enjoyable and rewarding. It’s a simple yet effective way to connect with nature, reduce your environmental impact, and enjoy the delicious taste of homegrown kale.
So, what are you waiting for? Gather your plastic bottles, grab some soil and seeds, and get started on your own plastic bottle kale garden today! We encourage you to share your experiences with us. Post photos of your creations on social media using #PlasticBottleKale and let us know what tips and tricks you’ve discovered along the way. We can’t wait to see your thriving vertical gardens!
Frequently Asked Questions (FAQ)
What type of plastic bottles are best for growing kale?
Ideally, you should use food-grade plastic bottles, such as those that previously contained water, juice, or soda. Avoid using bottles that held harsh chemicals or cleaning products, as these could contaminate the soil and affect the kale plants. PET (polyethylene terephthalate) bottles, commonly used for water and soda, are a good choice. Make sure to thoroughly clean the bottles with soap and water before using them. The size of the bottle will depend on how many kale plants you want to grow in each container. Larger bottles (2-3 liters) are suitable for multiple plants, while smaller bottles (500ml-1 liter) are better for individual plants or starting seedlings.
How do I prepare the plastic bottles for planting?
First, thoroughly wash the plastic bottles with soap and water to remove any residue. Then, depending on the design you choose, you’ll need to cut the bottles appropriately. For a simple vertical garden, you can cut a rectangular opening on one side of the bottle, leaving enough of the bottle intact to provide support. For hanging gardens, you’ll need to create drainage holes in the bottom of the bottle and holes for hanging wires or ropes. Ensure the drainage holes are adequate to prevent waterlogging, which can lead to root rot. You can use a drill, a sharp knife, or even a heated nail to create the holes. Be careful when using sharp tools and always supervise children during this process.
What type of soil should I use for growing kale in plastic bottles?
A well-draining potting mix is essential for growing kale in plastic bottles. Avoid using garden soil, as it can be too heavy and compact, hindering root growth and drainage. A good potting mix should contain a blend of peat moss, perlite, and vermiculite. You can also add compost or other organic matter to enrich the soil and provide essential nutrients for the kale plants. Consider using a soil mix specifically formulated for vegetables or leafy greens. You can also create your own potting mix by combining equal parts peat moss, perlite, and compost.
How often should I water my plastic bottle kale garden?
The frequency of watering will depend on several factors, including the weather, the size of the bottles, and the type of soil you’re using. Generally, you should water your kale plants when the top inch of soil feels dry to the touch. Avoid overwatering, as this can lead to root rot. Check the drainage holes to ensure that excess water is draining properly. During hot and dry weather, you may need to water your plants more frequently. In cooler weather, you can reduce the watering frequency. A good rule of thumb is to water deeply but infrequently, allowing the soil to dry out slightly between waterings.
How much sunlight does kale need to grow in plastic bottles?
Kale thrives in full sun, which means it needs at least 6 hours of direct sunlight per day. However, it can also tolerate partial shade, especially during the hottest part of the day. If you’re growing your kale indoors, place the bottles near a sunny window or use grow lights to provide adequate light. If you’re growing your kale outdoors, choose a location that receives plenty of sunlight throughout the day. Be mindful of the position of the sun and adjust the location of your bottles as needed to ensure that the plants receive sufficient light.
What are some common pests and diseases that affect kale, and how can I prevent them?
Common pests that affect kale include aphids, cabbage worms, and flea beetles. To prevent these pests, you can use organic pest control methods such as insecticidal soap, neem oil, or diatomaceous earth. You can also cover your kale plants with row covers to protect them from pests. Diseases that can affect kale include black rot and downy mildew. To prevent these diseases, ensure good air circulation around the plants and avoid overwatering. Remove any infected leaves promptly to prevent the spread of disease. Consider using disease-resistant kale varieties.
How do I harvest kale from my plastic bottle garden?
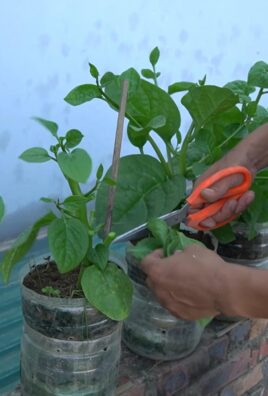
You can start harvesting kale leaves when they are about 4-6 inches long. Harvest the outer leaves first, leaving the inner leaves to continue growing. This will allow you to harvest kale continuously throughout the growing season. Use a sharp knife or scissors to cut the leaves close to the stem. Avoid tearing the leaves, as this can damage the plant. Wash the harvested leaves thoroughly before using them.
Can I grow other vegetables in plastic bottles besides kale?
Yes, you can grow a variety of other vegetables in plastic bottles, including lettuce, spinach, herbs, and even small tomatoes or peppers. The key is to choose vegetables that have shallow root systems and don’t require a lot of space. Herbs like basil, mint, and oregano are particularly well-suited for growing in plastic bottles. Lettuce and spinach are also good choices, as they can tolerate partial shade and don’t require a lot of nutrients. When choosing vegetables to grow in plastic bottles, consider the size of the bottle and the specific needs of the plant.
How do I fertilize my plastic bottle kale garden?
Kale is a heavy feeder, so it’s important to fertilize your plants regularly to ensure healthy growth. You can use a balanced liquid fertilizer or a slow-release granular fertilizer. Follow the instructions on the fertilizer package for application rates. You can also add compost or other organic matter to the soil to provide essential nutrients. Avoid over-fertilizing, as this can lead to nutrient burn. A good rule of thumb is to fertilize your kale plants every 2-3 weeks during the growing season.
How do I overwinter my plastic bottle kale plants?
Kale is a relatively hardy plant and can tolerate cold temperatures. However, in areas with harsh winters, you may need to take steps to protect your plants. You can move the plastic bottles indoors to a sunny location or a greenhouse. You can also cover the plants with a layer of mulch or straw to insulate them from the cold. Avoid overwatering during the winter months, as the plants will not be actively growing. With proper care, your kale plants can survive the winter and continue to produce leaves in the spring.

Leave a Comment