
Grow Melons Easily, even if you think you don’t have a green thumb! Have you ever dreamed of biting into a juicy, sun-ripened melon, bursting with flavor, that you actually grew yourself? It’s more attainable than you think, and this DIY guide is your secret weapon to melon-growing success. For centuries, melons have been cultivated across the globe, from the watermelons of ancient Africa, depicted in Egyptian tombs, to the cantaloupes enjoyed by Roman emperors. These sweet fruits have nourished and delighted people for generations.
But let’s be honest, growing melons can sometimes feel like a gamble. You might end up with small, bland fruits, or worse, nothing at all! That’s where these simple, yet effective, DIY tricks come in. I’m going to share my favorite hacks that will help you grow melons easily, maximizing your yield and flavor, even in a small space. Forget complicated gardening techniques; we’re focusing on practical, budget-friendly solutions that anyone can implement. Get ready to impress your friends and family with your homegrown melon bounty!
Grow Melons Like a Pro: My Foolproof DIY Guide
Okay, melon lovers, listen up! I’m about to share my secrets for growing juicy, delicious melons right in your own backyard. Forget those bland, overpriced grocery store melons – we’re talking homegrown goodness bursting with flavor. This guide is designed to be super easy to follow, even if you’re a complete beginner. So, grab your gardening gloves, and let’s get started!
Choosing the Right Melon Variety
Before we even think about planting, we need to pick the perfect melon for your climate and taste. Here’s a quick rundown of some popular choices:
* Watermelon: A summer classic! Look for varieties like ‘Sugar Baby’ (small and early), ‘Crimson Sweet’ (classic flavor), or ‘Yellow Doll’ (unique yellow flesh).
* Cantaloupe: Sweet and aromatic. ‘Hales Best Jumbo’ is a reliable choice, or try ‘Athena’ for disease resistance.
* Honeydew: Mild and refreshing. ‘Honeycrisp’ is a popular option known for its sweetness.
* Galia: A cross between cantaloupe and honeydew, offering a unique flavor.
Important Tip: Check your local climate and growing season. Some melons need a longer, hotter summer than others. Your local nursery can give you great advice on what thrives in your area.
Preparing Your Melon Patch
Melons are sun-worshippers and heavy feeders, so proper soil preparation is key.
* Sunlight: Melons need at least 6-8 hours of direct sunlight per day. Choose a spot in your yard that gets plenty of sunshine.
* Soil: Melons prefer well-drained, sandy loam soil. If your soil is heavy clay, don’t despair! We can fix it.
* Soil Testing: A soil test is your best friend. It tells you exactly what your soil is lacking. You can usually get a soil test kit from your local extension office or garden center.
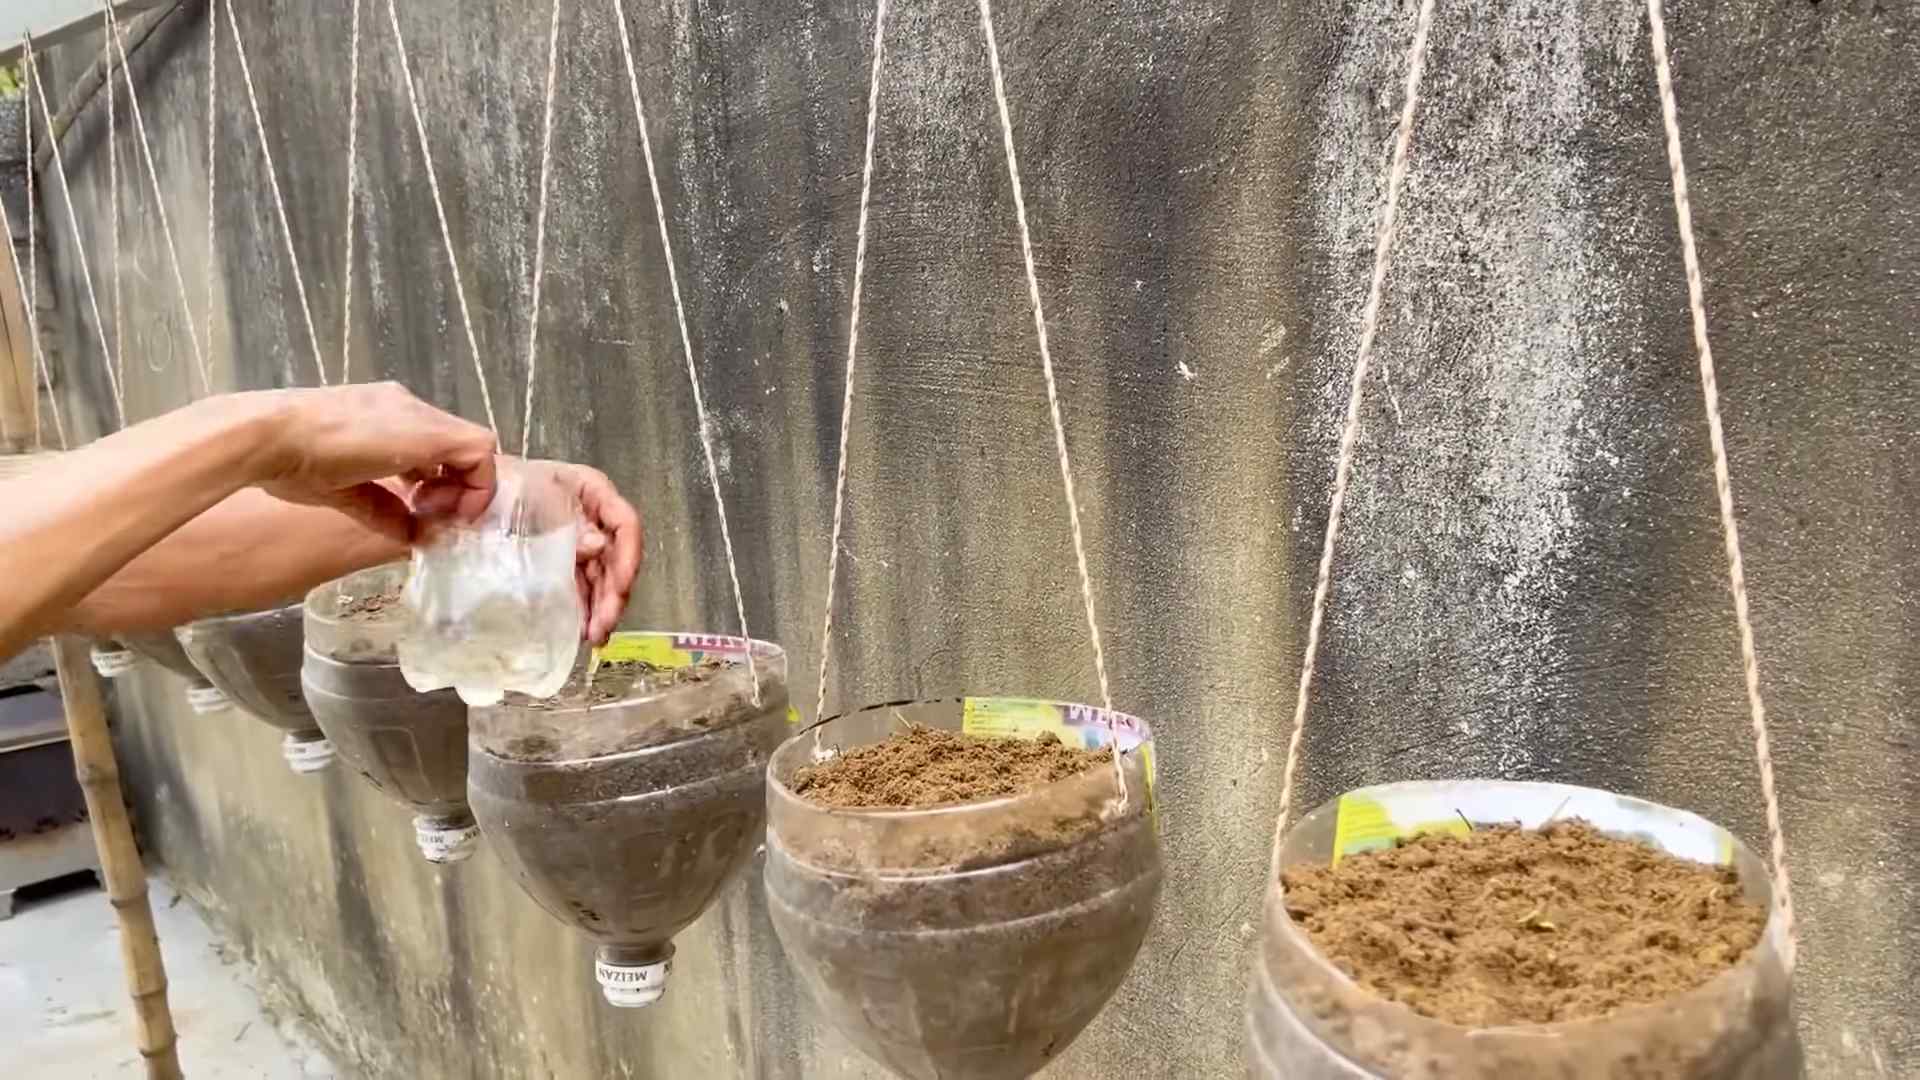
* Amending the Soil: Based on your soil test results, amend your soil with compost, aged manure, or other organic matter. This will improve drainage, fertility, and overall soil health. I usually add a generous amount of compost – about 4-6 inches worked into the top 12 inches of soil.
* pH Level: Melons prefer a soil pH between 6.0 and 6.8. If your soil is too acidic (low pH), add lime. If it’s too alkaline (high pH), add sulfur. Again, your soil test will tell you what you need to do.
* Raised Beds (Optional): If you have poor drainage or heavy clay soil, consider growing your melons in raised beds. This will improve drainage and warm the soil faster in the spring.
Planting Your Melon Seeds or Transplants
Now for the fun part – getting those melons in the ground!
* Starting Seeds Indoors (Recommended): I highly recommend starting your melon seeds indoors about 4-6 weeks before the last expected frost. This gives them a head start and protects them from early-season pests and diseases.
1. Use Seed Starting Trays or Pots: Fill them with a good quality seed starting mix.
2. Plant Seeds: Plant 2-3 seeds per cell or pot, about 1 inch deep.
3. Water Gently: Keep the soil consistently moist, but not soggy.
4. Provide Warmth: Melons need warmth to germinate. Use a heat mat or place the trays in a warm location.
5. Provide Light: Once the seedlings emerge, provide them with plenty of light. A grow light is ideal, but a sunny windowsill can also work.
6. Thin Seedlings: Once the seedlings have a few true leaves, thin them to one strong seedling per cell or pot.
* Direct Sowing (If You Have a Long Growing Season): If you live in a warm climate with a long growing season, you can direct sow melon seeds directly into the garden.
1. Wait Until the Soil is Warm: Make sure the soil temperature is at least 70°F (21°C) before planting.
2. Plant Seeds: Plant seeds about 1 inch deep, spacing them according to the variety you’re growing (check the seed packet).
3. Water Gently: Keep the soil consistently moist until the seedlings emerge.
* Transplanting Seedlings: Once the danger of frost has passed and the soil has warmed up, it’s time to transplant your seedlings into the garden.
1. Harden Off Seedlings: Before transplanting, harden off your seedlings by gradually exposing them to outdoor conditions for a week or two. Start by placing them in a sheltered location for a few hours each day, gradually increasing the amount of time they spend outdoors.
2. Prepare the Planting Holes: Dig holes that are slightly larger than the root balls of your seedlings.
3. Add Compost: Add a handful of compost to each planting hole.
4. Gently Remove Seedlings: Carefully remove the seedlings from their trays or pots, being careful not to damage the roots.
5. Plant Seedlings: Place the seedlings in the planting holes and gently backfill with soil.
6. Water Thoroughly: Water the seedlings thoroughly after planting.
7. Spacing: Space watermelon plants 2-5 feet apart, cantaloupe and honeydew plants 2-3 feet apart. Check your specific variety for recommendations.
Caring for Your Melon Plants
Now that your melons are planted, it’s time to give them the TLC they need to thrive.
* Watering: Melons need consistent watering, especially during hot, dry weather. Water deeply and regularly, aiming for about 1-2 inches of water per week. Avoid overhead watering, as this can promote fungal diseases. Drip irrigation or soaker hoses are ideal.
* Fertilizing: Melons are heavy feeders, so regular fertilization is important. Use a balanced fertilizer (e.g., 10-10-10) every 2-3 weeks. You can also side-dress with compost or aged manure.
* Weeding: Keep your melon patch free of weeds. Weeds compete with melons for water, nutrients, and sunlight. Mulching can help suppress weeds.
* Mulching: Apply a layer of mulch around your melon plants. This will help retain moisture, suppress weeds, and keep the soil cool. Straw, hay, or wood chips are good choices.
* Pest Control: Keep an eye out for common melon pests like aphids, squash bugs, and cucumber beetles. Use organic pest control methods like insecticidal soap or neem oil.
* Disease Control: Melons can be susceptible to fungal diseases like powdery mildew and downy mildew. Prevent these diseases by providing good air circulation, avoiding overhead watering, and using disease-resistant varieties. If you see signs of disease, treat with a fungicide.
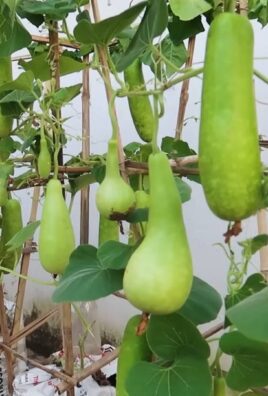
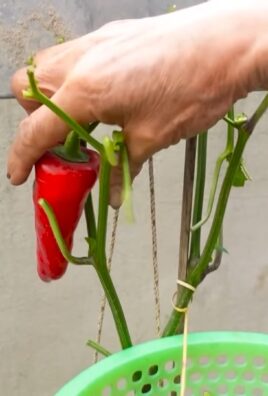
* Vine Training (Optional): If you’re short on space, you can train your melon vines to grow up a trellis. This will also improve air circulation and reduce the risk of fungal diseases.
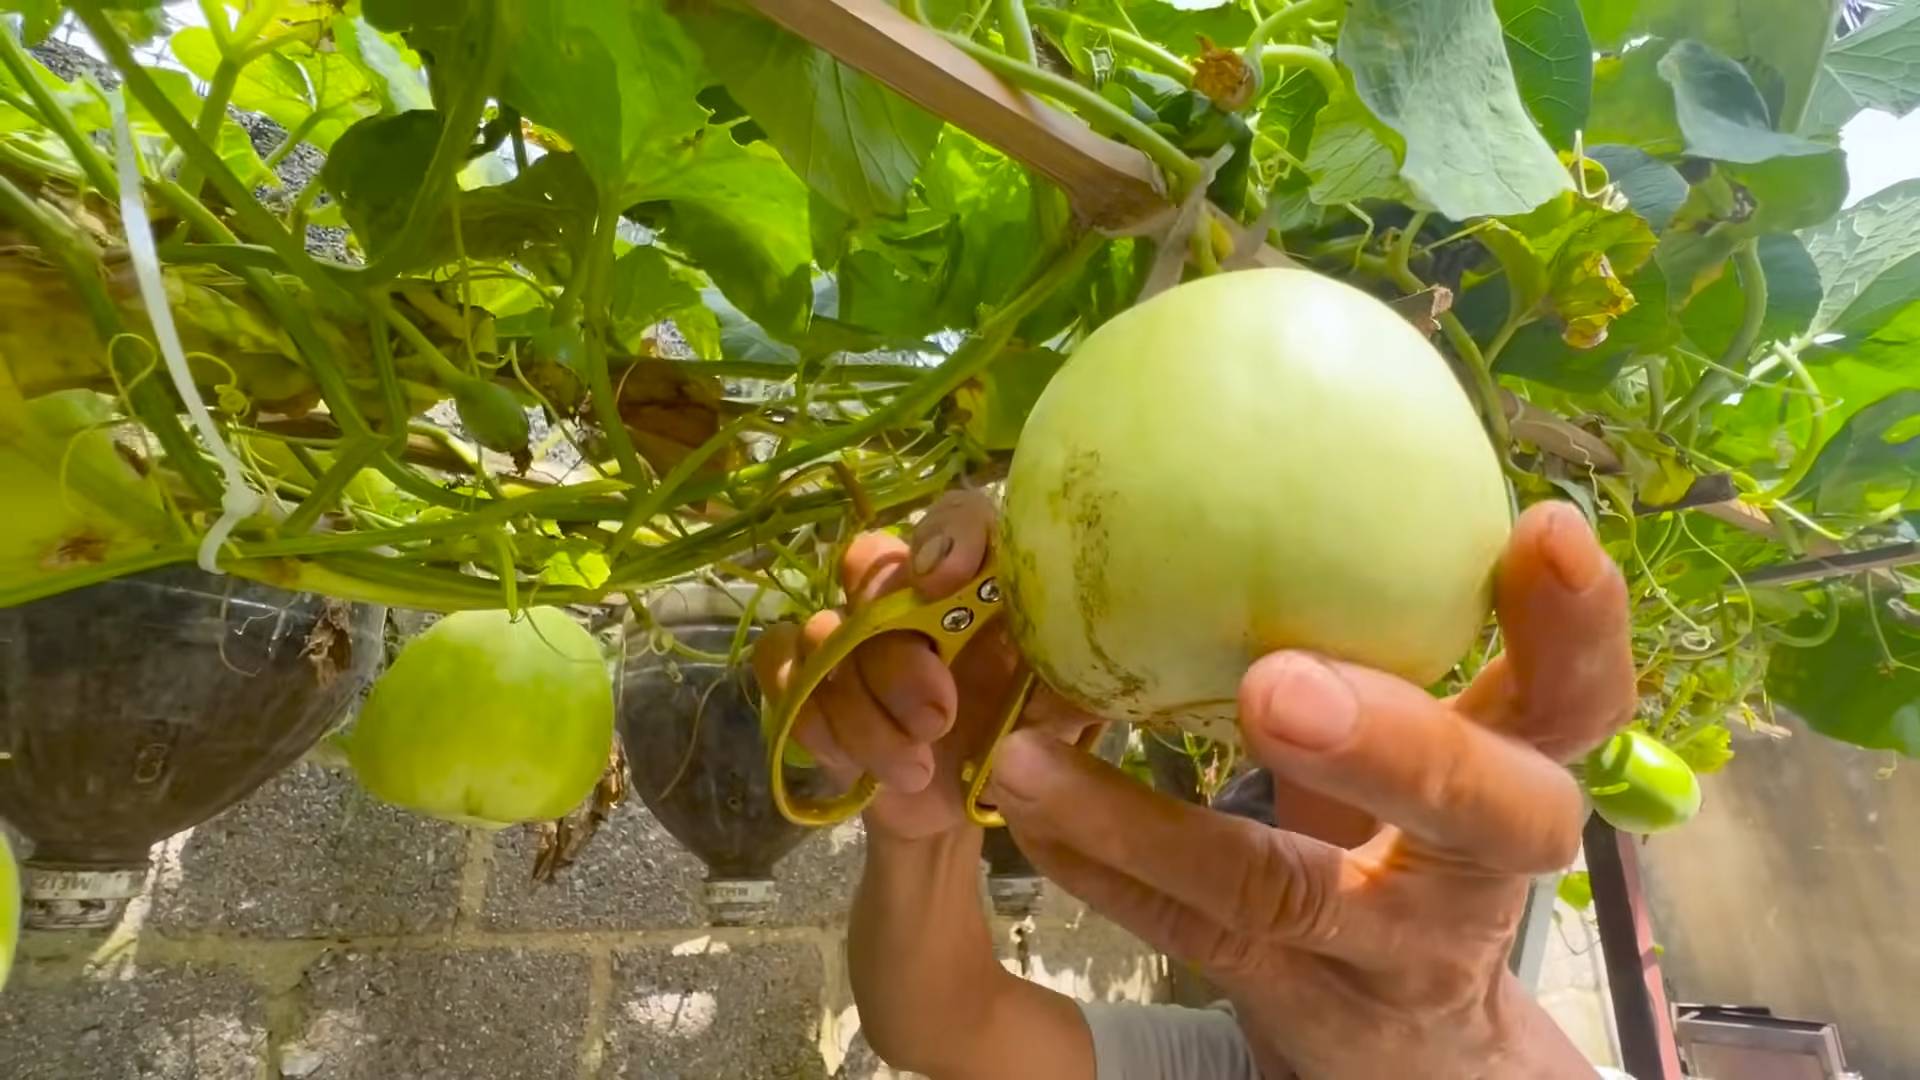
* Supporting the Fruit (For Larger Melons): As your melons grow larger, you may need to support them to prevent them from breaking off the vine. You can use slings made from pantyhose or netting to support the fruit.
Pollination: Helping Nature Along
Melons need to be pollinated in order to produce fruit. Bees are the primary pollinators, so encourage them to visit your garden by planting flowers that attract bees.
* Hand Pollination (If Necessary): If you’re not seeing a lot of bees in your garden, you may need to hand-pollinate your melons.
1. Identify Male and Female Flowers: Male flowers have a long, thin stem, while female flowers have a small, immature melon at the base.
2. Pollinate in the Morning: Pollinate the flowers in the morning, when they are most receptive.
3. Transfer Pollen: Use a small paintbrush or cotton swab to transfer pollen from the male flower to the female flower.
4. Repeat: Repeat this process for several days to ensure pollination.
Harvesting Your Melons
The moment we’ve all been waiting for – harvesting those delicious melons! Knowing when a melon is ripe can be tricky, but here are some tips:
* Watermelon:
* Thump Test: A ripe watermelon will sound hollow when you thump it.
* Ground Spot: The spot where the watermelon rests on the ground (the ground spot) should be yellow or cream-colored.
* Tendril: The tendril closest to the watermelon should be brown and dry.
* Cantaloupe:
*
Conclusion
So, there you have it! Growing melons doesn’t have to be a daunting task reserved for seasoned gardeners with acres of land. With this simple DIY trick, you can unlock the potential for a bountiful harvest of juicy, sweet melons, even in a smaller space or with limited gardening experience. This method, focusing on optimizing the soil and providing consistent support, truly is a game-changer.
Why is this a must-try? Because it addresses the two biggest challenges in melon cultivation: inconsistent watering and lack of support for the heavy fruit. By creating a well-draining, nutrient-rich environment at the base of the plant, you’re setting the stage for strong root development and vigorous growth. The support structure, whether it’s a trellis, netting, or even repurposed pantyhose, prevents the melons from resting directly on the ground, reducing the risk of rot and pest damage. This leads to healthier plants, bigger yields, and, most importantly, incredibly delicious melons.
But don’t stop there! Feel free to experiment with variations to suit your specific needs and preferences. For example, if you live in a particularly hot climate, consider using a shade cloth to protect your developing melons from scorching sun. You could also try companion planting with herbs like basil or marigolds to deter pests naturally. Another variation is to use different types of organic matter in your soil mix. Compost, well-rotted manure, and even coffee grounds can all contribute valuable nutrients.
For those with limited space, consider growing smaller melon varieties like cantaloupe or personal-sized watermelons. These are better suited for container gardening and can still benefit greatly from this DIY support system. You can even adapt the support structure to fit your container size, using bamboo stakes or a small tomato cage.
The key takeaway here is that growing melons is achievable for everyone. This DIY trick empowers you to take control of your garden and enjoy the satisfaction of harvesting your own homegrown fruit. It’s a rewarding experience that connects you with nature and provides you with a healthy, delicious treat.
We wholeheartedly encourage you to give this DIY trick a try. We’re confident that you’ll be amazed by the results. And once you’ve experienced the joy of biting into a perfectly ripe, homegrown melon, we want to hear all about it! Share your experiences, photos, and any variations you’ve tried in the comments below. Let’s build a community of melon-growing enthusiasts and learn from each other’s successes. Let’s all learn how to grow melons easily!
Frequently Asked Questions (FAQ)
What type of soil is best for growing melons?
Melons thrive in well-draining, fertile soil that is rich in organic matter. A slightly acidic to neutral pH (between 6.0 and 7.0) is ideal. Amend your soil with compost, well-rotted manure, or other organic materials to improve drainage, fertility, and water retention. Avoid heavy clay soils, as they can become waterlogged and lead to root rot. If you have clay soil, consider growing your melons in raised beds or containers with a specially formulated potting mix.
How often should I water my melon plants?
Consistent watering is crucial for melon growth, especially during fruit development. Water deeply and regularly, aiming to keep the soil consistently moist but not waterlogged. The frequency of watering will depend on your climate, soil type, and the size of your plants. As a general rule, water deeply every 2-3 days, or more often during hot, dry weather. Use a soaker hose or drip irrigation to deliver water directly to the roots and avoid wetting the foliage, which can increase the risk of fungal diseases. Reduce watering slightly as the melons ripen to concentrate their sugars and enhance their flavor.
What kind of support structure should I use for my melons?
The type of support structure you use will depend on the size and weight of your melon variety. For smaller melons like cantaloupe or personal-sized watermelons, a simple trellis or tomato cage may suffice. For larger watermelons, you’ll need a sturdier support system, such as a strong trellis or netting. You can also use repurposed materials like old pantyhose or burlap sacks to create slings for individual melons. The key is to ensure that the support structure is strong enough to bear the weight of the developing fruit and that it provides adequate airflow around the melons to prevent rot.
How do I know when my melons are ripe?
Determining when a melon is ripe can be tricky, but there are a few telltale signs to look for. For watermelons, check the underside of the melon where it rests on the ground. This spot, known as the ground spot, should turn from white to a creamy yellow color. You can also thump the melon; a ripe watermelon will have a deep, hollow sound. For cantaloupes, the stem should slip easily from the vine when the melon is ripe. The melon will also have a fragrant aroma and a slightly softened rind. Honeydew melons are ripe when the rind turns a creamy yellow color and the blossom end is slightly soft to the touch.
What are some common pests and diseases that affect melon plants, and how can I prevent them?
Common pests that affect melon plants include aphids, squash bugs, and vine borers. You can prevent these pests by using row covers, hand-picking them off the plants, or applying insecticidal soap or neem oil. Common diseases include powdery mildew, downy mildew, and fusarium wilt. To prevent these diseases, ensure good air circulation around your plants, avoid overhead watering, and apply a fungicide if necessary. Choose disease-resistant melon varieties whenever possible. Crop rotation can also help to prevent soilborne diseases.
Can I grow melons in containers?
Yes, you can absolutely grow melons in containers, especially smaller varieties like cantaloupe or personal-sized watermelons. Choose a large container (at least 20 gallons) with good drainage. Use a high-quality potting mix and amend it with compost or other organic matter. Provide a support structure for the vines to climb on. Water regularly and fertilize every 2-3 weeks with a balanced fertilizer. Place the container in a sunny location that receives at least 6-8 hours of sunlight per day.
How can I improve the sweetness of my melons?
Several factors can influence the sweetness of your melons. First, choose a melon variety that is known for its sweetness. Second, ensure that your plants receive adequate sunlight. Third, water consistently during fruit development, but reduce watering slightly as the melons ripen to concentrate their sugars. Fourth, fertilize with a fertilizer that is high in potassium, which promotes fruit development and sweetness. Finally, harvest your melons at the peak of ripeness.
What is the best time of year to plant melons?
Melons are warm-season crops that require a long growing season. Plant them after the last frost when the soil has warmed to at least 60°F (15°C). In most regions, this is typically in late spring or early summer. You can start melon seeds indoors 4-6 weeks before the last frost to get a head start on the growing season. Harden off the seedlings before transplanting them outdoors.
How do I harden off melon seedlings before transplanting them?
Hardening off is the process of gradually acclimating seedlings to outdoor conditions before transplanting them. This helps to prevent transplant shock and ensures that the seedlings are strong enough to survive in the garden. Start by placing the seedlings outdoors in a sheltered location for a few hours each day, gradually increasing the amount of time they spend outdoors over the course of a week or two. Protect the seedlings from direct sunlight, wind, and frost. Reduce watering slightly during the hardening-off process.
What are some good companion plants for melons?
Companion planting can help to deter pests, attract beneficial insects, and improve the overall health of your melon plants. Good companion plants for melons include basil, marigolds, nasturtiums, and radishes. Basil repels aphids and other pests. Marigolds deter nematodes and other soilborne pests. Nasturtiums attract beneficial insects like ladybugs and lacewings. Radishes can help to break up the soil and improve drainage. Avoid planting melons near potatoes or other members of the nightshade family, as they can compete for nutrients.

Leave a Comment