
Cupcake liner crafts: Who knew those humble little paper cups could be transformed into so much more than just vessels for delicious treats? I’m always amazed by the sheer creativity people unleash with everyday items, and cupcake liners are no exception! From adorable decorations to surprisingly elegant embellishments, the possibilities are truly endless.
While the modern cupcake liner is a relatively recent invention, the idea of using paper to contain food dates back centuries. Think of ancient Chinese paper lanterns or the delicate paper wrappings used in traditional Japanese sweets. These early examples showcase a long-standing appreciation for the beauty and practicality of paper in culinary and decorative arts.
But why should you dive into the world of cupcake liner crafts? Well, for starters, it’s an incredibly budget-friendly way to add a personal touch to your home decor, parties, or even gifts. Plus, it’s a fantastic activity to do with kids, fostering their creativity and fine motor skills. Let’s be honest, we all have a drawer overflowing with unused cupcake liners, right? Instead of letting them gather dust, let’s transform them into something beautiful and unique! I’m excited to share some of my favorite DIY tricks and hacks that will inspire you to see these simple liners in a whole new light. Get ready to unleash your inner artist and turn those paper cups into works of art!
DIY Cupcake Liner Crafts: Unleash Your Creativity!
Hey there, fellow crafters! Get ready to dive into a world of colorful possibilities with… cupcake liners! Yes, those humble little paper cups can be transformed into amazing decorations, adorable critters, and so much more. I’m going to show you some of my favorite cupcake liner crafts that are easy, fun, and perfect for all ages. Let’s get started!
Materials You’ll Need (For Most Projects)
Before we jump into specific projects, let’s gather some essential supplies. Having these on hand will make the crafting process smooth and enjoyable.
* **Cupcake Liners:** Obviously! I recommend having a variety of colors, patterns, and sizes. Standard, mini, and jumbo liners will give you the most flexibility.
* **Scissors:** A good pair of scissors is crucial for cutting and shaping the liners.
* **Glue:** I prefer using a glue stick for most projects, as it’s less messy. However, a hot glue gun (with adult supervision, of course!) can be helpful for more intricate designs or when you need a stronger bond.
* **Markers or Colored Pencils:** For adding details and embellishments.
* **Googly Eyes:** Because googly eyes make everything better!
* **Pipe Cleaners:** Great for creating stems, legs, or other structural elements.
* **Pom-poms:** For adding texture and dimension.
* **String or Yarn:** For hanging decorations.
* **Ruler:** For precise measurements (optional, but helpful).
* **Pencil:** For sketching or tracing.
Project 1: Cupcake Liner Flowers
These flowers are super easy to make and look beautiful as decorations, on cards, or even as hair accessories!
Step-by-Step Instructions:
1. **Flatten the Liner:** Take a cupcake liner and gently flatten it out on a flat surface. You can use your fingers or a rolling pin to smooth out any creases.
2. **Fold in Half:** Fold the flattened liner in half.
3. **Fold in Half Again:** Fold it in half again, so you now have a quarter circle.
4. **Create Petal Shapes:** Using your scissors, round off the open edge of the folded liner. You can also create pointed petals by cutting a triangle shape. Experiment with different shapes to create different flower styles!
5. **Unfold and Layer:** Unfold the liner. You should now have a flower shape. To create a fuller flower, repeat steps 1-4 with several more liners.
6. Layer and Glue: Layer the flower shapes on top of each other, slightly offsetting the petals. Glue the layers together in the center.
7. **Add a Center:** Glue a pom-pom, button, or sequin in the center of the flower to add a finishing touch. You can also draw a center with markers.
8. **Attach a Stem (Optional):** If you want to create a flower on a stem, glue a pipe cleaner to the back of the flower.
Project 2: Cupcake Liner Butterflies
These adorable butterflies are perfect for decorating a child’s room or adding a whimsical touch to any space.
Step-by-Step Instructions:
1. **Flatten and Fold:** Flatten two cupcake liners. Fold each liner in half.
2. **Create Wing Shapes:** For each folded liner, cut a decorative edge along the open side. You can create scalloped edges, pointed edges, or any other shape you like. This will be the top wing.
3. **Create Smaller Wings:** Take two more cupcake liners, flatten and fold them in half. Cut a decorative edge, but make these wings smaller than the first set. These will be the bottom wings.
4. **Assemble the Wings:** Glue the smaller wings behind the larger wings, creating a layered effect.
5. **Create the Body:** Cut a small piece of pipe cleaner and fold it in half to create the butterfly’s body. Glue the wings to the pipe cleaner body.
6. **Add Antennae:** Cut two small pieces of pipe cleaner and glue them to the top of the butterfly’s head to create antennae. You can curl the ends of the antennae around a pencil to give them a fun shape.
7. **Add Details:** Add googly eyes to the butterfly’s head. You can also decorate the wings with markers, glitter, or sequins.
Project 3: Cupcake Liner Christmas Tree
Get into the holiday spirit with this festive cupcake liner Christmas tree! It’s a great project for kids and adults alike.
Step-by-Step Instructions:
1. **Prepare the Base:** You’ll need a cone-shaped base for your tree. You can buy a styrofoam cone from a craft store, or you can make your own cone out of cardboard. I like to use cardboard because it’s more eco-friendly. Just cut a circle out of cardboard, cut a slit from the edge to the center, and then overlap the edges to form a cone. Secure with tape or glue.
2. **Flatten and Fold (Partially):** Flatten a cupcake liner. Instead of folding it completely in half, fold it so that the edges slightly overlap, creating a cone shape. Glue the overlapping edges together.
3. **Create Lots of Cones:** Repeat step 2 with lots of cupcake liners. You’ll need a lot to cover the entire cone base. I recommend using different shades of green for a more realistic look.
4. **Attach the Liners:** Starting at the bottom of the cone base, glue the folded cupcake liners to the cone, overlapping them slightly. Work your way up the cone, row by row, until the entire cone is covered.
5. **Add a Star:** Cut a star shape out of cardboard or construction paper and glue it to the top of the tree. You can also use a store-bought star ornament.
6. **Decorate:** Decorate your tree with glitter, sequins, pom-poms, or any other embellishments you like. You can even string beads or small ornaments around the tree.
Project 4: Cupcake Liner Animals
Let’s get wild and create some adorable animals using cupcake liners! I’ll show you how to make a cute little c
Hey there, fellow crafters! Get ready to dive into a world of colorful possibilities with… cupcake liners! Yes, those humble little paper cups can be transformed into amazing decorations, adorable critters, and so much more. I’m going to show you some of my favorite cupcake liner crafts that are easy, fun, and perfect for all ages. Let’s get started!
Materials You’ll Need (For Most Projects)
Before we jump into specific projects, let’s gather some essential supplies. Having these on hand will make the crafting process smooth and enjoyable.
* **Cupcake Liners:** Obviously! I recommend having a variety of colors, patterns, and sizes. Standard, mini, and jumbo liners will give you the most flexibility.
* **Scissors:** A good pair of scissors is crucial for cutting and shaping the liners.
* **Glue:** I prefer using a glue stick for most projects, as it’s less messy. However, a hot glue gun (with adult supervision, of course!) can be helpful for more intricate designs or when you need a stronger bond.
* **Markers or Colored Pencils:** For adding details and embellishments.
* **Googly Eyes:** Because googly eyes make everything better!
* **Pipe Cleaners:** Great for creating stems, legs, or other structural elements.
* **Pom-poms:** For adding texture and dimension.
* **String or Yarn:** For hanging decorations.
* **Ruler:** For precise measurements (optional, but helpful).
* **Pencil:** For sketching or tracing.
Project 1: Cupcake Liner Flowers
These flowers are super easy to make and look beautiful as decorations, on cards, or even as hair accessories!
Step-by-Step Instructions:
1. **Flatten the Liner:** Take a cupcake liner and gently flatten it out on a flat surface. You can use your fingers or a rolling pin to smooth out any creases.
2. **Fold in Half:** Fold the flattened liner in half.
3. **Fold in Half Again:** Fold it in half again, so you now have a quarter circle.
4. **Create Petal Shapes:** Using your scissors, round off the open edge of the folded liner. You can also create pointed petals by cutting a triangle shape. Experiment with different shapes to create different flower styles!
5. **Unfold and Layer:** Unfold the liner. You should now have a flower shape. To create a fuller flower, repeat steps 1-4 with several more liners.
6. Layer and Glue: Layer the flower shapes on top of each other, slightly offsetting the petals. Glue the layers together in the center.
7. **Add a Center:** Glue a pom-pom, button, or sequin in the center of the flower to add a finishing touch. You can also draw a center with markers.
8. **Attach a Stem (Optional):** If you want to create a flower on a stem, glue a pipe cleaner to the back of the flower.
Project 2: Cupcake Liner Butterflies
These adorable butterflies are perfect for decorating a child’s room or adding a whimsical touch to any space.
Step-by-Step Instructions:
1. **Flatten and Fold:** Flatten two cupcake liners. Fold each liner in half.
2. **Create Wing Shapes:** For each folded liner, cut a decorative edge along the open side. You can create scalloped edges, pointed edges, or any other shape you like. This will be the top wing.
3. **Create Smaller Wings:** Take two more cupcake liners, flatten and fold them in half. Cut a decorative edge, but make these wings smaller than the first set. These will be the bottom wings.
4. **Assemble the Wings:** Glue the smaller wings behind the larger wings, creating a layered effect.
5. **Create the Body:** Cut a small piece of pipe cleaner and fold it in half to create the butterfly’s body. Glue the wings to the pipe cleaner body.
6. **Add Antennae:** Cut two small pieces of pipe cleaner and glue them to the top of the butterfly’s head to create antennae. You can curl the ends of the antennae around a pencil to give them a fun shape.
7. **Add Details:** Add googly eyes to the butterfly’s head. You can also decorate the wings with markers, glitter, or sequins.
Project 3: Cupcake Liner Christmas Tree
Get into the holiday spirit with this festive cupcake liner Christmas tree! It’s a great project for kids and adults alike.
Step-by-Step Instructions:
1. **Prepare the Base:** You’ll need a cone-shaped base for your tree. You can buy a styrofoam cone from a craft store, or you can make your own cone out of cardboard. I like to use cardboard because it’s more eco-friendly. Just cut a circle out of cardboard, cut a slit from the edge to the center, and then overlap the edges to form a cone. Secure with tape or glue.
2. **Flatten and Fold (Partially):** Flatten a cupcake liner. Instead of folding it completely in half, fold it so that the edges slightly overlap, creating a cone shape. Glue the overlapping edges together.
3. **Create Lots of Cones:** Repeat step 2 with lots of cupcake liners. You’ll need a lot to cover the entire cone base. I recommend using different shades of green for a more realistic look.
4. **Attach the Liners:** Starting at the bottom of the cone base, glue the folded cupcake liners to the cone, overlapping them slightly. Work your way up the cone, row by row, until the entire cone is covered.
5. **Add a Star:** Cut a star shape out of cardboard or construction paper and glue it to the top of the tree. You can also use a store-bought star ornament.
6. **Decorate:** Decorate your tree with glitter, sequins, pom-poms, or any other embellishments you like. You can even string beads or small ornaments around the tree.
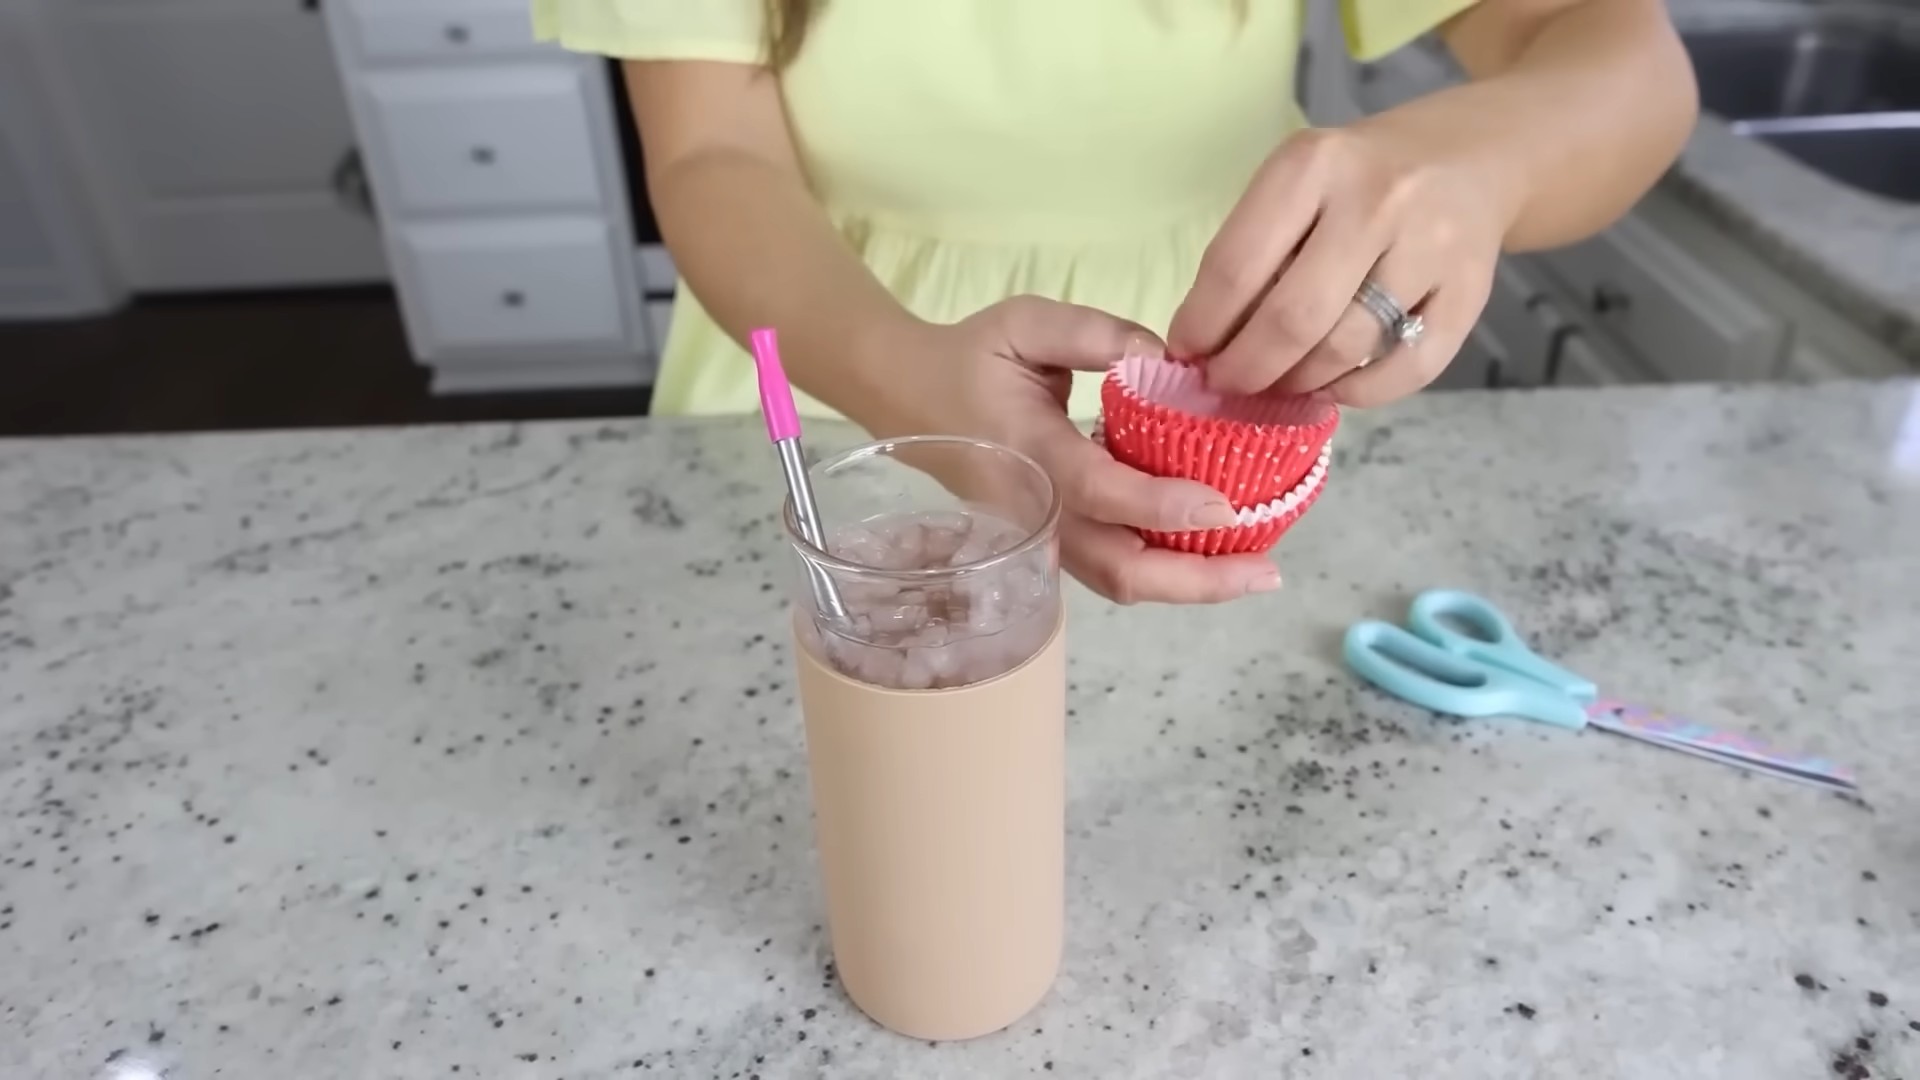
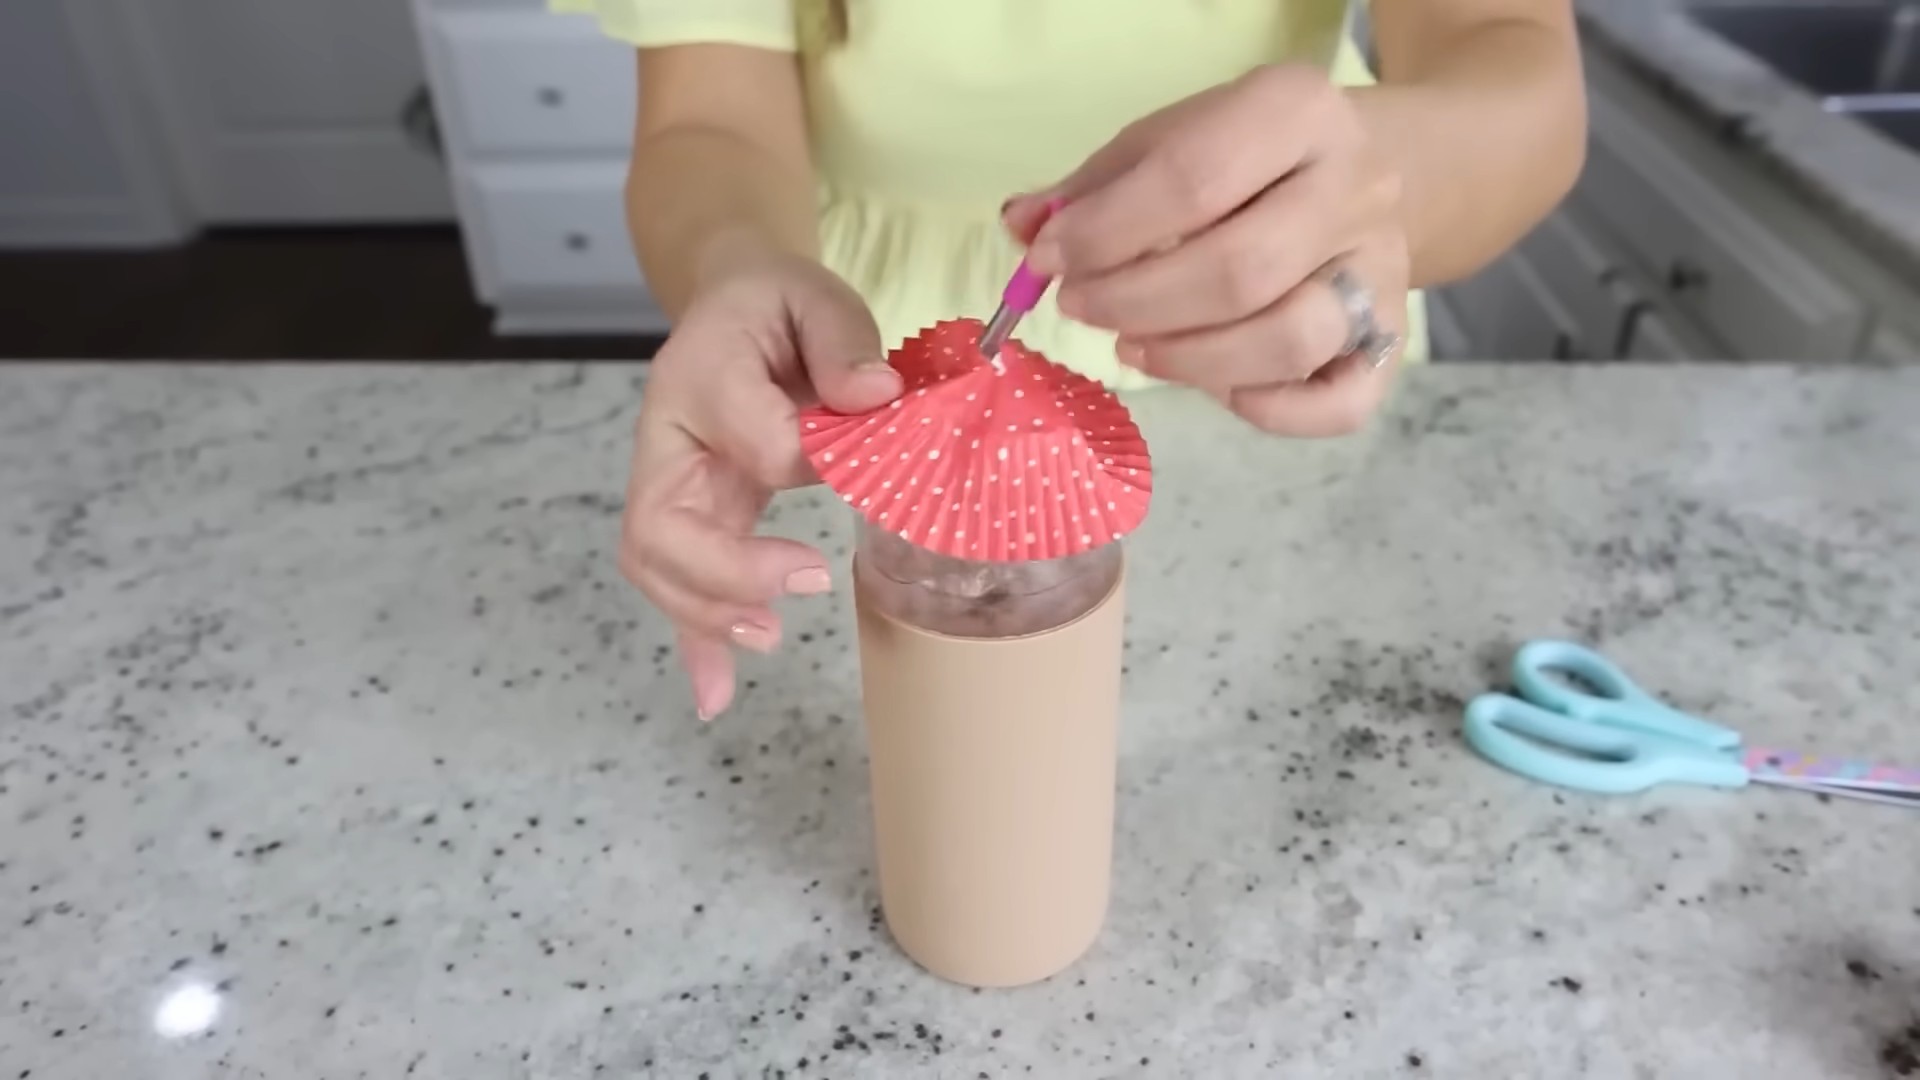
Project 4: Cupcake Liner Animals
Let’s get wild and create some adorable animals using cupcake liners! I’ll show you how to make a cute little chick, but you can adapt the same techniques to create other animals like owls, ladybugs, or even monsters!
Step-by-Step Instructions (Chick):
1. **Flatten and Shape:** Flatten a yellow cupcake liner. Gently crumple it a bit to give it some texture.
2. **Create the Head:** Flatten another yellow cupcake liner. Fold it in half. This will be the chick’s head.
3. **Attach the Head:** Glue the folded liner (the head) to the top of the crumpled liner (the body).
4. **Add Eyes:** Glue two googly eyes to the chick’s head.
5. **Create the Beak:** Cut a small diamond shape out of orange construction paper. Fold it in half to create a beak. Glue the beak below the eyes.
6. **Add Wings:** Cut two small wing shapes out of yellow construction paper. Glue them to the sides of the chick’s body.
7. **Add Feet (Optional):** Cut two small feet shapes out of orange construction paper and glue them to the bottom of the chick’s body.
8. **Embellish:** You can add more details to your chick, such as feathers made from small pieces of yellow paper or a tuft of fluff on its head.
Project 5: Cupcake Liner Garland
This garland is a simple and festive way to decorate for parties, holidays, or just to add a pop of color to your home.
Step-by-Step Instructions:
1. **Flatten and Fold (Optional):** You can either flatten the cupcake liners completely or leave them in their original cup shape. Flattening them will create a flatter, more streamlined garland, while leaving them in their cup shape will add more dimension. I personally like to flatten them slightly, but it’s totally up to you!
2. **Punch Holes:** Use a hole punch to create two holes in the top of each cupcake liner. Make sure the holes are evenly spaced.
3. **String the Liners:** Thread string or yarn through the holes in the cupcake liners, creating a garland. You can alternate colors and patterns to create a visually appealing design.
4. **Space the Liners:** Adjust the spacing between the liners to create the desired look. You can bunch them together for a fuller garland or space them further apart for a more delicate look.
5. **Hang and Enjoy:** Hang your garland and enjoy your colorful creation!
Tips and Tricks for Cupcake Liner Crafts
* Experiment with Different Materials: Don’t be afraid to use other materials in your cupcake liner crafts, such as glitter, paint, fabric scraps, or even natural elements like leaves and twigs.
* Use Different Sizes and Shapes: Cupcake liners come in a variety of sizes and shapes. Experiment with different combinations to create unique and interesting designs.
* Get Creative with Cutting: Try different cutting techniques to create
Conclusion
So, there you have it! Transforming simple cupcake liners into stunning decorations and delightful crafts is not just a fun activity; it’s a budget-friendly, eco-conscious way to unleash your creativity. This DIY trick is a must-try for anyone looking to add a personal touch to their home decor, party decorations, or even create unique gifts. Forget expensive store-bought embellishments – with a little imagination and a stack of cupcake liners, the possibilities are truly endless.
Why is this a must-try? Because it’s incredibly versatile. From elegant paper flowers that can adorn a wedding cake to whimsical garlands that brighten up a child’s room, cupcake liners offer a surprising range of applications. It’s also a fantastic way to involve children in crafting, fostering their artistic skills and providing hours of engaging entertainment. Plus, repurposing cupcake liners reduces waste and gives you a sense of accomplishment knowing you’re creating something beautiful from something so simple.
Looking for suggestions or variations? Absolutely! Consider experimenting with different sizes, colors, and patterns of cupcake liners. Metallic liners add a touch of glamour, while patterned liners bring a playful vibe. Try layering multiple liners to create depth and dimension in your crafts. For a more durable finish, you can lightly coat your finished creations with a sealant spray. You can also incorporate other craft supplies like glitter, beads, sequins, and paint to further personalize your projects. For example, create miniature hot air balloons by attaching a small basket to a cluster of cupcake liner “balloons,” or craft adorable animals by shaping and gluing liners together. Don’t be afraid to think outside the box and let your imagination run wild!
We especially encourage you to explore the world of cupcake liner crafts for seasonal decorations. Imagine crafting delicate snowflakes for winter, vibrant sunflowers for summer, or spooky bats for Halloween – all from humble cupcake liners! Themed parties become even more special with handmade decorations that perfectly match the occasion.
But the best part of all this is the joy of creating something unique and beautiful with your own hands. It’s a chance to disconnect from screens, reconnect with your inner artist, and produce something tangible that you can be proud of.
So, what are you waiting for? Gather your cupcake liners, grab your glue, and get crafting! We’re confident that you’ll be amazed at what you can create. And most importantly, we want to hear about your experience! Share your cupcake liner creations with us on social media using [Your Hashtag Here]. We can’t wait to see what you come up with! Let’s inspire each other and spread the joy of DIY crafting.
Frequently Asked Questions (FAQ)
What kind of cupcake liners work best for crafts?
The best cupcake liners for crafts are generally the paper or parchment variety. These are easy to fold, cut, and glue. Foil liners can be used, but they are more difficult to work with and may not hold their shape as well. Silicone liners are typically not suitable for crafting as glue doesn’t adhere well to them and they are designed for baking, not crafting. Consider the project you’re undertaking when choosing your liners. For example, if you want to paint the liners, white or light-colored paper liners are ideal. For a more textured look, try using pleated liners.
How do I prevent cupcake liners from tearing when I’m working with them?
Delicate handling is key! When unfolding or shaping cupcake liners, do so gently to avoid tearing. If you’re using older liners, they may be more brittle and prone to tearing. Consider lightly misting the liners with water before working with them; this can make them more pliable and less likely to tear. However, be careful not to over-wet them, as this can weaken the paper. Also, use sharp scissors or craft knives for clean cuts, which will prevent jagged edges that can lead to tearing.
What type of glue is best for cupcake liner crafts?
The best type of glue depends on the specific project and the materials you’re using. For most paper-to-paper applications, a standard craft glue or glue stick works well. Hot glue is a good option for projects that require a stronger bond or for attaching heavier embellishments. However, be careful when using hot glue, especially with children, as it can cause burns. For more delicate projects, consider using a liquid adhesive that dries clear. Always test the glue on a scrap piece of cupcake liner before applying it to your project to ensure it doesn’t bleed through or damage the paper.
Can I paint or color cupcake liners?
Yes, you can definitely paint or color cupcake liners! Watercolors, acrylic paints, and markers all work well. If you’re using watercolors, be mindful that they can make the paper more delicate, so apply them sparingly. Acrylic paints provide more vibrant colors and are more durable. Markers are great for adding fine details and patterns. Before painting or coloring, flatten the cupcake liners and allow them to dry completely before using them in your crafts. You can also use spray paint for a quick and even coat of color, but be sure to do this in a well-ventilated area.
How do I store my finished cupcake liner crafts?
Proper storage is essential to keep your cupcake liner crafts looking their best. Store them in a cool, dry place away from direct sunlight, which can fade the colors. If you’ve created 3D crafts, such as flowers or animals, consider storing them in a box or container to protect them from being crushed. For flat crafts, like garlands or wall decorations, you can store them in a folder or portfolio. If you live in a humid climate, you may want to add a desiccant packet to the storage container to absorb moisture and prevent the paper from warping.
Are there any safety precautions I should take when crafting with cupcake liners?
Yes, safety should always be a priority when crafting. If you’re using sharp tools like scissors or craft knives, always supervise children and teach them how to use the tools safely. When using hot glue, be careful to avoid burns. Work in a well-ventilated area if you’re using spray paint or other adhesives with strong fumes. Always wash your hands after crafting, especially if you’ve been using paints or glues. And most importantly, have fun and be creative!
Can I use cupcake liner crafts for commercial purposes?
Whether you can use cupcake liner crafts for commercial purposes depends on the specific liners you are using. If you are using plain, generic cupcake liners, you are generally free to use the crafts you create for commercial purposes. However, if you are using liners with copyrighted designs or patterns, you may need to obtain permission from the copyright holder before selling items made with those liners. It’s always a good idea to check the packaging or contact the manufacturer to clarify the usage rights.
Where can I find inspiration for cupcake liner crafts?
Inspiration is everywhere! Online platforms like Pinterest, Instagram, and YouTube are treasure troves of cupcake liner craft ideas. Search for “cupcake liner crafts” or related terms to discover a wide range of projects, from simple decorations to intricate sculptures. Craft blogs and websites also offer tutorials and inspiration. Don’t be afraid to experiment and put your own spin on existing ideas. And remember, the best inspiration often comes from your own imagination!
Leave a Comment