
Grow Celery Easily
Have you ever dreamt of enjoying crisp, homegrown celery straight from your garden? I know I have! For years, I thought growing celery was a complicated, almost impossible task, reserved for experienced gardeners. But let me tell you, after discovering a few simple grow celery easily tricks, I’ve been harvesting delicious stalks all season long. This article is all about sharing those secrets with you – transforming the seemingly daunting task of celery cultivation into a rewarding and surprisingly simple home gardening project.
The history of celery is fascinating! Originally cultivated for its medicinal properties, celery’s journey from ancient Roman times to our modern-day kitchens is a testament to its enduring appeal. But let’s be honest, the real reason we want to learn how to grow celery easily is the incredible taste and freshness of homegrown produce. Nothing beats the satisfying crunch of a celery stalk you’ve nurtured yourself, free from pesticides and brimming with flavor.
Why You Need These DIY Celery Growing Hacks
In today’s fast-paced world, many of us crave a connection to nature and the satisfaction of growing our own food. Learning how to grow celery easily allows you to achieve this, even with limited space or gardening experience. These DIY tricks will empower you to overcome common challenges, such as slow growth and pests, ensuring a bountiful harvest. Plus, imagine the pride of serving your family and friends celery you’ve grown yourself – it’s a conversation starter and a delicious testament to your green thumb!
So, are you ready to embark on this rewarding journey? Let’s dive into the simple yet effective techniques that will help you grow celery easily and enjoy the fruits (or rather, stalks!) of your labor.
Growing Hot Peppers: A Beginner’s Guide
Growing your own hot peppers is incredibly rewarding! It’s easier than you think, and the flavor of fresh, homegrown peppers is unbeatable. This guide will walk you through the process, step-by-step.
Phase 1: Planning and Preparation
- Choose your pepper variety: Research different types of hot peppers. Consider factors like heat level (Scoville units), plant size, and growing season. Beginner-friendly options include jalapeños, serranos, or poblanos. Don’t jump straight into ghost peppers unless you’re experienced!
- Source your seeds or seedlings: You can buy pepper seeds online, at garden centers, or even save seeds from peppers you’ve already eaten (make sure they’re from a healthy plant). Seedlings are a faster option, giving you a head start.
- Select a location: Hot peppers need at least six to eight hours of direct sunlight per day. Choose a sunny spot in your garden or on your patio. Consider the wind – a sheltered location is best.
- Prepare the soil: Hot peppers thrive in well-drained, fertile soil. Amend your soil with compost or other organic matter to improve drainage and nutrient content. A soil pH between 6.0 and 7.0 is ideal.
- Gather your supplies: You’ll need pots or seed trays (if starting from seeds), potting mix (if starting indoors), gardening gloves, watering can, and possibly fertilizer.
Phase 2: Starting Seeds (If Applicable)
- Fill your seed trays or pots: Use a high-quality seed-starting mix. Don’t use garden soil, as it can be too dense and may contain diseases.
- Sow the seeds: Plant seeds about ¼ inch deep and about 1 inch apart. Gently cover with soil.
- Water gently: Use a spray bottle to avoid disturbing the seeds. Keep the soil consistently moist, but not soggy.
- Provide warmth and light: Place the seed trays in a warm location (around 70-80°F) with plenty of light. A sunny windowsill or a grow light is ideal. You may need a heat mat to maintain consistent warmth.
- Thin seedlings: Once seedlings have a few true leaves, thin them out, leaving the strongest plants about 2-3 inches apart. You can transplant the extras to other pots.
- Harden off seedlings: Before transplanting outdoors, gradually acclimate your seedlings to outdoor conditions over a week or two. Start by placing them outside for a few hours each day, gradually increasing the time.
Phase 3: Transplanting and Growing
- Prepare the planting holes: Dig holes slightly larger than the root balls of your seedlings or the size of your starter pots. Space plants 12-18 inches apart, depending on the variety.
- Transplant carefully: Gently remove seedlings from their pots, being careful not to damage the roots. Plant them in the prepared holes, covering the roots with soil.
- Water thoroughly: Water deeply after transplanting to help the plants settle in.
- Mulch around the plants: Apply a layer of mulch (straw, wood chips, etc.) to help retain moisture, suppress weeds, and regulate soil temperature.
- Water regularly: Water deeply and regularly, especially during dry periods. Check the soil moisture before watering; don’t overwater.
- Fertilize as needed: Use a balanced fertilizer according to package directions. Over-fertilizing can be harmful, so follow instructions carefully. A slow-release fertilizer is a good option.
- Stake taller varieties: Some pepper plants can grow quite tall and may need staking to prevent them from falling over, especially in windy conditions.
- Monitor for pests and diseases: Regularly inspect your plants for signs of pests or diseases. Address any problems promptly using appropriate methods (organic pest control is preferred).
Phase 4: Harvesting and Enjoying
- Harvest at the right time: Peppers are ready for harvest when they reach their mature size and color. The color will vary depending on the variety. Some peppers will turn red, others orange or yellow.
- Harvest carefully: Use sharp scissors or a knife to cut the peppers from the plant, leaving a short stem attached.
- Store properly: Store harvested peppers in a cool, dry place. You can also freeze them for later use.
- Enjoy your homegrown peppers! Use them in your favorite recipes, salsas, or sauces. Remember to wash your hands thoroughly after handling hot peppers, especially before touching your eyes or face.
Tips for Success:
- Start seeds indoors 6-8 weeks before the last expected frost. This gives them a head start and increases your chances of a successful harvest.
- Provide adequate support for your plants. This is especially important for larger varieties.
- Don’t be afraid to experiment. Try different varieties of hot peppers to find your favorites.
- Have fun! Growing your own hot peppers is a rewarding experience. Enjoy the process and the delicious results.
Troubleshooting:
If your pepper plants aren’t doing well, consider these possibilities: insufficient sunlight, improper watering, nutrient deficiencies, pests, or diseases. Research specific problems and solutions online or consult with a local gardening expert.
Conclusion
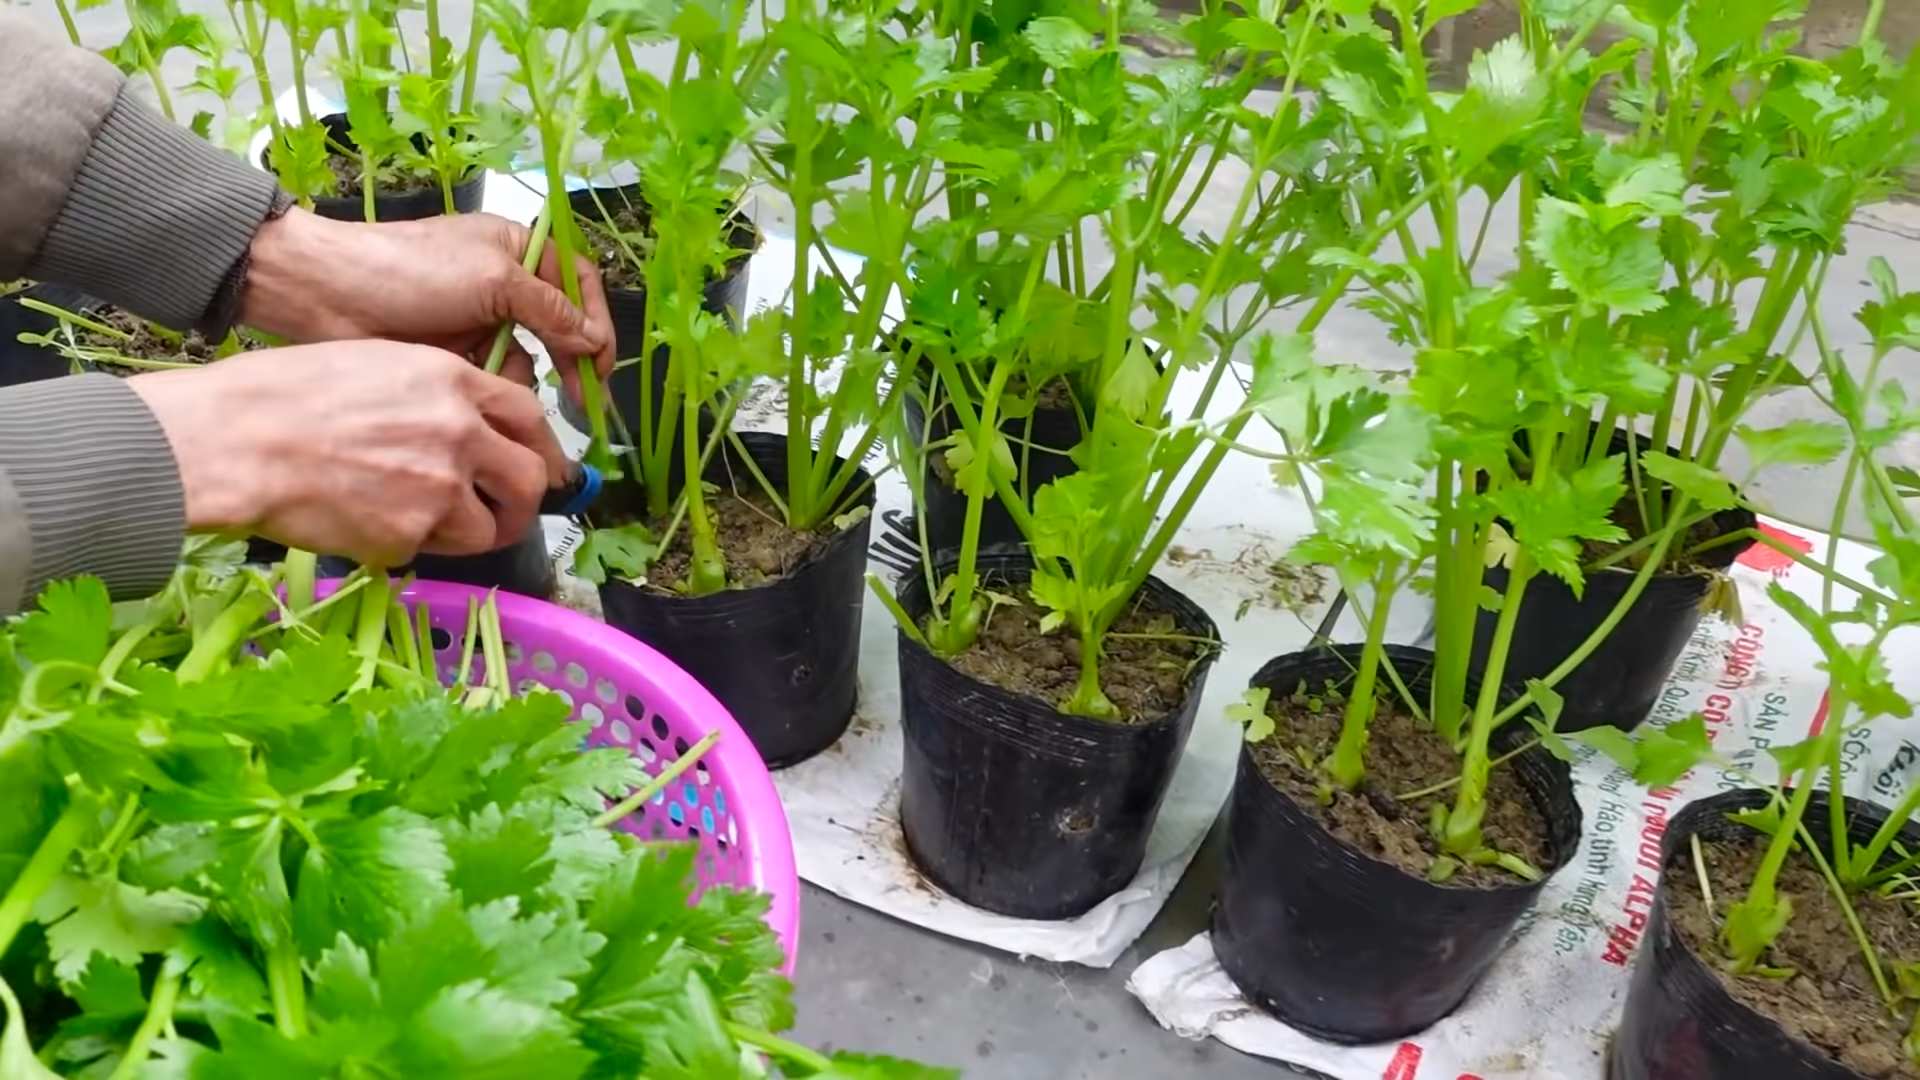
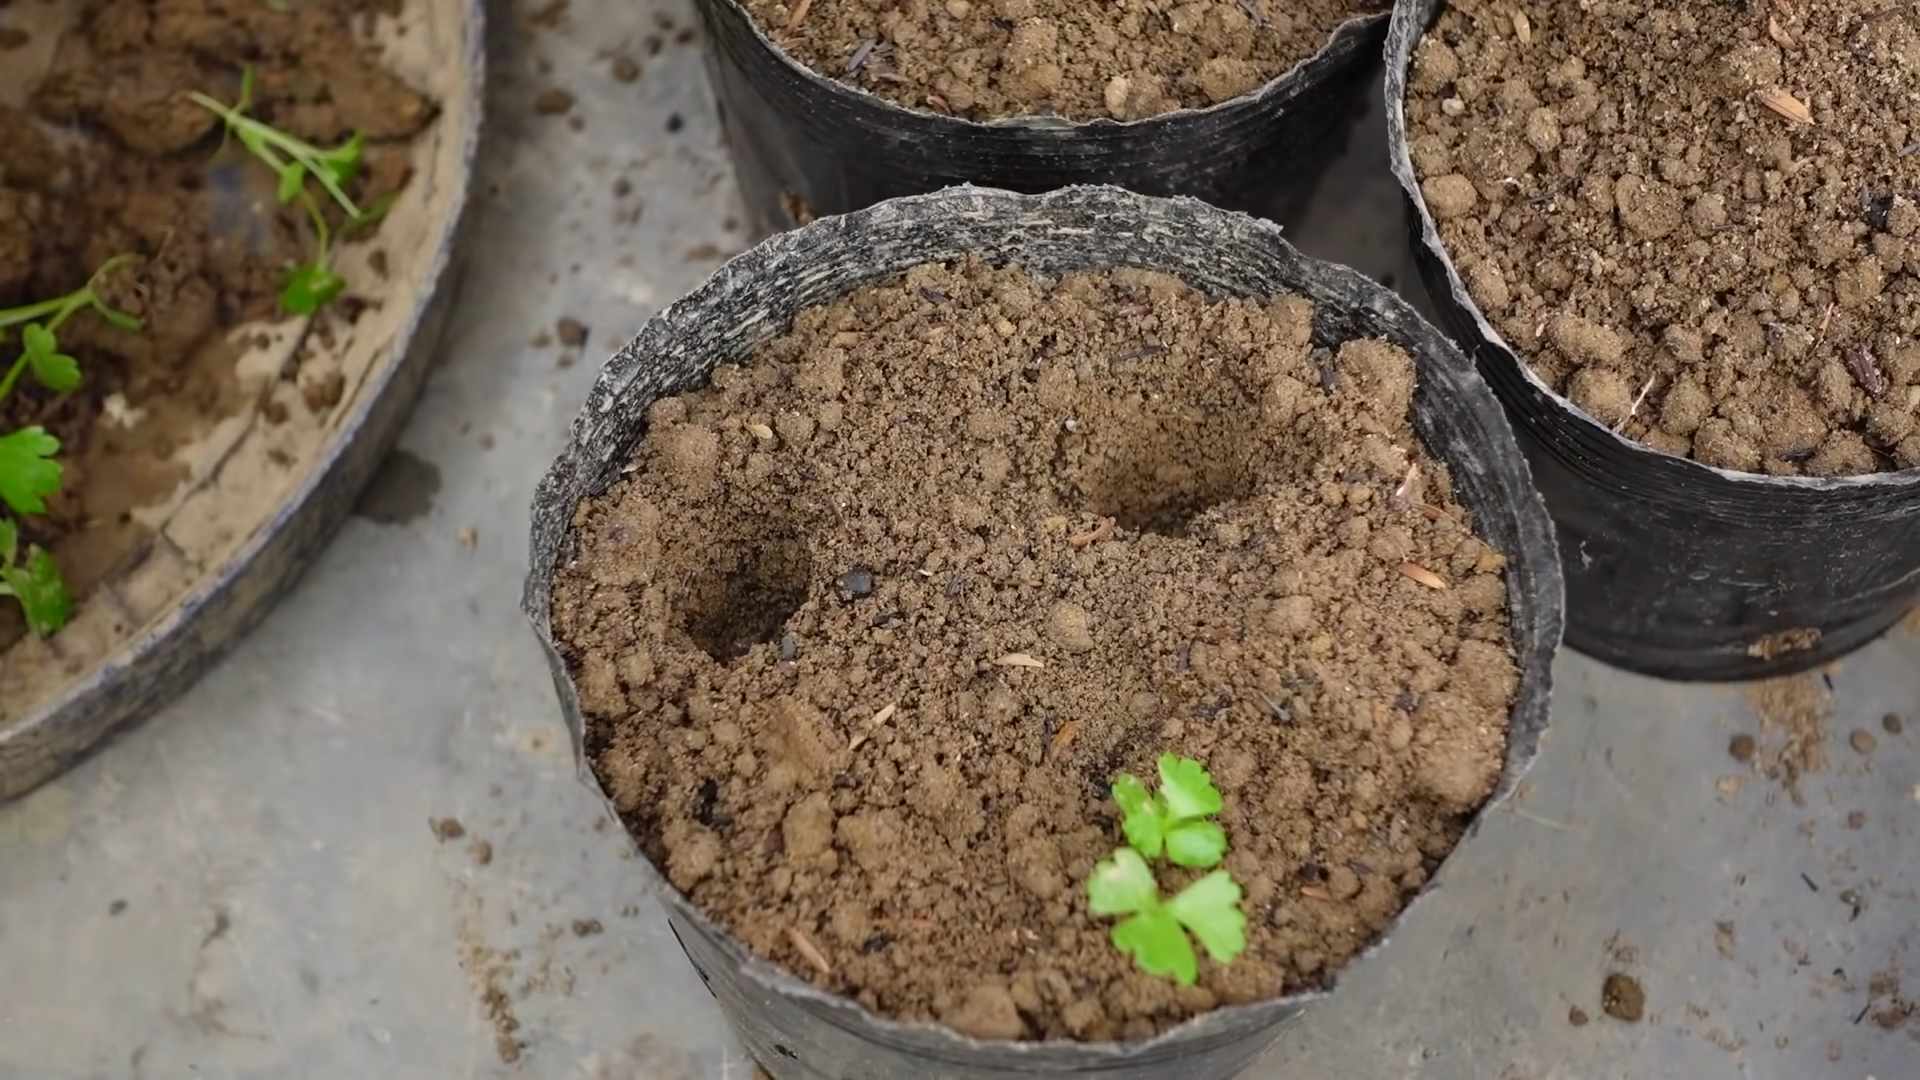
So there you have it! A simple, effective, and surprisingly satisfying method for growing your own celery. This DIY trick isn’t just about saving money on grocery bills; it’s about experiencing the incredible satisfaction of nurturing a plant from its humble beginnings to a crisp, flavorful stalk ready for your next meal. Growing celery easily is more achievable than you might think, and this method proves it. The process is remarkably straightforward, requiring minimal effort and resources, making it perfect for beginners and seasoned gardeners alike. You’ll be amazed at how quickly your celery base transforms into vibrant, healthy stalks, ready to be harvested and enjoyed. The taste? Unmatched. Nothing beats the fresh, clean flavor of homegrown celery.
Beyond the core method, there are numerous avenues for experimentation and customization. Feel free to try different types of celery – some varieties are known for their particularly robust flavor or thicker stalks. Consider experimenting with the growing medium. While water is effective, you could explore using a small pot with soil, ensuring it remains consistently moist. This might even lead to faster growth. The possibilities are endless! You could even try planting your celery outdoors during warmer months, providing it with ample sunlight and protection from harsh weather conditions. Remember to monitor the water level closely, regardless of your chosen method, as consistently moist conditions are key to success. Don’t be afraid to adjust your approach based on your environment and the celery’s growth.
Ultimately, the beauty of this grow celery easily method lies in its simplicity and adaptability. It’s a project that’s perfect for families, encouraging children to participate in the process and learn about the wonders of nature. It’s a rewarding experience that connects you to your food in a tangible way. So, what are you waiting for? Grab a celery base from your local grocery store, follow these simple steps, and embark on your own celery-growing adventure. We encourage you to share your experiences, successes, and even your challenges with us! Post pictures of your thriving celery plants on social media using #GrowCeleryEasily and tag us – we’d love to see your results and celebrate your green thumb achievements. Let’s build a community of homegrown celery enthusiasts together! The journey from base to delicious stalk is more rewarding than you can imagine.
Frequently Asked Questions
What type of celery base is best for this method?
While any celery base will work, look for one that’s firm, fresh, and free of blemishes. The base should be relatively intact, with the leaves still attached. Avoid bases that are wilted, soft, or show signs of rot.
How often should I change the water?
Changing the water every 1-2 days is recommended to prevent bacterial growth and ensure the celery remains fresh and healthy. Make sure to use fresh, clean water each time.
How long does it take for the celery to grow?
You should start seeing noticeable growth within a week or two, with new shoots emerging from the base. The time it takes to reach full maturity will depend on the variety of celery and growing conditions, but generally, you can expect to harvest your celery within 4-6 weeks.
What if my celery starts to wilt?
Wilting can be a sign of insufficient water. Ensure the water level is consistently maintained and that the base remains submerged. If the wilting persists, check for any signs of rot or disease. If necessary, trim away any damaged parts of the base.
Can I use this method to grow celery year-round?
While this method works well in most environments, it’s best suited for indoor growing, especially during colder months. In warmer climates, you might be able to grow celery outdoors, but you’ll need to provide adequate shade and protection from extreme temperatures.
What can I do with my homegrown celery?
The possibilities are endless! Use your homegrown celery in soups, stews, salads, smoothies, or as a healthy snack. Its fresh, crisp flavor will elevate any dish.
Can I use tap water?
Tap water is generally acceptable, but if your tap water contains high levels of chlorine or other chemicals, consider using filtered water instead. This will help ensure the health of your celery.
What if my celery doesn’t grow?
Several factors can affect celery growth. Ensure the base is fresh and healthy, the water is clean and changed regularly, and the environment is consistently moist but not waterlogged. If you’re still experiencing problems, consider trying a different celery base or experimenting with a small pot of soil.
Is this method suitable for children?
Absolutely! This is a fantastic project for children to participate in. It teaches them about plant growth, responsibility, and the rewards of patience. Supervise young children closely, especially when handling water.
Are there any other vegetables I can grow using a similar method?
While celery is particularly well-suited to this method, you can try similar techniques with other root vegetables like leeks or scallions. Experiment and see what works best for you!

Leave a Comment