
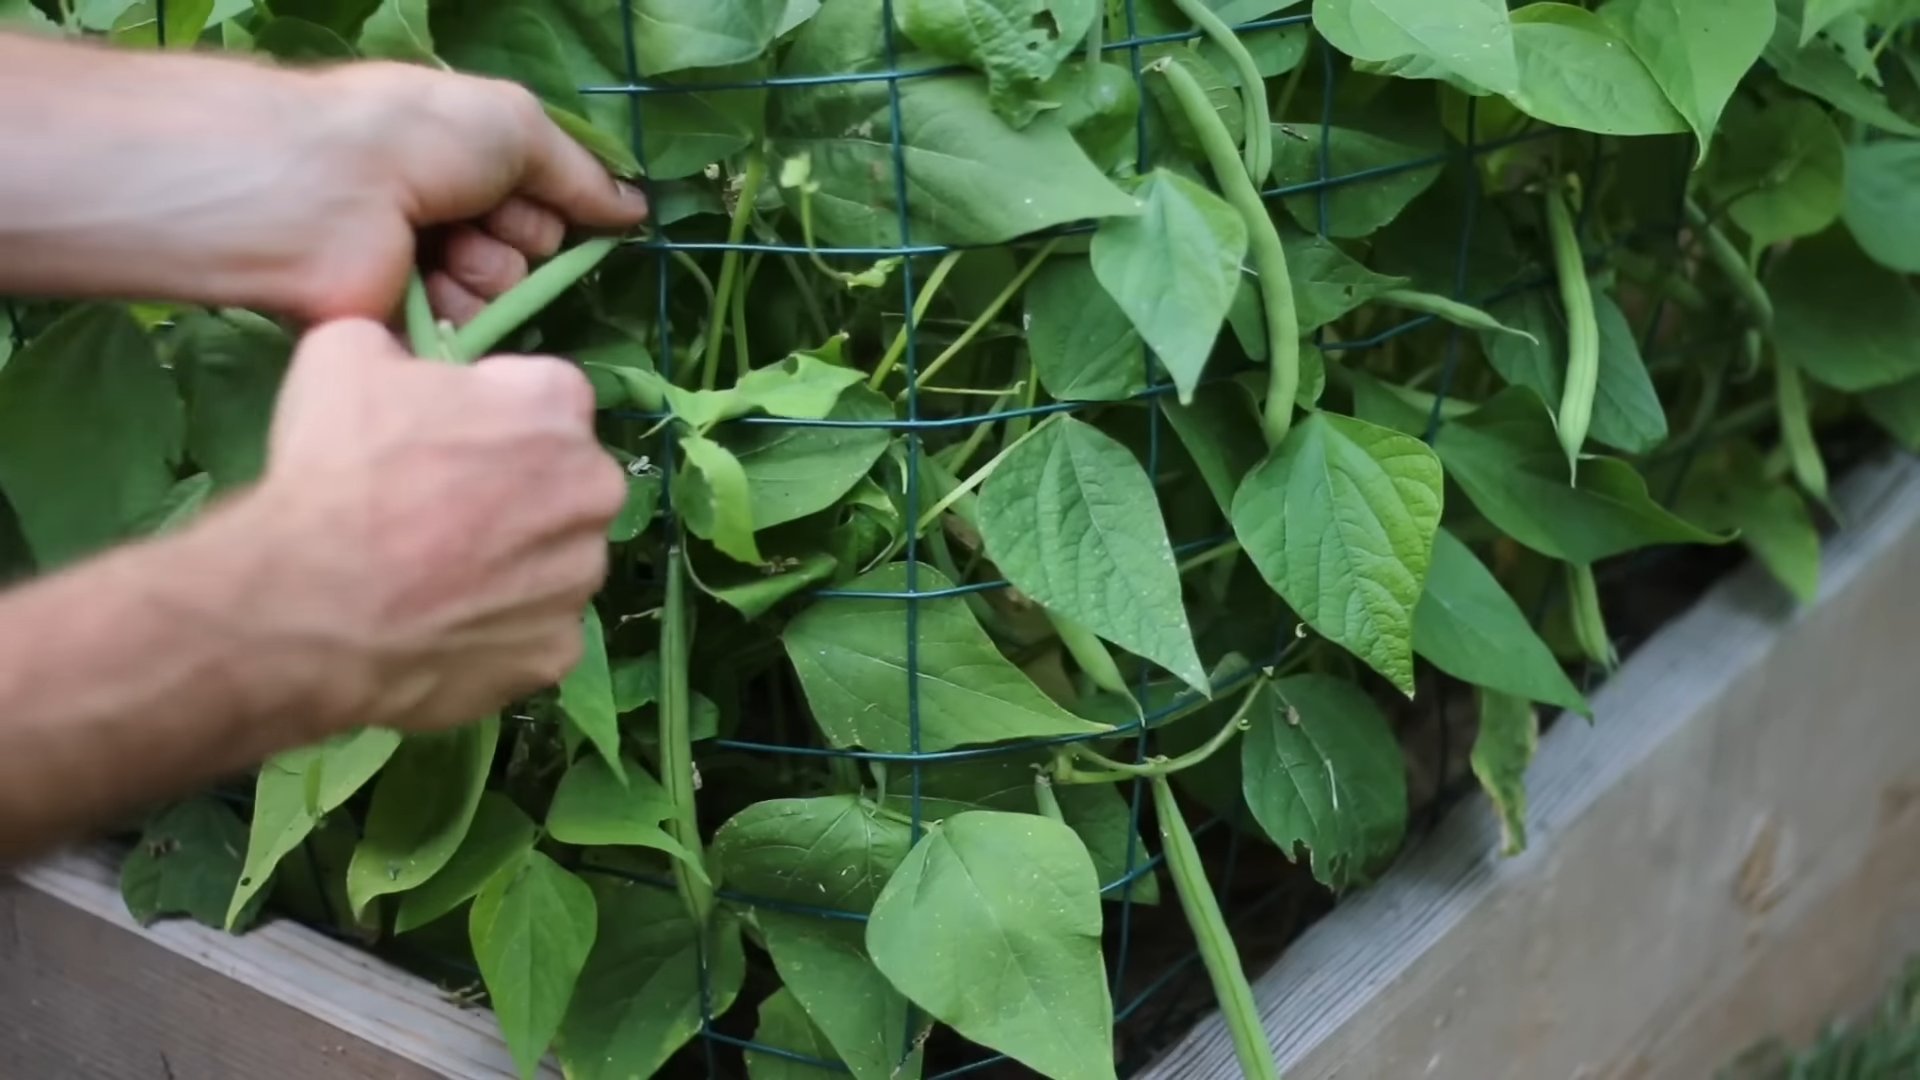
Planting Bush Beans: Your Guide to a Bountiful Harvest
Planting bush beans is easier than you think! I’ve always loved the satisfaction of growing my own food, and there’s something incredibly rewarding about harvesting fresh, homegrown beans. This simple guide will walk you through everything you need to know, from seed selection to harvesting, transforming your backyard into a thriving bean patch. Forget expensive grocery store produce; with a little know-how and these easy Planting Bush Beans tips, you’ll be enjoying delicious, healthy beans all summer long.
The history of beans is fascinating! Cultivated for thousands of years, they’ve been a staple crop across numerous cultures, providing essential nutrients and forming the basis of countless culinary traditions. From humble beginnings, beans have evolved into a wide variety of shapes, sizes, and colors, each with its unique flavor profile. And now, you can easily participate in this rich history by growing your own!
Why Grow Your Own Bush Beans?
There are so many reasons to try Planting Bush Beans! Beyond the obvious satisfaction of nurturing a plant from seed to harvest, homegrown beans are incredibly flavorful and far fresher than anything you’ll find in the supermarket. You’ll also have complete control over the growing process, ensuring your beans are free from pesticides and other harmful chemicals. Plus, it’s a fantastic way to connect with nature and teach children about the wonders of gardening. This simple act of planting can bring a sense of accomplishment and a deeper appreciation for the food we consume.
So, are you ready to embark on this rewarding journey? Let’s get started with our comprehensive guide to planting bush beans and creating your own little piece of edible paradise!
Grow Strawberries Easily: A DIY Guide
I’ve always loved the taste of freshly picked strawberries, but buying them from the store just doesn’t compare. So, I decided to try growing my own! It turned out to be easier than I thought, and now I’m sharing my method with you. This guide will walk you through everything from choosing the right plants to harvesting your delicious bounty.
Choosing Your Strawberry Plants
- Select the right variety: There are June-bearing, everbearing, and day-neutral varieties. June-bearing strawberries produce a large crop once a year, typically in June. Everbearing strawberries produce smaller crops throughout the growing season. Day-neutral strawberries produce fruit continuously throughout the growing season, making them ideal for beginners. I chose an everbearing variety for a consistent harvest.
- Buy healthy plants: Look for plants with healthy, green leaves and strong roots. Avoid plants with yellowing leaves, signs of disease, or damaged roots. I purchased mine from a local nursery, but you can also find them online.
- Consider the size: Strawberry plants are usually sold as bare root plants or in small pots. Bare root plants are cheaper but require more care during planting. Potted plants are more expensive but easier to handle.
Preparing Your Growing Space
- Choose a sunny location: Strawberries need at least six to eight hours of sunlight per day. I found a spot in my backyard that gets plenty of sun.
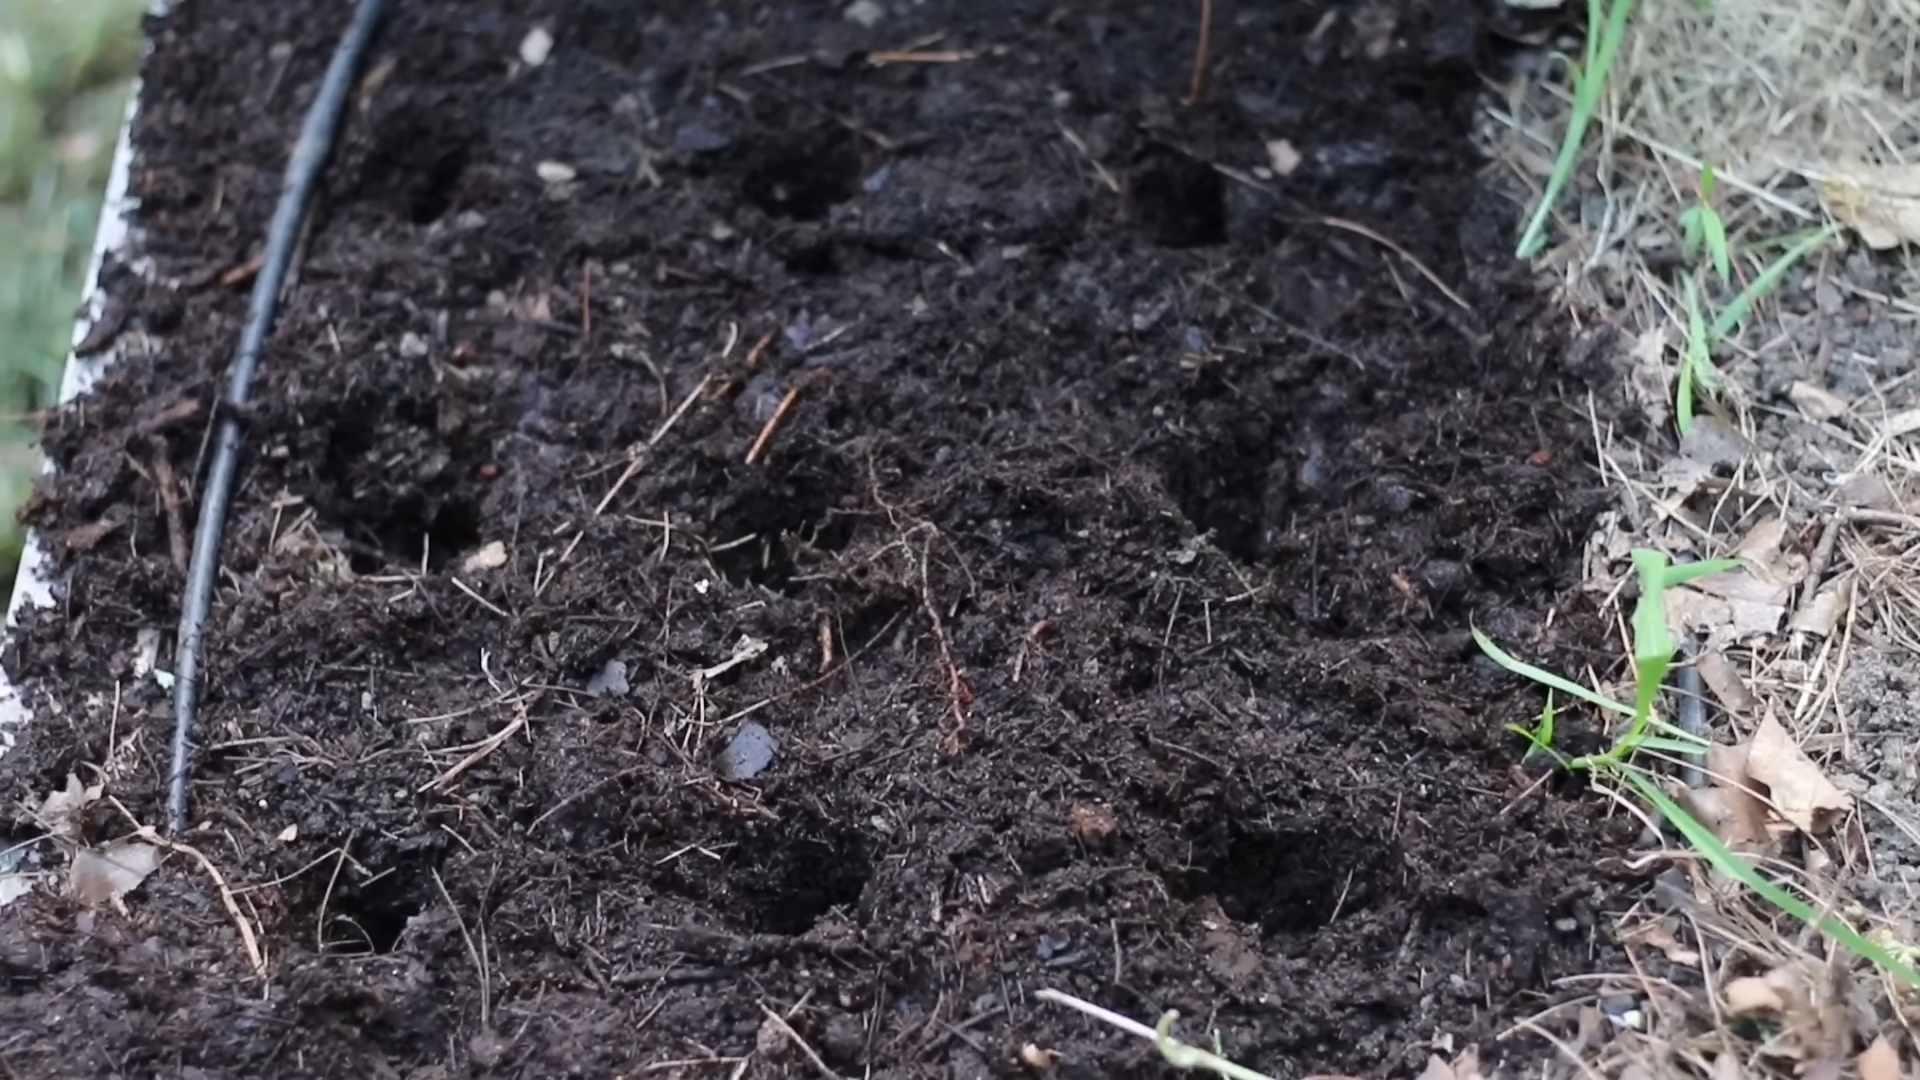
- Prepare the soil: Strawberries prefer well-drained soil that is rich in organic matter. I amended my soil with compost to improve its drainage and fertility. You can also use a soil test kit to determine your soil’s pH and nutrient levels. Strawberries prefer a slightly acidic soil pH (around 6.0-6.5).
- Amend the soil: Based on your soil test, add necessary amendments. If your soil is too acidic, add lime. If it’s too alkaline, add sulfur. If it lacks nutrients, add a balanced fertilizer. I added compost and a slow-release fertilizer.
- Clear the area: Remove any weeds, rocks, or debris from the planting area. This will ensure that your strawberry plants have enough space to grow.
Planting Your Strawberry Plants
- Dig the holes: Dig holes that are deep enough to accommodate the roots of your strawberry plants. The holes should be about the same depth as the containers your plants came in. Space the plants about 12-18 inches apart, depending on the variety.
- Plant the strawberries: Gently place the strawberry plants in the holes, making sure that the crown (the point where the leaves meet the roots) is at or slightly above the soil level. Don’t bury the crown too deep, as this can lead to rot.
- Fill the holes: Fill the holes with soil, gently firming it around the roots. Water the plants thoroughly after planting.
- Mulch around the plants: Apply a layer of mulch, such as straw or shredded bark, around the plants. This will help to retain moisture, suppress weeds, and regulate soil temperature.
Caring for Your Strawberry Plants
- Water regularly: Strawberries need consistent moisture, especially during dry periods. Water deeply and regularly, but avoid overwatering, which can lead to root rot. I water my plants about once a week, depending on the weather.
- Fertilize as needed: Feed your plants with a balanced fertilizer every few weeks during the growing season. Follow the instructions on the fertilizer package.
- Weed regularly: Keep the area around your strawberry plants free of weeds. Weeds compete with your plants for water and nutrients.
- Protect from pests and diseases: Monitor your plants for signs of pests or diseases. Take appropriate action if necessary. I use organic pest control methods whenever possible.
- Support the plants: As the plants grow, they may need support to prevent the fruit from touching the ground. You can use straw or other materials to support the plants.
Harvesting Your Strawberries
- Harvest when ripe: Strawberries are ready to harvest when they are fully colored and slightly soft to the touch. Don’t wait too long, as overripe strawberries will be mushy and less flavorful.
- Harvest gently: Gently pull the strawberries from the plant, being careful not to damage the plant or the fruit.
- Enjoy your harvest: Eat your freshly picked strawberries right away or use them in your favorite recipes. They taste so much better than store-bought strawberries!
Troubleshooting Common Problems
Dealing with Pests
Common strawberry pests include aphids, spider mites, and slugs. Regularly inspect your plants for signs of infestation. For aphids and spider mites, you can use a strong spray of water to dislodge them. For slugs, you can use beer traps or diatomaceous earth.
Dealing with Diseases
Common strawberry diseases include gray mold and leaf spot. Ensure good air circulation around your plants to prevent fungal diseases. Remove any infected leaves or fruit promptly. Consider using organic fungicides if necessary.
Dealing with Poor Fruit Production
If your strawberry plants are not producing many fruits, it could be due to several factors, including insufficient sunlight, poor soil drainage, lack of nutrients, or improper watering. Review the steps above and ensure you are addressing all the plant’s needs.
Remember to be patient!
Growing strawberries takes time and effort, but the reward of fresh, delicious fruit is well worth it. Enjoy the process and the delicious results!
Conclusion
So there you have it – a comprehensive guide to successfully planting bush beans in your garden! This DIY approach to growing your own beans offers a rewarding experience that goes beyond simply harvesting delicious vegetables. It connects you directly with the process of food production, allowing you to appreciate the journey from seed to supper. This simple yet effective method of planting bush beans is a must-try for both seasoned gardeners and enthusiastic beginners alike. The satisfaction of nurturing your plants from tiny seeds to bountiful harvests is unparalleled. You’ll not only enjoy the freshest, most flavorful beans you’ve ever tasted, but you’ll also gain a deeper understanding of the natural world and the magic of growing your own food. The minimal effort required for this planting method makes it an ideal project for busy individuals or those with limited gardening space. Plus, the versatility of bush beans allows you to experiment with different varieties and colors, adding a vibrant touch to your garden and your culinary creations.
Beyond the basic method outlined, there are numerous ways to personalize your bush bean planting experience. Experiment with companion planting, incorporating herbs like basil or marigolds to deter pests and enhance the growth of your beans. Consider using different types of soil amendments to optimize your soil’s drainage and nutrient content. You can also explore various bean varieties, from the classic green beans to yellow wax beans or even colorful heirloom varieties. The possibilities are endless! Don’t be afraid to get creative and adapt the techniques to suit your specific needs and preferences. Remember, gardening is a journey of discovery and experimentation, so embrace the learning process and enjoy the fruits (or rather, vegetables!) of your labor.
We strongly encourage you to try this DIY approach to planting bush beans and share your experience with us! Whether you’re a seasoned gardener or a complete novice, we’d love to hear about your successes, challenges, and any unique variations you’ve implemented. Share your photos and stories on social media using #DIYBushBeans and tag us – we can’t wait to see what you grow! This simple act of planting bush beans can transform your garden and your culinary landscape, bringing you closer to nature and providing you with a delicious, healthy harvest. So, grab your seeds, get your hands dirty, and embark on this rewarding gardening adventure. You won’t regret it! Start your own successful bush bean planting journey today!
Frequently Asked Questions (FAQs)
What type of soil is best for planting bush beans?
Bush beans thrive in well-drained, loose soil that is rich in organic matter. Amend heavy clay soils with compost or other organic materials to improve drainage and aeration. Sandy soils may benefit from the addition of peat moss or other organic matter to retain moisture. The ideal soil pH for bush beans is slightly acidic to neutral, ranging from 6.0 to 7.0. A soil test can help determine your soil’s pH and nutrient levels, allowing you to make necessary adjustments before planting. Proper soil preparation is crucial for successful bush bean cultivation.
How much sunlight do bush beans need?
Bush beans are sun-loving plants and require at least six to eight hours of direct sunlight per day to thrive. Choose a location in your garden that receives ample sunlight throughout the day. Insufficient sunlight can lead to poor growth, reduced yields, and increased susceptibility to diseases. Consider the sun’s path throughout the day when selecting a planting site to ensure your beans receive the optimal amount of sunlight.
How often should I water my bush beans?
Consistent watering is essential for healthy bush bean growth. Aim to keep the soil consistently moist but not waterlogged. Water deeply and less frequently rather than shallowly and often. The frequency of watering will depend on factors such as weather conditions, soil type, and plant stage. During dry periods, you may need to water more frequently. Observe the soil moisture level regularly and adjust your watering schedule accordingly. Overwatering can lead to root rot, while underwatering can result in stunted growth and reduced yields.
When is the best time to plant bush beans?
The best time to plant bush beans depends on your climate. In most regions, bush beans can be planted after the last frost, when soil temperatures have warmed to at least 60°F (15°C). You can also start seeds indoors several weeks before the last frost to get a head start on the growing season. In warmer climates, you may be able to plant bush beans throughout the growing season, with successive plantings every few weeks for a continuous harvest. Always check your local frost dates to determine the optimal planting time for your area.
What are some common pests and diseases that affect bush beans?
Bush beans can be susceptible to various pests and diseases, including aphids, bean beetles, spider mites, and fungal diseases like anthracnose and bean rust. Regularly inspect your plants for signs of pests or diseases. Implementing preventative measures such as crop rotation, companion planting, and maintaining good garden hygiene can help minimize pest and disease problems. If pests or diseases become a significant issue, consider using organic pest control methods or consulting with a local gardening expert for advice on appropriate treatment options. Early detection and prompt action are crucial for managing pest and disease problems effectively.
Can I save seeds from my bush beans for next year?
Yes, you can save seeds from your bush beans for planting the following year. Select healthy, mature pods from the best plants. Allow the pods to dry completely on the plant or in a well-ventilated area. Once dry, remove the seeds from the pods and store them in a cool, dry place in airtight containers. Proper seed saving techniques ensure the viability of your seeds for future plantings. Remember to label your seeds with the variety and year of harvest. Saving your own seeds is a rewarding aspect of gardening and allows you to continue growing your favorite bush bean varieties.
Leave a Comment