
Black corn home growing might sound like something out of a fantasy novel, but trust me, it’s a real and rewarding experience you can have right in your own backyard! Forget the same old yellow kernels; imagine the vibrant, almost mystical beauty of deep purple-black corn gracing your dinner table.
For centuries, indigenous cultures across the Americas have cultivated colorful corn varieties, including those with striking dark hues. These weren’t just for show; they often held deep cultural and spiritual significance, used in ceremonies and traditional dishes. Now, you can connect with that rich history by trying your hand at growing your own black corn.
Why should you bother with this unique project? Well, beyond the sheer novelty and visual appeal, black corn home growing offers a fantastic opportunity to learn about heirloom varieties, experiment with different growing techniques, and enjoy the satisfaction of harvesting something truly special. Plus, black corn is often packed with antioxidants, making it a healthy and delicious addition to your diet. I’m excited to share some simple DIY tricks and hacks that will help you successfully cultivate this fascinating crop, even if you’re a beginner gardener. Let’s get started and turn your garden into a vibrant tapestry of color and flavor!
Growing Black Corn at Home: A Comprehensive DIY Guide
Hey there, fellow gardening enthusiasts! Ever wanted to grow something truly unique and eye-catching in your backyard? Well, look no further than black corn! It’s not just a conversation starter; it’s also packed with antioxidants and makes for some seriously cool tortillas. I’ve been growing it for a few years now, and I’m excited to share my tips and tricks with you. Let’s dive in!
What You’ll Need
Before we get our hands dirty, let’s gather the essentials. Trust me, having everything ready beforehand will make the whole process much smoother.
* **Black Corn Seeds:** Obviously! Look for varieties like ‘Black Aztec’ or ‘Midnight Snack’. You can find them online or at specialty seed stores.
* **Well-Draining Soil:** Corn loves rich, fertile soil. If your soil is heavy clay, amend it with compost and other organic matter.
* **Compost or Aged Manure:** This will give your corn a nutrient boost.
* **Fertilizer (Optional):** A balanced fertilizer (like 10-10-10) can help boost growth, but it’s not always necessary if your soil is already healthy.
* **Gardening Tools:** Shovel, rake, hoe, and watering can or hose.
* **Row Covers (Optional):** To protect seedlings from pests and frost.
* **Stakes or Trellis (Optional):** For support, especially in windy areas.
* **Pest Control (Optional):** Insecticidal soap or neem oil for dealing with pests.
Preparing the Soil
Good soil is the foundation of a successful corn crop. Here’s how I get my soil ready:
1. **Choose a Sunny Spot:** Corn needs at least 6-8 hours of direct sunlight per day. Pick a location in your garden that gets plenty of sunshine.
2. **Clear the Area:** Remove any weeds, rocks, or debris from the planting area.
3. **Till or Dig the Soil:** Loosen the soil to a depth of at least 12 inches. This will allow the roots to penetrate easily.
4. **Amend the Soil:** Mix in plenty of compost or aged manure. This will improve drainage, fertility, and water retention. I usually add a few inches of compost and work it in well.
5. **Level the Soil:** Rake the soil smooth to create a level planting surface.
Planting the Seeds
Now for the fun part – planting the seeds!
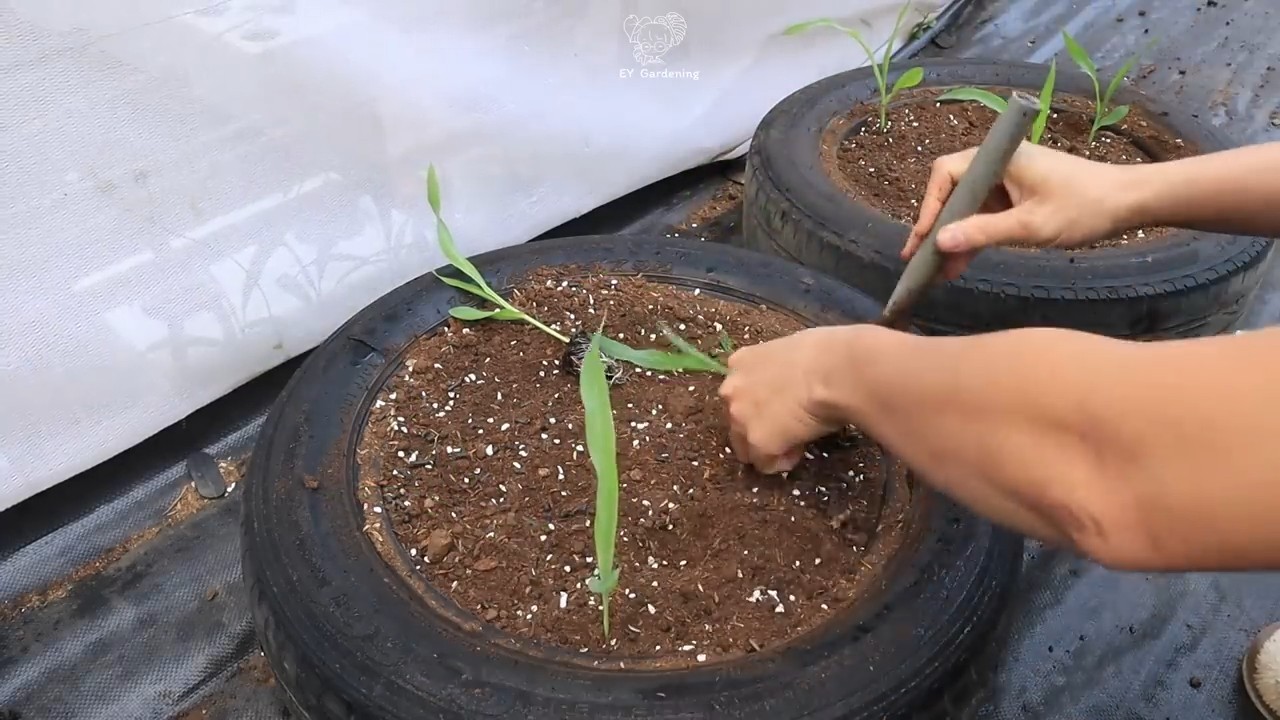
1. **Timing is Key:** Black corn is a warm-season crop, so wait until the soil has warmed up to at least 60°F (15°C) before planting. This is usually a couple of weeks after the last frost in your area.
2. **Planting Depth:** Plant the seeds about 1-2 inches deep.
3. **Spacing:** Space the seeds about 6-8 inches apart in rows that are 30-36 inches apart. Corn is wind-pollinated, so planting in blocks (rather than long, single rows) will improve pollination.
4. **Water Thoroughly:** After planting, water the soil gently but thoroughly. Keep the soil consistently moist until the seeds germinate.
5. **Consider Succession Planting:** To extend your harvest, plant a new batch of seeds every 2-3 weeks.
Caring for Your Black Corn
Once your corn seedlings emerge, it’s time to provide them with the care they need to thrive.
1. **Watering:** Corn needs consistent moisture, especially during tasseling (when the tassels appear at the top of the plant) and silking (when the silks emerge from the ears). Water deeply whenever the top inch of soil feels dry.
2. **Weeding:** Keep the area around your corn plants free of weeds. Weeds compete with corn for nutrients and water. Hand-pull weeds or use a hoe to cultivate the soil.
3. **Fertilizing (Optional):** If your corn plants are looking pale or stunted, you can apply a balanced fertilizer. Follow the instructions on the fertilizer package. I usually side-dress my corn with fertilizer about a month after planting.
4. **Pest Control:** Keep an eye out for common corn pests like corn earworms, aphids, and Japanese beetles. You can use insecticidal soap or neem oil to control these pests. Row covers can also help protect young seedlings.
5. **Supporting the Plants:** In windy areas, you may need to stake or trellis your corn plants to prevent them from falling over.
Pollination: A Crucial Step
Corn is wind-pollinated, meaning the pollen from the tassels needs to reach the silks on the ears for kernels to develop. Here’s how to ensure good pollination:
1. **Plant in Blocks:** As mentioned earlier, planting in blocks (rather than single rows) will improve pollination.
2. **Hand-Pollination (Optional):** If you’re concerned about pollination, you can hand-pollinate your corn. Gently shake the tassels over the silks to release pollen. You can also collect pollen from the tassels in a paper bag and then sprinkle it over the silks.
3. **Ensure Adequate Watering:** Water stress can reduce pollen production and silk receptivity.
Harvesting Your Black Corn
The moment we’ve all been waiting for – harvesting!
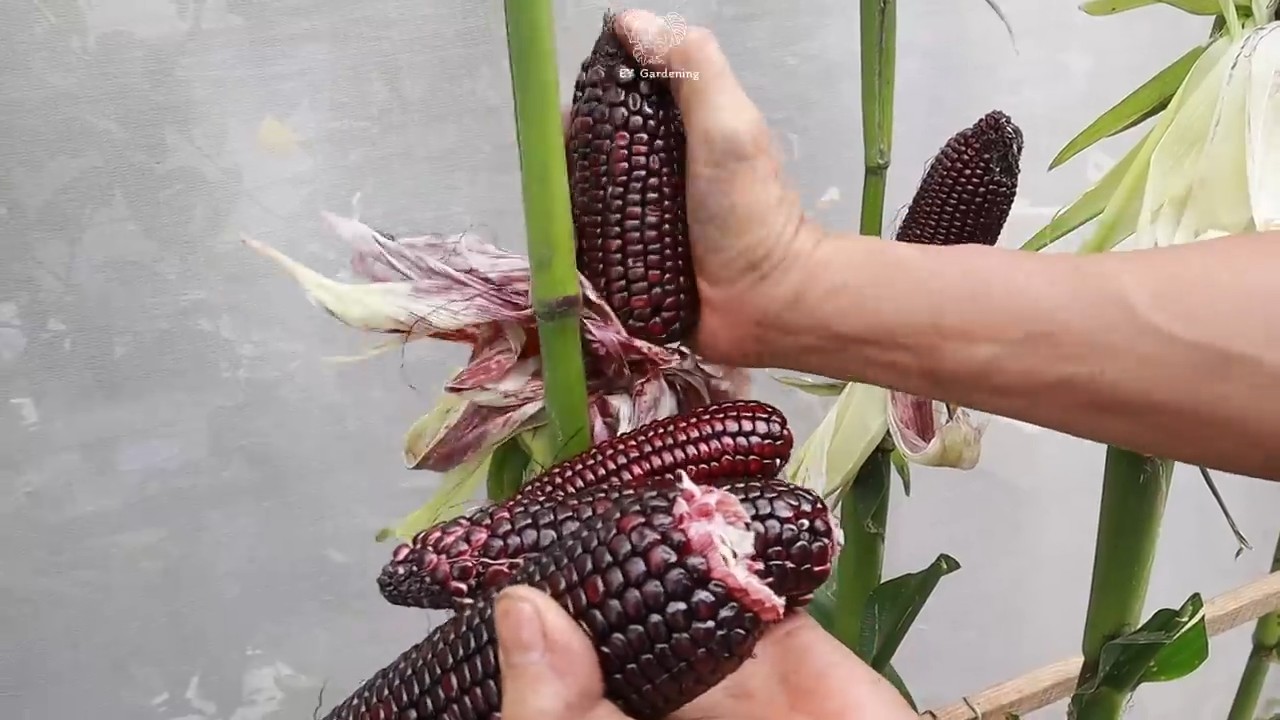
1. **Timing is Everything:** Black corn is typically ready to harvest about 90-100 days after planting. The silks will turn brown and dry, and the kernels will be plump and filled with a milky substance.
2. **Check the Kernels:** Peel back the husk and poke a kernel with your fingernail. If the liquid is milky, the corn is ready to harvest. If it’s clear, it needs more time.
3. **Harvest Carefully:** Grasp the ear firmly and twist it downward to snap it off the stalk.
4. **Enjoy Your Harvest:** You can eat black corn fresh, roast it, grill it, or use it to make tortillas, cornbread, or other delicious dishes.
Drying Black Corn for Flour
If you want to make black corn flour, you’ll need to dry the kernels. Here’s how I do it:
1. **Harvest Mature Ears:** Choose ears that are fully mature and have dry, brown silks.
2. **Remove the Husks:** Peel back the husks and remove any damaged kernels.
3. **Dry the Ears:** There are several ways to dry corn:
* **Air Drying:** Hang the ears in a well-ventilated area for several weeks until the kernels are hard and dry.
* **Oven Drying:** Spread the kernels on a baking sheet and dry them in a low oven (170°F or 77°C) for several hours, stirring occasionally.
* **Dehydrator:** Use a food dehydrator to dry the kernels according to the manufacturer’s instructions.
4. **Shell the Kernels:** Once the kernels are dry, remove them from the cob. You can do this by hand or with a corn sheller.
5. **Grind the Kernels:** Use a grain mill or a high-powered blender to grind the kernels into flour.
6. **Store the Flour:** Store the flour in an airtight container in a cool, dry place.
Troubleshooting
Even with the best planning, things can sometimes go wrong. Here are some common problems and how to deal with them:
* **Poor Germination:** Make sure your seeds are fresh and that the soil is warm enough. Overwatering can also cause seeds to rot.
* **Stunted Growth:** This could be due to lack of nutrients, water, or sunlight. Amend the soil with compost, water regularly, and ensure the plants are getting enough sunlight.
* **Pest Problems:** Inspect your plants regularly for pests and take action promptly. Insecticidal soap and neem oil are effective for many common corn pests.
* **Poor Pollination:** Plant in blocks, hand-pollinate if necessary, and ensure adequate watering.
* **Ears Not Filling Out:** This could be due to poor pollination, lack of nutrients, or water stress.
Extra Tips for Success
Here are a few extra tips that I’ve learned over the years:
* Choose the Right Variety: Some varieties of black corn are better suited to certain climates than others. Do some research to find a variety that will thrive in your area.
* Rotate Your Crops: Avoid planting corn in the same spot year after year. Crop rotation helps prevent soil depletion and pest problems.
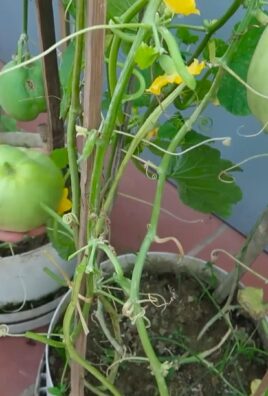
* Companion Planting: Plant corn with beneficial companion plants like beans, squash, and sunflowers. These plants can help improve soil health, attract pollinators, and deter pests.
* Don’t Be Afraid to Experiment: Gardening is all about learning and experimenting. Try different techniques and see what works best for you.
Growing black corn at home is a rewarding experience. It takes a little effort, but the results are well worth it. You’ll have a unique and delicious crop that you can be proud of. Happy
Conclusion
So, there you have it! Growing your own black corn at home is not just a fun project; it’s a gateway to experiencing a unique and nutritious food source right from your backyard. We’ve walked you through the process, from selecting the right seeds to harvesting those beautiful, dark kernels. But why is this DIY trick a must-try?
Firstly, the flavor. Store-bought corn, even the best varieties, often lack the depth and complexity of freshly harvested, homegrown black corn. The sweetness is more pronounced, the texture is more satisfying, and there’s a certain pride that comes with knowing you nurtured it from seed to table.
Secondly, the health benefits are undeniable. Black corn is packed with antioxidants, particularly anthocyanins, which give it its distinctive color and offer a range of health-promoting properties. By growing your own, you’re ensuring you have access to a fresh, unprocessed source of these vital nutrients. You know exactly what went into growing it, avoiding potentially harmful pesticides and herbicides.
Thirdly, the sheer satisfaction of watching something grow from a tiny seed into a bountiful harvest is incredibly rewarding. It’s a connection to nature that’s often missing in our modern lives. Plus, it’s a fantastic educational opportunity for children, teaching them about the food cycle and the importance of sustainable practices.
But don’t stop there! Experiment with different varieties of black corn. Some are sweeter, some are more savory, and some are specifically bred for grinding into flour. Try roasting the ears on the grill for a smoky flavor, or use the kernels in salads, salsas, or even cornbread. The possibilities are endless!
Consider these variations to enhance your black corn growing experience:
* Succession Planting: Plant seeds every few weeks to ensure a continuous harvest throughout the growing season.
* Companion Planting: Plant beans alongside your corn to help fix nitrogen in the soil, benefiting both crops. Squash can also be planted to act as a ground cover, suppressing weeds and retaining moisture.
* Vertical Growing: If you have limited space, consider using a vertical growing system to maximize your yield.
* Heirloom Varieties: Explore different heirloom varieties of black corn for unique flavors and colors.
We wholeheartedly encourage you to give this DIY trick a try. It’s a rewarding experience that will not only provide you with delicious and nutritious food but also connect you with nature in a meaningful way.
And most importantly, we want to hear about your experience! Share your photos, tips, and challenges in the comments below. Let’s build a community of black corn enthusiasts and learn from each other. What varieties did you try? What growing techniques worked best for you? What delicious recipes did you create? Your insights will help others succeed in their own black corn growing adventures. So, get your hands dirty, plant those seeds, and let the magic of black corn unfold!
Frequently Asked Questions (FAQ)
What exactly is black corn, and how is it different from regular corn?
Black corn, also known as blue corn or purple corn depending on the specific variety, is a type of corn that gets its dark color from high levels of anthocyanins, the same antioxidants found in blueberries and other dark-colored fruits and vegetables. While regular corn is typically yellow or white, black corn boasts a deep, rich color that ranges from dark blue to almost black. This difference in color also translates to a difference in nutritional value, with black corn generally containing more antioxidants than its yellow counterpart. The flavor profile can also differ, with some varieties of black corn having a slightly nuttier or earthier taste.
What are the best varieties of black corn to grow at home?
Several varieties of black corn are well-suited for home growing. ‘Blue Hopi’ is a popular choice known for its drought tolerance and ability to thrive in challenging conditions. ‘Cherokee Blue’ is another excellent option, prized for its beautiful color and delicious flavor. ‘Black Aztec’ is an heirloom variety that’s relatively easy to grow and produces a good yield. When selecting a variety, consider your local climate, soil conditions, and intended use for the corn. Some varieties are better suited for grinding into flour, while others are ideal for roasting or grilling.
How much space do I need to grow black corn successfully?
Black corn, like other types of corn, requires a decent amount of space to grow properly. As a general rule, you should allow at least 12-18 inches between plants and 30-36 inches between rows. Corn is wind-pollinated, so planting in blocks rather than long, single rows will improve pollination rates and increase your yield. If you’re short on space, consider using a vertical growing system or planting in large containers. However, keep in mind that corn plants can grow quite tall, so make sure they have adequate support.
What kind of soil and sunlight does black corn need?
Black corn thrives in well-drained soil that’s rich in organic matter. Before planting, amend your soil with compost or well-rotted manure to improve its fertility and drainage. Corn also needs plenty of sunlight – at least 6-8 hours per day. Choose a location that receives full sun throughout the growing season. If your soil is heavy clay, consider adding sand or other amendments to improve drainage. A slightly acidic to neutral soil pH (around 6.0-7.0) is ideal.
How often should I water my black corn plants?
Black corn needs consistent moisture, especially during germination and early growth. Water deeply and regularly, aiming to keep the soil consistently moist but not waterlogged. During hot, dry periods, you may need to water more frequently. A good rule of thumb is to water when the top inch of soil feels dry to the touch. Once the corn plants are established, they become more drought-tolerant, but consistent watering will still result in a better yield. Consider using a soaker hose or drip irrigation system to deliver water directly to the roots.
What are some common pests and diseases that affect black corn, and how can I prevent them?
Several pests and diseases can affect black corn, including corn earworms, corn borers, aphids, and fungal diseases like corn smut. To prevent pest and disease problems, practice good garden hygiene. Remove weeds and debris from around your corn plants to reduce hiding places for pests and improve air circulation. Consider using organic pest control methods, such as introducing beneficial insects or applying neem oil. Crop rotation can also help prevent soilborne diseases. Choose disease-resistant varieties of black corn whenever possible.
When is the best time to harvest black corn?
The best time to harvest black corn depends on the intended use. If you’re planning to eat it fresh, harvest when the kernels are plump and milky and the silks have turned brown and dry. To test for ripeness, peel back the husk and puncture a kernel with your fingernail. If the liquid is milky, the corn is ready to harvest. If you’re planning to grind the corn into flour, allow the ears to dry on the stalk until the kernels are hard and dry. The husks should be completely brown and papery.
Can I save seeds from my black corn harvest to plant next year?
Yes, you can save seeds from your black corn harvest, but keep in mind that corn is open-pollinated, so there’s a chance that the seeds may not be true to type if they were cross-pollinated with other varieties of corn. To save seeds, select healthy, mature ears of corn and allow them to dry completely on the stalk. Once the husks are dry and papery, remove the kernels from the cob and store them in an airtight container in a cool, dry place. Label the container with the variety and date.
What are some delicious ways to use my homegrown black corn?
The possibilities are endless! You can roast or grill the ears for a delicious side dish, use the kernels in salads, salsas, or soups, or grind the dried kernels into flour for making cornbread, tortillas, or other baked goods. Black corn flour adds a unique flavor and color to your recipes. You can also use the husks to make tamales or other traditional dishes. Experiment with different recipes and find your favorite ways to enjoy your homegrown black corn.
Leave a Comment