
Growing Sweet Potatoes in Pots might sound like a challenge, but trust me, it’s a surprisingly rewarding and accessible project, even if you’re short on space! Have you ever dreamt of harvesting your own vibrant, nutrient-packed sweet potatoes right from your balcony or patio? Well, dream no more! This DIY guide will unlock the secrets to successfully cultivating these delicious tubers in containers, bringing a touch of the farm-to-table experience directly to your home.
Sweet potatoes have a rich history, deeply rooted in South American cultures for thousands of years. They’ve journeyed across continents, becoming a staple in cuisines worldwide. Beyond their culinary appeal, they’re packed with vitamins and antioxidants, making them a healthy and delicious addition to any diet.
But why bother with growing them in pots? Well, for many of us, sprawling gardens are a luxury we simply don’t have. Apartment living, small yards, or even just a desire for a more controlled growing environment can make traditional gardening difficult. That’s where the magic of container gardening comes in! This DIY trick allows you to enjoy the satisfaction of harvesting your own sweet potatoes, regardless of your space constraints. Plus, growing sweet potatoes in pots offers better control over soil quality and pest management, leading to a healthier and more abundant harvest. So, let’s dive in and discover how to transform your limited space into a sweet potato paradise!
Growing Sweet Potatoes in Pots: A Beginner’s Guide
Hey there, fellow gardening enthusiasts! Ever thought about growing your own sweet potatoes? It might sound intimidating, but trust me, it’s totally doable, even if you’re short on space. I’m going to walk you through how to grow these delicious and nutritious tubers right in pots! Get ready to enjoy homegrown goodness.
Choosing the Right Sweet Potato Variety
First things first, not all sweet potato varieties are created equal when it comes to container gardening. You’ll want to pick one that’s more compact and bush-like rather than a sprawling vine. Here are a few of my favorites:
* ‘Bush Porto Rico’: This is a classic choice, known for its reliability and delicious orange flesh. It’s a compact grower, making it perfect for pots.
* ‘Georgia Jet’: If you’re looking for a faster-maturing variety, ‘Georgia Jet’ is a great option. It produces large, reddish-skinned sweet potatoes.
* ‘Beauregard’: Another popular choice, ‘Beauregard’ is known for its high yields and disease resistance. It has a beautiful reddish-purple skin and orange flesh.
* ‘Centennial’: This variety is a good all-around choice, producing sweet potatoes with orange skin and flesh. It’s also relatively compact.
Preparing Your Pots and Soil
Okay, now that we’ve got our variety sorted, let’s get our hands dirty! The right pot and soil are crucial for sweet potato success.
* Choosing the Right Pot: Sweet potatoes need room to grow, so opt for a large container. I recommend a pot that’s at least 15-20 gallons in size. The bigger, the better, really! Make sure your pot has drainage holes – sweet potatoes don’t like soggy feet.
* Selecting the Right Soil: Sweet potatoes thrive in well-draining, loose soil that’s rich in organic matter. Avoid heavy clay soils, as they can restrict root growth. I like to use a mix of:
* Potting mix (about 60%)
* Compost (about 30%)
* Perlite or vermiculite (about 10%) – this helps with drainage.
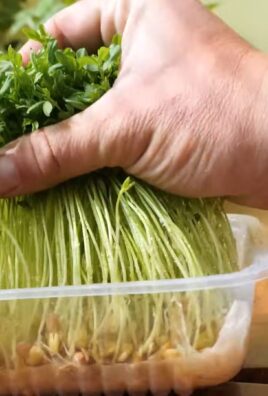
Starting Sweet Potato Slips
Now, here’s where the magic happens! Sweet potato “slips” are the sprouts that grow from a sweet potato, and these are what you’ll plant in your pots. You can buy slips online or at your local garden center, but it’s also super easy (and fun!) to grow your own.
Growing Your Own Slips:
1. Choose a Healthy Sweet Potato: Select an organic sweet potato from the grocery store or farmer’s market. Organic is important to avoid any growth inhibitors.
2. Prepare the Sweet Potato: There are two main methods:
* Water Method: Suspend the sweet potato in a jar or glass of water, with the bottom half submerged. You can use toothpicks to hold it in place.
* Soil Method: Bury the sweet potato horizontally in a container filled with moist potting mix, leaving the top exposed.
3. Provide Warmth and Light: Place the jar or container in a warm, sunny location. A temperature of around 75-80°F (24-27°C) is ideal.
4. Wait for Slips to Sprout: In a few weeks, you should start to see slips sprouting from the sweet potato. Keep the water level consistent if using the water method, and keep the soil moist if using the soil method.
5. Harvest the Slips: Once the slips are 6-8 inches long, gently twist or cut them off the sweet potato.
6. Root the Slips (Optional but Recommended): Place the slips in a glass of water, making sure the bottom inch or two is submerged. In a few days, roots will start to form. This step isn’t strictly necessary, but it gives the slips a head start.
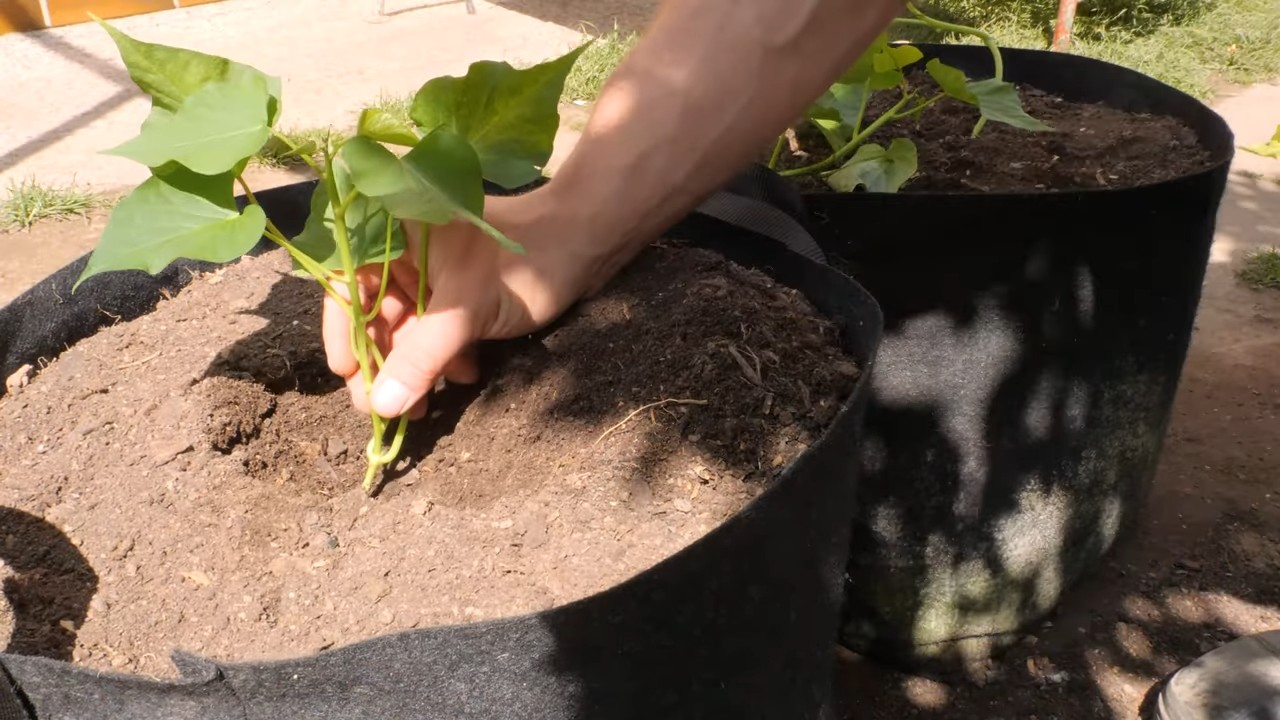
Planting Your Sweet Potato Slips
Alright, your slips are ready to go! Let’s get them planted in those prepared pots.
1. Prepare the Planting Hole: Dig a hole in the soil that’s deep enough to accommodate the roots of the slip.
2. Plant the Slip: Gently place the slip in the hole, burying the roots and the bottom part of the stem. Leave the top leaves exposed.
3. Water Thoroughly: Water the newly planted slip well to help it settle in.
4. Space Multiple Slips: If you’re planting multiple slips in the same pot, space them about 12-18 inches apart.
Caring for Your Sweet Potato Plants
Now comes the part where you nurture your little sweet potato plants and watch them grow!
1. Watering: Sweet potatoes need consistent moisture, especially during the first few weeks after planting. Water deeply whenever the top inch of soil feels dry. Avoid overwatering, as this can lead to root rot.
2. Sunlight: Sweet potatoes love sunshine! Make sure your pots are placed in a location that receives at least 6-8 hours of direct sunlight per day.
3. Fertilizing: Sweet potatoes are heavy feeders, so regular fertilization is important. I recommend using a balanced organic fertilizer every 2-3 weeks. Look for a fertilizer with an NPK ratio of around 5-10-10. Avoid fertilizers that are too high in nitrogen, as this can promote leafy growth at the expense of tuber development.
4. Weeding: Keep your pots free of weeds, as they can compete with your sweet potato plants for nutrients and water.
5. Pest Control: Sweet potatoes are generally pest-resistant, but keep an eye out for common garden pests like aphids, flea beetles, and sweet potato weevils. If you spot any pests, treat them with an organic insecticide like neem oil or insecticidal soap.
6. Vine Management: Some sweet potato varieties can produce long vines. You can either let them trail over the sides of the pot or prune them back to keep them under control. Pruning can actually encourage tuber development.
Harvesting Your Sweet Potatoes
The moment you’ve been waiting for! Harvesting your own sweet potatoes is incredibly rewarding.
1. Timing: Sweet potatoes typically take 90-120 days to mature. You’ll know they’re ready to harvest when the leaves start to turn yellow and the vines begin to die back.
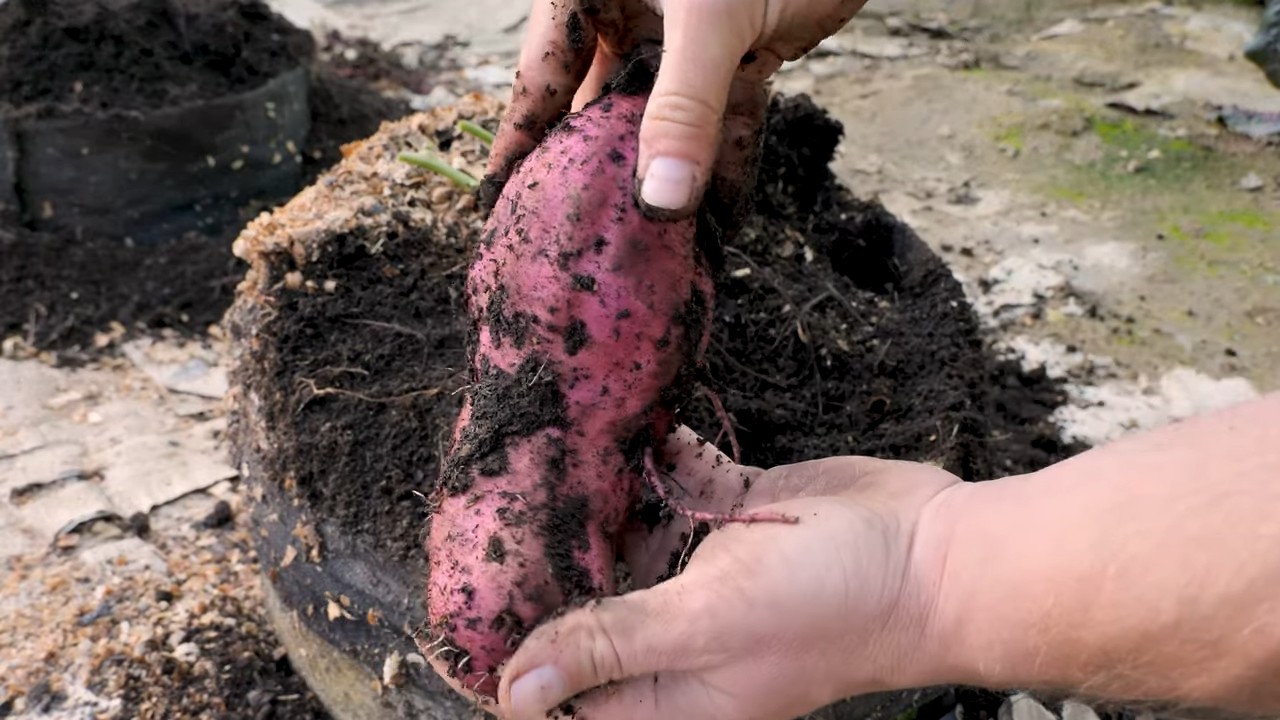
2. Harvesting: Gently dig around the base of the plant, being careful not to damage the tubers. Use a garden fork or trowel to lift the sweet potatoes out of the soil.
3. Curing: Curing is an important step that improves the flavor and storage life of your sweet potatoes. To cure them, place them in a warm, humid location (around 80-85°F or 27-29°C) for 7-10 days. A garage or shed works well.
4. Storing: After curing, store your sweet potatoes in a cool, dry, and dark place. They should last for several months.
Troubleshooting
Even with the best care, you might encounter a few challenges along the way. Here are some common problems and how to address them:
* Yellowing Leaves: This could be a sign of nutrient deficiency, overwatering, or underwatering. Check the soil moisture and fertilize if necessary.
* Slow Growth: Make sure your plants are getting enough sunlight and fertilizer. Also, check the soil temperature – sweet potatoes prefer warm soil.
* Root Rot: This is caused by overwatering. Make sure your pots have good drainage and allow the soil to dry out slightly between waterings.
* Pest Infestations: Treat any pest infestations promptly with an organic insecticide.
Enjoying Your Homegrown Sweet Potatoes
Congratulations! You’ve successfully grown your own sweet potatoes in pots. Now it’s time to enjoy the fruits (or rather, tubers) of your labor. Sweet potatoes are incredibly versatile and can be used in a variety of dishes, from sweet potato fries and casseroles to soups and stews. I love roasting them with a little olive oil, salt, and pepper – simple and delicious!
So, what are you waiting for? Get out there and start growing your own sweet potatoes! It’s a fun, rewarding, and delicious experience. Happy gardening!
Conclusion
So, there you have it! Growing sweet potatoes in pots isn’t just a quirky gardening experiment; it’s a genuinely rewarding way to cultivate your own delicious and nutritious crop, even if you’re short on space. We’ve walked through the entire process, from selecting the right pot and soil to nurturing your plants and knowing when to harvest. The beauty of this method lies in its accessibility. Whether you have a sprawling backyard or a tiny balcony, you can enjoy the satisfaction of harvesting your own homegrown sweet potatoes.
But why is this DIY trick a must-try? Beyond the sheer joy of gardening, growing your own sweet potatoes offers several compelling advantages. First, you have complete control over the growing environment. You can ensure your plants receive the best possible care, free from harmful pesticides and chemicals. This translates to healthier, more flavorful sweet potatoes for your table. Second, it’s incredibly cost-effective. Once you’ve invested in the initial supplies, the ongoing costs are minimal, especially if you compost your own kitchen scraps to enrich the soil. Third, it’s a fantastic learning experience. You’ll gain a deeper understanding of plant life cycles, soil science, and the interconnectedness of nature.
Looking for variations to spice things up? Consider experimenting with different sweet potato varieties. Beauregard is a classic choice, but you might also try Japanese sweet potatoes with their purple skin and creamy white flesh, or even the vibrant orange Covington variety. You can also play around with companion planting. Marigolds, for example, can help deter pests, while basil can improve the flavor of your sweet potatoes. Another fun variation is to try growing sweet potato vines purely for their ornamental value. The lush, trailing vines make a beautiful addition to any patio or balcony.
Don’t be afraid to get creative with your container gardening setup. You can use repurposed containers like old buckets, laundry baskets, or even grow bags. Just make sure they have adequate drainage. You can also experiment with different soil amendments, such as adding compost tea or worm castings to boost nutrient levels. Remember to monitor your plants regularly for signs of pests or diseases. Early detection is key to preventing problems and ensuring a successful harvest.
Ultimately, the best way to discover the magic of growing sweet potatoes in pots is to simply give it a try. It’s a fun, educational, and rewarding experience that will connect you with nature and provide you with a delicious and nutritious harvest. We are confident that you’ll find the process surprisingly easy and incredibly satisfying. So, grab a pot, some soil, and a sweet potato slip, and get ready to embark on your own sweet potato growing adventure.
We’re eager to hear about your experiences! Share your photos, tips, and challenges in the comments below. Let’s create a community of sweet potato enthusiasts and learn from each other. What variety did you choose? What challenges did you face, and how did you overcome them? What delicious recipes did you create with your homegrown sweet potatoes? Your insights will help other gardeners succeed and inspire even more people to try this rewarding DIY trick. Remember, every gardening journey is unique, and we can all learn from each other’s successes and failures. So, don’t be shy – share your story and let’s grow together! Mastering the art of growing sweet potatoes in pots is within your reach, and we’re here to support you every step of the way. Happy gardening!
Frequently Asked Questions (FAQ)
What is the best size pot for growing sweet potatoes?
The ideal pot size for growing sweet potatoes is at least 10 gallons, but larger is generally better. A 15-20 gallon pot will provide ample space for the roots to develop and produce a good yield. The pot should also be at least 12 inches deep to accommodate the long, tuberous roots of the sweet potato plant. Remember, the more room the roots have to grow, the larger and more abundant your harvest will be. Consider using a fabric grow bag, as these allow for better drainage and aeration, which are crucial for healthy root development.
How often should I water my sweet potato plants in pots?
Watering frequency depends on several factors, including the weather, the size of the pot, and the type of soil you’re using. Generally, you should water your sweet potato plants when the top inch of soil feels dry to the touch. During hot, dry weather, you may need to water them daily, while during cooler, wetter periods, you may only need to water them every few days. Avoid overwatering, as this can lead to root rot. Ensure your pot has adequate drainage to prevent water from pooling at the bottom. A good rule of thumb is to water deeply until you see water draining from the bottom of the pot.
What kind of soil is best for growing sweet potatoes in pots?
Sweet potatoes thrive in well-draining, sandy loam soil that is rich in organic matter. A good potting mix for sweet potatoes should consist of equal parts of compost, peat moss (or coconut coir), and perlite or vermiculite. The compost will provide essential nutrients, the peat moss (or coconut coir) will help retain moisture, and the perlite or vermiculite will improve drainage. Avoid using heavy clay soil, as this can compact and restrict root growth. You can also amend your potting mix with slow-release fertilizer to provide a steady supply of nutrients throughout the growing season.
How much sunlight do sweet potato plants need?
Sweet potato plants need at least 6-8 hours of direct sunlight per day to thrive. Choose a location for your pots that receives plenty of sunlight throughout the day. If you live in a particularly hot climate, you may need to provide some afternoon shade to prevent the plants from overheating. Insufficient sunlight can lead to stunted growth and reduced yields. If you’re growing your sweet potatoes indoors, you’ll need to supplement with grow lights to provide adequate illumination.
When is the best time to harvest my sweet potatoes?
Sweet potatoes are typically ready to harvest about 90-120 days after planting. A good indicator that your sweet potatoes are ready is when the leaves start to turn yellow and the vines begin to die back. You can also gently dig around the base of the plant to check the size of the tubers. Harvest your sweet potatoes on a dry day to prevent them from rotting. Carefully dig around the plant, being careful not to damage the tubers. Cure your sweet potatoes for 7-10 days in a warm, humid place to allow the skins to harden and the starches to convert to sugars. This will improve their flavor and storage life.
Can I grow sweet potatoes from store-bought sweet potatoes?
Yes, you can grow sweet potatoes from store-bought sweet potatoes, but it’s important to choose organic sweet potatoes that haven’t been treated with sprout inhibitors. To sprout a sweet potato, suspend it in a jar of water, with the bottom half submerged. Place the jar in a warm, sunny location. After a few weeks, sprouts (slips) will begin to emerge from the sweet potato. Once the slips are about 6-8 inches long, gently twist them off and root them in water before planting them in your pots. Keep in mind that sweet potatoes grown from store-bought sweet potatoes may not be true to type, meaning they may not produce the same variety of sweet potato as the parent plant.
What are some common pests and diseases that affect sweet potato plants?
Some common pests that can affect sweet potato plants include aphids, flea beetles, and sweet potato weevils. Diseases that can affect sweet potato plants include fusarium wilt, black rot, and scurf. To prevent pests and diseases, choose disease-resistant varieties, practice crop rotation, and keep your garden clean and free of debris. You can also use organic pest control methods, such as insecticidal soap or neem oil, to control pests. If you notice signs of disease, remove the affected plants immediately to prevent the disease from spreading.
How do I store my harvested sweet potatoes?
Proper storage is crucial for preserving the flavor and quality of your harvested sweet potatoes. After curing your sweet potatoes, store them in a cool, dark, and well-ventilated place, such as a basement or root cellar. The ideal storage temperature is between 55-60°F (13-16°C). Avoid storing sweet potatoes in the refrigerator, as this can cause them to develop a hard core and lose their flavor. Properly stored sweet potatoes can last for several months. Check your sweet potatoes regularly for signs of spoilage, such as soft spots or mold. Discard any sweet potatoes that show signs of spoilage.
Leave a Comment