
Growing bell peppers in a small space might seem like a daunting task, but trust me, it’s absolutely achievable and incredibly rewarding! Have you ever dreamed of plucking vibrant, juicy bell peppers straight from your own garden, even if all you have is a tiny balcony or a sunny windowsill? Well, dream no more! This DIY guide is packed with clever tricks and hacks to help you cultivate a thriving bell pepper harvest, no matter how limited your area.
Bell peppers have a rich history, originating in South America and spreading throughout the world thanks to their versatility and delicious flavor. They’ve been a staple in various cuisines for centuries, adding color and zest to countless dishes. But beyond their culinary appeal, growing your own bell peppers connects you to a tradition of self-sufficiency and sustainable living.
In today’s world, where space is often a premium, many of us are looking for ways to bring nature into our homes. Growing bell peppers in a small space allows you to enjoy fresh, organic produce without the need for a sprawling garden. Plus, it’s a fantastic way to reduce your carbon footprint and connect with the natural world. This DIY article will provide you with the knowledge and confidence to transform your limited space into a productive and beautiful bell pepper haven. Let’s get started!
Growing Bell Peppers in Small Spaces: A DIY Guide
Hey there, fellow gardening enthusiasts! So, you’re itching to grow some vibrant, crunchy bell peppers but are short on space? Don’t worry, I’ve got you covered! I’ve been growing bell peppers in containers for years, and I’m here to share all my secrets to a bountiful harvest, even if you only have a balcony or a small patio. Let’s dive in!
Choosing the Right Bell Pepper Variety
First things first, not all bell pepper varieties are created equal when it comes to container gardening. Some grow much larger than others, requiring bigger pots and more support. Here are a few of my favorite compact bell pepper varieties that thrive in small spaces:
* ‘Patio Bell’: As the name suggests, this variety is specifically bred for container gardening. It produces smaller, but still delicious, bell peppers on compact plants.
* ‘Mini Bell’: These adorable little peppers are perfect for snacking and salads. The plants are relatively small and productive.
* ‘Lunchbox Peppers’: Similar to mini bells, these come in a variety of colors and are great for kids (and adults!) who enjoy a sweet and crunchy treat.
* ‘Sweet Palermo’: While technically not a bell pepper, these elongated, sweet peppers are easy to grow in containers and offer a unique flavor.
Gathering Your Supplies
Okay, now that we’ve picked our pepper variety, let’s gather the necessary supplies. This is where the DIY magic begins!
* Containers: Choose containers that are at least 12 inches in diameter and 12 inches deep. Larger is always better, as it gives the roots more room to grow. I personally love using fabric pots because they allow for better drainage and aeration.
* Potting Mix: This is crucial! Don’t use garden soil in your containers. It’s too heavy and doesn’t drain well. Instead, opt for a high-quality potting mix specifically designed for containers. I usually go for a mix that contains peat moss, perlite, and vermiculite.
* Bell Pepper Seeds or Seedlings: You can start your bell peppers from seed indoors about 8-10 weeks before the last expected frost, or you can purchase seedlings from a local nursery. Seedlings are a great option if you’re short on time or don’t have a good setup for starting seeds indoors.
* Fertilizer: Bell peppers are heavy feeders, so you’ll need to fertilize them regularly. I recommend using a balanced, slow-release fertilizer at planting time, followed by liquid fertilizer every 2-3 weeks during the growing season.
* Watering Can or Hose: You’ll need a way to water your plants regularly. A watering can is great for smaller containers, while a hose with a gentle spray nozzle is better for larger setups.
* Plant Support (Optional): Depending on the variety you choose, your bell pepper plants may need some support as they grow. Stakes, cages, or trellises can help prevent the plants from toppling over, especially when they’re loaded with peppers.
* Gardening Gloves: Protect your hands from dirt and potential irritants.
* Trowel or Small Shovel: For transplanting seedlings or adding potting mix.
Planting Your Bell Peppers
Alright, let’s get our hands dirty! This is where the real fun begins.
1. Prepare Your Containers: Make sure your containers are clean and have drainage holes. If you’re using fabric pots, they’re ready to go! If you’re using plastic or ceramic pots, you might want to add a layer of gravel or broken pottery at the bottom to improve drainage.
2. Fill with Potting Mix: Fill your containers with potting mix, leaving about an inch or two of space at the top.
3. Plant Your Seeds or Seedlings:
* From Seed: If you’re starting from seed, sow the seeds about 1/4 inch deep and water gently. Keep the soil moist but not soggy.
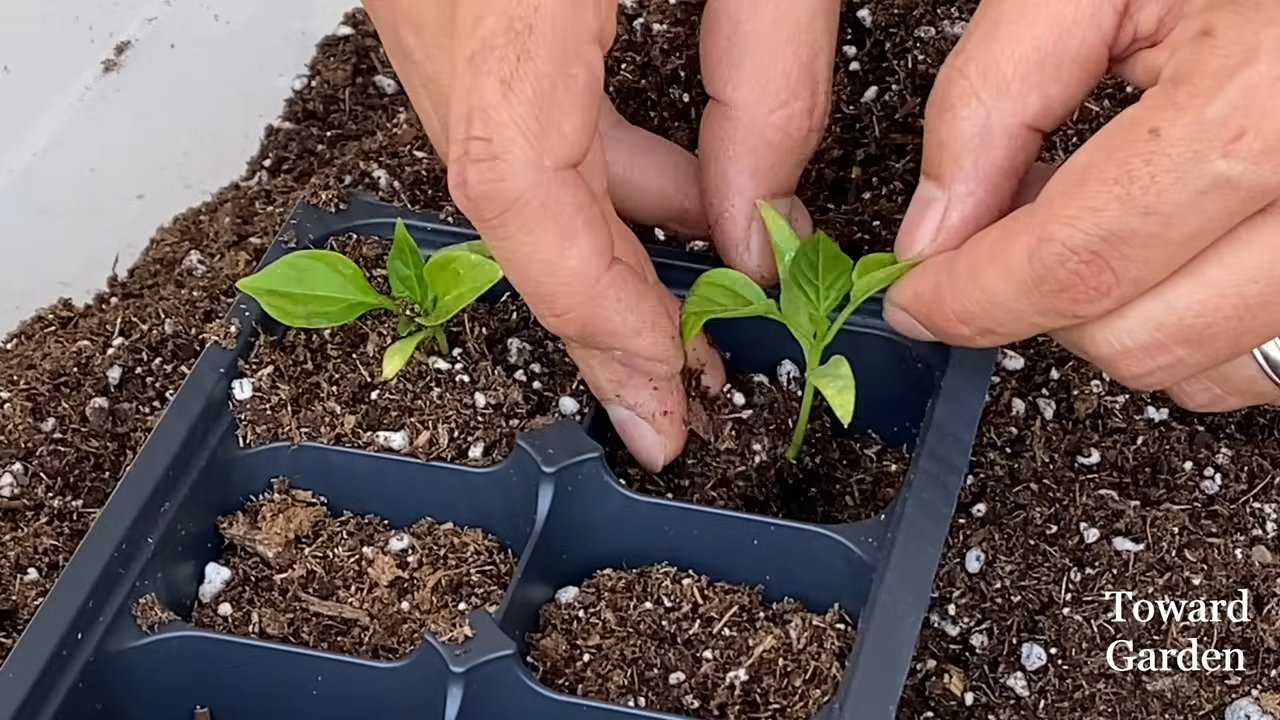
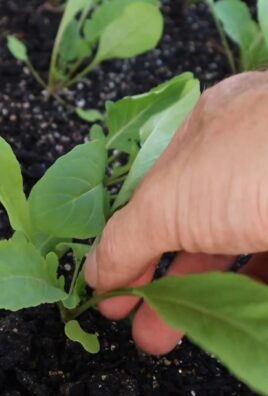
* From Seedlings: If you’re using seedlings, gently remove them from their nursery pots and loosen the roots a bit. Dig a hole in the potting mix that’s large enough to accommodate the root ball. Place the seedling in the hole and backfill with potting mix, gently firming the soil around the base of the plant.
4. Water Thoroughly: After planting, water your bell pepper plants thoroughly until the water drains out of the bottom of the container. This will help settle the soil and get the roots off to a good start.
5. Add Fertilizer: Sprinkle a slow-release fertilizer around the base of the plant, following the instructions on the package.
6. Add Support (If Needed): If you’re using stakes, cages, or trellises, install them now while the plants are still small. This will prevent you from damaging the roots later on.
Caring for Your Bell Pepper Plants
Now that your bell pepper plants are in their new homes, it’s time to provide them with the care they need to thrive.
1. Sunlight: Bell peppers need at least 6-8 hours of sunlight per day. Place your containers in a sunny location where they’ll receive plenty of direct sunlight. If you don’t have a sunny spot, you can supplement with grow lights.
2. Watering: Water your bell pepper plants regularly, especially during hot, dry weather. The soil should be consistently moist but not soggy. Check the soil moisture by sticking your finger into the soil. If the top inch or two feels dry, it’s time to water.
3. Fertilizing: As I mentioned earlier, bell peppers are heavy feeders. In addition to the slow-release fertilizer you added at planting time, you’ll need to fertilize them every 2-3 weeks with a liquid fertilizer. Choose a fertilizer that’s high in phosphorus and potassium, which are essential for fruit production.
4. Pruning: Pruning can help improve air circulation and encourage bushier growth. Remove any suckers (small shoots that grow from the base of the plant) and any yellowing or dead leaves.
5. Pest and Disease Control: Keep an eye out for pests and diseases. Common pests that attack bell peppers include aphids, spider mites, and whiteflies. You can control these pests with insecticidal soap or neem oil. Common diseases include blossom end rot and fungal infections. Blossom end rot is caused by a calcium deficiency, so make sure your soil is rich in calcium. Fungal infections can be prevented by providing good air circulation and avoiding overhead watering.
6. Pollination: Bell peppers are self-pollinating, but they sometimes need a little help. You can gently shake the plants or use a small paintbrush to transfer pollen from one flower to another. This is especially important if you’re growing your bell peppers indoors or in a sheltered location where there aren’t many pollinators.
Harvesting Your Bell Peppers
The moment you’ve been waiting for! Harvesting your bell peppers is the most rewarding part of the process.
1. When to Harvest: Bell peppers can be harvested at any stage of maturity, but they’re usually sweetest and most flavorful when they’re fully colored. Green bell peppers are immature, while red, yellow, and orange bell peppers are fully ripe.
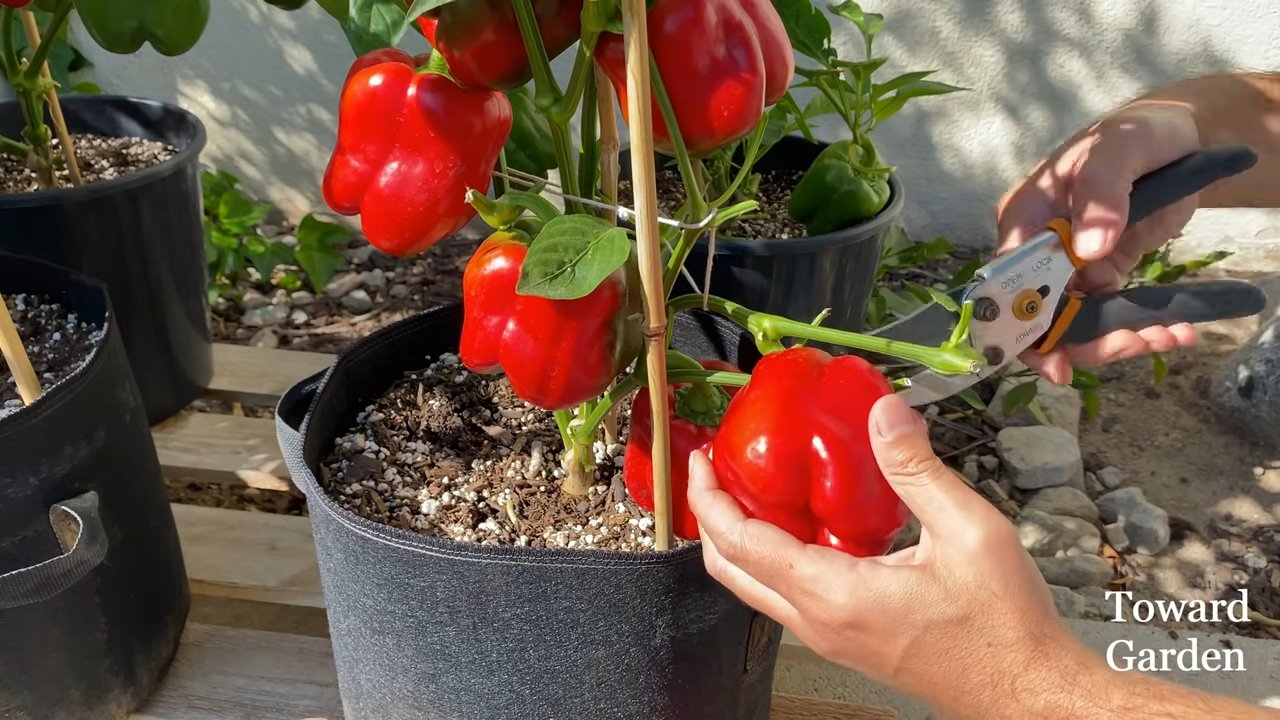
2. How to Harvest: Use a sharp knife or pruning shears to cut the bell peppers from the plant. Cut the stem close to the pepper, leaving a small piece of stem attached.
3. Enjoy Your Harvest: Now it’s time to enjoy the fruits (or vegetables!) of your labor. Bell peppers can be eaten raw, cooked, or pickled. They’re a versatile ingredient that can be used in a variety of dishes.
Troubleshooting Common Problems
Even with the best care, you might encounter some problems along the way. Here are a few common issues and how to fix them:
* Blossom End Rot: As mentioned earlier, this is caused by a calcium deficiency. Make sure your soil is rich in calcium and water your plants regularly. You can also add calcium supplements to the soil.
* Yellowing Leaves: This can be caused by a variety of factors, including nutrient deficiencies, overwatering, and underwatering. Check the soil moisture and fertilize your plants regularly.
* Pest Infestations: Keep an eye out for pests and treat them promptly with insecticidal soap or neem oil.
* Lack of Fruit Production: This can be caused by a lack of sunlight, poor pollination, or nutrient deficiencies. Make sure your plants are getting enough sunlight, help with pollination if needed, and fertilize them regularly.
Extra Tips for Success
Here are a few extra tips to help you grow the best bell peppers possible in your small space:
* Rotate Your Crops: Don’t plant bell peppers in the same spot year after year. Rotate your crops to prevent soilborne diseases.
* Mulch Your Plants: Mulch helps retain moisture,
Conclusion
So, there you have it! Growing bell peppers in a small space isn’t just a pipe dream; it’s an achievable reality with a little ingenuity and the right approach. We’ve explored the key elements, from selecting the perfect compact varieties to optimizing your container setup and mastering essential care techniques. The beauty of this DIY trick lies in its adaptability. Whether you have a sprawling balcony, a tiny patio, or even just a sunny windowsill, you can cultivate your own vibrant bell pepper bounty.
Why is this a must-try? Beyond the sheer satisfaction of harvesting your own produce, growing bell peppers offers a multitude of benefits. You’ll have access to fresher, more flavorful peppers than you can typically find in stores, and you’ll know exactly what went into growing them – no mystery pesticides or questionable practices. Plus, it’s a fantastic way to connect with nature, even in the heart of the city. The vibrant green foliage and the colorful peppers themselves add a touch of beauty to any space, creating a mini-oasis of tranquility.
But the real magic happens when you start experimenting. Consider trying different bell pepper varieties to discover your favorites. Perhaps you’re partial to the sweetness of a yellow bell pepper, or maybe you crave the fiery kick of a poblano (yes, technically a chili pepper, but closely related and often grown similarly!). You can also explore different container sizes and materials to see what works best for your space and climate. Some gardeners swear by terracotta pots for their excellent drainage, while others prefer the lightweight convenience of plastic containers.
Don’t be afraid to get creative with your support systems, too. While tomato cages are a common choice, you can also use bamboo stakes, trellises, or even repurposed materials to provide the necessary support for your growing bell peppers. And remember, companion planting can be a game-changer. Basil, marigolds, and carrots are all excellent companions for bell peppers, helping to deter pests and improve overall plant health.
Ultimately, the key to success with this DIY trick is observation and adaptation. Pay close attention to your plants, learn their needs, and adjust your approach accordingly. Are the leaves starting to droop? They might need more water. Are the peppers slow to ripen? They might need more sunlight. The more you observe and respond to your plants’ needs, the more successful you’ll be.
We wholeheartedly encourage you to give this DIY trick a try. It’s a rewarding and fulfilling experience that will not only provide you with delicious bell peppers but also connect you with the natural world in a meaningful way. And most importantly, don’t forget to share your experiences with us! We’d love to hear about your successes, your challenges, and any tips or tricks you’ve discovered along the way. Share your photos, your stories, and your questions in the comments below. Let’s create a community of small-space bell pepper growers and inspire others to embrace the joy of homegrown produce. So, grab your seeds, your soil, and your containers, and get ready to embark on a delicious and rewarding gardening adventure! Let’s get growing bell peppers!
Frequently Asked Questions (FAQ)
What is the best type of bell pepper to grow in a small space?
Compact or dwarf bell pepper varieties are ideal for small spaces. Look for varieties like ‘Patio Bell’, ‘Mini Bell’, or ‘Lunchbox’ peppers. These varieties are bred to be smaller and more manageable, making them perfect for containers and limited spaces. They still produce full-sized peppers, just on a smaller plant. Avoid larger varieties like ‘California Wonder’ unless you have a very large container and plenty of space.
How much sunlight do bell peppers need when grown in containers?
Bell peppers are sun-loving plants and require at least 6-8 hours of direct sunlight per day to thrive. If you don’t have a spot that receives that much sunlight, consider using grow lights to supplement their light exposure. Insufficient sunlight can lead to stunted growth, fewer peppers, and a less vibrant flavor. Rotate your containers regularly to ensure even sunlight exposure on all sides of the plant.
What size container is best for growing bell peppers?
A container that is at least 12 inches in diameter and 12 inches deep is generally recommended for growing bell peppers. Larger containers (15-20 inches) are even better, as they provide more room for the roots to grow and allow for better water retention. Make sure the container has drainage holes to prevent waterlogging, which can lead to root rot.
What type of soil should I use for growing bell peppers in containers?
Use a well-draining potting mix specifically formulated for containers. Avoid using garden soil, as it can become compacted in containers and doesn’t provide adequate drainage. A good potting mix will contain a blend of peat moss, perlite, and vermiculite, which helps to retain moisture while still allowing for good drainage. You can also amend the potting mix with compost to provide additional nutrients.
How often should I water my bell pepper plants?
Water your bell pepper plants regularly, especially during hot and dry weather. The soil should be kept consistently moist, but not waterlogged. Check the soil moisture by sticking your finger about an inch into the soil. If it feels dry, it’s time to water. Water deeply, allowing the water to drain out of the drainage holes. Avoid overhead watering, as this can lead to fungal diseases.
Do bell pepper plants need fertilizer?
Yes, bell pepper plants are heavy feeders and benefit from regular fertilization. Use a balanced fertilizer (e.g., 10-10-10) or a fertilizer specifically formulated for vegetables. Fertilize every 2-3 weeks during the growing season, following the instructions on the fertilizer label. You can also use organic fertilizers like compost tea or fish emulsion.
How do I support my bell pepper plants?
Bell pepper plants can become top-heavy as they produce peppers, so it’s important to provide them with support. Use tomato cages, stakes, or trellises to support the plants and prevent them from falling over. Insert the support system early in the growing season, before the plants become too large.
How do I deal with pests and diseases on my bell pepper plants?
Inspect your bell pepper plants regularly for pests and diseases. Common pests include aphids, spider mites, and whiteflies. You can control these pests with insecticidal soap, neem oil, or by handpicking them off the plants. Common diseases include blossom end rot and fungal diseases. Blossom end rot is caused by calcium deficiency and can be prevented by adding calcium to the soil. Fungal diseases can be prevented by providing good air circulation and avoiding overhead watering.
When should I harvest my bell peppers?
Bell peppers can be harvested at any stage of maturity, depending on your preference. Green bell peppers are typically harvested when they are firm and fully sized, but still green. Colored bell peppers (red, yellow, orange) are harvested when they have reached their mature color and are firm to the touch. Use pruning shears or a sharp knife to cut the peppers from the plant, leaving a small stem attached.
Can I grow bell peppers indoors?
Yes, you can grow bell peppers indoors, but it requires providing them with adequate light and warmth. Place the plants in a sunny window that receives at least 6-8 hours of direct sunlight per day, or use grow lights to supplement their light exposure. Maintain a consistent temperature of 70-80°F during the day and 60-70°F at night. Pollinate the flowers by hand using a small brush or cotton swab.
Leave a Comment