
Tomato growing tricks are the secret weapon every gardener needs to unlock a bountiful harvest of juicy, sun-ripened tomatoes! Let’s face it, there’s nothing quite like the taste of a homegrown tomato, bursting with flavor that store-bought varieties just can’t match. But sometimes, getting those perfect tomatoes can feel like a real challenge, right?
For centuries, tomatoes have been a staple in cuisines around the world, from the vibrant sauces of Italy to the refreshing salsas of Mexico. Their journey from South America to our plates is a testament to their deliciousness and versatility. But even with all that history, mastering the art of tomato growing can still feel elusive.
That’s where these DIY tomato growing tricks come in! I’m going to share some simple, yet effective hacks that will help you overcome common tomato-growing problems, like blossom end rot, pests, and diseases. Whether you’re a seasoned gardener or just starting out, these tips will empower you to grow the best tomatoes you’ve ever tasted. Imagine biting into a perfectly ripe tomato, knowing you nurtured it from seed to table. It’s a rewarding experience, and with these tomato growing tricks, it’s totally achievable! So, grab your gardening gloves, and let’s get started!
Unlock Bumper Tomato Harvests: My Favorite DIY Tomato Growing Hacks!
Hey fellow gardeners! I’m so excited to share some of my tried-and-true DIY tomato growing hacks that have helped me achieve incredible harvests year after year. Forget those tiny, bland supermarket tomatoes – we’re talking juicy, flavorful, homegrown goodness! These tips are perfect for beginners and seasoned gardeners alike. Let’s dive in!
Choosing the Right Tomato Variety
Before we even get our hands dirty, let’s talk about variety. Not all tomatoes are created equal! Choosing the right variety for your climate and growing conditions is crucial.
* Consider your climate: Are you in a hot, humid area or a cooler, drier one? Determinate varieties (bush tomatoes that ripen all at once) are often better for shorter growing seasons, while indeterminate varieties (vining tomatoes that produce fruit throughout the season) thrive in longer, warmer climates.
* Think about your space: If you’re gardening in containers, choose compact or dwarf varieties. If you have plenty of space, go wild with larger, vining types.
* Flavor preferences: Do you prefer sweet, tangy, or acidic tomatoes? Research different varieties to find the flavor profile you love. Some of my favorites include ‘Brandywine’ (heirloom, beefsteak), ‘San Marzano’ (paste tomato), and ‘Sungold’ (cherry tomato).
Starting Strong: Seed Starting and Seedling Care
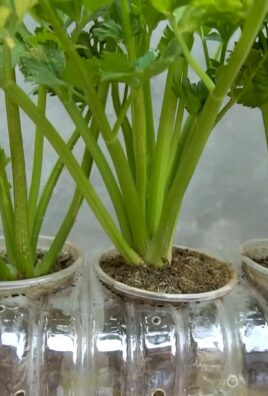
Getting your tomato plants off to a good start is essential for a successful harvest. I always start my seeds indoors about 6-8 weeks before the last expected frost.
* Materials you’ll need:
* Seed starting trays or small pots
* Seed starting mix (a sterile, lightweight mix)
* Tomato seeds
* Spray bottle
* Heat mat (optional, but helpful)
* Grow lights (essential if you don’t have a sunny windowsill)
Step-by-Step Instructions:
1. Prepare your seed starting trays: Fill each cell or pot with seed starting mix, leaving about ½ inch of space at the top. Gently tap the trays to settle the mix.
2. Sow the seeds: Place 2-3 tomato seeds in the center of each cell or pot. Cover the seeds with a thin layer of seed starting mix (about ¼ inch).
3. Water gently: Use a spray bottle to mist the soil until it’s evenly moist but not soggy.
4. Provide warmth: Place the trays on a heat mat (if using) and cover them with a clear plastic dome or plastic wrap to create a humid environment.
5. Provide light: Place the trays under grow lights or in a very sunny windowsill. If using grow lights, keep them about 2-4 inches above the soil surface.
6. Monitor moisture: Check the soil moisture daily and mist as needed to keep it consistently moist.
7. Remove the dome: Once the seeds germinate (usually within 5-10 days), remove the plastic dome or plastic wrap.
8. Thin the seedlings: Once the seedlings have their first true leaves (the second set of leaves that appear after the cotyledons), thin them to one seedling per cell or pot. Choose the strongest, healthiest-looking seedling and snip off the others at the soil line.
9. Harden off the seedlings: About a week before you plan to transplant the seedlings outdoors, begin hardening them off. This process gradually acclimates the seedlings to outdoor conditions. Start by placing the trays outdoors in a sheltered location for an hour or two each day, gradually increasing the amount of time they spend outdoors. Protect them from direct sunlight and strong winds.
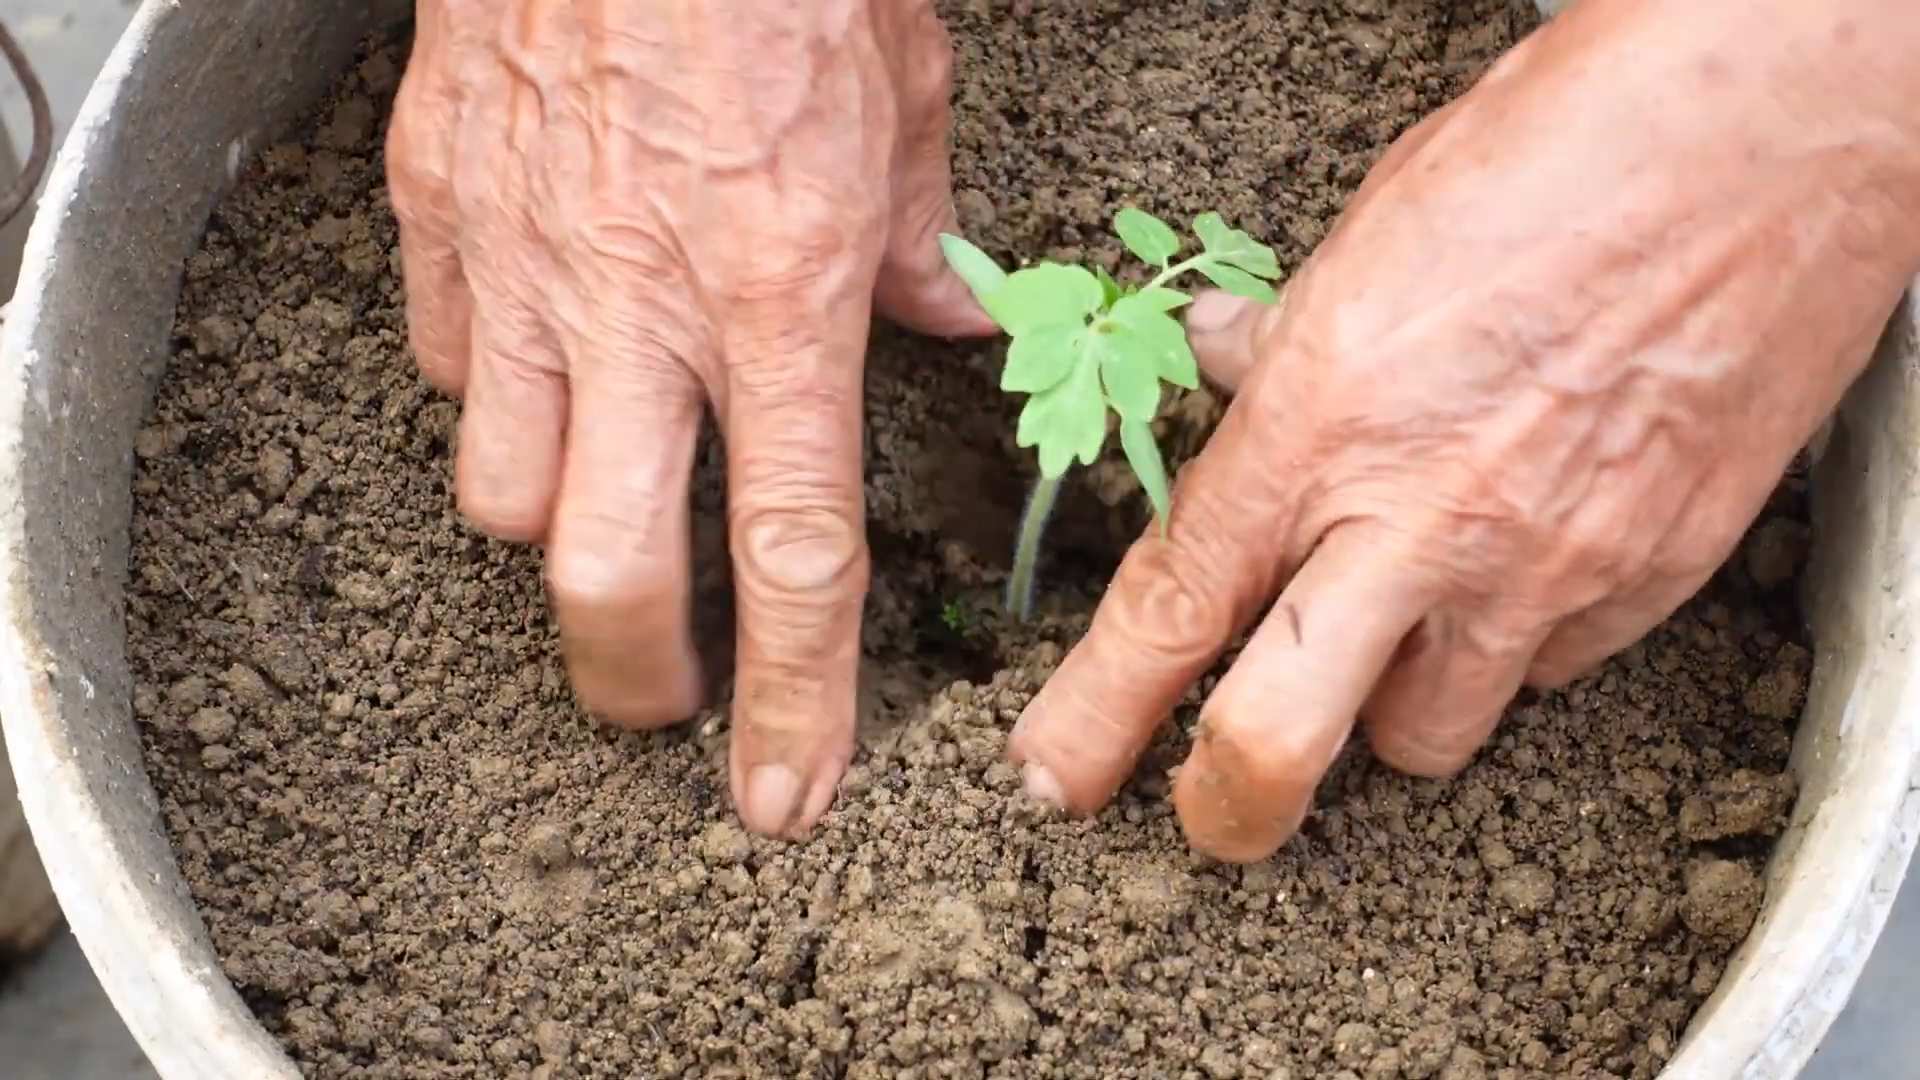
Supercharging Growth: My Secret Planting Techniques
Transplanting your tomato seedlings into the garden is a critical step. Here are a few tricks I use to give my plants a boost:
* Bury deep: Tomatoes have the amazing ability to grow roots along their stems. When transplanting, bury the seedlings deep, leaving only the top few sets of leaves exposed. This will encourage a stronger root system and a more vigorous plant.
* Add amendments to the planting hole: Before planting, amend the soil in the planting hole with compost, bone meal, and Epsom salts. Compost provides essential nutrients, bone meal promotes strong root development, and Epsom salts (magnesium sulfate) can help prevent blossom end rot.
* Water thoroughly: After planting, water the seedlings thoroughly to help them settle in.
Step-by-Step Instructions:
1. Prepare the planting hole: Dig a hole that is deep enough to bury most of the tomato seedling’s stem.
2. Amend the soil: Mix compost, bone meal, and Epsom salts into the soil at the bottom of the hole. I usually use about a handful of compost, a tablespoon of bone meal, and a teaspoon of Epsom salts per planting hole.
3. Remove the seedling from its container: Gently squeeze the sides of the container to loosen the root ball. Carefully remove the seedling, being careful not to damage the roots.
4. Bury the stem: Place the seedling in the hole, burying the stem up to the bottom set of leaves.
5. Fill the hole: Fill the hole with soil, gently firming it around the base of the plant.
6. Water thoroughly: Water the seedling thoroughly to help it settle in.
7. Add a stake or cage: Install a stake or cage to support the plant as it grows.
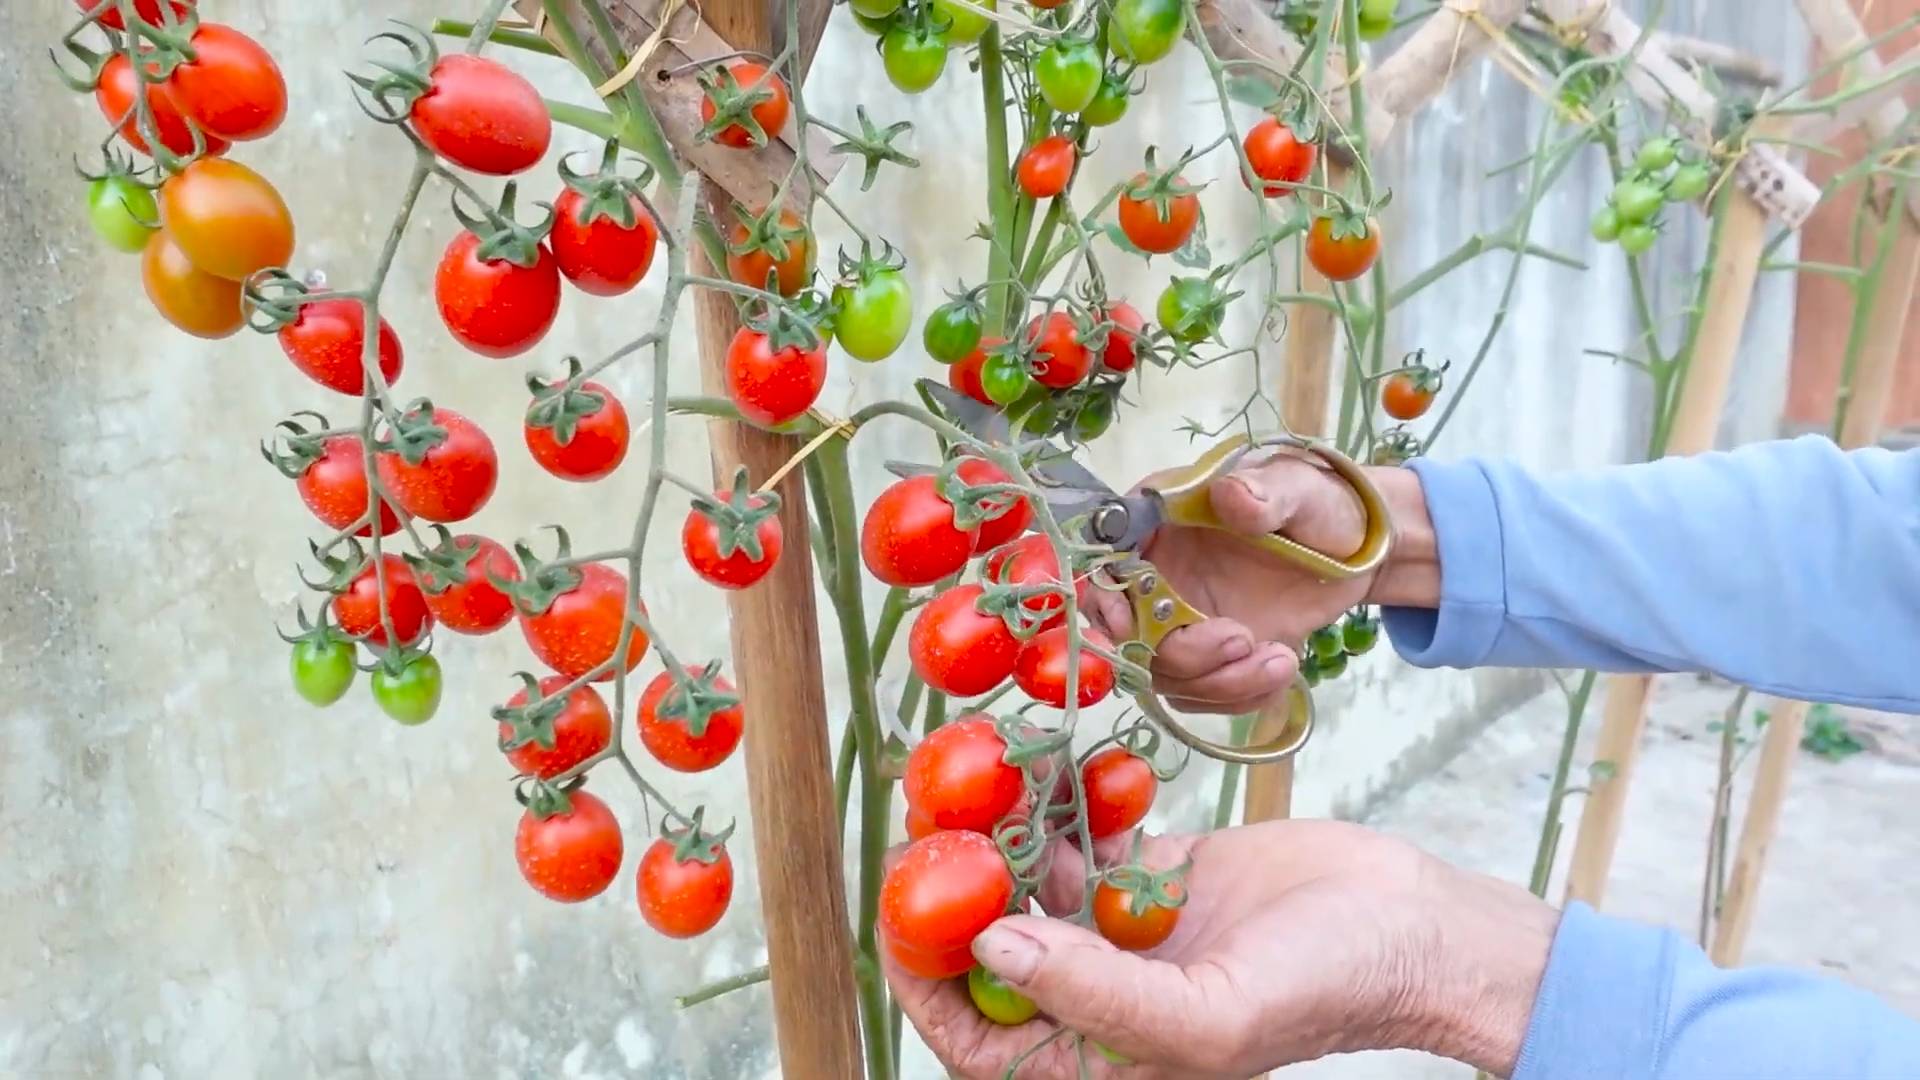
Boosting Yields: Pruning and Suckering
Pruning and suckering are essential for maximizing tomato yields, especially for indeterminate varieties.
* What are suckers? Suckers are small shoots that grow in the “armpit” of the plant, where a branch meets the main stem.
* Why prune suckers? Removing suckers directs the plant’s energy towards producing fruit rather than foliage. It also improves air circulation, which can help prevent diseases.
* How to prune suckers: Use your fingers or pruning shears to pinch or cut off the suckers when they are small (2-3 inches long).
Step-by-Step Instructions:
1. Identify suckers: Look for small shoots growing in the “armpit” of the plant, where a branch meets the main stem.
2. Prune suckers: Use your fingers or pruning shears to pinch or cut off the suckers when they are small (2-3 inches long).
3. Focus on the lower part of the plant: Concentrate on removing suckers from the lower part of the plant to improve air circulation and prevent diseases.
4. Don’t over-prune: Avoid removing too many leaves, as they are essential for photosynthesis.
Feeding Your Tomatoes: My DIY Fertilizer Recipe
Tomatoes are heavy feeders, meaning they require a lot of nutrients to produce a bountiful harvest. I like to make my own DIY fertilizer using simple ingredients.
* My secret recipe:
* Epsom salts (magnesium sulfate): Provides magnesium, which is essential for chlorophyll production and fruit development.
* Bone meal: Provides phosphorus, which promotes strong root development and flowering.
* Compost tea: A nutrient-rich liquid fertilizer made by steeping compost in water.
Step-by-Step Instructions:
1. Prepare the Epsom salts solution: Dissolve 1 tablespoon of Epsom salts in 1 gallon of water.
2. Apply the Epsom salts solution: Water your tomato plants with the Epsom salts solution every 2-3 weeks.
3. Apply bone meal: Sprinkle bone meal around the base of your tomato plants every 4-6 weeks. Gently work it into the soil.
4. Make compost tea: Fill a bucket with water and add a few handfuls of compost. Let it steep for 24-48 hours, stirring occasionally.
5. Strain the compost tea: Strain the compost tea through a cheesecloth or fine-mesh sieve to remove any solids.
6. Apply the compost tea: Water your tomato plants with the compost tea every 1-2 weeks.
Watering Wisely: Avoiding Blossom End Rot
Blossom end rot is a common problem in tomatoes, caused by a calcium deficiency. However, it’s often not a lack of calcium in the soil, but rather an inability of the plant to absorb it due to inconsistent watering.
* Water deeply and consistently: Water your tomato plants deeply and consistently, especially during hot, dry weather. Aim for at least 1 inch of water per week.
* Use mulch: Apply a layer of mulch around your tomato plants to help retain moisture in the soil.
* Avoid over-watering: Over-watering can also lead to blossom end rot, as it can leach calcium from the soil.
Protecting Your Crop: Pest and Disease Control
Tomatoes are susceptible to a variety of pests and diseases. Here are a few tips for protecting
Conclusion
So, there you have it! These simple yet incredibly effective tomato growing tricks are your secret weapon to unlocking a bountiful harvest of juicy, flavorful tomatoes, even if you’ve struggled in the past. We’ve covered everything from optimizing soil conditions and providing essential support to mastering the art of pruning and warding off common pests and diseases.
But why is this DIY approach a must-try? Because it empowers you to take control of your tomato-growing journey. You’re not relying on expensive store-bought solutions or crossing your fingers and hoping for the best. Instead, you’re actively creating the ideal environment for your tomato plants to thrive, resulting in healthier, more productive plants and, ultimately, more delicious tomatoes for your table.
Think of the possibilities! Imagine sinking your teeth into a sun-ripened heirloom tomato, bursting with flavor, that you grew yourself. Picture sharing a vibrant tomato salad with friends and family, knowing that every ingredient was nurtured with your own hands. This isn’t just about growing tomatoes; it’s about connecting with nature, enjoying the satisfaction of a successful garden, and savoring the unparalleled taste of homegrown goodness.
And the best part? These tomato growing tricks are adaptable to your specific needs and preferences. Experiment with different tomato varieties to find your favorites. Try companion planting with basil or marigolds to enhance flavor and deter pests. Explore different pruning techniques to optimize fruit production. The possibilities are endless!
For example, if you live in a particularly hot climate, consider providing your tomato plants with some afternoon shade to prevent sunscald. If you’re short on space, try growing tomatoes in containers or hanging baskets. And if you’re looking for a fun and educational project to do with kids, involve them in the planting, watering, and harvesting process.
Don’t be afraid to get your hands dirty and embrace the learning process. Gardening is all about experimentation and discovery. The more you learn about your plants and their needs, the more successful you’ll become.
We are confident that by implementing these tomato growing tricks, you’ll be amazed at the difference they make. You’ll see healthier plants, increased yields, and, most importantly, more delicious tomatoes than you ever thought possible.
So, what are you waiting for? Grab your gardening gloves, gather your supplies, and get ready to transform your tomato-growing experience. We encourage you to try these techniques and share your results with us! Post pictures of your thriving tomato plants and delicious harvests on social media using [Your Hashtag] or leave a comment below to let us know how these tips worked for you. We’re excited to hear about your success stories and learn from your experiences. Happy gardening!
Frequently Asked Questions (FAQ)
What is the best type of soil for growing tomatoes?
Tomatoes thrive in well-draining, slightly acidic soil with a pH between 6.0 and 6.8. Loamy soil is ideal, as it provides a good balance of drainage and water retention. Before planting, amend your soil with compost or other organic matter to improve its fertility and structure. If your soil is heavy clay, consider adding sand or perlite to improve drainage. You can also purchase a soil testing kit to determine your soil’s pH and nutrient levels and adjust accordingly. Remember, healthy soil is the foundation for healthy tomato plants.
How often should I water my tomato plants?
Water deeply and consistently, especially during hot, dry weather. Aim to water at the base of the plant to avoid wetting the foliage, which can lead to fungal diseases. A good rule of thumb is to water when the top inch of soil feels dry to the touch. The frequency of watering will depend on factors such as weather conditions, soil type, and the size of your plants. Container-grown tomatoes will typically need more frequent watering than those grown in the ground. Mulching around your tomato plants can help retain moisture in the soil and reduce the need for frequent watering.
When should I start pruning my tomato plants?
Pruning is essential for maximizing fruit production and preventing diseases. Start pruning your tomato plants once they reach about 12 inches in height. The main goal of pruning is to remove suckers, which are small shoots that grow between the main stem and the branches. These suckers can divert energy away from fruit production and make the plant more susceptible to diseases. Use clean pruning shears to remove suckers early in the morning on a dry day. For determinate tomato varieties, which grow to a fixed size, minimal pruning is required. For indeterminate varieties, which continue to grow throughout the season, regular pruning is essential.
How can I protect my tomato plants from pests and diseases?
Prevention is key when it comes to pests and diseases. Start by choosing disease-resistant tomato varieties. Ensure good air circulation around your plants by spacing them properly and pruning regularly. Inspect your plants regularly for signs of pests or diseases. Common tomato pests include aphids, tomato hornworms, and whiteflies. Common tomato diseases include early blight, late blight, and blossom end rot. If you spot any pests or diseases, take action immediately. You can use organic pest control methods such as insecticidal soap or neem oil to control pests. For diseases, remove infected leaves and apply a fungicide if necessary.
What is blossom end rot, and how can I prevent it?
Blossom end rot is a common problem in tomatoes caused by a calcium deficiency. It appears as a dark, leathery spot on the bottom of the tomato fruit. To prevent blossom end rot, ensure that your soil has adequate calcium levels. You can add lime or bone meal to your soil before planting to increase calcium levels. Also, maintain consistent watering to prevent fluctuations in soil moisture, which can interfere with calcium uptake. Avoid over-fertilizing with nitrogen, as this can also contribute to blossom end rot.
Can I grow tomatoes in containers?
Yes, you can definitely grow tomatoes in containers! Choose a large container, at least 20 gallons in size, with good drainage holes. Use a high-quality potting mix specifically formulated for vegetables. Select determinate tomato varieties, which are more compact and well-suited for container growing. Provide your container-grown tomatoes with plenty of sunlight, at least 6-8 hours per day. Water regularly and fertilize every two weeks with a balanced fertilizer. You may also need to provide support for your plants, such as a stake or cage.
What are some good companion plants for tomatoes?
Companion planting can help improve the health and productivity of your tomato plants. Some good companion plants for tomatoes include basil, marigolds, garlic, onions, and carrots. Basil helps repel pests and improve the flavor of tomatoes. Marigolds deter nematodes and other soil pests. Garlic and onions repel aphids and other insects. Carrots help loosen the soil and improve drainage. Avoid planting tomatoes near brassicas, such as cabbage and broccoli, as they can compete for nutrients.
How long does it take for tomatoes to ripen?
The time it takes for tomatoes to ripen depends on the variety and growing conditions. Generally, it takes about 60-85 days from transplanting for tomatoes to ripen. Warmer temperatures and plenty of sunlight will speed up the ripening process. You can tell when a tomato is ripe when it has reached its full color and is slightly soft to the touch. Gently twist the tomato off the vine when it is ripe.
What should I do with green tomatoes at the end of the season?
Don’t let those green tomatoes go to waste! There are many delicious ways to use green tomatoes. You can fry them, pickle them, or use them in chutneys and relishes. You can also ripen green tomatoes indoors by placing them in a paper bag with a ripe apple or banana. The ethylene gas released by the ripe fruit will help the green tomatoes ripen.
Leave a Comment