
Grow Taro Indoors Eco Friendly? Absolutely! Have you ever looked at a lush, tropical Taro plant and thought, “I wish I could have that in my home, but I don’t have a garden?” Well, I’m here to tell you that you absolutely can! This isn’t just about adding another plant to your collection; it’s about bringing a piece of the tropics into your living space in a sustainable and rewarding way.
Taro, also known as Kalo in Hawaiian culture, has a rich history, deeply intertwined with sustenance and spirituality. For centuries, it has been a staple food and a symbol of life and prosperity. While traditionally grown in flooded fields, I’m going to show you how to adapt this ancient practice for the modern home, making it both accessible and eco-friendly.
Why should you learn this DIY trick? Because in today’s world, bringing nature indoors is more important than ever. Not only does it purify the air and boost your mood, but growing your own plants, even something as unique as Taro, connects you to the natural world in a meaningful way. Plus, by learning how to grow Taro indoors eco friendly, you’re contributing to a more sustainable lifestyle, reducing your carbon footprint, and enjoying the beauty of nature all year round. Let’s dive in and discover the secrets to successfully cultivating this amazing plant in your own home!
Growing Taro Indoors: An Eco-Friendly Guide
Hey there, plant enthusiasts! Ever thought about growing your own taro indoors? It’s totally doable, surprisingly rewarding, and a fantastic way to bring a touch of the tropics into your home while being eco-conscious. Taro, also known as *Colocasia esculenta*, is a beautiful plant with large, heart-shaped leaves, and it’s not just pretty – its corms (the underground stems) are edible and a staple in many cuisines. Let’s dive into how you can cultivate this amazing plant indoors!
Choosing the Right Taro Variety
Not all taro varieties are created equal when it comes to indoor growing. Some get HUGE! So, selecting a more compact variety is key. Here are a few that tend to do well indoors:
* ‘Black Magic’: This one has stunning, almost black foliage, adding a dramatic flair to any room. It tends to stay relatively compact compared to other varieties.
* ‘Illustris’: Known for its unique green leaves with purple veins, ‘Illustris’ is another visually appealing choice that doesn’t get overwhelmingly large.
* ‘Elena’: This variety offers vibrant green leaves and a manageable size, making it perfect for indoor containers.
Gathering Your Supplies
Before we get our hands dirty, let’s make sure we have everything we need. This is where the “eco-friendly” part really comes into play!
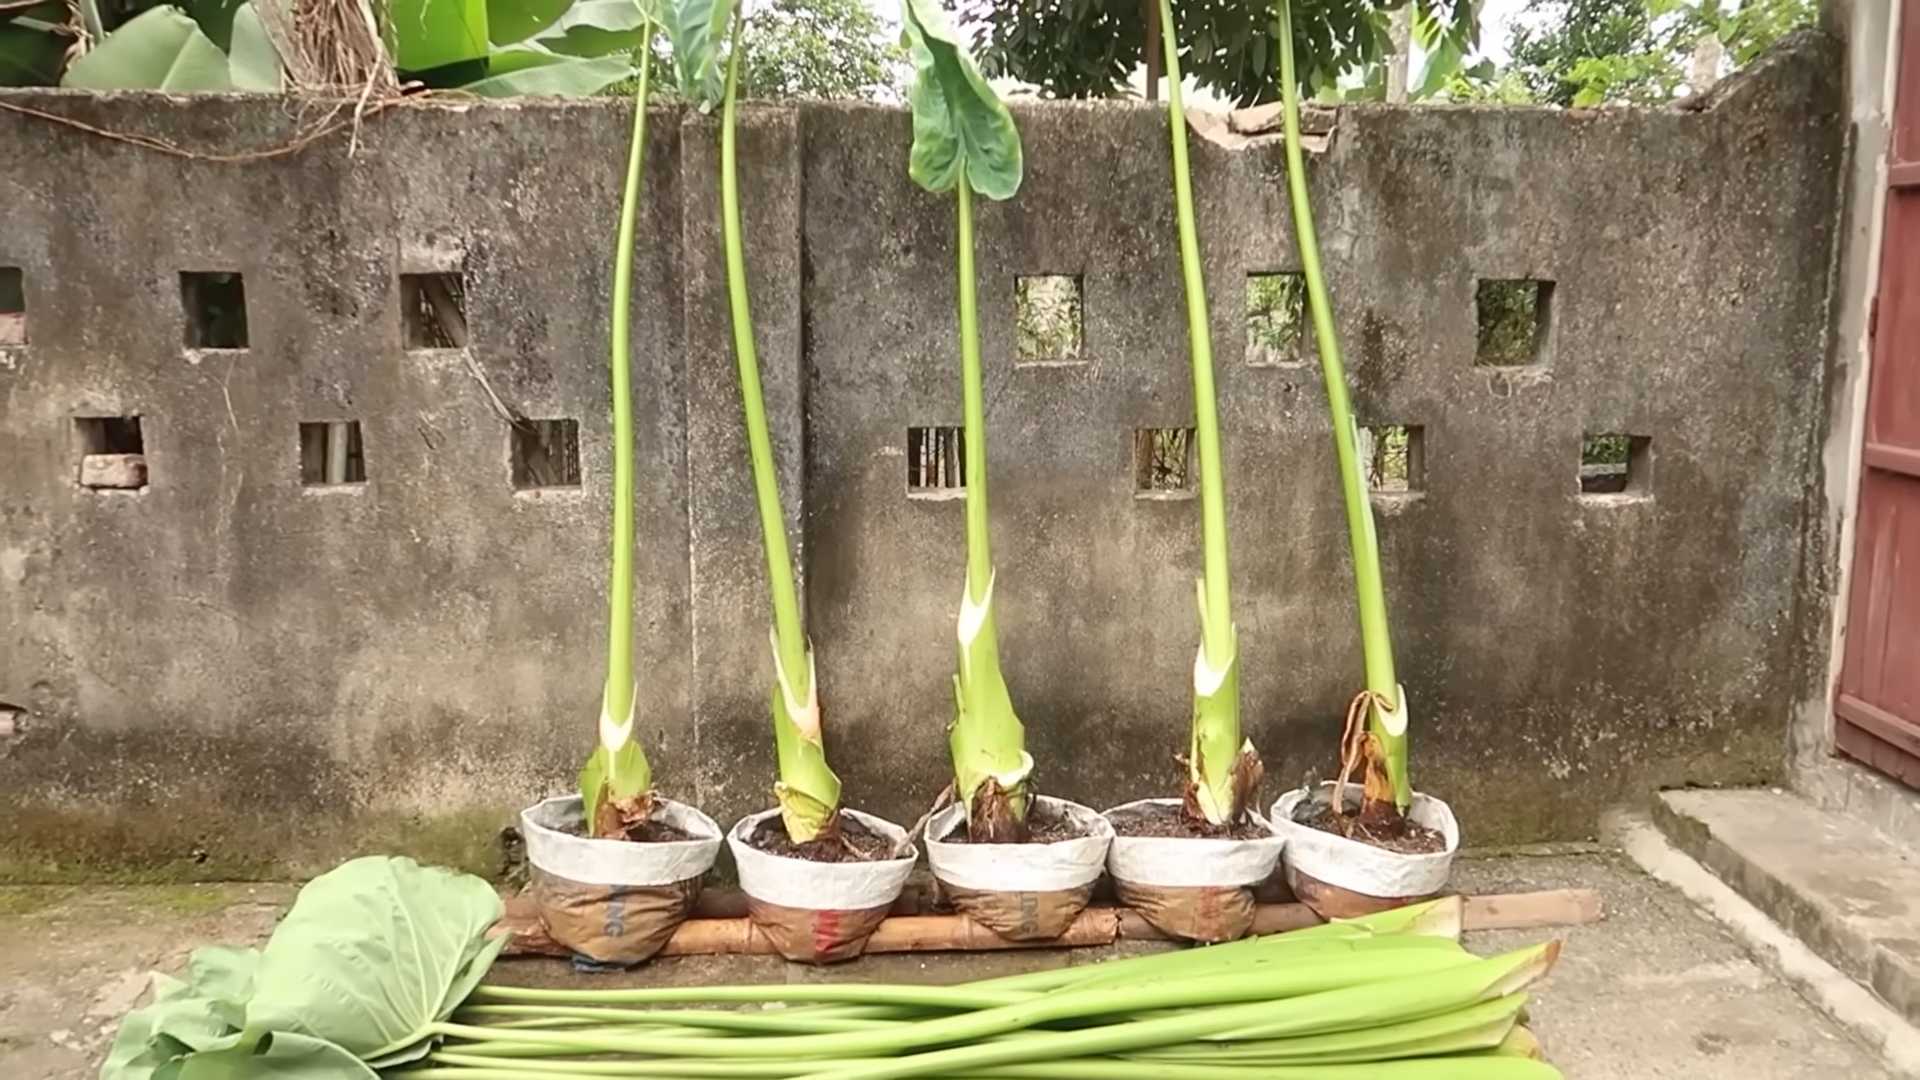
* Taro Corm or Seedling: You can find these at local nurseries or online. If you’re starting from a corm, make sure it’s firm and healthy-looking.
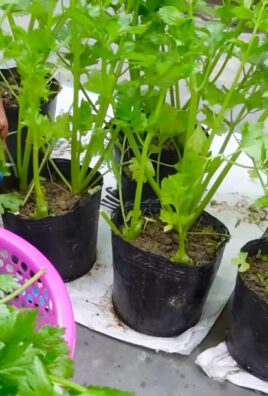
* Large Pot: Choose a pot that’s at least 12 inches in diameter and depth. Taro likes room to grow!
* Eco-Friendly Potting Mix: This is crucial! Look for a potting mix that’s peat-free and made from sustainable materials like coconut coir, composted bark, and worm castings. Avoid mixes with synthetic fertilizers. I personally love making my own!
* Perlite or Vermiculite: These help improve drainage and aeration in the soil.
* Watering Can: A watering can with a gentle spout is ideal for watering your taro without disturbing the soil.
* Spray Bottle: Taro loves humidity, so a spray bottle will come in handy for misting the leaves.
* Grow Light (Optional): If you don’t have a spot with bright, indirect light, a grow light can be a lifesaver.
* Organic Fertilizer: Choose an organic fertilizer specifically formulated for leafy greens. Worm castings are a fantastic option!
* Pebbles or Gravel: For drainage at the bottom of the pot.
* Tray or Saucer: To catch excess water.
Planting Your Taro
Okay, let’s get planting!
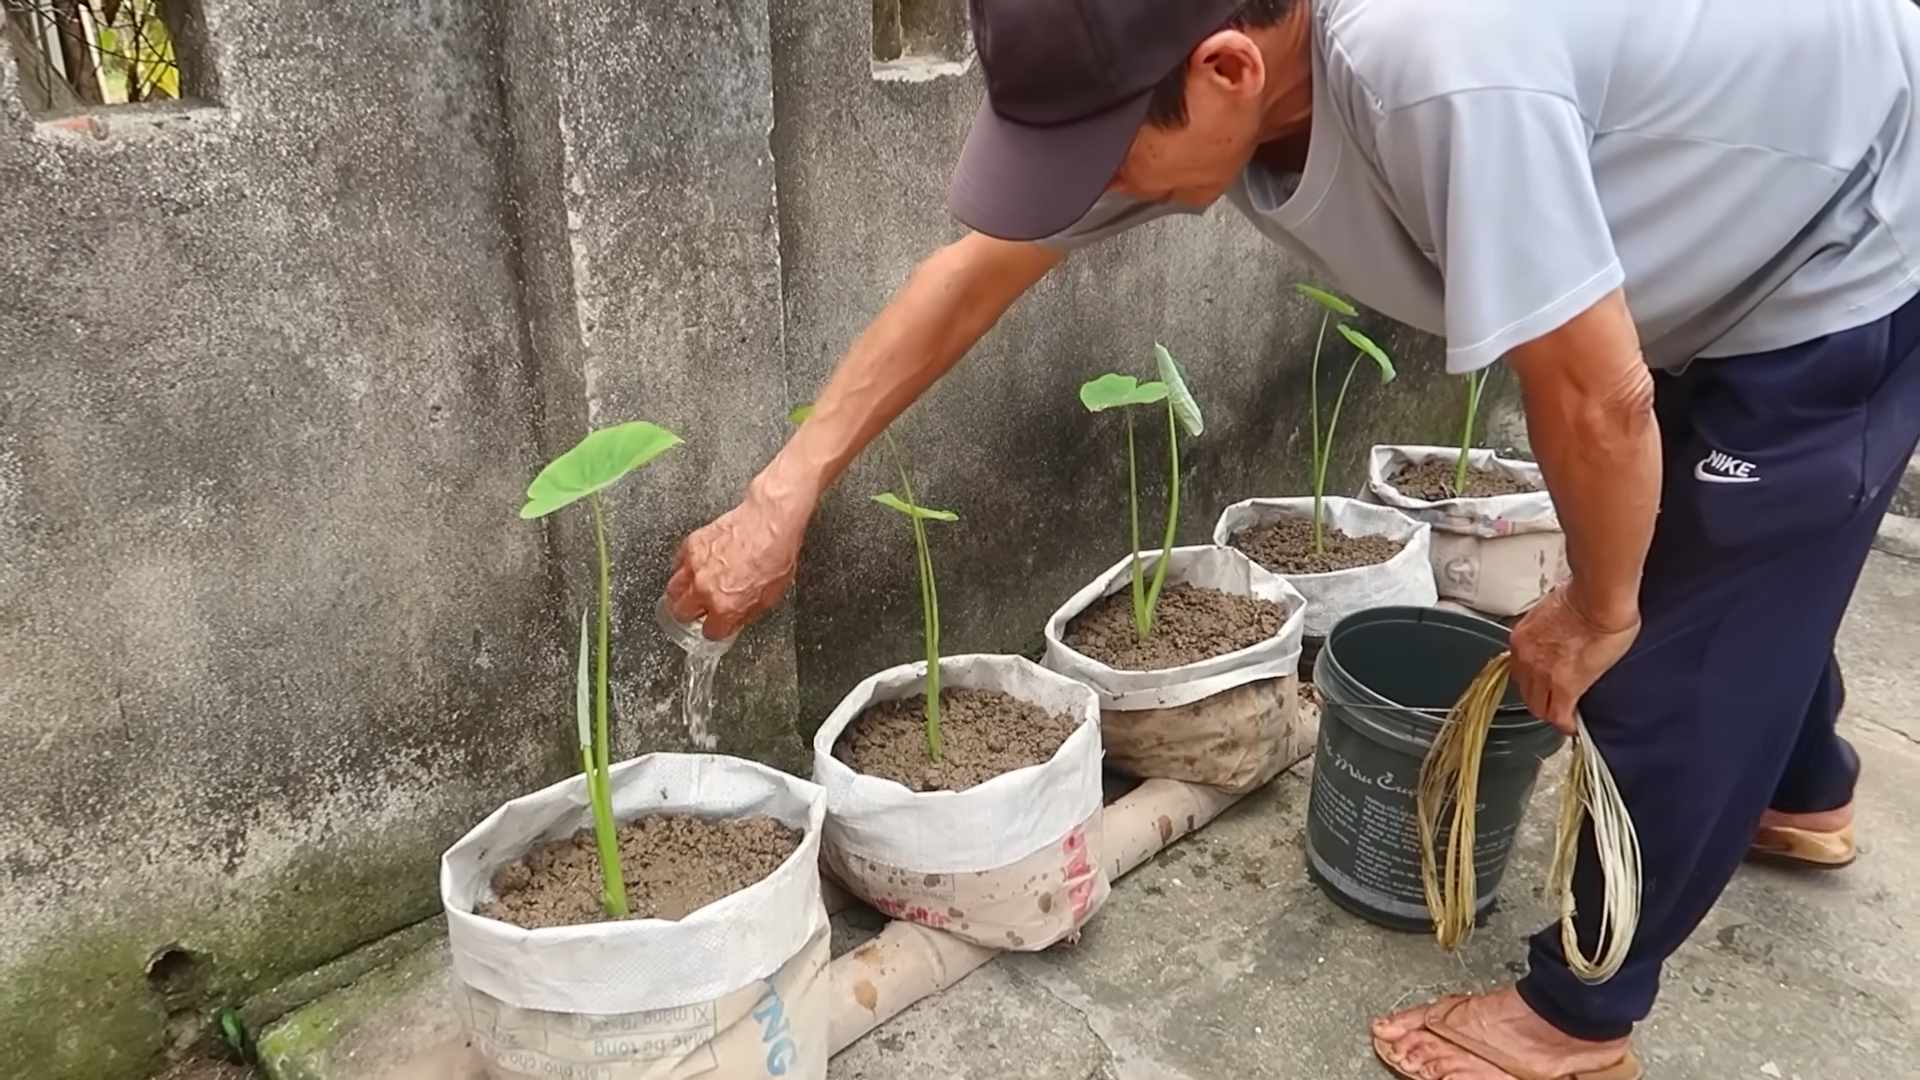
1. Prepare the Pot: Start by placing a layer of pebbles or gravel at the bottom of your pot. This will help with drainage and prevent the roots from sitting in soggy soil.
2. Mix the Potting Soil: In a large container or bucket, combine your eco-friendly potting mix with perlite or vermiculite. A good ratio is about 4 parts potting mix to 1 part perlite/vermiculite. This will ensure good drainage and aeration.
3. Fill the Pot: Fill the pot about two-thirds full with the potting mix.
4. Plant the Corm or Seedling:
* From Corm: If you’re starting with a corm, place it in the center of the pot with the pointed end facing up. Cover it with the remaining potting mix, leaving about an inch or two of space at the top of the pot.
* From Seedling: If you’re using a seedling, gently remove it from its nursery pot and loosen the roots slightly. Place it in the center of the pot and fill in around it with the potting mix.
5. Water Thoroughly: Water the soil thoroughly until water drains out of the bottom of the pot. This will help settle the soil and ensure that the roots are well-hydrated.
Caring for Your Indoor Taro
Now that your taro is planted, let’s talk about how to keep it happy and thriving indoors.
1. Light: Taro loves bright, indirect light. A spot near an east-facing window is ideal. If you don’t have enough natural light, supplement with a grow light. Avoid direct sunlight, as it can scorch the leaves.
2. Watering: Taro prefers consistently moist soil, but not soggy. Water when the top inch of soil feels dry to the touch. During the growing season (spring and summer), you may need to water more frequently. Reduce watering in the fall and winter. Always check the soil moisture before watering to avoid overwatering.
3. Humidity: Taro thrives in high humidity. Mist the leaves regularly with a spray bottle, especially during dry winter months. You can also place the pot on a tray filled with pebbles and water. As the water evaporates, it will increase the humidity around the plant. A humidifier is also a great option!
4. Temperature: Taro prefers temperatures between 65°F and 80°F (18°C and 27°C). Avoid placing it near drafts or heating vents.
5. Fertilizing: Feed your taro with an organic fertilizer every 4-6 weeks during the growing season. Worm castings are an excellent choice, or you can use a liquid fertilizer diluted to half strength.
6. Pruning: Remove any yellowing or dead leaves to keep your taro looking its best. You can also prune back the plant to encourage bushier growth.
7. Repotting: Taro grows relatively quickly, so you may need to repot it every year or two. Choose a pot that’s slightly larger than the previous one. The best time to repot is in the spring.
8. Pest Control: Keep an eye out for common houseplant pests like aphids, spider mites, and mealybugs. If you spot any pests, treat them with an organic insecticide or insecticidal soap. Neem oil is a great natural option.
Troubleshooting Common Issues
Even with the best care, you might encounter a few issues along the way. Here’s how to troubleshoot some common problems:
* Yellowing Leaves: This could be a sign of overwatering, underwatering, or nutrient deficiency. Check the soil moisture and adjust your watering schedule accordingly. If the soil is consistently moist, you’re likely overwatering. If it’s dry, you need to water more frequently. Also, make sure you’re fertilizing regularly.
* Brown Leaf Tips: This is often caused by low humidity or dry air. Increase the humidity around your plant by misting the leaves regularly or using a humidifier.
* Drooping Leaves: This could be a sign of underwatering or root rot. Check the soil moisture and adjust your watering schedule. If the soil is soggy, you may have root rot. Repot the plant in fresh soil and make sure the pot has good drainage.
* Leggy Growth: This is usually caused by insufficient light. Move your taro to a brighter location or supplement with a grow light.
* Pests: As mentioned earlier, keep an eye out for common houseplant pests. Treat them promptly with an organic insecticide or insecticidal soap.
Harvesting Taro Corms (Optional)
While you can grow taro indoors primarily for its beautiful foliage, you can also harvest the corms if you wish. However, keep in mind that harvesting the corms will likely weaken the plant.
1. Wait for Maturity: Taro corms typically take 6-9 months to mature. You’ll know they’re ready when the plant starts to die back.
2. Harvest Carefully: Gently dig up the plant and separate the corms from the roots.
3. Replenish the Soil: After harvesting, you can replant the remaining plant in fresh soil.
Eco-Friendly Tips for Growing Taro
Here are some additional tips to make your indoor taro growing even more eco-friendly:
* Compost: Use your own homemade compost to enrich the potting soil.
* Rainwater Harvesting: Collect rainwater to water your plants. Rainwater is naturally soft and free of chemicals.
* Recycle Pots: Reuse plastic pots or opt for biodegradable pots made from materials like coconut coir or bamboo.
* DIY Pest Control: Make your own pest control solutions using natural ingredients like neem oil, garlic, and chili peppers.
* Reduce, Reuse, Recycle: Be mindful of your consumption and try to reduce waste whenever possible.
Growing taro indoors is a fun and rewarding experience. With a little care and attention, you can enjoy the beauty of this tropical plant in your home while being kind to the environment. Happy growing!
Conclusion
So, there you have it! Cultivating your own taro indoors isn’t just a fun project; it’s a sustainable and rewarding way to bring a touch of the tropics into your home. We’ve walked you through the simple steps, highlighting the eco-friendly benefits of growing your own food and reducing your reliance on commercially produced options. This DIY trick is a must-try for anyone looking to add a unique and vibrant element to their indoor garden while embracing a more sustainable lifestyle.
Why is this a must-try? Because beyond the sheer joy of nurturing a plant from rhizome to leafy splendor, you’re actively participating in a greener future. You’re reducing your carbon footprint by minimizing transportation needs associated with store-bought produce. You’re also controlling the growing environment, ensuring your taro is free from harmful pesticides and herbicides often used in conventional farming. Plus, let’s be honest, the lush, heart-shaped leaves of the taro plant are simply stunning and will add a touch of exotic beauty to any room.
But the possibilities don’t stop there! Feel free to experiment with different varieties of taro. Some varieties are known for their vibrant purple hues, while others boast a more classic green. You can also explore different potting mixes to find what works best for your growing conditions. Consider adding a layer of mulch to help retain moisture and suppress weeds. And if you’re feeling adventurous, try propagating your taro plant to create even more leafy companions!
Don’t be afraid to get creative with your presentation, too. Taro plants look fantastic in decorative pots, adding a touch of elegance to your indoor space. You can even train them to climb a small trellis for a more dramatic effect. The possibilities are endless!
We truly believe that growing taro indoors is an experience that everyone should try. It’s a simple, sustainable, and incredibly rewarding way to connect with nature and bring a touch of the tropics into your home. So, grab a taro rhizome, gather your supplies, and get ready to embark on this exciting gardening adventure.
We’re confident that you’ll be amazed by the results. And once you’ve successfully grown your own taro, we encourage you to share your experience with us! Post photos of your thriving plants on social media using #IndoorTaro and #EcoFriendlyGardening. We can’t wait to see your green thumbs in action! Let’s spread the word about this fantastic DIY trick and inspire others to embrace a more sustainable and beautiful way of living. Growing taro indoors is more than just a hobby; it’s a step towards a greener, healthier future.
Frequently Asked Questions (FAQ)
What exactly is taro, and why should I grow it indoors?
Taro (Colocasia esculenta) is a tropical plant primarily grown for its starchy corms (underground stems), which are a staple food in many cultures. However, the plant itself is also incredibly ornamental, boasting large, heart-shaped leaves that add a touch of the tropics to any indoor space. Growing taro indoors allows you to enjoy its beauty year-round, regardless of your climate. Furthermore, it’s an eco-friendly way to source a unique food crop, reducing your reliance on commercially grown produce and minimizing your carbon footprint. You control the growing environment, ensuring your taro is free from harmful pesticides and herbicides.
Is it difficult to grow taro indoors?
Not at all! With the right conditions and a little bit of care, growing taro indoors is surprisingly easy. The key is to provide it with plenty of bright, indirect light, consistent moisture, and a well-draining potting mix. Taro thrives in warm, humid environments, so consider placing it near a humidifier or misting it regularly. As long as you meet these basic needs, your taro plant should flourish.
What kind of potting mix is best for growing taro indoors?
Taro prefers a well-draining potting mix that is rich in organic matter. A good option is a mix of equal parts potting soil, peat moss (or coconut coir), and perlite. This combination provides adequate drainage while retaining enough moisture to keep the plant happy. You can also add a small amount of compost to further enrich the soil.
How often should I water my indoor taro plant?
Taro loves moisture, so it’s important to keep the soil consistently moist but not waterlogged. Water thoroughly whenever the top inch of soil feels dry to the touch. Be sure to use a pot with drainage holes to prevent root rot. During the winter months, when the plant’s growth slows down, you can reduce watering slightly.
What kind of light does taro need indoors?
Taro thrives in bright, indirect light. Avoid placing it in direct sunlight, which can scorch the leaves. A spot near an east- or west-facing window is ideal. If you don’t have access to enough natural light, you can supplement with a grow light.
Can I eat the taro corms that I grow indoors?
Yes, you can! However, it’s important to note that raw taro corms contain calcium oxalate crystals, which can cause irritation to the mouth and throat. Therefore, it’s essential to cook the corms thoroughly before eating them. Boiling, steaming, or roasting are all effective methods. Once cooked, taro corms have a slightly sweet, nutty flavor and can be used in a variety of dishes.
How do I propagate taro plants?
Taro can be propagated in several ways, including from corms, cormels (small corms that grow around the main corm), and stem cuttings. The easiest method is to separate cormels from the main corm and plant them in individual pots. Stem cuttings can also be rooted in water or directly in potting mix.
Are there any pests or diseases that I should be aware of?
While taro is generally a hardy plant, it can be susceptible to certain pests and diseases. Common pests include spider mites, aphids, and mealybugs. These can be controlled with insecticidal soap or neem oil. Root rot can be a problem if the soil is too wet, so be sure to provide adequate drainage.
How big will my indoor taro plant get?
The size of your indoor taro plant will depend on the variety and growing conditions. However, most indoor taro plants will reach a height of 2-4 feet. You can prune the plant to maintain its desired size and shape.
Is growing taro indoors really eco-friendly?
Absolutely! Growing your own taro indoors is a fantastic way to reduce your environmental impact. By growing your own food, you’re reducing your reliance on commercially grown produce, which often involves long-distance transportation and the use of pesticides and herbicides. You’re also controlling the growing environment, ensuring your taro is free from harmful chemicals. Furthermore, growing plants indoors helps to purify the air and create a healthier living environment. So, by growing taro indoors, you’re not only enjoying a beautiful and unique plant, but you’re also contributing to a more sustainable future.
Leave a Comment