
Soil Free Rosemary Growing: Imagine harvesting fragrant rosemary sprigs right from your kitchen, even if you don’t have a garden! Sounds like a dream, right? Well, it’s totally achievable with this super cool DIY trick I’m about to share. For centuries, rosemary has been cherished not only for its culinary uses but also for its medicinal properties and symbolic significance – representing remembrance and love. From ancient Greece, where students wore rosemary garlands to improve memory, to modern-day aromatherapy, this herb has a rich and fascinating history.
But let’s face it, traditional gardening can be messy and time-consuming. Many of us live in apartments or have limited outdoor space, making it difficult to cultivate our favorite herbs. That’s where this soil-free method comes in! It’s a game-changer for anyone who wants fresh rosemary at their fingertips without the hassle of soil, pests, or complicated gardening techniques. I’m going to show you how to achieve soil free rosemary growing with just a few simple materials and minimal effort. Get ready to unlock the secrets to a thriving rosemary plant, no dirt required!
Growing Rosemary Without Soil: A DIY Hydroponic Adventure!
Hey there, fellow plant enthusiasts! Ever thought about ditching the dirt and trying something a little different with your rosemary? I’m talking about hydroponics – growing plants without soil, using just water and nutrients. It might sound intimidating, but trust me, it’s a fun and rewarding project, and rosemary thrives in a hydroponic setup. Plus, it’s a great way to have fresh rosemary year-round, even if you don’t have a garden!
Here’s how you can create your own simple hydroponic system for rosemary:
What You’ll Need:
Before we dive in, let’s gather our supplies. Don’t worry, you probably have a lot of this stuff lying around already!
* Rosemary Cuttings: You can take cuttings from an existing rosemary plant or buy them from a nursery. Look for healthy, green stems about 4-6 inches long.
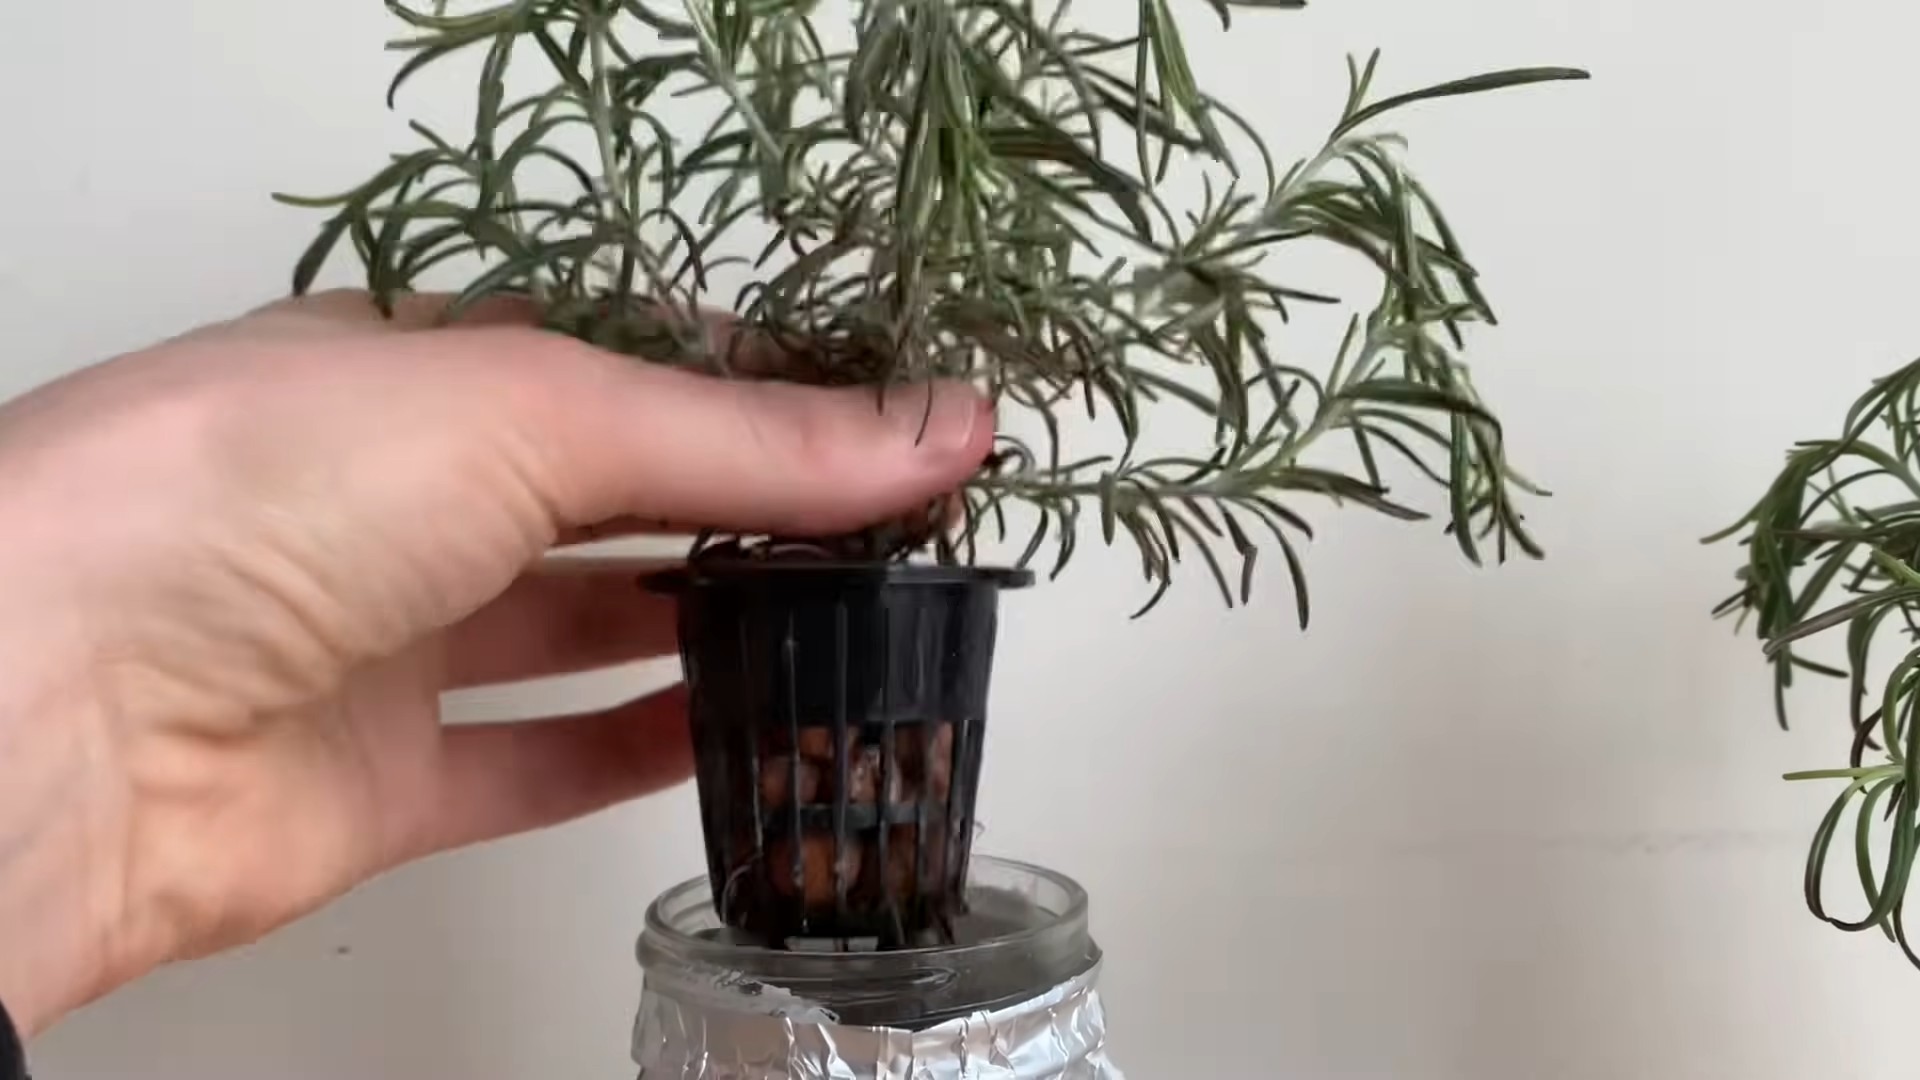
* Net Pots: These are small, plastic pots with holes in them. They’ll hold your rosemary cuttings and allow the roots to access the nutrient solution. 2-3 inch net pots are ideal.
* Hydroponic Grow Medium: This provides support for the roots. I recommend using Rockwool cubes, coco coir, or clay pebbles (LECA). Rockwool is great for starting cuttings, while coco coir and LECA are excellent for long-term growth.
* Container: This will hold the nutrient solution and the net pots. A plastic storage bin, a bucket, or even a repurposed container will work. Just make sure it’s opaque to prevent algae growth.
* Air Pump and Air Stone: These provide oxygen to the nutrient solution, which is crucial for healthy root development. A small aquarium air pump will do the trick.
* Hydroponic Nutrients: You’ll need a balanced hydroponic nutrient solution specifically formulated for herbs. Look for a two-part or three-part nutrient system.
* pH Meter or pH Test Kit: Maintaining the correct pH level is essential for nutrient absorption. A digital pH meter is more accurate, but a test kit is a more affordable option.
* pH Up and pH Down Solutions: These will help you adjust the pH of the nutrient solution if needed.
* Measuring Cups and Spoons: For accurately measuring the nutrient solution.
* Water: Use filtered or distilled water for the best results. Tap water can contain chlorine and other chemicals that can harm your plants.
* Optional: Grow Light: If you don’t have a sunny spot, a grow light will provide the necessary light for your rosemary to thrive. LED grow lights are energy-efficient and work well.
* Optional: Rooting Hormone: This can help speed up the rooting process, but it’s not essential.
Taking Rosemary Cuttings:
This is the first crucial step! Getting healthy cuttings is key to a successful hydroponic setup.
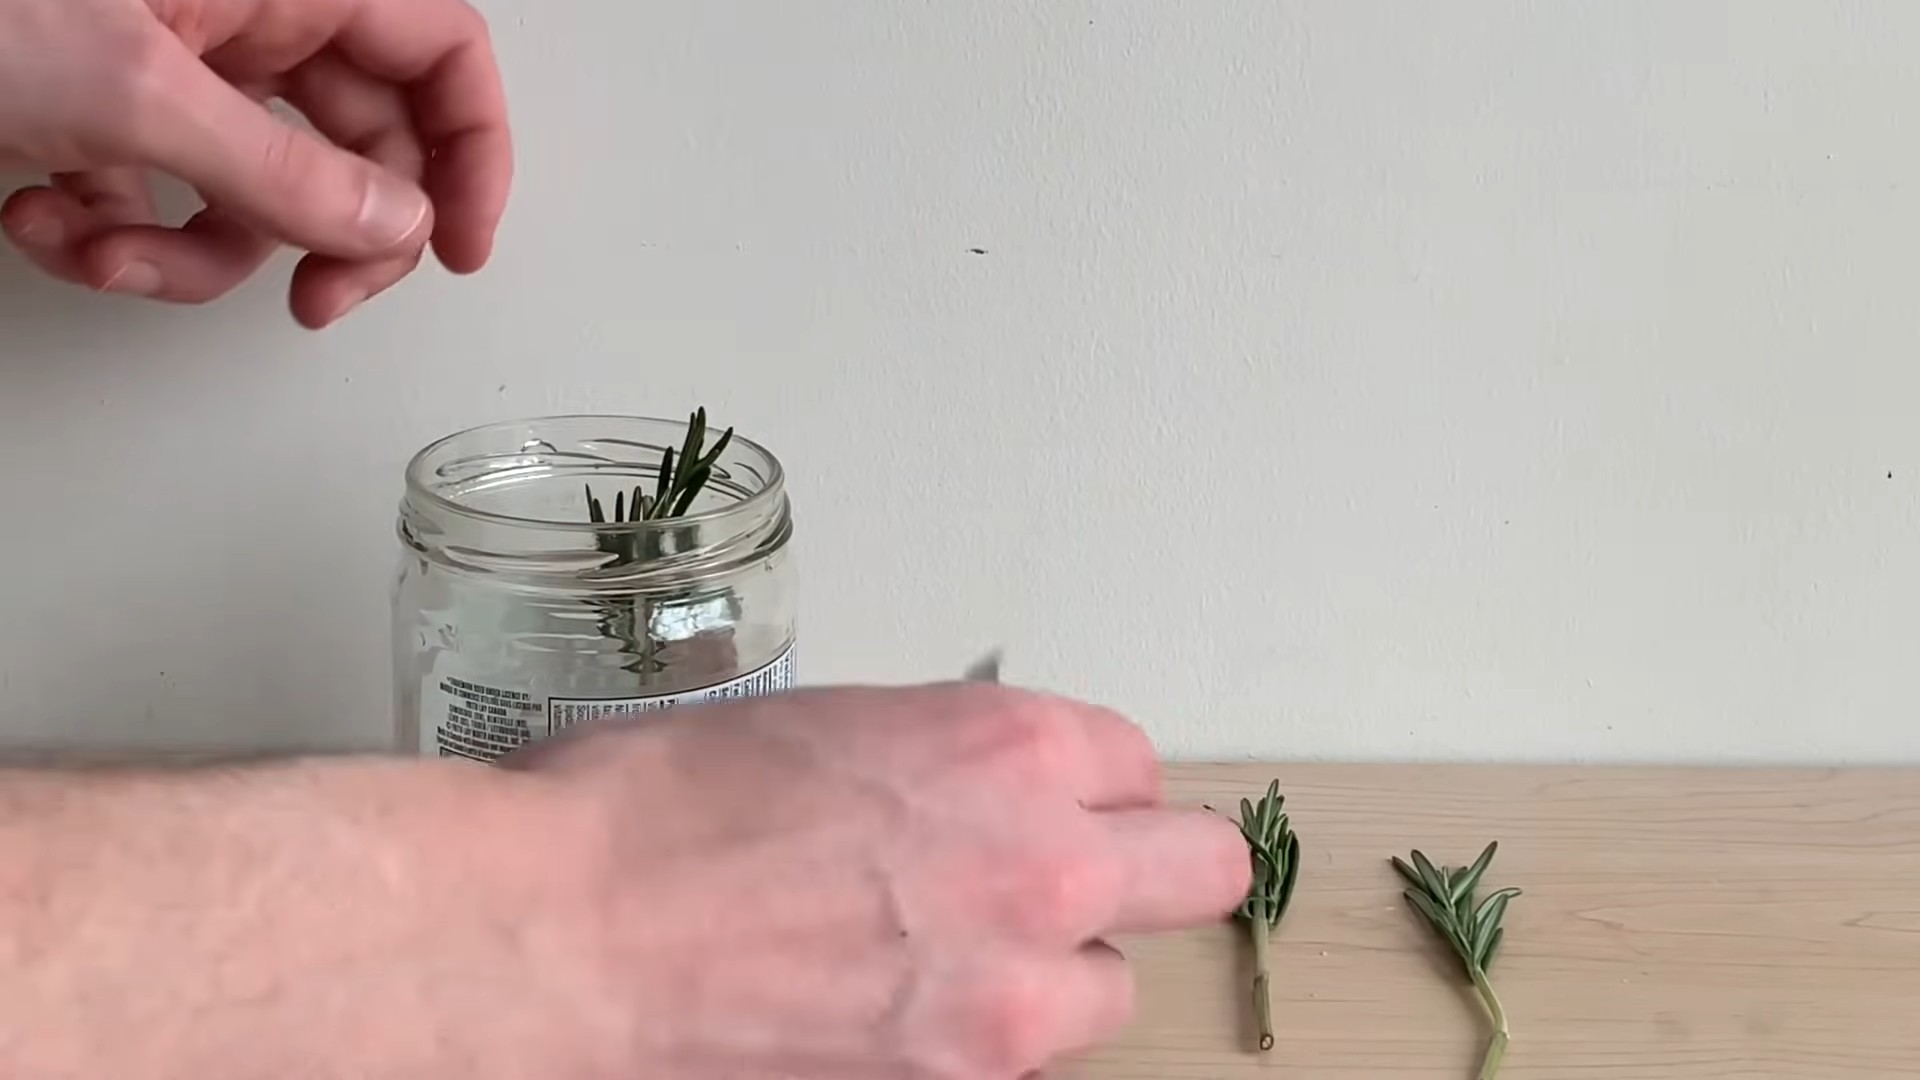
1. Choose Healthy Stems: Select healthy, green stems from a mature rosemary plant. Avoid stems that are woody or have flowers.
2. Cut the Stems: Using clean, sharp scissors or pruning shears, cut the stems at a 45-degree angle, about 4-6 inches long.
3. Remove Lower Leaves: Remove the leaves from the bottom inch or two of the stem. This will prevent them from rotting when submerged in water.
4. Optional: Apply Rooting Hormone: Dip the cut end of the stem in rooting hormone powder or gel. This will encourage root growth.
5. Place in Water: Place the cuttings in a glass of water, making sure the leaves are above the water line. Change the water every day or two to prevent bacterial growth.
Preparing the Hydroponic System:
Now, let’s get our hydroponic system ready for the rosemary cuttings.
1. Clean the Container: Thoroughly clean the container with soap and water to remove any dirt or debris. Rinse well.
2. Drill Holes (if needed): If your container doesn’t have a lid, you’ll need to drill holes in the lid to hold the net pots. The holes should be slightly smaller than the diameter of the net pots so they fit snugly. If you are using a container without a lid, you will need to create a support structure to hold the net pots above the water line. You can use styrofoam or a similar material.
3. Assemble the Air Pump and Air Stone: Connect the air stone to the air pump with the tubing. Place the air stone in the bottom of the container.
4. Add Water: Fill the container with filtered or distilled water, leaving a few inches of space at the top.
5. Add Nutrients: Follow the instructions on the hydroponic nutrient solution to add the correct amount of nutrients to the water. Start with a diluted solution, about half the recommended strength, to avoid burning the roots.
6. Adjust pH: Use a pH meter or test kit to check the pH of the nutrient solution. Rosemary prefers a pH between 5.5 and 6.5. If the pH is too high, add a small amount of pH down solution. If the pH is too low, add a small amount of pH up solution. Always add pH adjusters gradually and retest the pH after each addition.
Planting the Rosemary Cuttings:
Time to get those cuttings into their new hydroponic home!
1. Prepare the Grow Medium: If you’re using Rockwool cubes, soak them in water for a few minutes before using them. If you’re using coco coir, rinse it thoroughly to remove any excess salts. If you’re using clay pebbles, rinse them well to remove any dust.
2. Place Grow Medium in Net Pots: Fill the net pots with the grow medium.
3. Plant the Cuttings: Gently insert the rosemary cuttings into the grow medium, making sure the roots are covered. If the cuttings haven’t developed roots yet, that’s okay! They will root in the hydroponic system.
4. Place Net Pots in Container: Place the net pots into the holes in the lid of the container, or on your support structure, making sure the bottom of the net pots are submerged in the nutrient solution.
Maintaining the Hydroponic System:
Now that your rosemary is planted, it’s important to maintain the system to ensure healthy growth.
1. Monitor Water Level: Check the water level regularly and add more water as needed to keep the bottom of the net pots submerged.
2. Change Nutrient Solution: Change the nutrient solution every 1-2 weeks to prevent nutrient buildup and maintain optimal nutrient levels.
3. Monitor pH: Check the pH of the nutrient solution regularly and adjust as needed to maintain a pH between 5.5 and 6.5.
4. Provide Light: Rosemary needs at least 6 hours of sunlight per day. If you don’t have a sunny spot, use a grow light to provide supplemental light.
5. Prune Regularly: Prune your rosemary regularly to encourage bushier growth. You can use the pruned stems for cooking or propagation.
6. Monitor for Pests and Diseases: Keep an eye out for pests and diseases. If you notice any problems, treat them promptly with an appropriate organic pesticide or fungicide.
Troubleshooting:
Sometimes things don’t go exactly as planned. Here are a few common problems you might encounter and how to fix them:
* Yellowing Leaves: This could be a sign of nutrient deficiency. Make sure you’re using a balanced hydroponic nutrient solution and that the pH is within the correct range.
* Slow Growth: This could be due to insufficient light, low nutrient levels, or incorrect pH. Make sure your rosemary is getting enough light, that you’re using a balanced nutrient solution, and that the pH is within the correct range.
* Root Rot: This is caused by a lack of oxygen in the nutrient solution. Make sure your air pump and air stone are working properly and that the water is well-aerated. You can also add hydrogen peroxide to the nutrient solution to help kill bacteria.
* Algae Growth: This is caused by too much light in the nutrient solution. Make sure your container is opaque and that the nutrient solution is not exposed to direct sunlight.
Harvesting Your Rosemary:
Once your rosemary plants are established, you can start harvesting the leaves. Simply snip off the stems as needed. Regular harvesting will encourage bushier growth.
Enjoy Your Soil-Free Rosemary!
And there you have it! You’ve successfully grown rosemary without soil using a simple hydroponic system. Enjoy the fresh, flavorful rosemary in your cooking, and pat yourself on the back for a job well done! I hope you found this guide helpful, and happy growing!
Conclusion
So, there you have it! Growing rosemary without soil might seem unconventional, but as you’ve seen, it’s a surprisingly effective and rewarding method. This DIY trick isn’t just about novelty; it’s about providing your rosemary with a consistently moist environment, free from the potential pitfalls of overwatering or soilborne diseases that can plague traditional planting. It’s a must-try for anyone looking to simplify their herb gardening, especially those with limited space or a tendency to forget watering schedules.
Think of the possibilities! You can create a stunning display by using decorative glass jars or repurposed containers. Imagine a collection of rosemary cuttings, each nestled in its own water-filled vessel, adorning a sunny windowsill. It’s not only practical but also adds a touch of rustic charm to your kitchen.
Beyond the basic water propagation, you can experiment with different nutrient solutions. While plain water works wonders initially, adding a diluted liquid fertilizer specifically formulated for herbs can provide your rosemary with the extra boost it needs to thrive long-term. Just remember to dilute it significantly – less is more when it comes to hydroponics. Another variation is to try different types of rosemary. Some varieties might root faster or adapt better to water propagation than others. Experiment with ‘Blue Boy’, ‘Tuscan Blue’, or ‘Prostratus’ to see which one flourishes best in your soil-free setup.
Furthermore, consider the lighting conditions. While rosemary loves sunshine, direct, intense sunlight can sometimes scorch the leaves, especially when they’re in water. Filtered sunlight or a bright, indirect location is often ideal. You can also supplement with grow lights if you live in an area with limited natural light.
The beauty of this DIY trick lies in its simplicity and adaptability. It’s a fantastic way to propagate new rosemary plants from cuttings, ensuring a continuous supply of this fragrant herb for all your culinary creations. Plus, it’s incredibly satisfying to watch the roots develop and witness your rosemary thrive in a soil-free environment.
We wholeheartedly encourage you to give this method a try. It’s a fun, educational, and ultimately rewarding experience. And most importantly, don’t be afraid to experiment and adapt the technique to suit your specific needs and preferences. The world of soil-free rosemary growing is full of possibilities!
Once you’ve embarked on your soil-free rosemary adventure, we’d love to hear about your experiences! Share your tips, tricks, and successes (and even your challenges!) in the comments below. Let’s create a community of rosemary enthusiasts who are passionate about exploring innovative and sustainable gardening methods. Your insights could inspire others to try this fantastic DIY trick and discover the joys of growing rosemary in a whole new way. So go ahead, grab some rosemary cuttings, a jar of water, and get ready to witness the magic of soil-free propagation!
Frequently Asked Questions (FAQ)
1. What kind of rosemary cuttings should I use for soil-free propagation?
The best cuttings are those taken from healthy, actively growing rosemary plants. Look for stems that are about 4-6 inches long and have several sets of leaves. Avoid using woody, old stems, as they tend to root less readily. It’s ideal to take cuttings in the spring or early summer when the plant is actively growing. Use clean, sharp pruning shears or scissors to make a clean cut just below a leaf node (the point where leaves emerge from the stem). Remove the leaves from the bottom inch or two of the cutting to prevent them from rotting in the water.
2. What type of water is best for propagating rosemary cuttings?
While tap water can work, it’s often best to use filtered or distilled water. Tap water can contain chlorine and other chemicals that can inhibit root growth. If you do use tap water, let it sit out for 24 hours to allow the chlorine to evaporate. Rainwater is also an excellent option, as it’s naturally soft and free of chemicals. Regardless of the water source, make sure it’s clean and fresh. Change the water every few days to prevent the growth of algae and bacteria.
3. How long does it take for rosemary cuttings to root in water?
Rooting time can vary depending on several factors, including the variety of rosemary, the temperature, and the lighting conditions. Generally, you can expect to see roots emerge within 2-4 weeks. Be patient and continue to change the water regularly. Once the roots are about an inch long, you can transplant the cuttings into a pot with well-draining soil, if you choose to move them from the water.
4. Can I leave my rosemary cuttings in water indefinitely?
While rosemary can survive in water for an extended period, it’s not ideal for long-term growth. Water lacks the nutrients and support that soil provides. If you plan to grow your rosemary long-term, it’s best to transplant the rooted cuttings into a pot with well-draining soil. Alternatively, you can supplement the water with a diluted liquid fertilizer specifically formulated for herbs to provide the necessary nutrients.
5. What kind of fertilizer should I use for rosemary growing in water?
If you choose to fertilize your rosemary cuttings in water, use a diluted liquid fertilizer specifically formulated for herbs or hydroponics. Look for a balanced fertilizer with an N-P-K ratio (nitrogen, phosphorus, potassium) of around 10-10-10 or 20-20-20. Dilute the fertilizer to half or even a quarter of the recommended strength to avoid burning the roots. Fertilize sparingly, about once every 2-4 weeks.
6. My rosemary cuttings are turning yellow or brown. What am I doing wrong?
Yellowing or browning leaves can indicate several problems. Overwatering is a common culprit, even in a water propagation setup. Make sure the water is clean and fresh, and that the cuttings are not sitting in stagnant water. Insufficient light can also cause yellowing leaves. Ensure your cuttings are receiving adequate sunlight or supplement with grow lights. Nutrient deficiencies can also lead to yellowing. Try adding a diluted liquid fertilizer to the water. Finally, check for signs of pests or diseases. If you notice any, treat the cuttings accordingly.
7. Can I grow rosemary indoors using this soil-free method?
Yes, rosemary can be successfully grown indoors using this soil-free method. However, it’s important to provide the right conditions. Rosemary needs plenty of sunlight, so place your cuttings near a sunny window or supplement with grow lights. Maintain a consistent temperature and humidity level. Avoid placing the cuttings near drafts or heating vents. Regularly check the water level and change it as needed.
8. Is this method suitable for all varieties of rosemary?
While most rosemary varieties can be propagated in water, some may be more successful than others. ‘Blue Boy’, ‘Tuscan Blue’, and ‘Prostratus’ are generally considered to be good choices for water propagation. Experiment with different varieties to see which ones thrive best in your setup.
9. How do I transplant my rooted rosemary cuttings into soil?
Once the roots are about an inch long, you can transplant the cuttings into a pot with well-draining soil. Choose a pot that is slightly larger than the root ball. Gently remove the cuttings from the water and carefully plant them in the soil. Water thoroughly after planting and keep the soil consistently moist for the first few weeks. Gradually acclimate the cuttings to outdoor conditions if you plan to grow them outdoors.
10. Can I use this method to propagate other herbs besides rosemary?
Yes, many other herbs can be propagated in water using a similar method. Mint, basil, oregano, and thyme are all good candidates. The process is generally the same: take cuttings from healthy plants, remove the lower leaves, and place the cuttings in a jar of water. Change the water regularly and wait for roots to develop.


Leave a Comment