
Growing Watermelons at Home might seem like a daunting task reserved for seasoned farmers with acres of land, but I’m here to tell you that juicy, homegrown watermelons are absolutely within your reach, even if you only have a small backyard or a sunny balcony! Forget those bland, store-bought melons – imagine sinking your teeth into a sweet, crisp watermelon that you nurtured from seed to fruit.
Watermelons have a rich history, dating back thousands of years to Africa, where they were prized for their hydrating properties in arid climates. Over time, they spread across the globe, becoming a symbol of summer and refreshment. Today, the joy of harvesting your own watermelon is a deeply satisfying experience, connecting you to this ancient agricultural tradition.
Why should you try growing watermelons at home? Well, besides the unparalleled taste and the bragging rights, it’s a fantastic way to connect with nature, learn about the growing process, and enjoy fresh, healthy produce. Plus, with a few clever DIY tricks and hacks, you can overcome common challenges like limited space, pests, and diseases. This article is packed with easy-to-follow tips and techniques that will empower you to cultivate your own watermelon patch, no matter your experience level. Get ready to embark on a rewarding gardening adventure – let’s grow some watermelons!
Growing Watermelons at Home: A Sweet DIY Project!
Hey there, fellow gardening enthusiasts! I’m so excited to share my experience and guide you through the process of growing your own juicy watermelons right in your backyard. It might seem daunting, but trust me, with a little patience and these simple steps, you’ll be enjoying homegrown watermelon slices in no time. Let’s dive in!
Choosing the Right Watermelon Variety
Before we even think about planting, it’s crucial to pick the right watermelon variety for your climate and garden size. Some varieties are better suited for smaller spaces, while others thrive in warmer climates.
* Consider your climate: Some watermelons need a longer growing season than others. If you live in a cooler climate, opt for shorter-season varieties like ‘Sugar Baby’ or ‘Bush Sugar Baby’. For warmer climates, you have more options, including ‘Charleston Gray’ and ‘Jubilee’.
* Think about space: Watermelons need a lot of room to sprawl. If you have a small garden, consider bush varieties like ‘Bush Sugar Baby’ or ‘Golden Midget’. These varieties produce smaller vines and are perfect for containers or limited spaces.
* Flavor preferences: Do you prefer a super sweet watermelon or one with a slightly tangy flavor? Research different varieties and choose one that suits your taste buds. ‘Crimson Sweet’ is a popular choice for its classic watermelon flavor.
* Seedless vs. Seeded: Seedless watermelons are convenient, but they require a pollinator variety to produce fruit. Seeded watermelons are easier to grow, but you’ll have to deal with the seeds.
Preparing the Soil
Watermelons are heavy feeders, meaning they need nutrient-rich soil to thrive. Proper soil preparation is key to a successful harvest.
* Sunlight is key: Watermelons need at least 6-8 hours of direct sunlight per day. Choose a location in your garden that gets plenty of sun.
* Soil testing: Before planting, it’s a good idea to test your soil’s pH level. Watermelons prefer a slightly acidic soil with a pH between 6.0 and 6.8. You can purchase a soil testing kit at most garden centers.
* Amend the soil: Watermelons need well-draining soil that is rich in organic matter. Amend your soil with compost, aged manure, or other organic materials. This will improve drainage, aeration, and nutrient content.
* Create mounds or rows: Watermelons grow best in raised mounds or rows. This helps to improve drainage and warm the soil. Create mounds that are about 12 inches high and 3-4 feet apart. If you’re planting in rows, space the rows about 6-8 feet apart.
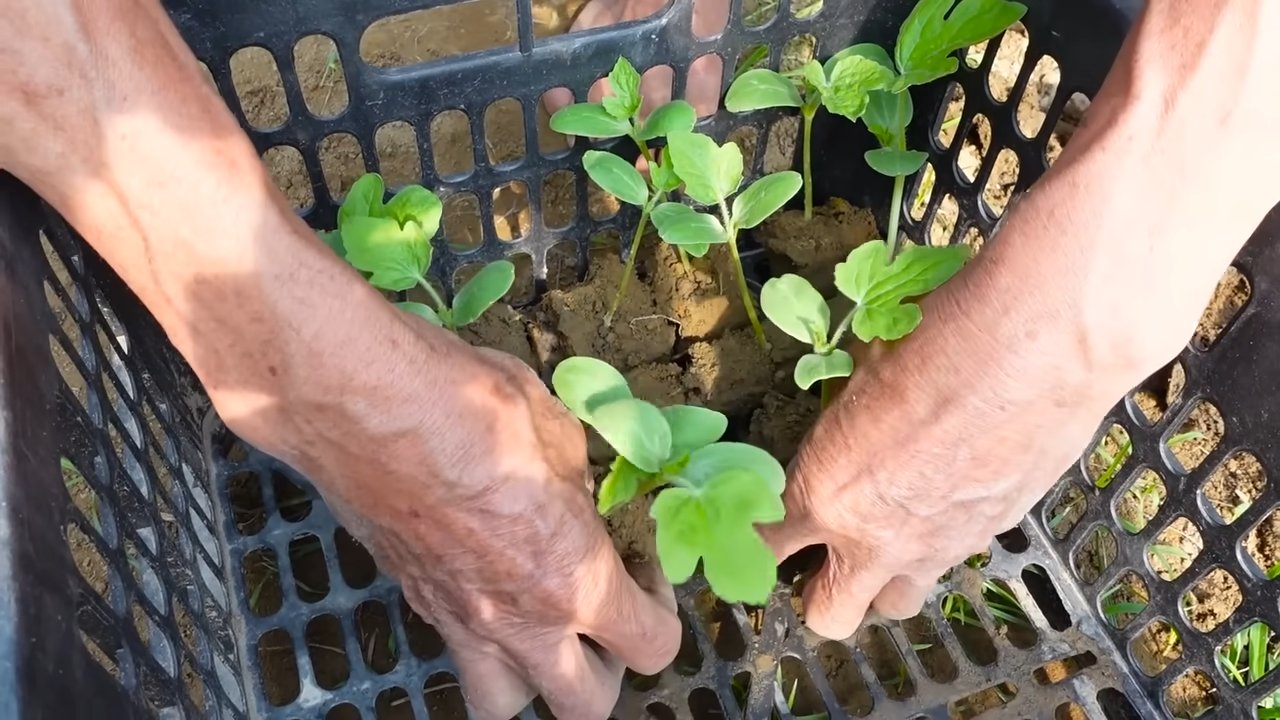
Planting Watermelon Seeds or Seedlings
Now comes the fun part – planting! You can start watermelon seeds indoors or directly sow them in the garden.
* Starting seeds indoors (optional): If you live in a cooler climate, starting seeds indoors can give you a head start on the growing season. Sow seeds in peat pots or seed trays about 4-6 weeks before the last expected frost. Keep the soil moist and warm (around 80-85°F). Once the seedlings have developed a few true leaves, you can transplant them into the garden.
* Direct sowing: If you live in a warmer climate, you can directly sow watermelon seeds in the garden. Wait until the soil has warmed to at least 70°F. Sow seeds about 1 inch deep and 2-3 feet apart.
* Transplanting seedlings: When transplanting seedlings, be careful not to disturb the roots. Dig a hole that is slightly larger than the root ball and gently place the seedling in the hole. Backfill with soil and water thoroughly.
* Spacing: Watermelons need plenty of space to grow. Space plants 2-3 feet apart in rows that are 6-8 feet apart. Bush varieties can be planted closer together, about 18-24 inches apart.
Watering and Fertilizing
Watermelons need consistent watering, especially during hot, dry weather. They also benefit from regular fertilization.
* Watering: Water deeply and regularly, especially during fruit development. Aim for about 1-2 inches of water per week. Avoid overhead watering, as this can lead to fungal diseases. Drip irrigation is an excellent way to water watermelons.
* Fertilizing: Watermelons are heavy feeders and need regular fertilization. Use a balanced fertilizer (e.g., 10-10-10) at planting time. Once the vines start to run, switch to a fertilizer that is higher in phosphorus and potassium (e.g., 5-10-10). Fertilize every 2-3 weeks.
* Mulching: Mulch around the plants with straw, hay, or black plastic. Mulch helps to retain moisture, suppress weeds, and warm the soil.
Pollination
Watermelons need to be pollinated in order to produce fruit. Bees are the primary pollinators, so it’s important to attract them to your garden.
* Attracting pollinators: Plant flowers that attract bees, such as sunflowers, zinnias, and lavender. Avoid using pesticides that can harm bees.
* Hand-pollination (if needed): If you’re not seeing a lot of bee activity, you may need to hand-pollinate your watermelons. Identify the female flowers (they have a small fruit behind the flower) and the male flowers (they have a long stem). Use a small paintbrush to transfer pollen from the male flower to the female flower. Do this in the morning, when the pollen is fresh.
Dealing with Pests and Diseases
Watermelons can be susceptible to various pests and diseases. Here’s how to deal with some common problems:
* Squash bugs: Squash bugs can damage watermelon vines and fruit. Handpick them off the plants or use insecticidal soap.
* Cucumber beetles: Cucumber beetles can spread diseases and damage foliage. Use row covers to protect young plants or spray with neem oil.
* Aphids: Aphids can suck the sap from watermelon leaves. Spray with insecticidal soap or release ladybugs to control aphids.
* Powdery mildew: Powdery mildew is a fungal disease that can cause white spots on watermelon leaves. Improve air circulation and spray with a fungicide if necessary.
* Anthracnose: Anthracnose is another fungal disease that can cause lesions on watermelon leaves and fruit. Use disease-resistant varieties and avoid overhead watering.
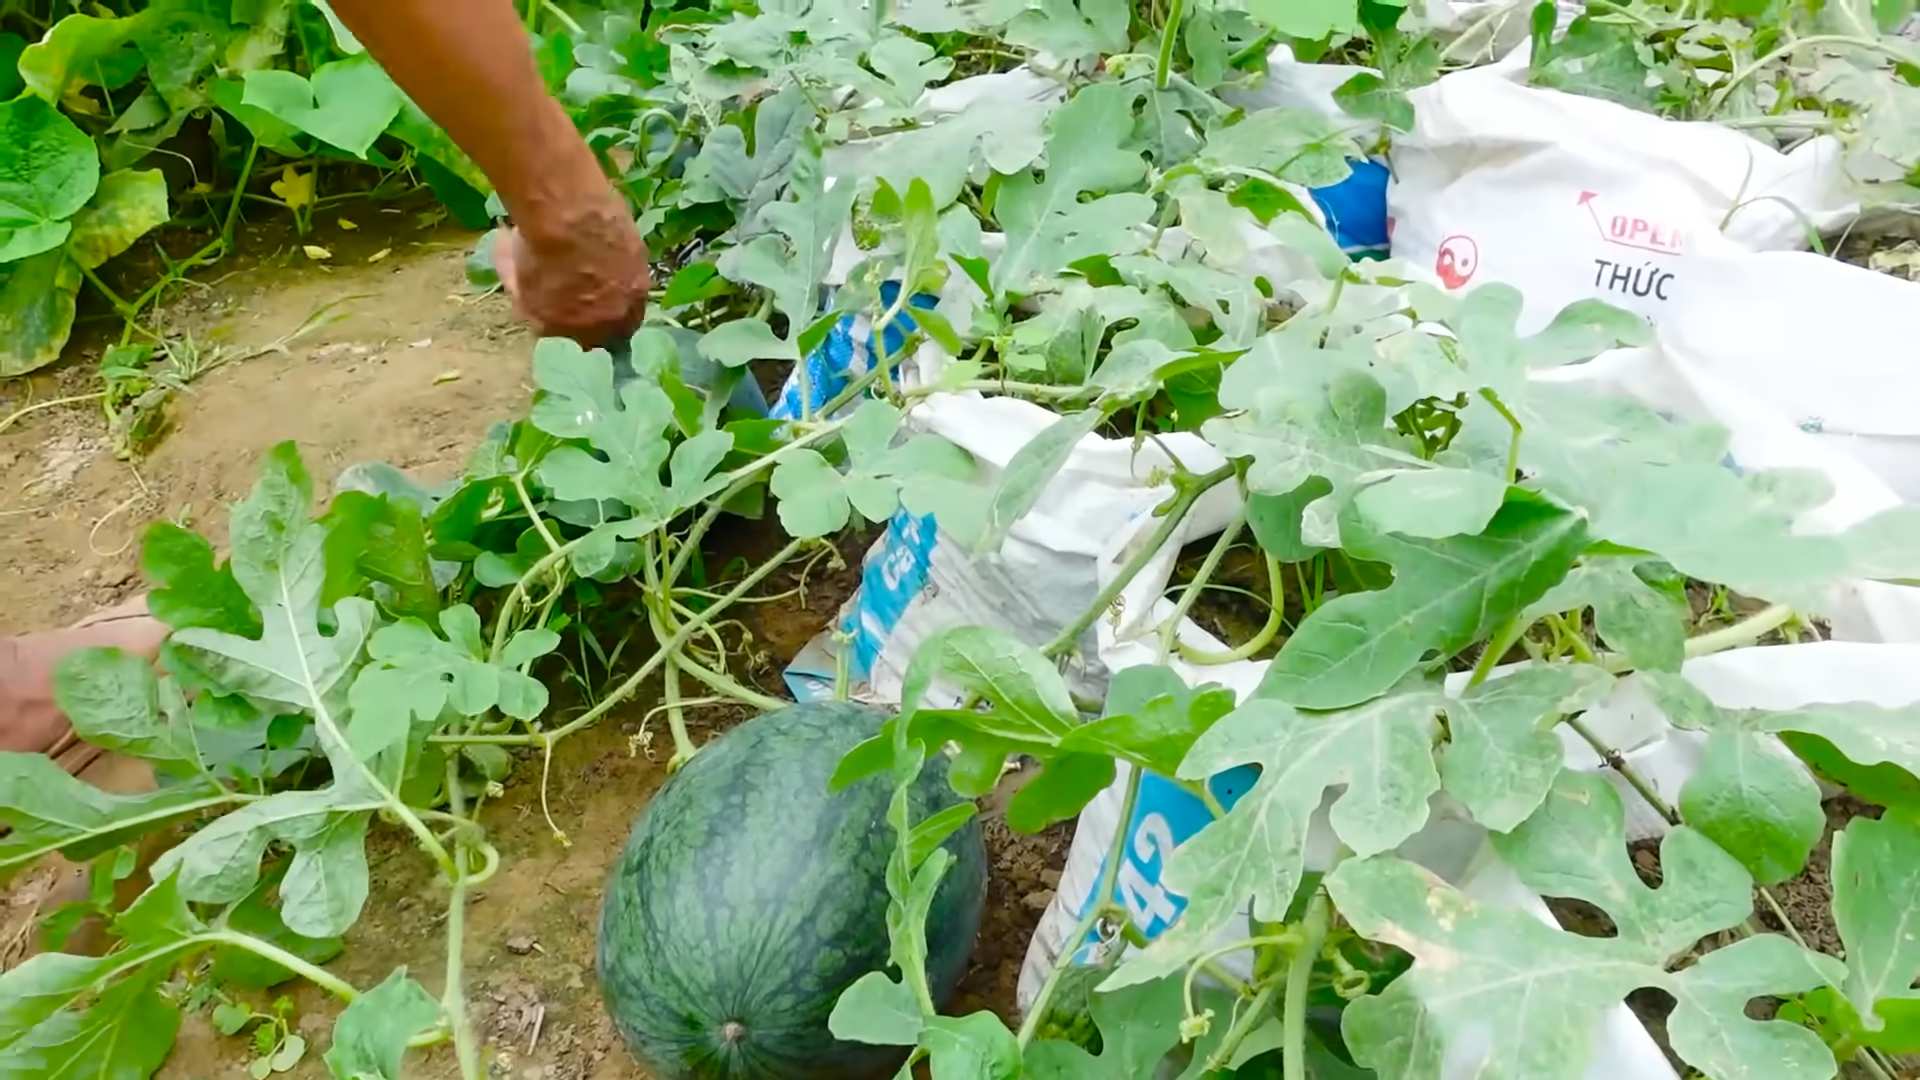
Harvesting Watermelons
Knowing when to harvest a watermelon can be tricky, but here are a few tips:
* Check the tendril: The tendril closest to the fruit should be brown and dry.
* Thump the watermelon: A ripe watermelon will sound hollow when thumped.
* Check the ground spot: The spot where the watermelon rests on the ground should be yellow or cream-colored.
* Days to maturity: Check the seed packet for the days to maturity and harvest accordingly.
Step-by-Step Instructions: From Seed to Slice
Okay, let’s break down the entire process into easy-to-follow steps:
1. Choose your variety: Select a watermelon variety that suits your climate, space, and taste preferences. I personally love ‘Sugar Baby’ for its sweetness and compact size.
2. Prepare the soil: Find a sunny spot in your garden and amend the soil with compost or aged manure. Create raised mounds or rows for planting.
3. Plant the seeds or seedlings: Sow seeds directly in the garden or start them indoors. Space plants 2-3 feet apart in rows that are 6-8 feet apart.
4. Water regularly: Water deeply and consistently, especially during hot, dry weather. Aim for 1-2 inches of water per week.
5. Fertilize: Use a balanced fertilizer at planting time and switch to a fertilizer higher in phosphorus and potassium once the vines start to run.
6. Attract pollinators: Plant flowers that attract bees to your garden.
7. Monitor for pests and diseases: Check your plants regularly for signs of pests and diseases and take action as needed.
8. Harvest when ripe: Check the tendril, thump the watermelon, and check the ground spot to determine when it’s ripe.
9. Enjoy your harvest: Cut open your watermelon and enjoy the sweet, juicy flavor of homegrown goodness!
Troubleshooting Common Watermelon Growing Problems
Even with the best planning, you might encounter some challenges. Here are a few common issues and how to address them:
* Poor fruit set: If your watermelon plants are producing flowers but not setting fruit, it could be due to poor pollination. Make sure you have plenty of bees in your garden or hand-pollinate the flowers.
* Cracked watermelons: Cracked watermelons can be caused by inconsistent watering.
Conclusion
So, there you have it! Growing watermelons at home, while it might seem daunting at first, is an incredibly rewarding experience. Imagine biting into a juicy, sweet watermelon that you nurtured from a tiny seed, knowing exactly where it came from and what went into its growth. That’s a satisfaction you simply can’t buy at the grocery store.
This DIY approach to watermelon cultivation isn’t just about saving money; it’s about connecting with nature, learning new skills, and enjoying the freshest possible produce. The taste difference between a store-bought watermelon and one ripened on the vine in your own backyard is truly remarkable. You’ll notice a depth of flavor and sweetness that’s unparalleled.
But the benefits extend beyond just taste. By growing your own watermelons, you’re also reducing your carbon footprint by minimizing transportation and packaging. You’re in control of the growing process, ensuring that your watermelons are free from harmful pesticides and chemicals. Plus, it’s a fantastic way to get some exercise and fresh air while tending to your garden.
Don’t be afraid to experiment with different varieties of watermelons. There are so many options to choose from, each with its own unique flavor profile and characteristics. Consider trying a smaller, personal-sized watermelon like ‘Sugar Baby’ if you have limited space, or go for a classic ‘Crimson Sweet’ for that traditional watermelon taste. You can even explore yellow or orange-fleshed varieties for a fun and colorful twist.
Another variation to consider is vertical gardening. If you’re short on ground space, you can train your watermelon vines to grow up a trellis or fence. This not only saves space but also improves air circulation around the plants, reducing the risk of fungal diseases. Just be sure to provide adequate support for the heavy fruits as they develop.
Remember to pay close attention to your watermelons as they ripen. The telltale signs of ripeness include a dull thud when you tap the watermelon, a dried tendril closest to the fruit, and a yellow or cream-colored spot on the underside where it rests on the ground.
We strongly encourage you to give this DIY watermelon growing trick a try. It’s a fun, educational, and delicious project that the whole family can enjoy. And once you’ve harvested your first watermelon, be sure to share your experience with us! We’d love to hear about your successes, challenges, and any tips you’ve learned along the way. Post photos of your homegrown watermelons on social media using #HomegrownWatermelon and inspire others to join the fun. Let’s spread the joy of growing our own food and savoring the sweet taste of success! This **DIY watermelon** project is more than just a gardening endeavor; it’s a step towards a more sustainable and fulfilling lifestyle.
Frequently Asked Questions (FAQs)
Q: What is the best time to start growing watermelons?
A: Watermelons are warm-season crops, so the best time to start growing them is in late spring or early summer, after the last frost has passed and the soil has warmed up to at least 70°F (21°C). You can start seeds indoors about 6-8 weeks before the last expected frost to get a head start. If you live in a warmer climate with a longer growing season, you can direct sow seeds into the ground.
Q: How much space do watermelons need?
A: Watermelons require a significant amount of space to grow, as their vines can spread several feet in all directions. Ideally, you should provide at least 4-6 feet of space between plants and 8-10 feet between rows. If you’re growing watermelons in containers, choose a large pot that is at least 24 inches in diameter and depth. Consider using a trellis for vertical growing to save space.
Q: What kind of soil is best for growing watermelons?
A: Watermelons thrive in well-drained, sandy loam soil that is rich in organic matter. The soil pH should be between 6.0 and 6.8. Before planting, amend the soil with compost or well-rotted manure to improve its fertility and drainage. Avoid heavy clay soils, as they can retain too much moisture and lead to root rot.
Q: How often should I water my watermelon plants?
A: Watermelons need consistent moisture, especially during fruit development. Water deeply and regularly, aiming for about 1-2 inches of water per week. Avoid overhead watering, as it can promote fungal diseases. Instead, water at the base of the plants using a soaker hose or drip irrigation system. Reduce watering as the fruits begin to ripen to prevent them from cracking.
Q: What are some common pests and diseases that affect watermelons?
A: Common pests that can affect watermelons include aphids, squash bugs, cucumber beetles, and vine borers. Diseases include powdery mildew, fusarium wilt, and anthracnose. Regularly inspect your plants for signs of pests or diseases and take appropriate action. Use organic pest control methods such as insecticidal soap or neem oil. Ensure good air circulation around the plants to prevent fungal diseases. Crop rotation can also help to minimize disease problems.
Q: How do I know when my watermelon is ripe?
A: There are several indicators that a watermelon is ripe. Look for the following signs:
* The tendril closest to the fruit should be dried and brown.
* The underside of the watermelon (where it rests on the ground) should be yellow or cream-colored.
* When you tap the watermelon, it should sound dull and hollow.
* The skin should be slightly dull and waxy, not shiny.
Q: Can I grow watermelons in containers?
A: Yes, you can grow watermelons in containers, but you’ll need to choose a large pot (at least 24 inches in diameter and depth) and select a smaller variety of watermelon, such as ‘Sugar Baby’ or ‘Bush Sugar Baby’. Use a high-quality potting mix and provide regular watering and fertilization. You may also need to provide support for the vines as they grow.
Q: What kind of fertilizer should I use for watermelons?
A: Watermelons benefit from regular fertilization, especially during the early stages of growth and fruit development. Use a balanced fertilizer (e.g., 10-10-10) at planting time, and then switch to a fertilizer that is higher in phosphorus and potassium (e.g., 5-10-10) as the fruits begin to develop. Avoid over-fertilizing with nitrogen, as this can promote excessive vine growth at the expense of fruit production.
Q: How can I prevent my watermelons from cracking?
A: Watermelon cracking can be caused by inconsistent watering, especially after a period of drought. To prevent cracking, water your plants regularly and deeply, especially during fruit development. Avoid letting the soil dry out completely. You can also mulch around the plants to help retain moisture in the soil.
Q: Are there any companion plants that are beneficial for watermelons?
A: Yes, several companion plants can benefit watermelons. Marigolds can help to repel nematodes and other pests. Nasturtiums can attract aphids away from the watermelon plants. Oregano is said to improve the flavor of watermelons. Planting these companion plants near your watermelons can help to improve their growth and yield.
Leave a Comment