
Blind Cleaning with Tongs: Sounds a little unconventional, right? But trust me, this simple DIY trick will revolutionize your cleaning routine! We’ve all been there, staring at dusty blinds, dreading the tedious task ahead. It feels like you’re moving dust from one slat to another, never truly getting them clean. But what if I told you there’s a faster, easier, and dare I say, fun way to tackle this chore?
While the history of window blinds stretches back centuries, from ancient Egypt to the Venetian blinds we know today, the struggle to keep them clean is a timeless one! For generations, people have wrestled with cloths, brushes, and various cleaning solutions, often with less-than-satisfactory results. But now, with this clever hack, you can finally say goodbye to frustrating blind-cleaning sessions.
Why do you need this blind cleaning with tongs trick? Because time is precious! We all have better things to do than spend hours meticulously wiping each individual blind slat. This DIY method is not only a time-saver, but it’s also incredibly effective. It allows you to clean multiple slats at once, reaching those tricky corners and crevices with ease. Plus, it’s a budget-friendly solution that utilizes materials you likely already have at home. So, ditch the dust and embrace this game-changing cleaning hack – your blinds (and your sanity) will thank you!
DIY Blind Cleaning Hack: Tongs to the Rescue!
Okay, let’s be honest, cleaning blinds is the chore that everyone dreads. It’s fiddly, dusty, and feels like it takes forever. But fear not, my friends! I’ve got a super simple, surprisingly effective hack that will make cleaning your blinds a breeze. All you need are some tongs, microfiber cloths, and a little bit of elbow grease (okay, maybe not *that* much elbow grease!).
What You’ll Need:
* A pair of tongs (kitchen tongs work perfectly!)
* Microfiber cloths (at least two, but more is better)
* Rubber bands or hair ties
* A spray bottle (optional, for cleaning solution)
* Your favorite all-purpose cleaner, vinegar solution (equal parts white vinegar and water), or even just plain water.
* A vacuum cleaner with a brush attachment (optional, for pre-cleaning)
* A ladder or step stool (if needed to reach high blinds)
Why This Works:
The beauty of this hack is its simplicity. The tongs act as a clamp, allowing you to clean both sides of a blind slat simultaneously. The microfiber cloths trap dust and grime, leaving your blinds sparkling clean. Plus, it’s much faster and easier than trying to clean each slat individually. Trust me, once you try this, you’ll never go back to the old way!
Getting Started: Preparation is Key!
Before we dive into the cleaning process, let’s get everything prepped and ready to go. This will make the whole process smoother and more efficient.
1. Gather Your Supplies: Make sure you have everything listed above within easy reach. There’s nothing worse than having to stop mid-cleaning to hunt down a rubber band!
2. Prepare Your Cleaning Solution: If you’re using a cleaning solution, mix it up now. I personally love using a simple vinegar and water solution because it’s natural, effective, and doesn’t leave any harsh chemical smells. But feel free to use your favorite all-purpose cleaner. Just make sure it’s safe for the material your blinds are made of.
3. Dust Removal (Optional but Recommended): If your blinds are particularly dusty, I highly recommend giving them a quick once-over with a vacuum cleaner using the brush attachment. This will remove loose dust and debris, making the cleaning process much easier and more effective. Gently run the brush attachment along each slat, being careful not to damage the blinds.
4. Protect Your Surroundings: Depending on how dirty your blinds are, you might want to lay down a drop cloth or some old towels underneath them to catch any drips or falling dust. This will save you from having to clean the floor afterwards.
The Cleaning Process: Tongs in Action!
Alright, now for the fun part! This is where the magic happens and your blinds start to transform from dusty to dazzling.
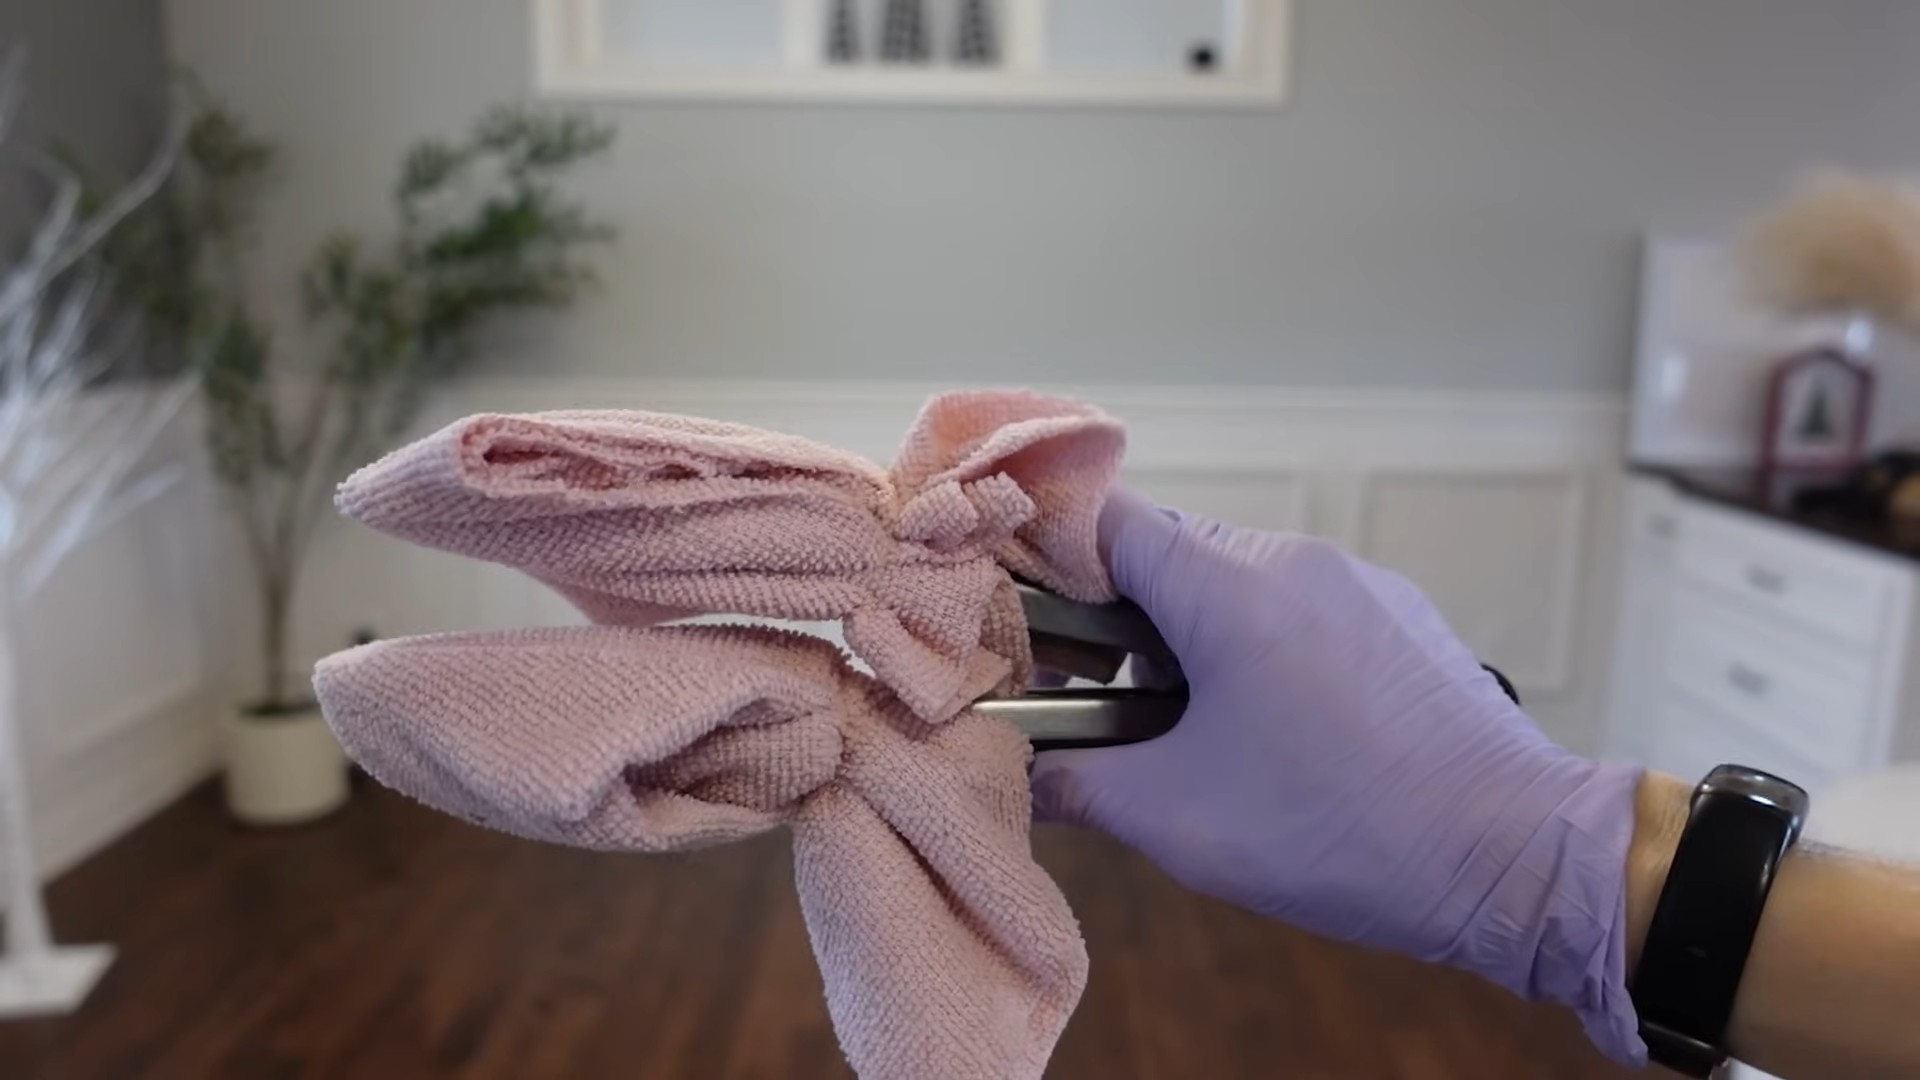
1. Wrap the Tongs: Take your microfiber cloths and wrap them around the ends of the tongs. Make sure the cloths are securely attached so they don’t slip off during cleaning. Use rubber bands or hair ties to hold them in place. The tighter the cloths are secured, the better the cleaning action will be. I usually use two rubber bands per tong end for extra security.
2. Test a Small Area: Before you start cleaning the entire blind, test your cleaning solution on a small, inconspicuous area to make sure it doesn’t damage or discolor the material. This is especially important if you’re using a new cleaning solution or if you’re unsure what your blinds are made of.
3. Spray (Optional): If you’re using a cleaning solution, lightly spray the microfiber cloths wrapped around the tongs. You don’t want them to be soaking wet, just damp enough to effectively clean the blinds. If you’re using plain water, you can skip this step.
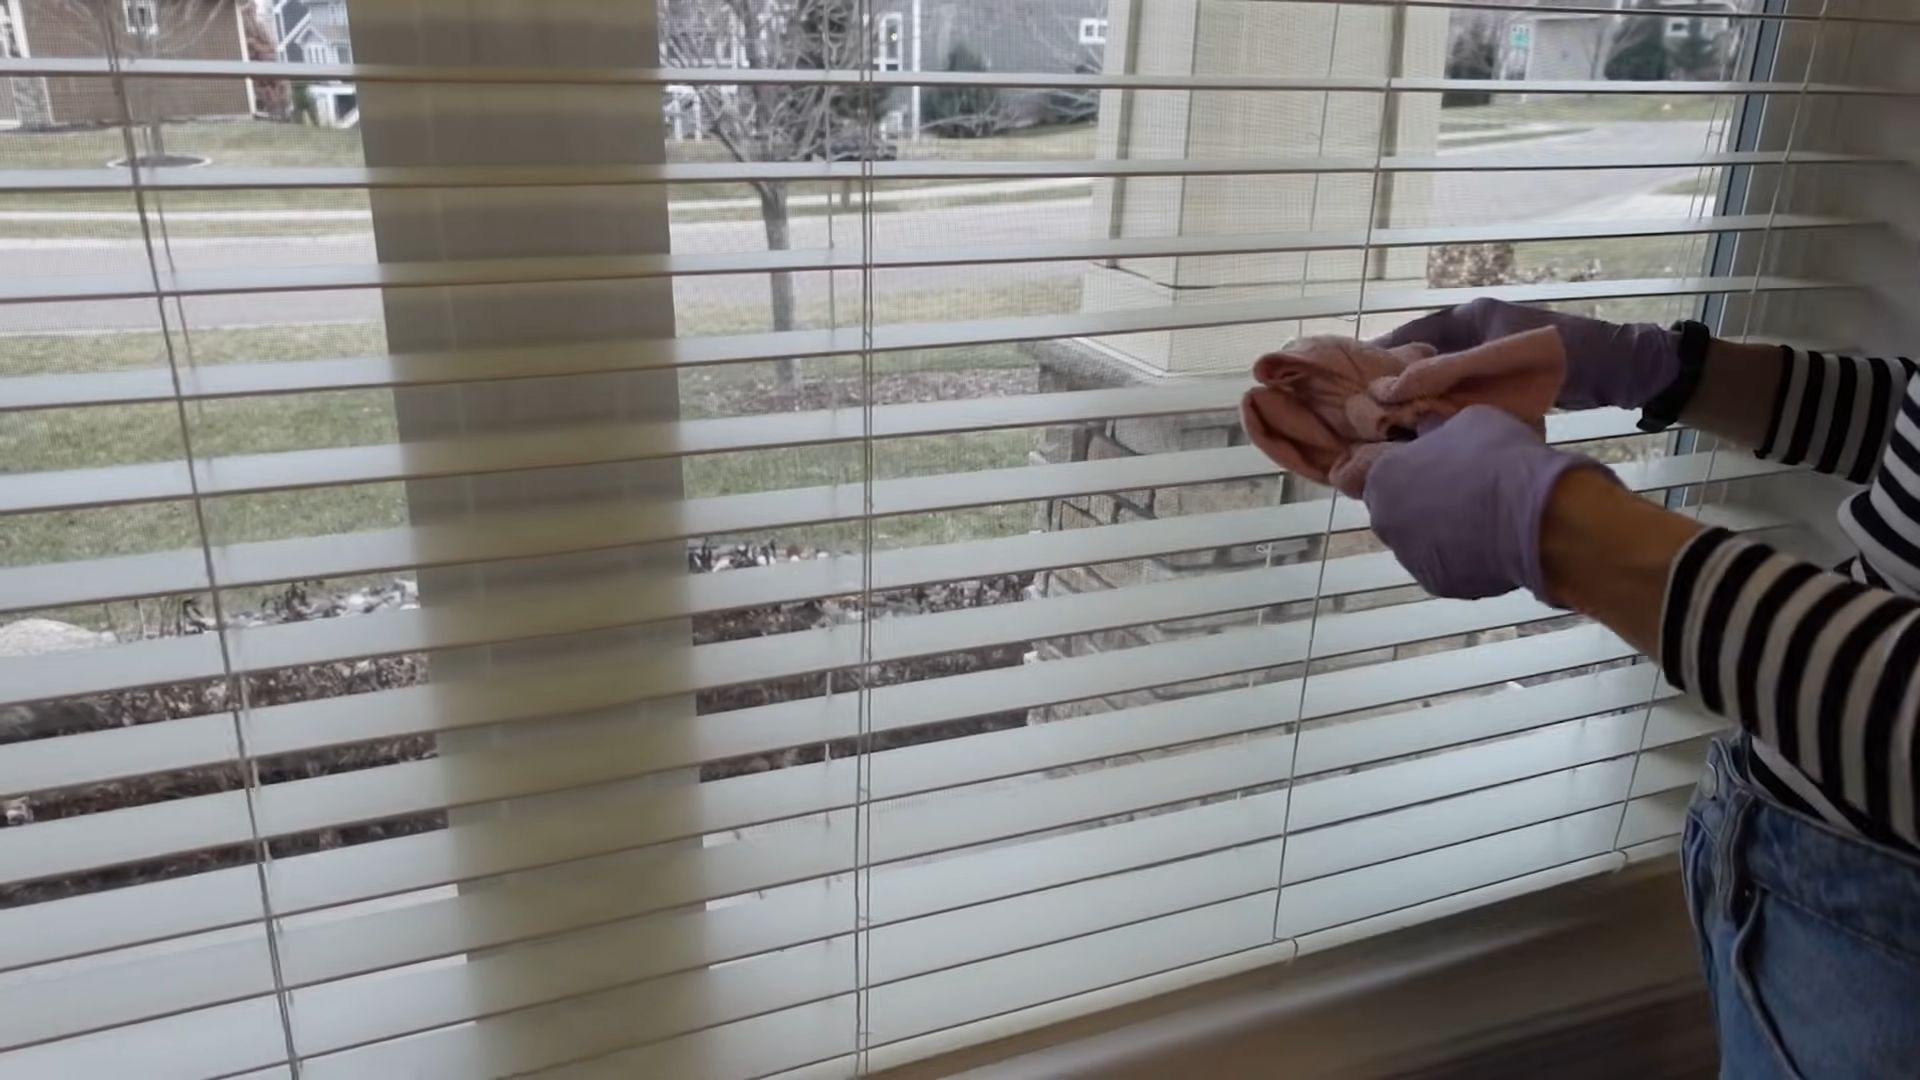
4. Clamp and Clean: Now, carefully position the tongs around a blind slat, clamping it between the microfiber cloths. Gently slide the tongs along the length of the slat, applying light pressure. The microfiber cloths will trap dust and grime as you go.
5. Work Your Way Down: Continue cleaning each slat, one by one, working your way down the blind. Overlap each pass slightly to ensure you don’t miss any spots. Remember to be gentle and avoid applying too much pressure, as this could damage the blinds.
6. Rinse and Repeat (If Necessary): If your blinds are particularly dirty, you may need to rinse the microfiber cloths and reapply cleaning solution (if using) several times. You’ll know it’s time to rinse when the cloths start to look dirty or when they stop effectively trapping dust.
7. Drying Time: Once you’ve cleaned all the slats, allow the blinds to air dry completely. You can leave them open to allow for better airflow. This usually takes about 30 minutes to an hour, depending on the humidity.
Dealing with Stubborn Spots:
Sometimes, you’ll encounter stubborn spots or stains that just won’t come off with the regular cleaning process. Don’t worry, I’ve got you covered!
1. Spot Treatment: For stubborn spots, try applying a small amount of cleaning solution directly to the affected area. Let it sit for a few minutes to loosen the grime, then gently scrub with a clean microfiber cloth.
2. Baking Soda Paste: For really tough stains, you can try making a paste of baking soda and water. Apply the paste to the stain, let it sit for a few minutes, then gently scrub with a damp cloth. Be sure to rinse thoroughly to remove any baking soda residue.
3. Magic Eraser: A magic eraser can also be effective for removing stubborn stains. Just be careful when using it, as it can be abrasive and may damage some materials. Test it on a small, inconspicuous area first.
Maintaining Your Clean Blinds: Prevention is Better Than Cure!
Now that your blinds are sparkling clean, let’s talk about how to keep them that way! Regular maintenance can prevent dust and grime from building up, making future cleanings much easier.
1. Dust Regularly: The easiest way to keep your blinds clean is to dust them regularly. Use a duster, a microfiber cloth, or even a vacuum cleaner with a brush attachment to remove dust and debris on a weekly basis.
2. Open Windows Strategically: When opening windows, be mindful of the direction of the wind. Avoid opening windows on windy days, as this can blow dust and dirt onto your blinds.
3. Control Humidity: High humidity can contribute to the buildup of dust and grime on your blinds. Use a dehumidifier in humid areas to help keep your blinds clean.
4. Professional Cleaning: For a deep clean, consider having your blinds professionally cleaned every year or two. This can help remove stubborn stains and grime that you may not be able to remove yourself.
Tips and Tricks for Different Types of Blinds:
This cleaning hack works well for most types of blinds, but here are a few tips and tricks for specific materials:
* Vinyl Blinds: Vinyl blinds are generally easy to clean and can withstand most cleaning solutions.
* Wood Blinds: Wood blinds are more delicate and should be cleaned with a gentle cleaner specifically designed for wood. Avoid using too much water, as this can damage the wood.
* Aluminum Blinds: Aluminum blinds are durable and can be cleaned with most cleaning solutions. However, be careful not to scratch the surface.
* Fabric Blinds: Fabric blinds are the most delicate and should be cleaned with a gentle cleaner specifically designed for fabrics. You may also want to consider having them professionally cleaned.
Safety First!
Before you start cleaning your blinds, it’s important to take a few safety precautions:
* Use a Sturdy Ladder: If you need to use a ladder or step stool to reach high blinds, make sure it’s sturdy and stable.
* Wear Gloves: If you’re using a cleaning solution, wear gloves to protect your hands.
* Ventilate the Area: If you’re using a strong cleaning solution, make sure the area is well-ventilated.
* Keep Cleaning Solutions Away from Children and Pets: Store cleaning solutions out of reach of children and pets.
And there you have it! With this simple tong hack, you can say goodbye to the dreaded blind cleaning chore and hello to sparkling clean blinds. Happy cleaning!
Conclusion
So, there you have it! Cleaning your blinds doesn’t have to be a dreaded chore. This simple, yet incredibly effective, DIY blind cleaning with tongs method will revolutionize your cleaning routine. Forget spending hours meticulously wiping each slat individually, or wrestling with expensive and often ineffective cleaning gadgets. This method is not only budget-friendly, utilizing items you likely already have in your home, but it’s also significantly faster and more efficient.
Think about it: more free time to enjoy your sparkling clean home! The satisfaction of seeing those dusty blinds transform into gleaming, light-filtering masterpieces is truly rewarding. Plus, you’re reducing your reliance on harsh chemicals, opting instead for a gentler, more environmentally conscious approach to cleaning.
But the benefits don’t stop there. This DIY trick is incredibly versatile. You can customize your cleaning solution to suit your specific needs. For example, add a few drops of essential oil, like lavender or lemon, to your cleaning solution for a refreshing scent that lingers in the air. For tougher grime, a slightly stronger solution with a touch of vinegar can work wonders. Remember to always test your cleaning solution on a small, inconspicuous area of your blinds first to ensure it doesn’t damage the material.
Variations to consider:
* Microfiber Cloths: While the sock method is great, you can also use microfiber cloths wrapped around the tongs for an even more effective clean. Microfiber is known for its superior dust-grabbing abilities.
* Different Cleaning Solutions: Experiment with different cleaning solutions to find what works best for your blinds. A simple mixture of water and dish soap is often sufficient, but you can also try using a specialized blind cleaner or a solution of water and vinegar.
* For Delicate Blinds: If you have delicate blinds, such as fabric blinds, be extra gentle and use a very mild cleaning solution. You may also want to consider using a dry cloth instead of a wet one.
We are confident that once you try this DIY blind cleaning with tongs method, you’ll never go back to your old ways. It’s a game-changer for anyone who wants to keep their blinds clean and their home looking its best.
Don’t just take our word for it, though! We encourage you to give this DIY trick a try and see the amazing results for yourself. We’re eager to hear about your experience. Share your before-and-after photos, your favorite cleaning solution combinations, and any tips or tricks you discover along the way in the comments section below. Let’s build a community of clean-blind enthusiasts! Your feedback will not only help others but also inspire us to continue sharing innovative and effective cleaning solutions. So, grab your tongs, your cleaning solution, and get ready to say goodbye to dusty blinds forever! This simple method will make your home cleaner and brighter, one slat at a time.
Frequently Asked Questions (FAQ)
What kind of tongs should I use?
Ideally, you should use kitchen tongs with a smooth, flat surface. Avoid tongs with sharp edges or teeth, as these could potentially damage your blinds. Tongs with silicone tips are also a good option, as they provide a gentle grip and won’t scratch the blinds. The size of the tongs doesn’t matter too much, but a medium-sized pair will likely be the easiest to maneuver.
What is the best cleaning solution to use?
The best cleaning solution depends on the type of blinds you have and the level of dirt and grime. For most blinds, a simple solution of warm water and a few drops of mild dish soap is sufficient. You can also add a small amount of white vinegar to the solution for extra cleaning power. For stubborn stains, you can try using a specialized blind cleaner or a solution of water and baking soda. Always test the cleaning solution on a small, inconspicuous area of your blinds first to ensure it doesn’t damage the material.
Can I use this method on all types of blinds?
This method is generally safe for most types of blinds, including vinyl, aluminum, and wood blinds. However, it’s important to be extra careful when cleaning delicate blinds, such as fabric blinds or blinds with intricate designs. For these types of blinds, you may want to consider using a dry cloth or a very mild cleaning solution. Always test the cleaning solution on a small, inconspicuous area of your blinds first.
How often should I clean my blinds?
The frequency of cleaning depends on how dusty your home is and how often you open your windows. As a general rule, you should aim to clean your blinds at least once a month. If you have pets or allergies, you may need to clean them more frequently. Regular cleaning will prevent dust and grime from building up, making it easier to keep your blinds looking their best.
How do I clean the cords and tassels?
The cords and tassels can be cleaned using a similar method. You can wrap a damp cloth around the cords and gently wipe them down. For tassels, you can soak them in a bowl of warm water and mild soap, then rinse them thoroughly and allow them to air dry. Be careful not to pull or tug on the cords, as this could damage the blinds.
What if my blinds are really dirty?
If your blinds are heavily soiled, you may need to pre-treat them before using the tongs method. You can do this by spraying them with a cleaning solution and letting it sit for a few minutes before wiping them down. You may also need to repeat the cleaning process several times to remove all the dirt and grime. For extremely dirty blinds, you may want to consider taking them down and washing them in a bathtub or sink.
How do I prevent streaks when cleaning my blinds?
To prevent streaks, make sure to use a clean cloth and avoid using too much cleaning solution. You can also try drying the blinds with a clean, dry cloth after wiping them down. Working in a well-ventilated area can also help prevent streaks, as the cleaning solution will evaporate more quickly.
Is it safe to use bleach on my blinds?
It is generally not recommended to use bleach on blinds, as it can damage the material and cause discoloration. If you must use bleach, dilute it heavily with water and test it on a small, inconspicuous area of the blinds first. Be sure to rinse the blinds thoroughly after using bleach to remove any residue.
Can I use this method on vertical blinds?
Yes, this method can also be used on vertical blinds. Simply adjust the angle of the tongs to fit the shape of the slats. You may need to use a slightly different technique to clean vertical blinds, but the basic principle remains the same.
What are the benefits of using this DIY blind cleaning method?
The benefits of using this DIY blind cleaning method include:
* It’s budget-friendly, using items you likely already have at home.
* It’s faster and more efficient than cleaning each slat individually.
* It’s versatile, allowing you to customize your cleaning solution.
* It’s environmentally friendly, reducing your reliance on harsh chemicals.
* It’s effective at removing dust, dirt, and grime.
* It helps keep your blinds looking their best.
* It contributes to a cleaner and healthier home environment.

Leave a Comment