
Clean Refrigerator Quickly – is that even possible? I know, I know, cleaning the fridge is probably on everyone’s list of least favorite chores. It’s right up there with scrubbing toilets and doing taxes, isn’t it? But what if I told you there are some super simple, DIY tricks that can make this dreaded task not only bearable but actually… quick?
For generations, a clean and well-stocked refrigerator has been a symbol of a healthy and thriving household. Think about it – our grandparents and great-grandparents didn’t have the fancy appliances we do, but they still understood the importance of keeping food fresh and safe. They relied on natural methods and clever hacks to maintain their refrigerators, often using things like baking soda to absorb odors. We’re just building on that legacy!
Let’s face it, a messy fridge isn’t just unsightly; it’s a breeding ground for bacteria and can lead to food waste. Nobody wants that! Plus, who has time to spend hours scrubbing shelves and throwing away mystery containers? That’s why I’m so excited to share these amazing DIY tricks with you. You’ll learn how to clean refrigerator quickly and efficiently, using items you probably already have in your pantry. Get ready to say goodbye to fridge-cleaning dread and hello to a sparkling, organized, and healthy refrigerator!
Grow Your Own Juicy Watermelons: A DIY Guide
Hey there, fellow gardening enthusiasts! Ever dreamt of biting into a sweet, homegrown watermelon on a hot summer day? Well, dream no more! Growing watermelons at home is totally achievable, even if you don’t have acres of land. I’m going to walk you through everything you need to know, from choosing the right variety to harvesting your prize-winning fruit. Let’s get started!
Choosing the Right Watermelon Variety
First things first, you need to pick a watermelon variety that suits your climate and garden space. Some varieties are more compact and faster to mature, making them ideal for smaller gardens or shorter growing seasons.
* Consider your climate: If you live in a region with a short growing season, opt for early-maturing varieties like ‘Sugar Baby’ (around 75 days) or ‘Bush Sugar Baby’ (even more compact!). For longer growing seasons, you have more options, such as ‘Crimson Sweet’ (around 85 days) or ‘Jubilee’ (around 95 days).
* Think about space: Watermelons are sprawling plants, so if you have limited space, choose bush or compact varieties. These varieties produce smaller vines, making them easier to manage in containers or smaller gardens.
* Flavor preferences: Do you prefer a super sweet, red-fleshed watermelon, or something a little different? There are yellow-fleshed varieties like ‘Yellow Doll’ and even seedless varieties like ‘Triploid’.
I personally love ‘Sugar Baby’ because it’s reliable, delicious, and matures quickly. But don’t be afraid to experiment and find your own favorite!
Preparing the Soil
Watermelons are heavy feeders, meaning they need nutrient-rich soil to thrive. Proper soil preparation is crucial for a successful harvest.
* Sunlight is key: Watermelons need at least 6-8 hours of direct sunlight per day. Choose a location in your garden that gets plenty of sun.
* Well-draining soil: Watermelons don’t like soggy roots. Make sure your soil drains well. If you have heavy clay soil, amend it with compost, aged manure, or other organic matter to improve drainage.
* Soil pH: Watermelons prefer a slightly acidic soil pH between 6.0 and 6.8. You can test your soil pH with a soil testing kit and amend it accordingly.
* Nutrient-rich soil: Watermelons need plenty of nutrients, especially nitrogen, phosphorus, and potassium. Amend your soil with compost, aged manure, or a balanced fertilizer before planting.
Here’s how I prepare my soil:
1. Clear the area: Remove any weeds, rocks, or debris from the planting area.
2. Amend the soil: Spread a 2-3 inch layer of compost or aged manure over the soil.
3. Till or dig: Till the soil to a depth of 12-18 inches, incorporating the compost or manure. If you don’t have a tiller, you can use a shovel or garden fork to dig and turn the soil.
4. Rake smooth: Rake the soil smooth and level.
Starting Watermelon Seeds (Optional)
You can either start watermelon seeds indoors or direct sow them in the garden. Starting seeds indoors gives you a head start, especially in regions with short growing seasons.
* When to start seeds: Start seeds indoors 3-4 weeks before the last expected frost.
* Seed starting mix: Use a seed starting mix that is lightweight and well-draining.
* Planting depth: Plant seeds about 1 inch deep.
* Warmth and moisture: Keep the soil warm (around 80-85°F) and moist. You can use a heat mat to provide bottom heat.
* Light: Once the seedlings emerge, provide them with plenty of light. You can use grow lights or place them in a sunny window.
My seed starting process:
1. Fill seed trays: Fill seed trays or small pots with seed starting mix.
2. Plant seeds: Plant 2-3 seeds per cell or pot.
3. Water gently: Water the soil gently to moisten it.
4. Cover with plastic wrap: Cover the seed trays or pots with plastic wrap to create a humid environment.
5. Place in a warm location: Place the seed trays or pots in a warm location, such as on top of a refrigerator or on a heat mat.
6. Remove plastic wrap: Once the seedlings emerge, remove the plastic wrap.
7. Provide light: Place the seedlings under grow lights or in a sunny window.
8. Thin seedlings: Once the seedlings have a few true leaves, thin them to one plant per cell or pot.
Planting Watermelon Seedlings or Seeds
Once the weather warms up and the danger of frost has passed, it’s time to plant your watermelon seedlings or seeds in the garden.
* Timing: Wait until the soil temperature is at least 70°F before planting.
* Spacing: Space watermelon plants 3-5 feet apart, depending on the variety. Bush varieties can be planted closer together.
* Planting depth: Plant seedlings at the same depth they were growing in their containers. Plant seeds about 1 inch deep.
* Water thoroughly: Water the plants thoroughly after planting.
Here’s how I plant my watermelons:
1. Dig holes: Dig holes that are slightly larger than the root balls of the seedlings or the size of the seed packet instructions.
2. Add compost: Add a handful of compost to each hole.
3. Plant seedlings or seeds: Gently remove the seedlings from their containers and place them in the holes. If planting seeds, sow them directly into the prepared holes.
4. Backfill with soil: Backfill the holes with soil, gently firming it around the plants.
5. Water thoroughly: Water the plants thoroughly to settle the soil.
6. Mulch: Apply a layer of mulch around the plants to help retain moisture and suppress weeds. I like to use straw or wood chips.
Caring for Your Watermelon Plants
Watermelons need consistent care to thrive and produce juicy fruit.
* Watering: Water watermelons deeply and regularly, especially during hot, dry weather. Aim for about 1-2 inches of water per week.
* Fertilizing: Fertilize watermelons every 2-3 weeks with a balanced fertilizer. You can also side-dress them with compost or aged manure.
* Weeding: Keep the area around your watermelon plants free of weeds. Weeds compete with watermelons for nutrients and water.
* Pruning (Optional): Some gardeners prune watermelon vines to encourage fruit production. You can remove some of the side shoots to direct the plant’s energy towards developing the main fruits. I usually don’t prune unless the vines are getting out of control.
* Pollination: Watermelons need to be pollinated to produce fruit. If you’re not seeing any fruit develop, you may need to hand-pollinate the flowers. To hand-pollinate, use a small paintbrush to transfer pollen from the male flowers to the female flowers. Female flowers have a small fruit developing behind the flower.
My watermelon care routine:
1. Water deeply: I water my watermelons deeply every 2-3 days, especially during hot weather.
2. Fertilize regularly: I fertilize my watermelons every 2-3 weeks with a balanced fertilizer.
3. Weed diligently: I weed the area around my watermelons regularly to prevent weeds from competing for nutrients and water.
4. Monitor for pests and diseases: I check my watermelons regularly for pests and diseases. If I see any problems, I take action immediately to prevent them from spreading.
Protecting Your Watermelons
Watermelons are susceptible to various pests and diseases. Taking preventative measures can help protect your crop.
* Pests: Common watermelon pests include aphids, squash bugs, and cucumber beetles. You can control these pests with insecticidal soap, neem oil, or by hand-picking them off the plants.
* Diseases: Common watermelon diseases include powdery mildew, downy mildew, and fusarium wilt. You can prevent these diseases by providing good air circulation, avoiding overhead watering, and using disease-resistant varieties.
* Sunscald: Watermelons can get sunscald if they are exposed to too much direct sunlight. You can protect them by covering them with shade cloth or by placing them in a partially shaded area.
* Animals: Raccoons, squirrels, and other animals may try to steal your watermelons. You can protect them by covering them with netting or by
Conclusion
So, there you have it! This simple, effective DIY trick for cleaning your refrigerator quickly is a game-changer. Forget spending hours scrubbing away at stubborn stains and lingering odors. This method leverages readily available household ingredients to deliver a sparkling clean fridge in a fraction of the time. The beauty of this approach lies not only in its speed but also in its eco-friendliness and cost-effectiveness. You’re avoiding harsh chemicals and saving money – a win-win!
Why is this a must-try? Because a clean refrigerator isn’t just about aesthetics; it’s about food safety and extending the life of your groceries. A clean fridge prevents cross-contamination, reduces the risk of foodborne illnesses, and helps your produce stay fresher for longer. This means less food waste and more money in your pocket. Plus, let’s be honest, opening a clean and organized refrigerator just feels good!
Looking for variations? Consider adding a few drops of your favorite essential oil, like lemon or grapefruit, to the cleaning solution for an extra burst of freshness. If you’re dealing with particularly stubborn stains, create a paste of baking soda and water and apply it directly to the affected area before wiping it clean. For shelves and drawers, you can even use a dishwasher-safe cleaner, but be sure to rinse them thoroughly before placing them back in the fridge. Another variation is to use vinegar and water solution instead of baking soda and water solution. Both are effective, but some people prefer the smell of vinegar.
We’re confident that this DIY trick will revolutionize your refrigerator cleaning routine. It’s quick, easy, and delivers impressive results. But don’t just take our word for it – try it yourself! We encourage you to give this method a try and see the difference it makes. Once you’ve experienced the joy of a sparkling clean refrigerator without the hassle, you’ll never go back to your old cleaning methods.
And most importantly, we want to hear about your experience! Share your before-and-after photos, your tips and tricks, and any variations you tried in the comments below. Let’s create a community of clean refrigerator enthusiasts and help each other keep our fridges fresh and organized. Your feedback is invaluable and will help us refine and improve this DIY trick even further. So, grab your supplies, roll up your sleeves, and get ready to experience the satisfaction of a beautifully clean refrigerator, quickly and easily! Remember, a clean fridge is a happy fridge, and a happy fridge means a happy you! This DIY refrigerator cleaning method is truly a game changer.
Frequently Asked Questions (FAQ)
1. How often should I clean my refrigerator?
Ideally, you should aim to give your refrigerator a thorough cleaning at least once a month. However, spot cleaning spills and wiping up messes as they occur is crucial for maintaining a clean and hygienic environment. This prevents stains from setting and minimizes the risk of bacterial growth. If you notice any unpleasant odors or visible signs of mold or mildew, it’s time for a more immediate cleaning. Consider a quick wipe-down of shelves and drawers weekly to prevent buildup.
2. What ingredients do I need for this DIY cleaning solution?
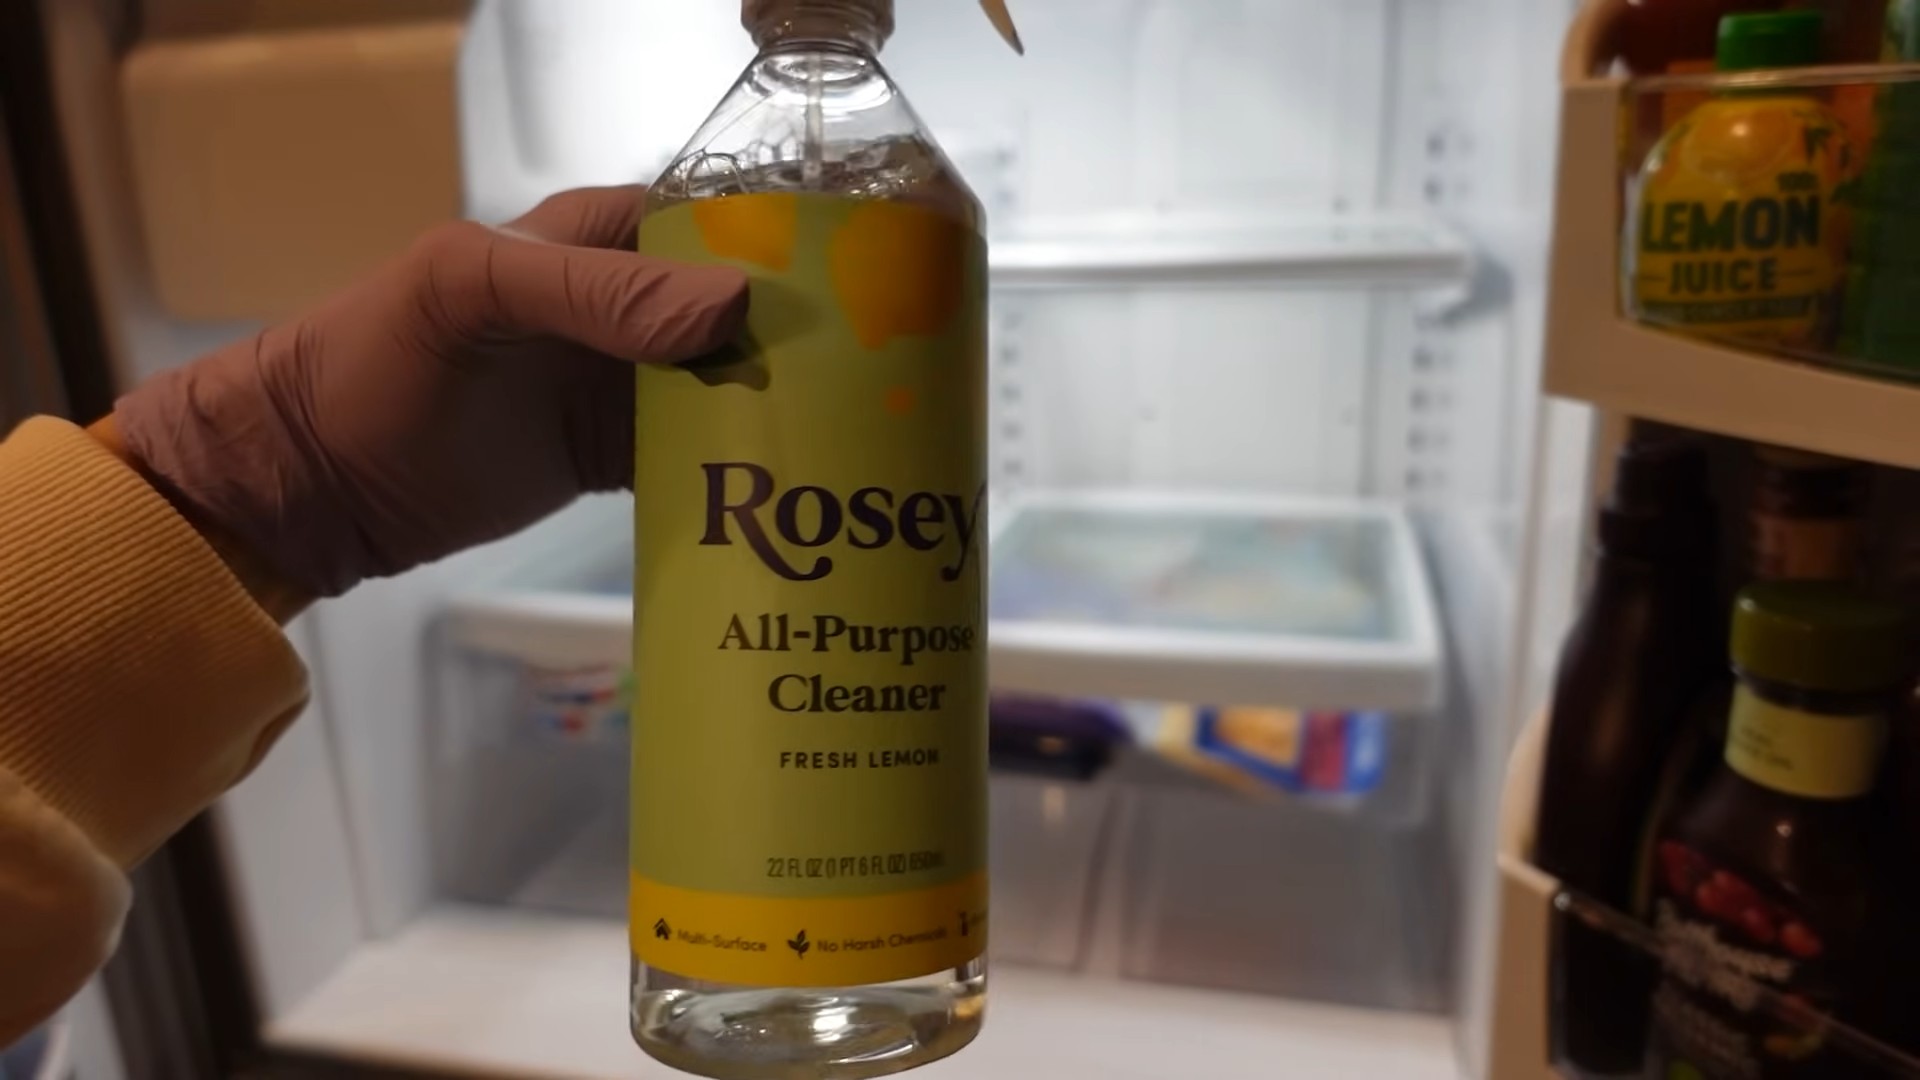
The basic recipe calls for simple ingredients you likely already have in your kitchen: baking soda, warm water, and a clean cloth or sponge. For added cleaning power, you can also use white vinegar. Some people like to add a few drops of essential oils, such as lemon or grapefruit, for a fresh scent. Avoid using harsh chemicals like bleach, as they can damage the refrigerator’s interior and leave behind harmful residues.
3. Can I use this cleaning solution on all types of refrigerators?
Yes, this DIY cleaning solution is generally safe for use on most types of refrigerators, including stainless steel, plastic, and glass. However, it’s always a good idea to test the solution on a small, inconspicuous area first to ensure it doesn’t cause any discoloration or damage. For stainless steel refrigerators, wipe in the direction of the grain to avoid streaks.
4. How do I deal with stubborn stains or odors in my refrigerator?
For stubborn stains, create a paste of baking soda and water and apply it directly to the affected area. Let it sit for a few minutes before wiping it clean. For lingering odors, place an open box of baking soda in the refrigerator to absorb the smells. You can also try placing a bowl of vinegar or coffee grounds in the fridge overnight. Another effective method is to soak cotton balls in vanilla extract and place them in the refrigerator for a few hours.
5. What’s the best way to organize my refrigerator after cleaning it?
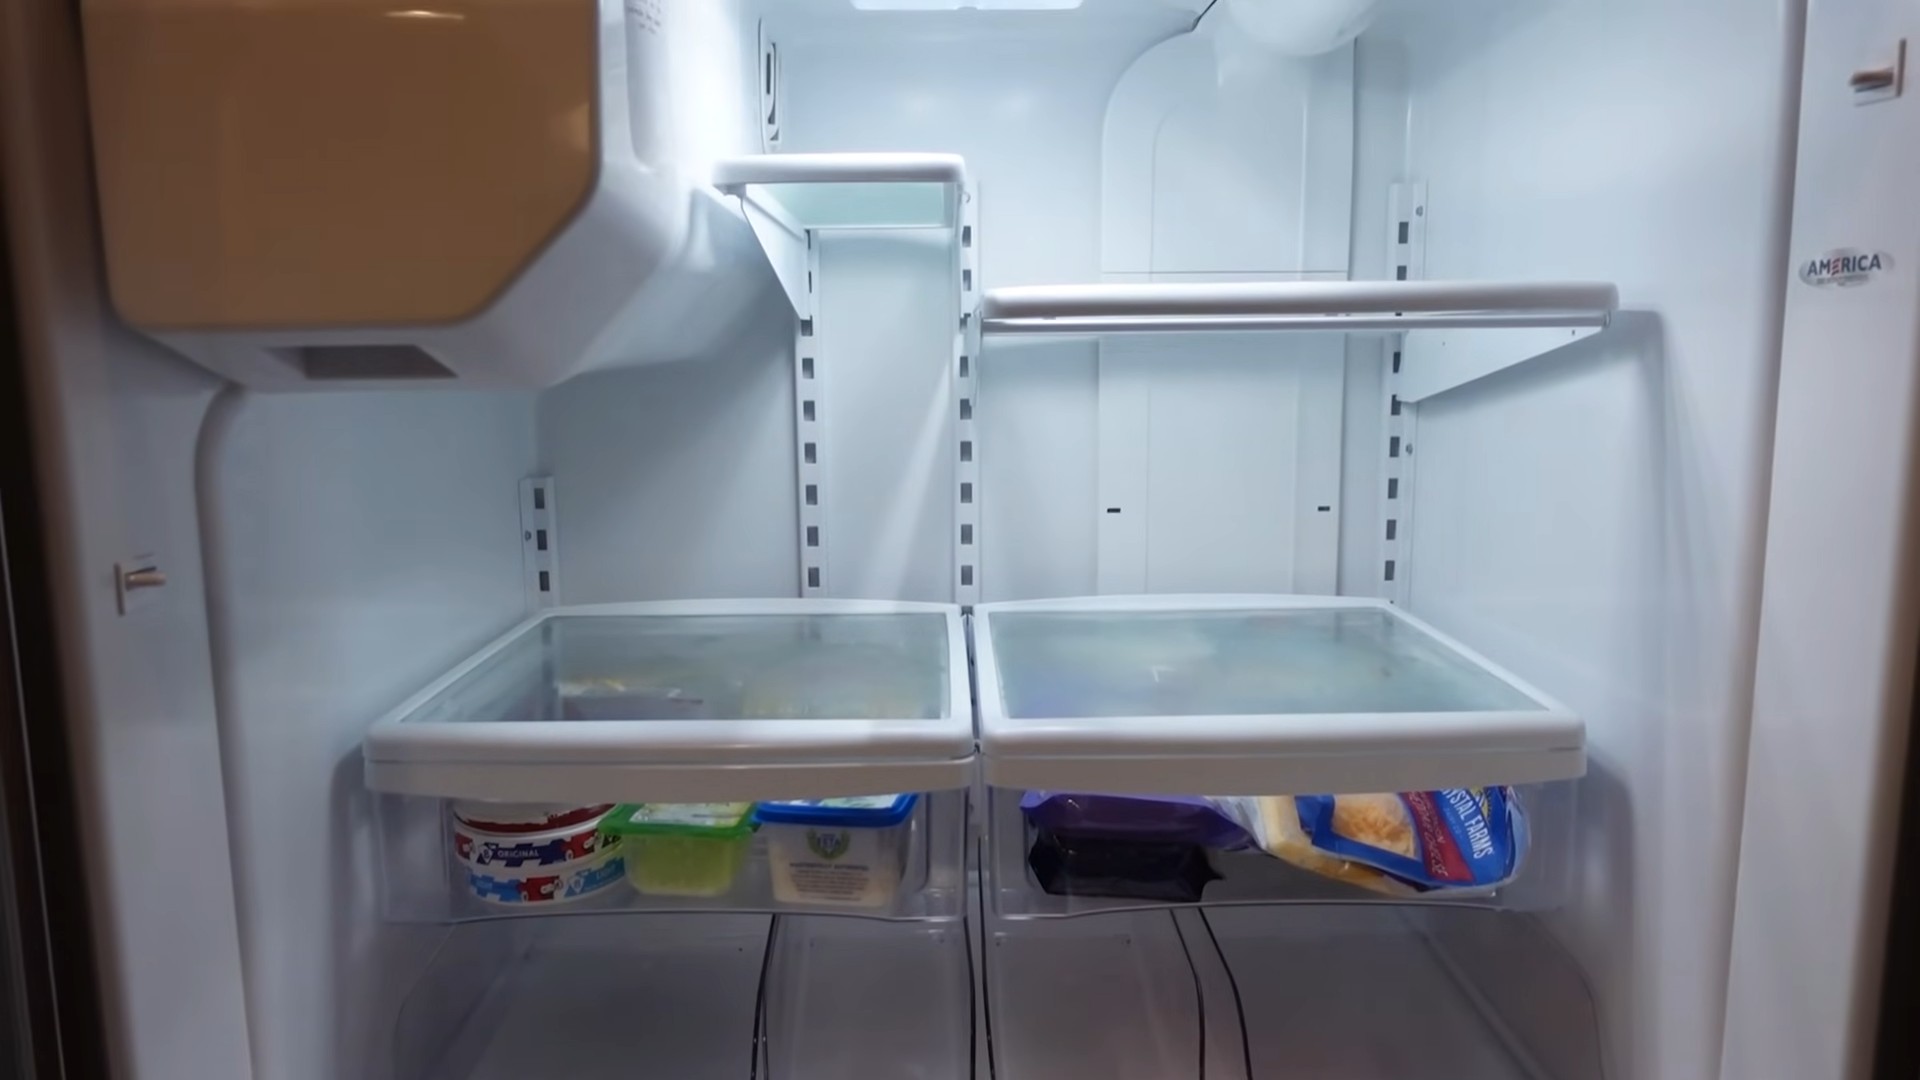
Organization is key to keeping your refrigerator clean and efficient. Start by grouping similar items together, such as fruits, vegetables, dairy products, and meats. Use clear containers or bins to store smaller items and prevent spills. Store leftovers in airtight containers to prevent odors and cross-contamination. Place frequently used items at eye level for easy access. Avoid overfilling your refrigerator, as this can restrict airflow and lead to uneven cooling.
6. How can I prevent my refrigerator from getting dirty in the first place?
Prevention is always better than cure. To minimize messes, line refrigerator shelves with plastic wrap or shelf liners. Wipe up spills immediately to prevent them from setting. Store food in airtight containers to prevent leaks and odors. Regularly check expiration dates and discard any spoiled food. Avoid placing hot food directly into the refrigerator, as this can raise the temperature and promote bacterial growth.
7. Is it safe to use essential oils in my refrigerator?
Yes, using essential oils in your refrigerator is generally safe, as long as you use them in moderation and choose food-safe oils like lemon, grapefruit, or orange. Avoid using essential oils that are known to be toxic or irritating. Always dilute essential oils with water before using them to clean your refrigerator.
8. What if I don’t have baking soda? Can I use something else?
If you don’t have baking soda, you can use white vinegar as an alternative cleaning agent. Vinegar is a natural disinfectant and deodorizer. Simply mix equal parts vinegar and water in a spray bottle and use it to clean your refrigerator. However, be aware that vinegar has a strong odor, so you may want to ventilate your kitchen while cleaning.
9. How long does it take to clean a refrigerator using this DIY trick?
The time it takes to clean your refrigerator using this DIY trick will depend on the size and condition of your refrigerator. However, most people can complete the cleaning process in 30 minutes to an hour. This includes removing all the items from the refrigerator, cleaning the interior, and organizing the contents.
10. Where can I share my experience and see what others are saying about this DIY refrigerator cleaning method?
We encourage you to share your experience in the comments section below this article. You can also share your before-and-after photos and tips on social media using relevant hashtags like #DIYRefrigeratorCleaning, #CleanFridge, #HomeCleaningTips. We’re excited to see your results and learn from your experiences!


Leave a Comment