
Indoor Celery Gardening: Ever dreamt of snipping fresh, crisp celery stalks right from your kitchen windowsill? I know I have! Forget those limp, store-bought celery sticks – imagine the vibrant flavor and satisfying crunch of homegrown celery, readily available for your salads, soups, and healthy snacks. This isn’t just a gardening trend; it’s a revolution in fresh, accessible produce.
Celery, with its origins tracing back to the Mediterranean, has been enjoyed for centuries, initially for its medicinal properties and later as a culinary delight. While traditionally grown in expansive fields, the beauty of modern gardening lies in its adaptability. We’re taking this classic vegetable indoors, making it accessible to everyone, regardless of space or climate.
Why should you embrace this DIY adventure? Because indoor celery gardening is surprisingly easy and incredibly rewarding! It’s a fantastic way to reduce food waste by regrowing celery from scraps, save money on groceries, and enjoy the freshest possible ingredients. Plus, it’s a fun and educational activity for the whole family. Let’s dive into the simple steps and unlock the secrets to a thriving indoor celery patch. I’m excited to share these tips and tricks with you!
Regrow Celery From Scraps: A Beginner’s Guide to Indoor Celery Gardening
Hey there, fellow plant enthusiasts! Ever feel guilty tossing those celery stalks after you’ve munched on the heart? Well, I’ve got a fantastic solution for you: regrowing celery from scraps! It’s a super easy and rewarding DIY project that brings a little bit of the garden indoors. Plus, you get fresh celery for soups, salads, and snacking – win-win! Let’s dive into how you can turn those kitchen scraps into a thriving celery plant.
What You’ll Need
Before we get started, let’s gather our supplies. This project is pretty low-maintenance, so you probably already have most of these things lying around:
* Celery Base: The bottom 2-3 inches of a celery stalk, where the stalks are connected. Make sure it’s firm and healthy-looking, not mushy or discolored.
* Shallow Dish or Bowl: Something to hold water and the celery base. A pie plate, a small plastic container, or even a saucer will work.
* Water: Tap water is fine, but filtered water is even better.
* Potting Soil: A well-draining potting mix is essential for when we transplant the celery.
* Pot: Choose a pot that’s at least 6-8 inches in diameter to give your celery plant room to grow.
* Sunny Spot: Celery loves sunlight, so find a bright windowsill or a spot under a grow light.
* Spray Bottle (Optional): For misting the leaves to keep them hydrated.
* Gardening Gloves (Optional): To keep your hands clean.
Phase 1: Rooting the Celery Base
This is where the magic happens! We’re going to coax those celery cells into producing roots. It’s surprisingly simple.
1. Prepare the Celery Base: Carefully remove any loose or damaged outer stalks from the celery base. You want to keep the core intact. Don’t worry if it looks a little rough; we’re aiming for healthy growth from the center.
2. Place in Water: Put the celery base in your shallow dish or bowl. Add enough water to cover the bottom inch or so of the base. You don’t want to submerge the entire thing, just the bottom part where the roots will emerge.
3. Find a Sunny Spot: Place the dish with the celery base in a bright, sunny location. A windowsill that gets at least 6 hours of sunlight a day is ideal. If you don’t have a sunny windowsill, you can use a grow light.
4. Change the Water Regularly: This is crucial! Change the water every 1-2 days to prevent bacteria growth and keep the water fresh. This will encourage healthy root development.
5. Observe and Wait: Now comes the patience part. Over the next few days, you should start to see small roots emerging from the bottom of the celery base. You’ll also likely see new green growth sprouting from the center. This is a sign that your celery is happy and thriving!
6. Continue Rooting: Keep changing the water and providing sunlight until the roots are about 1-2 inches long. This usually takes about 1-2 weeks. The more roots, the better the chances of successful transplanting.
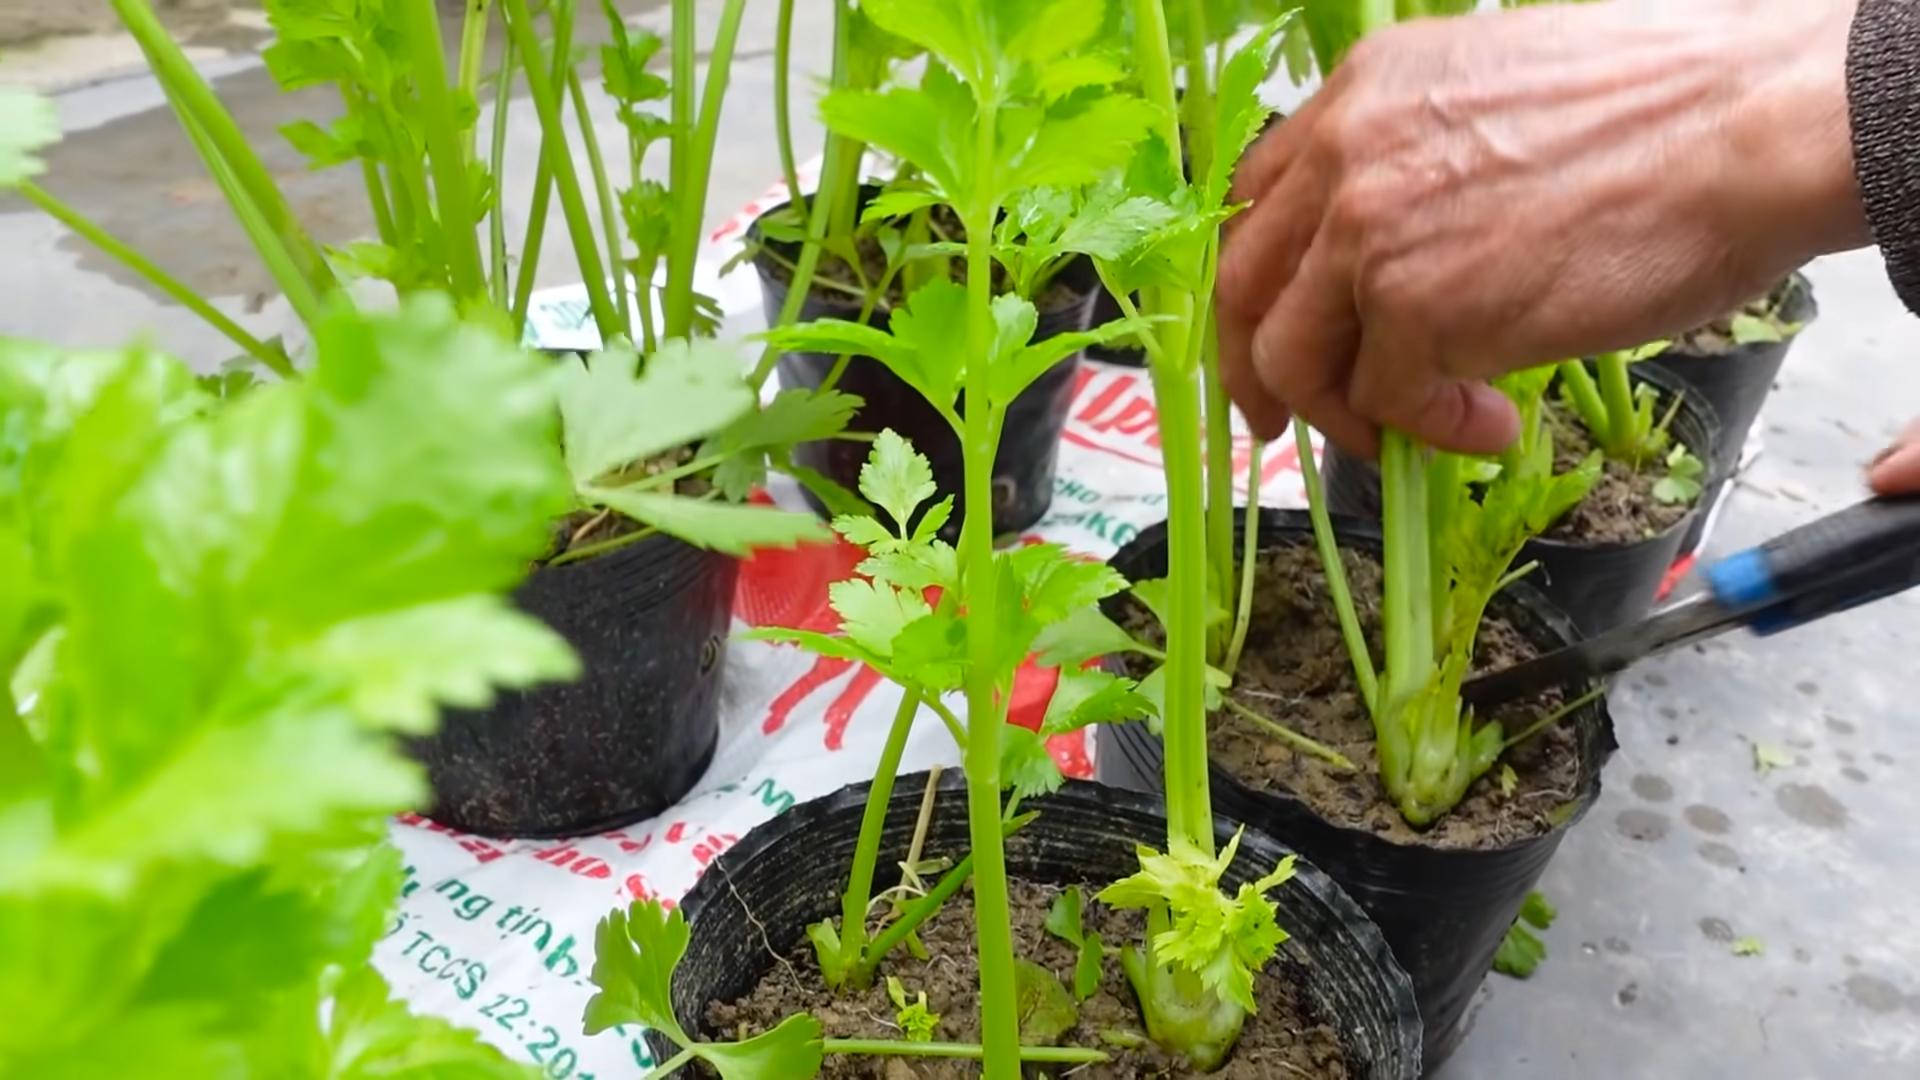
Phase 2: Transplanting to Soil
Once your celery base has developed a good root system, it’s time to move it to a pot with soil. This will give it the nutrients it needs to grow into a full-fledged celery plant.
1. Prepare the Pot: Fill your pot with well-draining potting soil. Leave about an inch of space at the top of the pot.
2. Create a Hole: Make a hole in the center of the soil that’s large enough to accommodate the celery base and its roots.
3. Carefully Remove the Celery Base: Gently lift the celery base from the water, being careful not to damage the roots.
4. Plant the Celery Base: Place the celery base in the hole, making sure the roots are spread out. Cover the roots with soil, leaving the top of the celery base exposed.
5. Water Thoroughly: Water the soil thoroughly until water drains out of the bottom of the pot. This will help settle the soil around the roots.
6. Return to Sunny Spot: Place the pot back in the sunny location where it was rooting.
Phase 3: Ongoing Care
Now that your celery is planted in soil, it’s time to provide it with the care it needs to flourish.
1. Watering: Celery needs consistent moisture, but it doesn’t like to be waterlogged. Water the plant when the top inch of soil feels dry to the touch. Avoid overwatering, as this can lead to root rot.
2. Sunlight: Continue to provide your celery plant with plenty of sunlight. If you’re using a grow light, keep it on for about 12-14 hours a day.
3. Fertilizing: To give your celery plant a boost, you can fertilize it every 2-3 weeks with a balanced liquid fertilizer. Follow the instructions on the fertilizer label.
4. Misting (Optional): Celery appreciates humidity, so you can mist the leaves with water every few days, especially if you live in a dry climate.
5. Harvesting: You can start harvesting celery stalks once they’re large enough to use. Simply cut off the outer stalks as needed, leaving the inner stalks to continue growing. This will allow you to harvest celery from your plant for several weeks.
6. Pest Control: Keep an eye out for pests like aphids or spider mites. If you notice any pests, you can try spraying the plant with insecticidal soap or neem oil.
Troubleshooting
Even with the best care, you might encounter a few challenges along the way. Here are some common problems and how to fix them:
* Yellowing Leaves: This could be a sign of overwatering, underwatering, or nutrient deficiency. Check the soil moisture and adjust your watering schedule accordingly. You can also try fertilizing the plant.
* Slow Growth: This could be due to insufficient sunlight or lack of nutrients. Make sure your celery plant is getting enough sunlight and fertilize it regularly.
* Root Rot: This is caused by overwatering. Make sure your pot has good drainage and avoid letting the soil stay soggy. If you suspect root rot, you can try repotting the plant in fresh soil.
* Pests: As mentioned earlier, keep an eye out for pests and treat them promptly.
Tips for Success
Here are a few extra tips to help you succeed with your indoor celery garden:
* Start with a Healthy Celery Base: The healthier the celery base, the better the chances of successful regrowth.
* Use Well-Draining Soil: This is crucial for preventing root rot.
* Provide Plenty of Sunlight: Celery needs lots of sunlight to thrive.
* Don’t Overwater: Overwatering is a common mistake that can lead to problems.
* Be Patient: It takes time for celery to regrow, so don’t get discouraged if you don’t see results immediately.
* Experiment: Try different varieties of celery to see which ones grow best indoors.
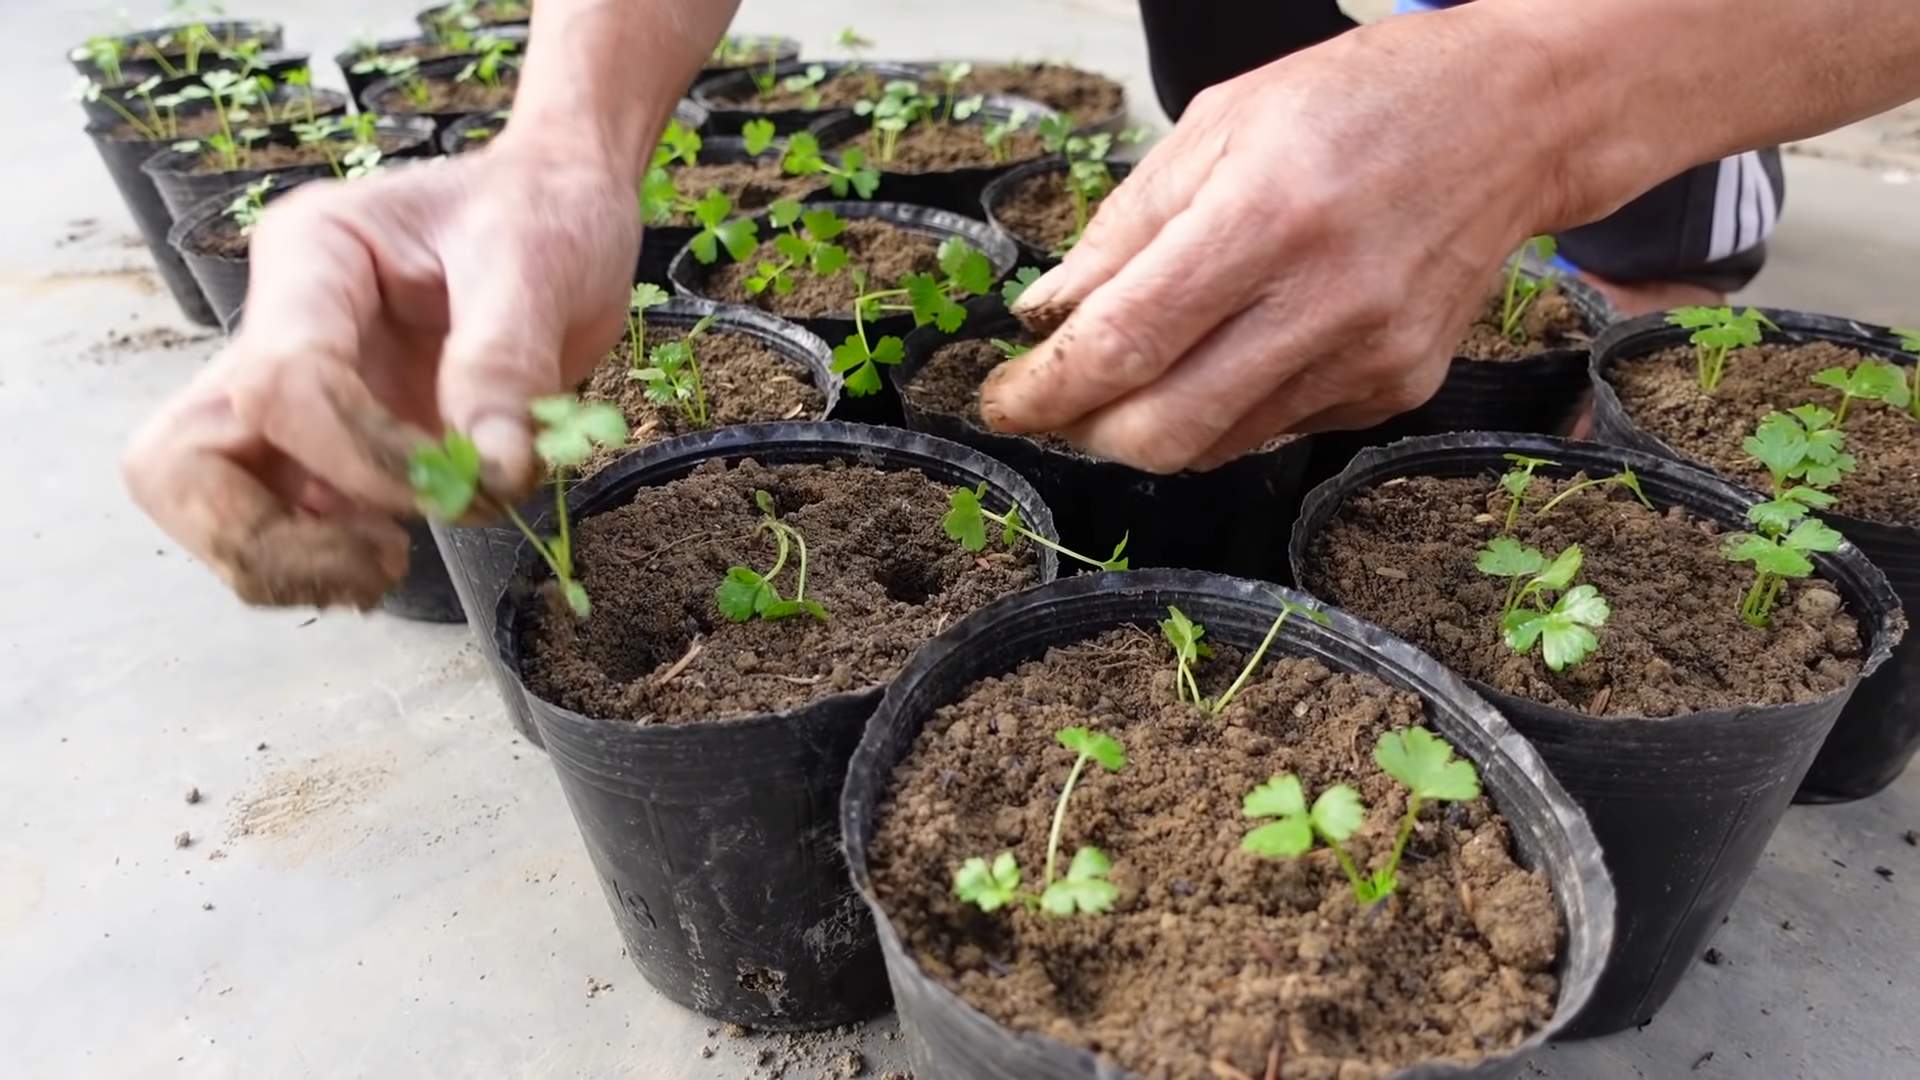
Beyond the Basics: Growing Celery from Seed
While regrowing from scraps is a fun and easy way to get started, you can also grow celery from seed for more variety and control. Here’s a quick overview:
1. Start Seeds Indoors: Celery seeds are tiny and need a long growing season, so start them indoors 10-12 weeks before the last expected frost.
2. Use Seed Starting Mix: Sow the seeds on the surface of a seed starting mix and gently press them down. Celery seeds need light to germinate.
3. Keep Moist: Keep the soil consistently moist but not soggy. You can cover the seed tray with a plastic dome to maintain humidity.
4. Provide Light: Place the seed tray under a grow light or in a very sunny window.
5. Transplant Seedlings: Once the seedlings have a few sets of true leaves, transplant them into individual pots.
6. Harden Off: Before planting outdoors, gradually acclimate the seedlings to outdoor conditions by hardening them off for a week or two.
7. Plant Outdoors: Plant the seedlings in a sunny location with well-drained soil.
Growing celery from seed requires more patience and effort than regrowing from scraps, but it can be a rewarding experience.
So there you have it! Regrowing celery from scraps is a simple and satisfying way to reduce waste, add some greenery to your home, and enjoy fresh celery. Give it a try, and let me know how it goes! Happy gardening!
Conclusion
So, there you have it! Transforming celery scraps into a thriving indoor garden is not only incredibly rewarding but also a fantastic way to reduce food waste and enjoy fresh, homegrown flavor right at your fingertips. This simple DIY trick is a must-try for anyone looking to add a touch of green to their home, experiment with sustainable living, or simply enjoy the satisfaction of nurturing something from almost nothing.
The beauty of this indoor celery gardening project lies in its adaptability. Feel free to experiment with different varieties of celery. Perhaps you prefer the more robust flavor of a darker green variety, or maybe you’d like to try growing a smaller, more tender type. The process remains the same, allowing you to tailor your garden to your specific tastes.
Beyond the celery itself, consider the container you use. While a simple glass of water works perfectly for the initial rooting stage, you can eventually transplant your celery into a larger pot filled with nutrient-rich soil. This will provide the plant with the necessary support and nourishment to grow even bigger and produce more stalks. You can even add companion plants like basil or parsley to your container for a mini herb garden alongside your celery.
Don’t be afraid to get creative with your setup! A sunny windowsill is ideal, but if you lack natural light, consider using a grow light to supplement the plant’s needs. Remember to rotate the celery regularly to ensure even growth on all sides.
The most important thing is to dive in and give it a try. This indoor celery gardening project is incredibly forgiving, and even if you encounter a few hiccups along the way, you’ll learn valuable lessons about plant propagation and care. The reward of harvesting your own fresh celery, grown from scraps you would have otherwise discarded, is well worth the effort.
We are confident that you’ll find this DIY trick to be a fun, educational, and ultimately delicious experience. We encourage you to embark on this green adventure and discover the joys of growing your own food, even in the smallest of spaces.
Once you’ve tried this method, we would absolutely love to hear about your experience! Share your photos, tips, and any variations you’ve tried in the comments below. Let’s create a community of indoor celery gardeners and inspire others to embrace sustainable living, one celery stalk at a time. Happy gardening!
Frequently Asked Questions (FAQ)
1. What kind of celery works best for regrowing?
Any type of celery you buy from the grocery store will work for regrowing, as long as the base is intact. Look for celery bunches that have a firm, healthy-looking base with the roots still attached. Avoid celery with a mushy or discolored base, as this may indicate that it’s already starting to rot. Organic celery is a great option, but conventional celery will work just as well. The key is to have a healthy base to start with.
2. How long does it take for celery to regrow?
The time it takes for celery to regrow can vary depending on several factors, including the amount of sunlight it receives, the temperature, and the quality of the water and soil. Generally, you should start to see new growth within a few days of placing the celery base in water. After about a week or two, you should have enough roots to transplant the celery into soil. From there, it can take several weeks or even months for the celery to grow to a harvestable size. Be patient and consistent with your care, and you’ll eventually be rewarded with fresh, homegrown celery.
3. How much sunlight does regrowing celery need?
Celery needs plenty of sunlight to thrive. Aim for at least 6 hours of direct sunlight per day. A sunny windowsill is an ideal location for your regrowing celery. If you don’t have a sunny windowsill, you can supplement with a grow light. Place the grow light a few inches above the celery and leave it on for 12-14 hours per day. Remember to rotate your celery regularly to ensure that all sides receive adequate sunlight.
4. What kind of water should I use for regrowing celery?
Use clean, fresh water for regrowing celery. Tap water is generally fine, but if your tap water is heavily chlorinated, you may want to let it sit out for 24 hours before using it to allow the chlorine to dissipate. You can also use filtered water or bottled water. Change the water every day or two to prevent the growth of bacteria and keep the celery base healthy.
5. When should I transplant the celery to soil?
You should transplant the celery to soil once it has developed a good root system. This usually takes about a week or two. Look for roots that are at least an inch or two long. When transplanting, choose a pot that is at least 6 inches in diameter and fill it with a well-draining potting mix. Gently remove the celery from the water and plant it in the soil, making sure to cover the roots completely. Water thoroughly after transplanting.
6. What kind of soil is best for growing celery?
Celery prefers a rich, well-draining soil. A good potting mix will work well. You can also amend your soil with compost or other organic matter to improve its fertility and drainage. Make sure the soil is loose and not compacted, as this can hinder root growth.
7. How often should I water the celery after transplanting?
Water the celery regularly after transplanting, keeping the soil consistently moist but not waterlogged. Check the soil moisture daily and water when the top inch of soil feels dry to the touch. Avoid overwatering, as this can lead to root rot.
8. Can I grow celery indoors year-round?
Yes, you can grow celery indoors year-round, as long as you provide it with adequate sunlight and water. Celery is a cool-season crop, so it prefers temperatures between 60 and 70 degrees Fahrenheit. If your home is too warm, you may need to provide additional ventilation or cooling.
9. How do I harvest the celery?
You can harvest the celery stalks as needed, starting with the outer stalks. Simply cut the stalks off at the base of the plant. The plant will continue to produce new stalks as long as you provide it with adequate care. You can also harvest the entire plant at once if you prefer.
10. Can I regrow celery multiple times from the same base?
Yes, you can regrow celery multiple times from the same base, but the stalks will likely become smaller and thinner with each successive regrowth. After a few regrowths, the base may become exhausted and stop producing new growth. At that point, you’ll need to start with a new celery base.
11. What are some common problems when regrowing celery and how can I fix them?
Some common problems when regrowing celery include yellowing leaves, slow growth, and root rot. Yellowing leaves can be caused by a lack of nutrients or sunlight. Try fertilizing the celery with a balanced fertilizer and moving it to a sunnier location. Slow growth can be caused by a lack of water or nutrients. Make sure you are watering the celery regularly and fertilizing it as needed. Root rot is caused by overwatering. Make sure the soil is well-draining and avoid overwatering. If you suspect root rot, you can try transplanting the celery to a new pot with fresh soil.
12. Can I eat the celery leaves?
Yes, you can eat the celery leaves! Celery leaves are packed with flavor and nutrients. They can be used in salads, soups, stews, and other dishes. You can also dry the leaves and use them as a seasoning.
13. Is regrowing celery worth it?
Absolutely! Regrowing celery is a fun, easy, and sustainable way to reduce food waste and enjoy fresh, homegrown celery. It’s a great project for kids and adults alike. Plus, it’s a great way to add a touch of green to your home. Give it a try and see for yourself!


Leave a Comment