
Dish soap baking soda cleaner: Ever feel like you’re battling a never-ending war against grime and stubborn stains in your home? I know I have! It’s frustrating to spend hours scrubbing, only to be left with less-than-sparkling results. But what if I told you the solution was already sitting in your kitchen cabinet?
For generations, resourceful homemakers have relied on simple, natural ingredients to keep their homes clean and fresh. Think back to your grandmother’s cleaning rituals – chances are, she had a secret weapon involving baking soda! This dynamic duo, dish soap baking soda cleaner, isn’t just a modern trend; it’s a time-tested method rooted in practicality and a desire for a healthier, less toxic home environment.
In today’s world, we’re increasingly aware of the harsh chemicals lurking in commercial cleaning products. Many of us are searching for safer, more eco-friendly alternatives that won’t break the bank. That’s where this DIY cleaning hack comes in. I’m going to show you how to create a powerful, all-purpose cleaner using just dish soap and baking soda – a cleaner that’s effective, affordable, and gentle on your family and the planet. Get ready to ditch those expensive, chemical-laden sprays and embrace the power of natural cleaning!
DIY All-Purpose Cleaner: Dish Soap and Baking Soda Powerhouse
Hey everyone! I’m so excited to share my go-to DIY all-purpose cleaner recipe with you. It’s incredibly simple, uses just two ingredients you probably already have in your kitchen – dish soap and baking soda – and it’s surprisingly effective for tackling a wide range of cleaning tasks around the house. Forget those expensive, chemical-laden cleaners from the store; this homemade solution is budget-friendly, eco-conscious, and gets the job done!
Why This Cleaner Works
Before we dive into the how-to, let’s quickly understand why this dynamic duo is so powerful:
* Dish Soap: Acts as a surfactant, meaning it reduces the surface tension of water. This allows the cleaner to penetrate grease, grime, and dirt more effectively, lifting them away from surfaces. It’s also great at cutting through oily messes.
* Baking Soda: A mild abrasive and deodorizer. It gently scrubs away stubborn stains and buildup without scratching most surfaces. Plus, it neutralizes odors, leaving your home smelling fresh and clean.
What You’ll Need
* Dish soap (any brand will do, but I prefer a grease-cutting formula)
* Baking soda
* Spray bottle (a clean, empty one, of course!)
* Measuring spoons or cups (optional, but helpful for consistency)
* Water (tap water is fine)
* A small bowl or container for mixing (optional)
* Gloves (optional, but recommended if you have sensitive skin)
Making the All-Purpose Cleaner: Two Methods
I’m going to share two methods for making this cleaner. The first is a simple spray solution, perfect for everyday cleaning. The second is a thicker paste, ideal for tackling tougher stains and grime.
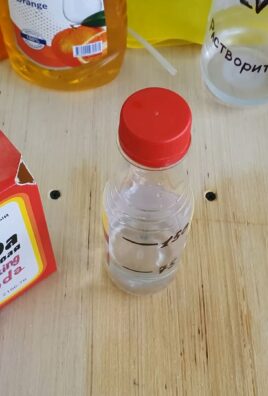
Method 1: All-Purpose Spray Cleaner
This is my go-to for quick cleanups in the kitchen and bathroom. It’s easy to make and works wonders on countertops, sinks, and even appliances.
Step 1: Prepare Your Spray Bottle
Make sure your spray bottle is clean and dry. Any residue from previous cleaners could interfere with the effectiveness of our DIY solution.
Step 2: Add Baking Soda
Pour 1 tablespoon of baking soda into the spray bottle. A funnel can be helpful here to avoid spills.
Step 3: Add Dish Soap
Next, add 1 tablespoon of dish soap to the spray bottle. Be careful not to add too much, as it can make the solution too sudsy.
Step 4: Add Water
Fill the rest of the spray bottle with warm water. Leave a little space at the top to allow for shaking.
Step 5: Shake Well
Secure the spray nozzle and shake the bottle vigorously until the baking soda is completely dissolved. This might take a minute or two.
Step 6: Test and Adjust (If Needed)
Spray a small amount of the cleaner onto an inconspicuous area of the surface you plan to clean. This is just to make sure it doesn’t damage or discolor the material. If everything looks good, you’re ready to go! If you find the solution is too weak, you can add a little more dish soap or baking soda. If it’s too strong, add more water.
Method 2: Heavy-Duty Cleaning Paste
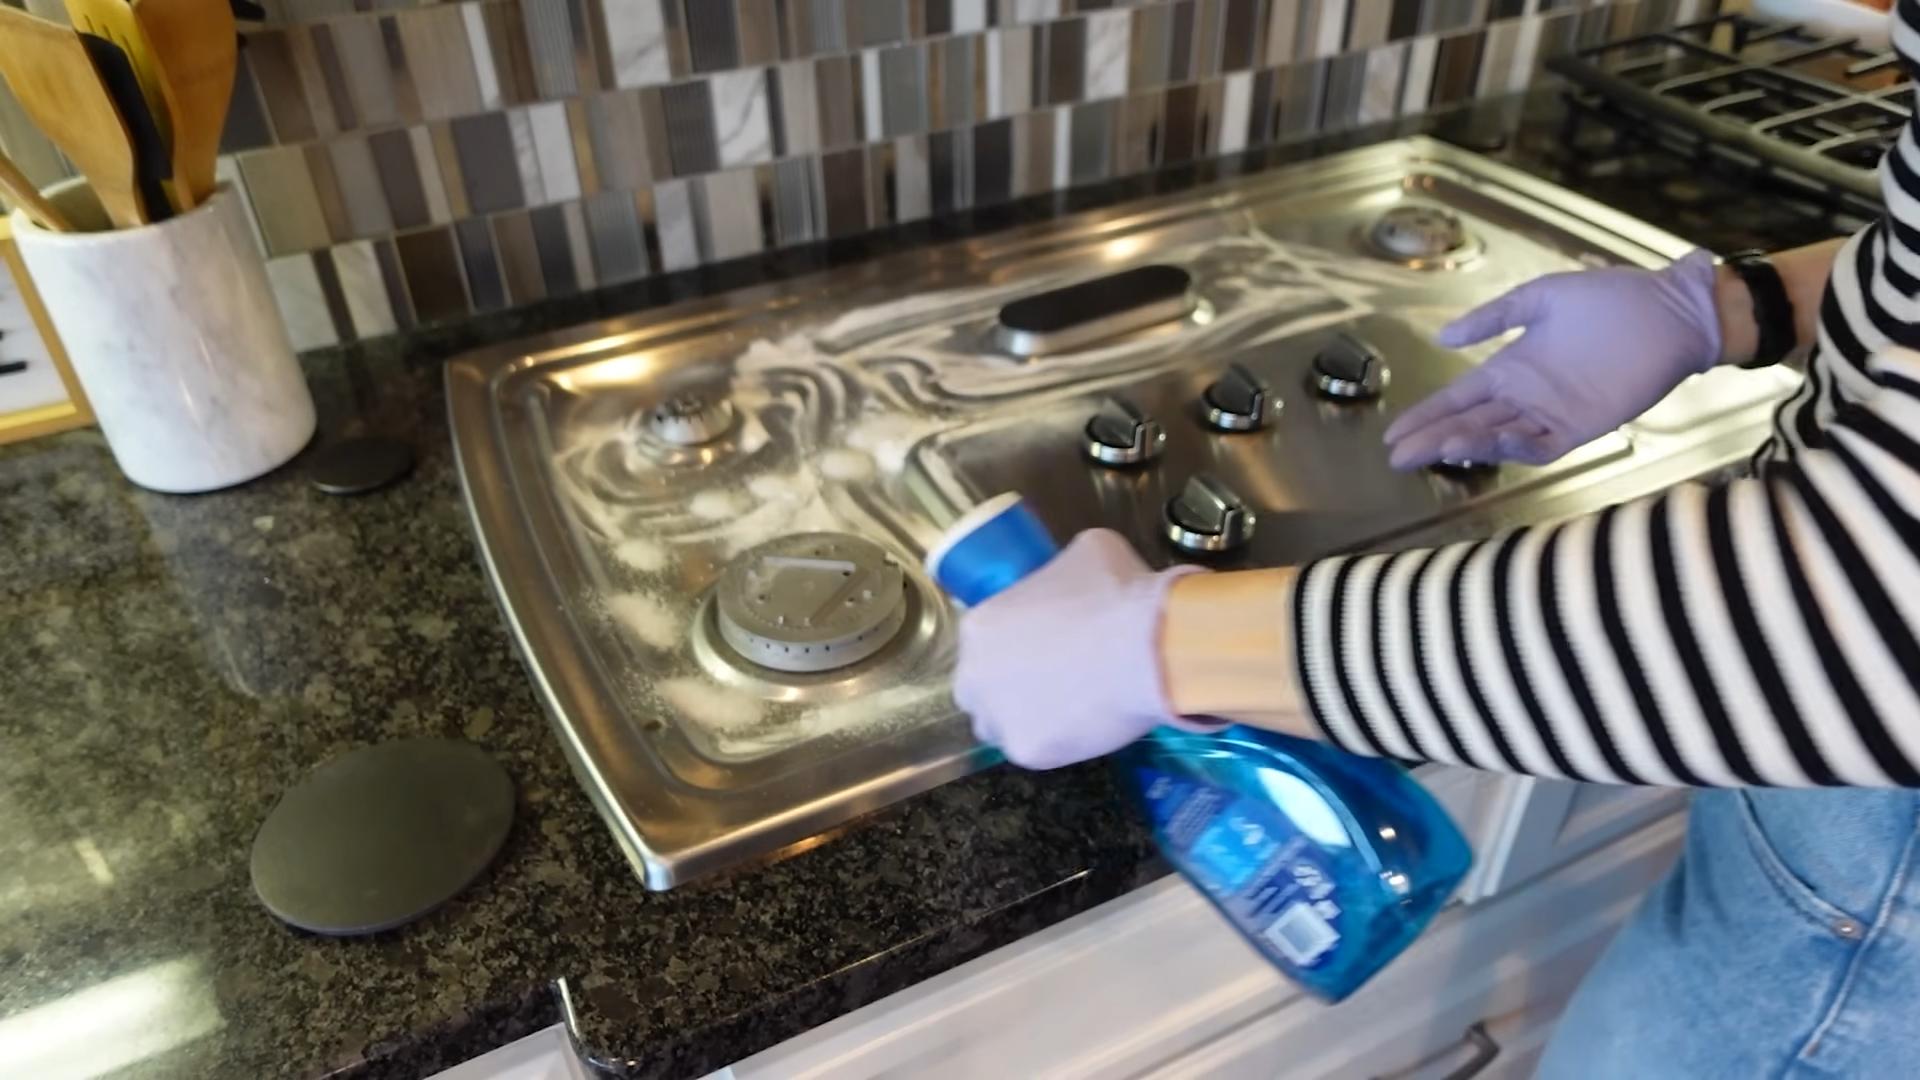
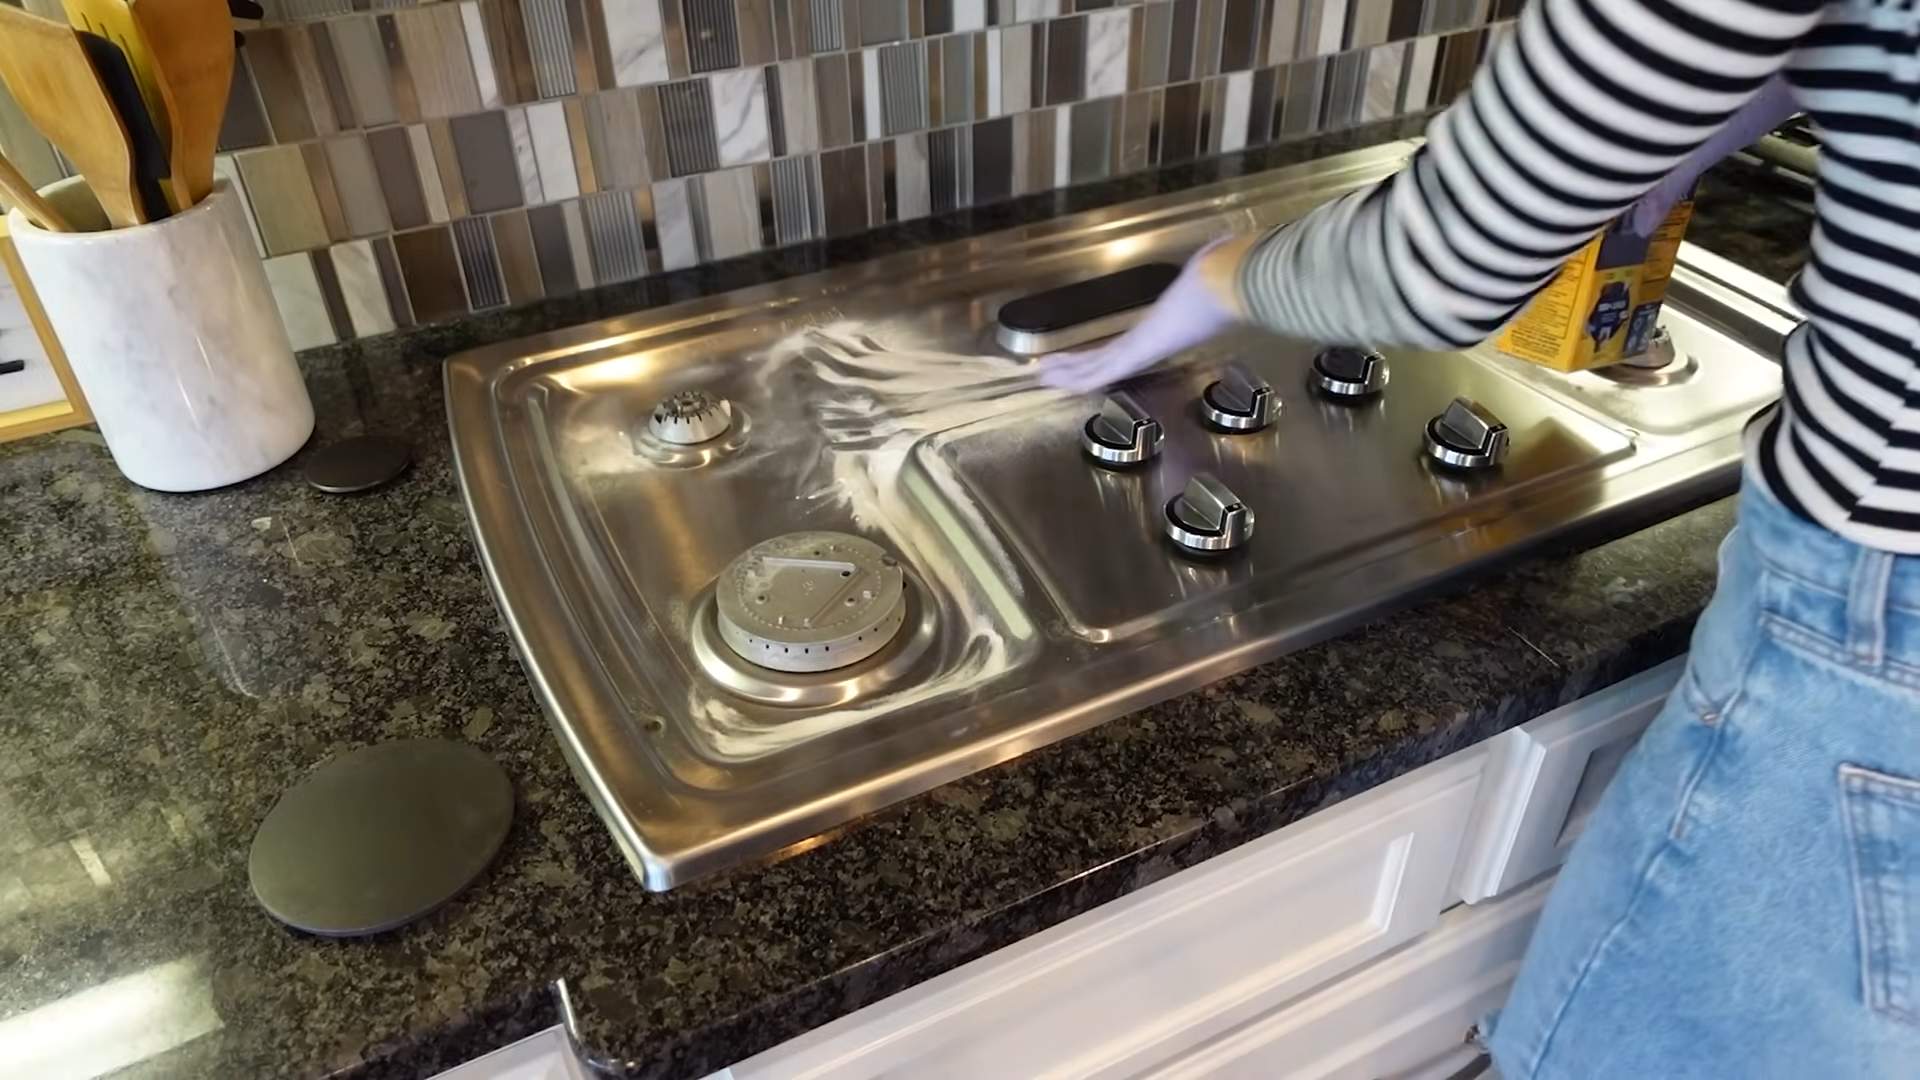
For those stubborn stains and grimy messes, a thicker paste is the way to go. This is great for cleaning ovens, stovetops, tile grout, and even removing hard water stains.
Step 1: Gather Your Ingredients
In a small bowl or container, gather your baking soda and dish soap.
Step 2: Mix the Baking Soda and Dish Soap
Add approximately 1/2 cup of baking soda to the bowl.
Step 3: Add Dish Soap Gradually
Slowly add dish soap to the baking soda, a tablespoon at a time. Stir the mixture after each addition.
Step 4: Achieve the Right Consistency
Continue adding dish soap until you achieve a thick, paste-like consistency. You want it to be thick enough to hold its shape but still spreadable. I usually end up using around 2-3 tablespoons of dish soap, but it might vary depending on the brand and consistency of your dish soap.
Step 5: Test and Adjust (If Needed)
Just like with the spray cleaner, it’s always a good idea to test the paste on an inconspicuous area first.
Using Your DIY Cleaner: Tips and Tricks
Now that you’ve made your cleaner, let’s talk about how to use it effectively.
For the Spray Cleaner:
1. Spray and Wipe: Simply spray the cleaner onto the surface you want to clean and wipe it down with a clean cloth or sponge.
2. Let it Sit for Tougher Stains: For tougher stains, let the cleaner sit for a few minutes before wiping. This gives the dish soap and baking soda time to work their magic.
3. Rinse if Necessary: For some surfaces, you may want to rinse with clean water after wiping to remove any residue.
4. Use on a Variety of Surfaces: I use this spray cleaner on countertops, sinks, appliances, bathroom fixtures, and even floors (just be careful not to make the floor too slippery).
For the Cleaning Paste:
1. Apply Generously: Apply a generous amount of the paste to the stained or grimy area.
2. Let it Sit for a While: This is key! Let the paste sit for at least 15-20 minutes, or even longer for really stubborn messes. The longer it sits, the better it will work.
3. Scrub Gently: Use a sponge, scrub brush, or even an old toothbrush to gently scrub the area. The baking soda will act as a mild abrasive to help lift away the grime.
4. Rinse Thoroughly: Rinse the area thoroughly with clean water to remove all traces of the paste.
5. Repeat if Necessary: For really tough stains, you may need to repeat the process.
Where to Use Your DIY Cleaner
This cleaner is incredibly versatile! Here are some of my favorite uses:
* Kitchen: Cleaning countertops, sinks, stovetops, ovens, microwaves, and appliances.
* Bathroom: Cleaning sinks, toilets, showers, tubs, and tile grout.
* General Cleaning: Cleaning floors (test in an inconspicuous area first!), walls, and even some furniture (again, test first!).
Important Considerations and Precautions
While this cleaner is generally safe and effective, there are a few things to keep in mind:
* Test Before Use: Always test the cleaner on an inconspicuous area before using it on a larger surface. This is especially important for delicate or sensitive materials.
* Avoid Certain Surfaces: Do not use this cleaner on marble, granite, or other porous stone surfaces, as the baking soda can scratch them. Also, avoid using it on wood furniture, as it can damage the finish.
* Don’t Mix with Other Cleaners: Never mix this cleaner with other cleaning products, especially bleach. Mixing cleaners can create dangerous fumes.
* Storage: Store the spray cleaner in a cool, dark place. The paste can be stored in an airtight container.
* Shelf Life: The spray cleaner is best used within a few weeks, as the baking soda can settle over time. The paste will last longer, but it’s best to make a fresh batch when needed.
* Wear Gloves (Optional): If you have sensitive skin, it’s a good idea to wear gloves when using this cleaner.
Troubleshooting
* Cleaner is too sudsy: You’ve probably added too much dish soap. Dilute the solution with more water.
* Cleaner isn’t strong enough: Add a little more dish soap or baking soda.
* Baking soda is clumping: Make sure you’re shaking the spray bottle vigorously to dissolve the baking soda. You can also try using warm water, which helps the baking soda dissolve more easily.
* Paste is too dry: Add a little more dish soap until you achieve the desired consistency.
* Paste is too runny: Add a little more baking soda.
Why I Love This DIY Cleaner
I’ve been using this DIY cleaner for years, and I absolutely love it! It’s:
* Affordable: Dish soap and baking soda are incredibly cheap, especially compared to store-bought cleaners.
* Eco-Friendly: It’s a much more sustainable option than buying cleaners in plastic bottles.
* Non-Toxic: You know exactly what’s in it, so you can avoid harsh chemicals and toxins.
* Effective: It really works! I’ve been amazed at how well it cleans a variety of surfaces.
* Customizable: You can easily adjust the recipe to suit your needs.
So there you have it! My ultimate guide to making and using a DIY all-purpose cleaner
Conclusion
So, there you have it! This simple yet incredibly effective dish soap baking soda cleaner is more than just a cleaning hack; it’s a game-changer for your home. We’ve explored how these two humble ingredients, often overlooked in their individual capacities, combine to create a powerful cleaning solution that tackles grime, grease, and stubborn stains with surprising ease.
Why is this DIY trick a must-try? Because it’s economical, eco-friendly, and remarkably versatile. Forget about spending a fortune on harsh chemical cleaners that can irritate your skin and pollute your home. With dish soap and baking soda, you’re harnessing the power of natural cleaning agents that are gentle on surfaces yet tough on dirt. Plus, you likely already have these ingredients in your pantry, making it an accessible and convenient option for anyone looking to simplify their cleaning routine.
But the beauty of this DIY cleaner lies not only in its effectiveness but also in its adaptability. Feel free to experiment with different variations to suit your specific needs. For a boost of freshness, add a few drops of your favorite essential oil, such as lemon, lavender, or tea tree. Lemon essential oil, in particular, is known for its degreasing properties and can enhance the cleaning power of the mixture. For tougher stains, consider adding a splash of white vinegar, but remember to test it on an inconspicuous area first to ensure it doesn’t damage the surface. You can also adjust the ratio of dish soap to baking soda depending on the type of mess you’re tackling. A thicker paste is ideal for scrubbing stubborn grime, while a more diluted solution works well for general cleaning.
This isn’t just about cleaning; it’s about creating a healthier and more sustainable home environment. By ditching harsh chemicals and embracing natural alternatives, you’re not only protecting your family but also contributing to a cleaner planet. The satisfaction of knowing you’re using a safe and effective cleaning solution is truly rewarding.
We wholeheartedly encourage you to give this dish soap baking soda cleaner a try. We’re confident that you’ll be amazed by the results. It’s a simple, affordable, and effective way to tackle a wide range of cleaning tasks around your home. From scrubbing your kitchen sink to cleaning your bathroom tiles, this DIY cleaner is a versatile solution that will quickly become a staple in your cleaning arsenal.
Don’t just take our word for it – try it out and see for yourself! And most importantly, we want to hear about your experience. Share your tips, tricks, and before-and-after photos with us in the comments below. Let’s build a community of DIY cleaning enthusiasts who are passionate about creating a cleaner, healthier, and more sustainable world, one sparkling surface at a time. We are eager to learn how this simple solution has transformed your cleaning routine and what unique applications you’ve discovered. Your feedback will not only inspire others but also help us refine and improve this already fantastic cleaning hack. So, grab your dish soap, baking soda, and a sponge, and get ready to experience the magic of this powerful DIY cleaner!
Frequently Asked Questions (FAQ)
Is this dish soap baking soda cleaner safe to use on all surfaces?
While this cleaner is generally safe for most surfaces, it’s always a good idea to test it on an inconspicuous area first, especially on delicate or painted surfaces. Baking soda is mildly abrasive, so excessive scrubbing on sensitive materials could potentially cause scratches. Avoid using it on surfaces like marble, granite, or other natural stone without proper sealing, as the baking soda can etch the surface over time. For these surfaces, a pH-neutral cleaner is generally recommended. Always refer to the manufacturer’s instructions for cleaning specific surfaces.
What type of dish soap works best for this cleaner?
Any standard liquid dish soap will work effectively in this recipe. However, for extra degreasing power, consider using a dish soap specifically formulated for grease-cutting. Avoid using dish soaps that contain bleach or other harsh chemicals, as these can react negatively with baking soda and create potentially harmful fumes. A clear, unscented dish soap is often a good choice, especially if you plan to add essential oils for fragrance.
How do I store the dish soap baking soda cleaner?
You can store the cleaner in an airtight container or spray bottle. If you’re using a spray bottle, make sure to shake it well before each use, as the baking soda may settle at the bottom. The cleaner is best used fresh, but it can typically be stored for up to a week without losing its effectiveness. If you notice any separation or changes in consistency, it’s best to discard the mixture and make a fresh batch.
Can I use this cleaner to clean my oven?
Yes, this cleaner can be used to clean your oven, but it requires a bit more effort. First, remove any loose debris from the oven. Then, make a paste of dish soap and baking soda and apply it to the interior surfaces of the oven, avoiding the heating elements. Let the paste sit for several hours or even overnight to loosen the baked-on grime. Finally, scrub the oven with a sponge or brush and wipe away the residue with a damp cloth. You may need to repeat the process for particularly stubborn stains.
Is this cleaner effective for removing mold and mildew?
While this cleaner can help to remove surface mold and mildew, it’s not a substitute for a dedicated mold and mildew remover. For more severe mold infestations, it’s best to use a product specifically designed to kill mold spores and prevent regrowth. However, for light mold and mildew stains, the dish soap baking soda cleaner can be a helpful first step. Be sure to ventilate the area well and wear gloves and a mask when cleaning mold.
Can I add vinegar to this cleaner?
Adding vinegar to this cleaner can create a fizzing reaction that can help to loosen grime and dirt. However, it’s important to note that vinegar is acidic, while baking soda is alkaline. When combined, they neutralize each other, which can reduce the overall cleaning power of the mixture. If you choose to add vinegar, do so sparingly and test it on an inconspicuous area first. For best results, consider using vinegar as a separate cleaning step, rather than mixing it directly with the dish soap and baking soda.
How often should I use this cleaner?
The frequency of use will depend on your cleaning needs and the surfaces you’re cleaning. For general cleaning tasks, you can use this cleaner as often as needed. However, for more delicate surfaces, it’s best to use it sparingly and avoid excessive scrubbing. Pay attention to how the surface reacts to the cleaner and adjust your cleaning routine accordingly.
Can I use this cleaner on my car?
While this cleaner can be used to clean certain parts of your car, such as the interior surfaces and tires, it’s not recommended for cleaning the exterior paint. The baking soda can be abrasive and potentially scratch the paint. For cleaning your car’s exterior, it’s best to use a car wash soap specifically designed for automotive paint.
What are some other uses for this dish soap baking soda cleaner?
The possibilities are endless! This cleaner can be used to clean everything from kitchen appliances and countertops to bathroom fixtures and tile grout. It’s also effective for removing stains from clothing and carpets. You can even use it to clean your grill or outdoor furniture. With its versatility and effectiveness, this DIY cleaner is a must-have for any home.
What if the baking soda doesn’t dissolve completely?
Sometimes, the baking soda may not fully dissolve, especially when using cold water. This is perfectly normal and doesn’t affect the cleaning power of the mixture. Simply shake the container or spray bottle well before each use to redistribute the baking soda. If you prefer a smoother consistency, you can try using warm water to dissolve the baking soda or grinding the baking soda into a finer powder before mixing it with the dish soap.
Leave a Comment