
Bean Sprouts DIY Home: Ever dreamt of having fresh, crunchy bean sprouts right at your fingertips, ready to add a burst of flavor and nutrition to your meals? Forget those limp, store-bought sprouts – I’m going to show you how incredibly easy it is to grow your own, right in your kitchen!
Sprouting beans has a rich history, dating back thousands of years in Asian cultures, where they were prized for their nutritional value and ease of cultivation, especially during times of scarcity. Think of it as a tiny, edible garden, bringing a touch of ancient wisdom into your modern home.
In today’s fast-paced world, we’re all looking for ways to eat healthier and be more sustainable. Growing your own bean sprouts DIY home is the perfect solution! Not only are they packed with vitamins and minerals, but you’ll also be reducing your carbon footprint by avoiding those plastic-wrapped supermarket options. Plus, it’s a fun and rewarding project that even kids can get involved in.
Ready to ditch the store-bought sprouts and embark on a journey of fresh, homegrown goodness? Let’s dive into the simple steps and unlock the secrets to cultivating your very own thriving bean sprout haven!
Growing Bean Sprouts at Home: A Simple DIY Guide
Hey there, fellow DIY enthusiasts! I’m super excited to share one of my favorite kitchen hacks with you: growing your own bean sprouts! It’s surprisingly easy, incredibly rewarding, and gives you a constant supply of fresh, crunchy goodness for salads, stir-fries, and more. Plus, it’s a fantastic way to reduce your grocery bill and know exactly where your food is coming from. Let’s dive in!
What You’ll Need
Before we get started, let’s gather our supplies. The beauty of this project is that you probably already have most of these things lying around!
* **Beans:** Mung beans are the classic choice for bean sprouts, but you can also use adzuki beans, lentils, or even chickpeas. Just make sure they’re whole, dried beans and not split or processed in any way. I usually buy organic mung beans to avoid any potential pesticides.
* **A Wide-Mouthed Jar:** A quart-sized mason jar works perfectly. You could also use a clean plastic container, but I prefer glass for its non-reactive properties.
* **Sprouting Lid or Cheesecloth:** You’ll need something to cover the jar and allow for drainage. A sprouting lid is ideal, but a piece of cheesecloth secured with a rubber band works just as well.
* **Water:** Clean, filtered water is best.
* **A Dark Place:** Bean sprouts need darkness to grow properly. A cupboard, pantry, or even a covered box will do the trick.
* **A Bowl or Tray:** To catch any drips from the jar.
Step-by-Step Instructions: Sprouting Success!
Okay, let’s get sprouting! This process takes about 3-5 days, so be patient and follow these steps carefully.
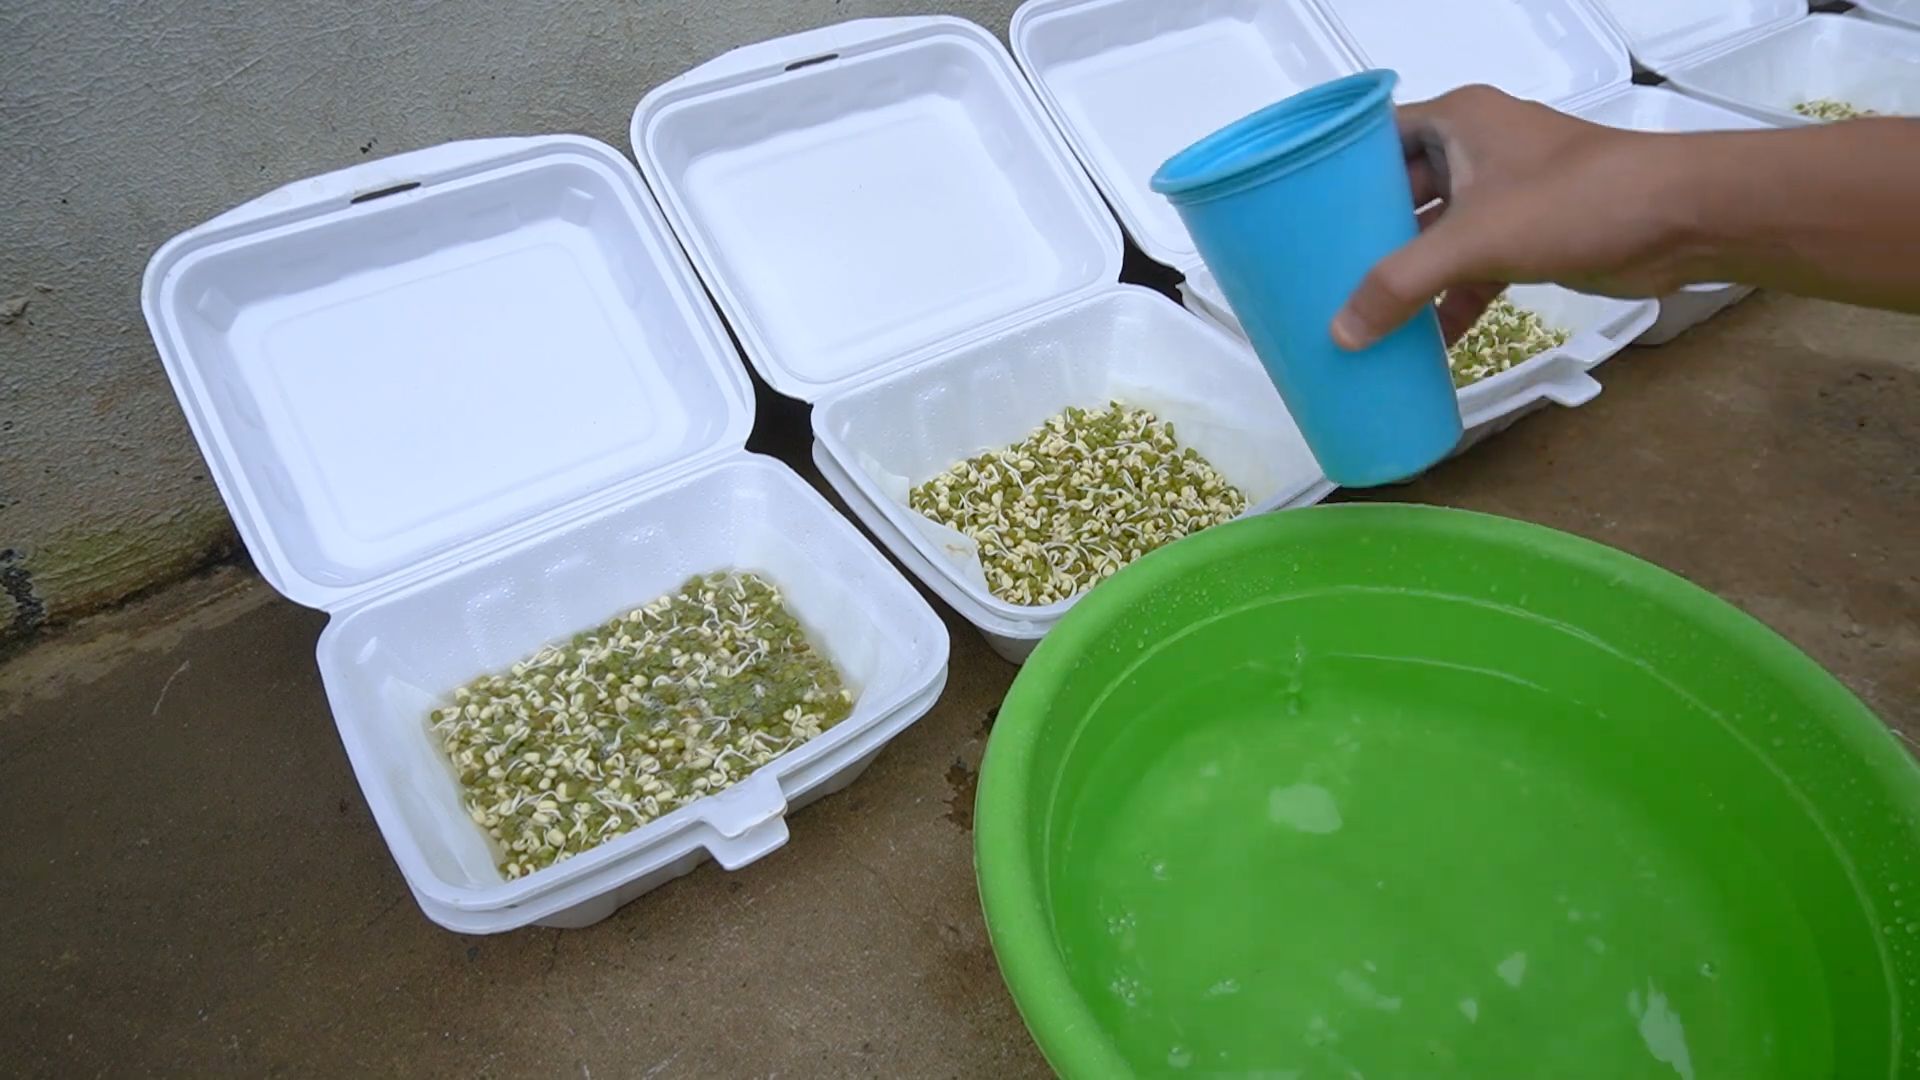
1. **Rinse the Beans:** Place about 1/4 to 1/2 cup of dried beans in your jar. Rinse them thoroughly with cool water, removing any debris or broken beans. This is important to prevent mold growth.
2. **Soak the Beans:** Fill the jar with cool water, ensuring the beans are completely submerged. They’ll expand significantly as they soak, so leave plenty of room. I usually use about three times the volume of water as beans. Cover the jar with your sprouting lid or cheesecloth and secure it with a rubber band. Let the beans soak for 8-12 hours, or overnight. This rehydrates the beans and starts the germination process.
3. **Drain and Rinse (The First Time):** After soaking, drain the water completely through the sprouting lid or cheesecloth. Rinse the beans thoroughly with fresh, cool water. This removes any accumulated starches and helps prevent spoilage.
4. **Darkness is Key:** Place the jar upside down in a bowl or tray in a dark, well-ventilated place. The upside-down position allows excess water to drain and prevents the beans from sitting in stagnant water. Make sure the jar is tilted at an angle to allow for proper drainage.
5. **Rinse and Drain (Twice Daily):** This is the most crucial step! Rinse and drain the beans twice a day (morning and evening) with fresh, cool water. This keeps them hydrated, prevents mold growth, and provides them with the moisture they need to sprout. Be gentle when rinsing to avoid damaging the delicate sprouts.
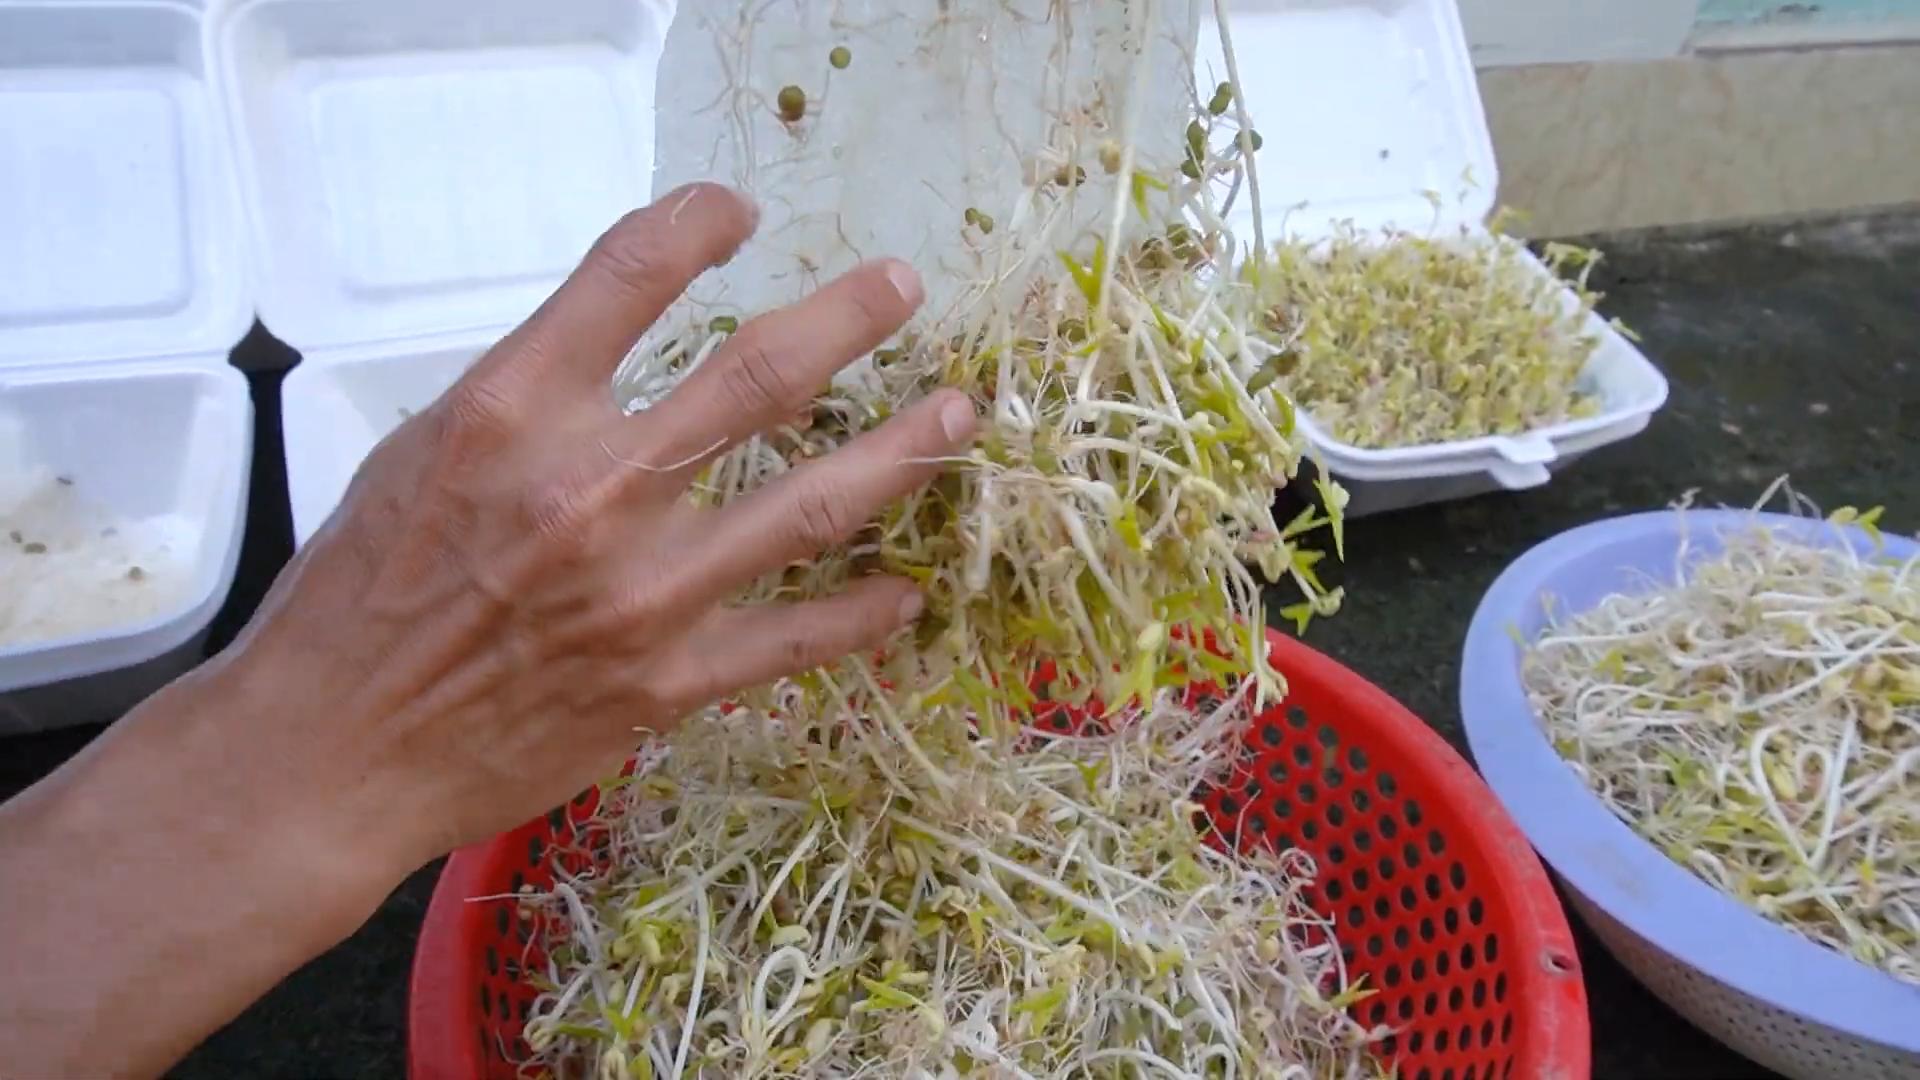
6. **Observe and Adjust:** As the beans sprout, you’ll notice tiny white roots emerging. This is a good sign! Continue rinsing and draining twice daily, ensuring the sprouts are always moist but not waterlogged. If you notice any mold or unpleasant smells, discard the batch immediately. It’s better to be safe than sorry.
7. **Harvest Time!** After 3-5 days, your bean sprouts should be ready to harvest. They should be about 1-2 inches long and have a crisp, fresh appearance. The exact time will depend on the type of bean and the temperature of your environment.
8. **Final Rinse and Storage:** Give your bean sprouts one final rinse with cool water. Remove any remaining bean hulls (the outer skins) if desired. This is optional, but it can improve the texture of the sprouts.
9. **Storage:** Store your freshly harvested bean sprouts in an airtight container in the refrigerator. They should last for about a week. I like to line the container with a paper towel to absorb any excess moisture.
Troubleshooting Tips and Tricks
Even with the best instructions, things can sometimes go wrong. Here are a few common issues and how to fix them:
* **Mold Growth:** Mold is usually caused by insufficient rinsing or poor ventilation. Make sure you’re rinsing the beans thoroughly twice a day and that the jar is well-drained. If you live in a humid environment, you may need to rinse them more frequently. Also, ensure the sprouting jar is in a well-ventilated area.
* **Slow Growth:** Slow growth can be caused by low temperatures or insufficient moisture. Try moving the jar to a slightly warmer location. You can also try rinsing the beans with slightly warmer water (not hot!).
* **Bitter Taste:** A bitter taste can be caused by overgrowth or exposure to light. Harvest the sprouts earlier or ensure they are kept in complete darkness.
* **Rotting:** Rotting is usually caused by overwatering or poor drainage. Make sure the jar is tilted at an angle to allow for proper drainage.
Choosing the Right Beans
While mung beans are the most popular choice, you can experiment with other types of beans and legumes. Here’s a quick rundown:
* **Mung Beans:** The classic choice. They sprout quickly and have a mild, slightly sweet flavor.
* **Adzuki Beans:** These have a slightly nutty flavor and take a bit longer to sprout than mung beans.
* **Lentils:** Lentils sprout easily and have a slightly earthy flavor. They’re also a good source of protein.
* **Chickpeas:** Chickpeas take the longest to sprout and have a slightly nutty flavor. They’re also a good source of fiber.
* **Alfalfa Seeds:** Technically not beans, but alfalfa seeds are commonly sprouted and have a mild, slightly grassy flavor.
No matter which type of bean you choose, make sure they are whole, dried beans and not split or processed in any way. Also, buy organic beans whenever possible to avoid any potential pesticides.
Using Your Homegrown Bean Sprouts
Now that you have a bounty of fresh bean sprouts, it’s time to put them to use! Here are a few of my favorite ways to enjoy them:
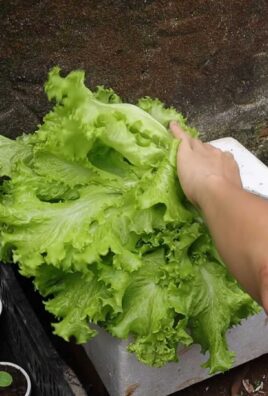
* **Salads:** Add bean sprouts to your favorite salads for a crunchy, refreshing boost.
* **Stir-Fries:** Bean sprouts are a classic ingredient in stir-fries. Add them towards the end of cooking to maintain their crispness.
* **Sandwiches and Wraps:** Add bean sprouts to sandwiches and wraps for extra texture and flavor.
* **Soups:** Bean sprouts can be added to soups for a crunchy garnish.
* **Spring Rolls:** Bean sprouts are a key ingredient in fresh spring rolls.
* **As a Snack:** I sometimes just eat them raw as a healthy and refreshing snack!
Why Grow Your Own Bean Sprouts?
Besides being incredibly easy and rewarding, there are several other reasons to grow your own bean sprouts:
* **Freshness:** Homegrown bean sprouts are much fresher than store-bought ones.
* **Cost-Effective:** Growing your own bean sprouts is much cheaper than buying them at the store.
* **Nutritious:** Bean sprouts are a good source of vitamins, minerals, and enzymes.
* **Sustainable:** Growing your own bean sprouts reduces your carbon footprint.
* **Fun!** It’s a fun and educational project for the whole family.
A Few Extra Tips for Sprouting Success
* **Use Clean Equipment:** Always use clean jars, lids, and utensils to prevent mold growth.
* **Don’t Overcrowd the Jar:** Don’t put too many beans in the jar, as they will expand significantly as they sprout.
* **Ensure Proper Drainage:** Make sure the jar is tilted at an angle to allow for proper drainage.
* **Be Patient:** It takes a few days for the beans to sprout, so be patient and don’t give up!
* **Experiment!** Try different types of beans and legumes to find your favorites.
Growing bean sprouts at home is a simple, fun, and rewarding project that anyone can do. With a little patience and attention to detail, you can have a constant supply of fresh, crunchy bean sprouts for all your culinary creations. So, what are you waiting for? Get sprouting! I hope you found this guide helpful, and happy sprouting!
Conclusion
So, there you have it! Cultivating your own bean sprouts at home is not only surprisingly simple, but also incredibly rewarding. Forget those limp, often flavorless sprouts from the grocery store. With this easy DIY trick, you can enjoy crisp, fresh, and vibrant bean sprouts bursting with flavor and nutrients, all from the comfort of your own kitchen.
Why is this a must-try? Because you’re taking control of your food source. You know exactly what’s going into your sprouts – no hidden chemicals, no questionable growing practices. You’re getting the freshest possible product, packed with vitamins and enzymes that degrade quickly after harvest. Plus, it’s significantly cheaper than buying them regularly. Think of all the delicious stir-fries, salads, and sandwiches you can elevate with your homegrown goodness!
Beyond the basic method, there’s plenty of room for experimentation. Try using different types of beans! Mung beans are the classic choice, but adzuki beans, lentils, or even chickpeas can be sprouted for unique flavors and textures. You can also play around with the sprouting environment. Some people prefer a completely dark environment for maximum sprout length, while others find that a little indirect light enhances their green color and nutrient content. Consider adding a touch of seaweed extract to the soaking water for an extra boost of minerals.
Don’t be afraid to get creative with your bean sprouts! They’re incredibly versatile. Add them to your morning omelet, toss them into a vibrant noodle salad, or use them as a crunchy topping for tacos. They’re a fantastic way to add texture and nutrition to any meal.
We wholeheartedly encourage you to give this DIY bean sprouts method a try. It’s a fun, educational, and delicious project that will transform the way you think about fresh produce. It’s a great way to introduce kids to the magic of gardening and healthy eating.
Once you’ve mastered the art of growing your own bean sprouts, we’d love to hear about your experience! Share your tips, tricks, and favorite recipes in the comments below. Let’s build a community of sprout enthusiasts and spread the word about this simple, sustainable, and incredibly satisfying way to enjoy fresh, healthy food. Happy sprouting!
Frequently Asked Questions (FAQ)
What kind of beans can I use for sprouting?
The most common and readily available bean for sprouting is the mung bean. However, you can also successfully sprout adzuki beans, lentils, chickpeas, and even some types of peas. Keep in mind that different beans will have different sprouting times and flavor profiles. Experiment to find your favorites! Avoid using dried beans intended for cooking, as they may not be viable for sprouting. Look for beans specifically labeled for sprouting or those sold in bulk from a reputable source.
How long does it take to grow bean sprouts?
Generally, bean sprouts are ready to harvest in 3-5 days. The exact time will depend on the type of bean, the temperature, and the humidity of your sprouting environment. Check your sprouts daily and harvest them when they reach your desired length and crispness.
What is the best container to use for sprouting?
You can use a variety of containers for sprouting, including a mason jar with a sprouting lid, a colander lined with cheesecloth, or a specialized sprouting tray. The key is to choose a container that allows for good drainage and air circulation. Make sure the container is clean and sanitized before each use to prevent mold growth.
How often should I rinse the bean sprouts?
Rinse your bean sprouts at least twice a day, preferably three times, with cool, clean water. This helps to keep them moist and prevents them from drying out or developing mold. Ensure that all the water drains away completely after each rinse.
What if my bean sprouts start to smell bad?
A foul odor is a sign of bacterial contamination or mold growth. If your bean sprouts smell bad, discard them immediately. To prevent this, make sure to use clean beans, sanitize your sprouting container, and rinse the sprouts thoroughly and frequently.
Can I eat the bean sprout roots?
Yes, the roots of bean sprouts are perfectly edible. They are tender and have a slightly sweet flavor.
How do I store bean sprouts?
Store your harvested bean sprouts in the refrigerator in a sealed container lined with a paper towel. The paper towel will help to absorb excess moisture and keep the sprouts fresh for longer. They should last for up to a week.
Why are my bean sprouts not growing?
There could be several reasons why your bean sprouts are not growing. First, make sure your beans are viable and specifically intended for sprouting. Second, ensure that the temperature is warm enough (around 70-75°F is ideal). Third, check that you are rinsing the sprouts frequently enough to keep them moist. Finally, make sure the sprouts have adequate drainage to prevent them from becoming waterlogged.
Are there any health benefits to eating bean sprouts?
Yes! Bean sprouts are a nutritional powerhouse. They are low in calories and high in fiber, vitamins, and minerals. They are a good source of vitamin C, vitamin K, folate, and manganese. They also contain enzymes that aid in digestion.
Can I grow bean sprouts in direct sunlight?
While bean sprouts don’t need direct sunlight, a little indirect light can be beneficial for their green color and nutrient content. However, too much direct sunlight can cause them to dry out or become bitter.
What are some creative ways to use bean sprouts?
Bean sprouts are incredibly versatile. Add them to stir-fries, salads, sandwiches, spring rolls, soups, and omelets. They can also be used as a topping for tacos, nachos, or baked potatoes. Get creative and experiment with different flavor combinations!
Is it safe to eat raw bean sprouts?
While generally safe, there is a small risk of bacterial contamination with raw bean sprouts. To minimize this risk, purchase your sprouting beans from a reputable source, sanitize your sprouting equipment, and rinse the sprouts thoroughly before eating. People with weakened immune systems, pregnant women, and young children should cook bean sprouts before consuming them.
How do I prevent mold from growing on my bean sprouts?
Preventing mold growth is crucial for successful sprouting. Use clean beans, sanitize your sprouting container with a diluted bleach solution, rinse the sprouts thoroughly and frequently, and ensure adequate drainage. Good air circulation is also important. If you notice any signs of mold, discard the sprouts immediately.
Can I use tap water for sprouting?
It’s generally safe to use tap water for sprouting, provided that your tap water is potable and free from contaminants. If you are concerned about the quality of your tap water, you can use filtered or bottled water instead.
What is the ideal temperature for sprouting bean sprouts?
The ideal temperature for sprouting bean sprouts is between 70-75°F (21-24°C). Avoid temperatures that are too hot or too cold, as this can inhibit germination and growth.
Leave a Comment