
Baking Soda and Salt Cleaner: Your secret weapon for a sparkling home, naturally! Are you tired of harsh chemicals and expensive cleaning products that promise the world but leave you with lingering odors and a lighter wallet? I know I was! That’s why I’m so excited to share this incredible DIY cleaning trick that’s been passed down through generations – harnessing the power of baking soda and salt.
For centuries, cultures around the globe have recognized the cleaning and deodorizing properties of baking soda. From ancient Egyptians using it in mummification to early American settlers relying on it for baking and cleaning, this humble ingredient has a rich history. Salt, too, has been valued for its preservative and abrasive qualities. Combining these two powerhouses creates a potent, yet gentle, cleaning solution that’s perfect for tackling a variety of household messes.
In today’s world, where we’re increasingly conscious of the impact our choices have on the environment and our health, finding natural alternatives to harsh chemicals is more important than ever. This baking soda and salt cleaner is not only eco-friendly and budget-friendly, but it’s also incredibly effective. Whether you’re scrubbing stubborn stains, deodorizing your fridge, or polishing your silverware, this simple DIY solution will become your go-to for a cleaner, healthier home. So, ditch the chemicals and let’s get cleaning!

DIY Baking Soda and Salt Cleaner: A Powerful and Natural Cleaning Solution
Hey there, fellow DIY enthusiasts! I’m so excited to share this super simple, yet incredibly effective cleaning solution with you. Forget those harsh chemicals and expensive store-bought cleaners. We’re going back to basics with two pantry staples: baking soda and salt! This dynamic duo creates a powerful abrasive cleaner that’s perfect for tackling tough stains, grime, and even rust. Plus, it’s completely natural and safe for your family and the environment. Let’s get started!
What You’ll Need
Before we dive in, let’s gather our supplies. This is a pretty straightforward project, so you probably already have everything you need.
* Baking Soda: The star of the show! Baking soda is a mild alkali that helps to dissolve dirt, grease, and grime.
* Salt: We’ll use regular table salt. The slightly abrasive texture helps to scrub away stubborn stains.
* Water: Just plain tap water will do.
* Spray Bottle (Optional): For easy application, especially on larger surfaces.
* Mixing Bowl: To combine the ingredients.
* Spoon or Spatula: For mixing.
* Cleaning Cloth or Sponge: To apply and scrub the cleaner.
* Gloves (Optional): To protect your hands, especially if you have sensitive skin.
* Old Toothbrush (Optional): Great for scrubbing tight corners and grout.
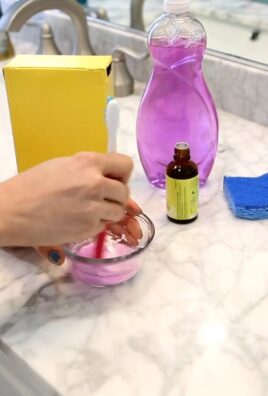
Mixing the Magic Potion
Okay, now for the fun part! We’re going to mix our baking soda and salt cleaner. The ratio is key here, so pay attention.
1. Combine the Dry Ingredients: In your mixing bowl, add 1 cup of baking soda and 1/2 cup of salt. Make sure to use a dry measuring cup for accuracy.
2. Mix Thoroughly: Use your spoon or spatula to mix the baking soda and salt together until they are evenly distributed. You want a consistent mixture.
3. Add Water Gradually: Now, slowly add water, a tablespoon at a time, while mixing continuously. You’re aiming for a paste-like consistency. Don’t add too much water at once, or it will become too runny.
4. Check the Consistency: The ideal consistency should be thick enough to cling to surfaces but still spreadable. It should resemble a thick toothpaste. If it’s too dry, add a little more water. If it’s too runny, add a little more baking soda and salt (in the same ratio).
5. Transfer to Spray Bottle (Optional): If you prefer a spray application, carefully transfer the mixture to your spray bottle. You might need to add a little more water to make it sprayable, but be careful not to dilute it too much. Remember to shake well before each use!
Putting the Cleaner to Work: Step-by-Step Instructions
Alright, we’ve got our cleaner ready to go. Now, let’s put it to the test! I’m going to walk you through how to use it on different surfaces.
Cleaning Sinks and Tubs
This cleaner is fantastic for removing soap scum, water stains, and general grime from sinks and tubs.
1. Wet the Surface: Start by wetting the surface you want to clean with water. This helps the cleaner adhere better.
2. Apply the Cleaner: Using your cleaning cloth or sponge, apply a generous amount of the baking soda and salt paste to the surface.
3. Scrub Gently: Scrub the surface in a circular motion, focusing on areas with stubborn stains or grime. Don’t scrub too hard, as the salt can be abrasive.
4. Let it Sit (Optional): For really tough stains, let the cleaner sit for 5-10 minutes before scrubbing. This allows the baking soda and salt to work their magic.
5. Rinse Thoroughly: Rinse the surface thoroughly with water to remove all traces of the cleaner.
6. Dry with a Clean Cloth: Dry the surface with a clean cloth to prevent water spots.
Cleaning Grout
Grout can be a real pain to clean, but this cleaner makes it much easier!
1. Apply the Cleaner: Using an old toothbrush, apply the baking soda and salt paste directly to the grout lines.
2. Scrub Vigorously: Scrub the grout lines with the toothbrush, using a back-and-forth motion. Pay extra attention to areas with heavy staining.
3. Let it Sit (Optional): For stubborn stains, let the cleaner sit for 10-15 minutes.
4. Rinse Thoroughly: Rinse the grout lines thoroughly with water. You may need to use a damp cloth or sponge to remove all the residue.
5. Dry with a Clean Cloth: Dry the grout lines with a clean cloth.
Removing Rust
Believe it or not, this cleaner can even help remove rust!
1. Apply the Cleaner: Apply a thick layer of the baking soda and salt paste to the rusted area.
2. Let it Sit: Let the cleaner sit for at least 30 minutes, or even longer for heavy rust.
3. Scrub Gently: Scrub the rusted area with a cleaning cloth or sponge. You may need to use a little more pressure for stubborn rust.
4. Rinse Thoroughly: Rinse the area thoroughly with water.
5. Dry with a Clean Cloth: Dry the area with a clean cloth. You may need to repeat this process for heavily rusted items.
Cleaning Burnt Food from Pots and Pans
This cleaner is also great for rescuing those pots and pans with stubborn burnt-on food.
1. Coat the Burnt Area: Generously coat the burnt food residue with the baking soda and salt paste.
2. Add a Little Water: Add just enough water to create a thick, soupy mixture.
3. Let it Soak: Let the mixture soak for at least an hour, or even overnight for really stubborn burnt food.
4. Scrub Gently: After soaking, scrub the pot or pan with a non-abrasive sponge or cloth. The burnt food should loosen and come off more easily.
5. Rinse Thoroughly: Rinse the pot or pan thoroughly with water and wash as usual.
Important Considerations and Tips
Before you go wild cleaning everything in sight, here are a few things to keep in mind:
* Test on a Small Area First: As with any cleaning product, it’s always a good idea to test the cleaner on a small, inconspicuous area first to make sure it doesn’t damage the surface. This is especially important for delicate surfaces like painted walls or polished metals.
* Avoid Abrasive Surfaces: While the salt provides a gentle abrasive action, avoid using this cleaner on surfaces that are easily scratched, such as stainless steel appliances or delicate countertops.
* Don’t Mix with Other Cleaners: Never mix this cleaner with other cleaning products, especially bleach. Mixing cleaning products can create dangerous fumes.
* Storage: Store any leftover cleaner in an airtight container. It may dry out over time, so you may need to add a little water to rehydrate it before using.
* Adjust the Ratio: Feel free to adjust the ratio of baking soda and salt to suit your needs. For tougher stains, you can use a higher concentration of salt. For more delicate surfaces, you can use a higher concentration of baking soda.
* Use Warm Water: Using warm water can help to dissolve the baking soda and salt more effectively, making the cleaner even more powerful.
* Ventilation: When cleaning in enclosed spaces, make sure to have adequate ventilation.
Why I Love This DIY Cleaner
I absolutely love this DIY baking soda and salt cleaner because it’s:
* Natural and Safe: No harsh chemicals or toxic fumes!
* Affordable: Baking soda and salt are incredibly inexpensive.
* Effective: It really works!
* Versatile: You can use it on so many different surfaces.
* Easy to Make: It takes just a few minutes to whip up a batch.
So, there you have it! My go-to DIY baking soda and salt cleaner. I hope you find it as helpful as I do. Happy cleaning!

Conclusion
So, there you have it! This simple yet incredibly effective DIY baking soda and salt cleaner is a game-changer for anyone looking to ditch harsh chemicals and embrace a more natural approach to cleaning. We’ve explored how the abrasive power of salt combined with the deodorizing and mild alkaline properties of baking soda creates a cleaning powerhouse that tackles everything from stubborn grime in your oven to unsightly stains on your grout.
But why is this DIY trick a must-try? Beyond the obvious cost savings and eco-friendly benefits, this cleaner offers a level of control and customization you simply can’t achieve with store-bought products. You know exactly what’s going into your cleaner, eliminating any concerns about hidden chemicals or allergens. Plus, it’s incredibly satisfying to create something so effective with just two readily available ingredients.
This isn’t just a cleaner; it’s a statement. It’s a statement that you care about your health, your home, and the environment. It’s a statement that you’re willing to take a proactive approach to creating a cleaner, healthier living space.
Looking for variations? Absolutely! Consider adding a few drops of your favorite essential oil, like lemon or tea tree, for an extra boost of fragrance and antibacterial power. For tougher stains, create a paste with a bit of water and let it sit on the affected area for a few minutes before scrubbing. You can also experiment with different ratios of baking soda and salt to find the perfect balance for your specific cleaning needs. For example, for delicate surfaces, use more baking soda than salt to minimize abrasion. For really tough baked-on messes, a coarser salt like sea salt can provide extra scrubbing power.
Don’t be afraid to get creative and adapt this DIY baking soda and salt cleaner to suit your individual preferences and cleaning challenges. The possibilities are endless!
We are confident that once you try this simple yet powerful cleaning solution, you’ll be amazed by the results. It’s a cost-effective, eco-friendly, and incredibly versatile way to keep your home sparkling clean.
Now, it’s your turn! We wholeheartedly encourage you to give this DIY baking soda and salt cleaner a try. We’re eager to hear about your experiences. Did it work wonders on your stovetop? Did it banish those stubborn stains from your bathroom tiles? Share your tips, tricks, and before-and-after photos in the comments below. Let’s build a community of DIY cleaning enthusiasts and inspire others to embrace a more natural and sustainable way of life. Your feedback is invaluable and will help us refine and improve this recipe for everyone. So, grab your baking soda, your salt, and get ready to experience the cleaning power of nature! Let us know how this baking soda and salt cleaner works for you!
Frequently Asked Questions (FAQ)
Is this baking soda and salt cleaner safe for all surfaces?
While baking soda and salt are generally safe, it’s always a good idea to test the cleaner on an inconspicuous area first, especially on delicate surfaces like polished stone, certain types of plastic, or painted surfaces. The abrasiveness of the salt could potentially scratch some materials. For these surfaces, you might want to use a higher ratio of baking soda to salt, or even just baking soda alone. Avoid using this cleaner on surfaces that are known to be sensitive to abrasives, such as certain types of stainless steel or coated cookware. Always err on the side of caution and test before applying liberally.
What is the best ratio of baking soda to salt?
The ideal ratio depends on the cleaning task. For general cleaning, a 1:1 ratio of baking soda to salt works well. For more abrasive cleaning, such as scrubbing burnt food from pots and pans, you can increase the amount of salt. For delicate surfaces, use a 2:1 or even 3:1 ratio of baking soda to salt to minimize the risk of scratching. Experiment to find the ratio that works best for your specific needs. Remember, you can always add more salt for extra scrubbing power if needed.
Can I add other ingredients to this cleaner?
Yes, you can! Adding a few drops of essential oils, such as lemon, tea tree, or lavender, can provide a pleasant scent and additional antibacterial properties. Vinegar can be added for extra cleaning power, but be cautious when mixing it with baking soda, as it can create a fizzing reaction. Always add vinegar slowly and in a well-ventilated area. Avoid mixing bleach with this cleaner, as it can create harmful fumes. Other potential additions include borax (for extra cleaning power) or castile soap (for a more sudsy cleaner). Always research the safety of mixing different cleaning agents before combining them.
How should I store the baking soda and salt cleaner?
You can store the dry mixture of baking soda and salt in an airtight container in a cool, dry place. If you’ve added water to create a paste, it’s best to use it immediately. Storing the paste for extended periods can cause it to dry out or lose its effectiveness. If you do need to store the paste, keep it in a sealed container in the refrigerator for up to a week.
Is this cleaner safe for septic systems?
Yes, baking soda and salt are generally considered safe for septic systems. They are natural substances that won’t harm the beneficial bacteria in your septic tank. However, it’s always a good idea to use cleaning products sparingly, regardless of whether they are natural or chemical-based. Excessive use of any cleaning product can potentially disrupt the balance of your septic system.
Can I use this cleaner on my oven?
Yes, this cleaner is excellent for cleaning ovens. Sprinkle the baking soda and salt mixture onto the bottom of the oven and spray with water. Let it sit overnight, then scrub away the grime with a sponge or brush. For stubborn baked-on messes, create a paste with water and apply it directly to the affected areas. You may need to scrub vigorously, but the baking soda and salt will help to loosen the grime.
What are the benefits of using a DIY cleaner over store-bought cleaners?
There are several benefits to using a DIY cleaner like this one. First, it’s more cost-effective, as baking soda and salt are inexpensive and readily available. Second, it’s more environmentally friendly, as you’re reducing your reliance on harsh chemicals and plastic packaging. Third, it’s safer for your health, as you’re avoiding exposure to potentially harmful chemicals. Finally, it gives you more control over the ingredients, allowing you to customize the cleaner to your specific needs and preferences.
What if the baking soda and salt cleaner doesn’t remove a stain completely?
For particularly stubborn stains, you may need to repeat the cleaning process or try a different approach. Consider creating a paste with a higher concentration of salt or adding a small amount of vinegar. You can also try using a more abrasive scrubbing tool, such as a scouring pad or steel wool (but be careful not to scratch delicate surfaces). In some cases, a professional cleaning service may be required to remove extremely stubborn stains.
How often should I use this cleaner?
The frequency of use depends on your cleaning needs. For general cleaning, you can use this cleaner as often as you would use any other cleaning product. For more abrasive cleaning, such as scrubbing ovens or removing stubborn stains, it’s best to use it less frequently to avoid damaging surfaces. Pay attention to how your surfaces respond to the cleaner and adjust your usage accordingly.
Can I use this cleaner on my toilet?
Yes, baking soda and salt can be used to clean toilets. Sprinkle the mixture into the bowl, let it sit for a few minutes, then scrub with a toilet brush. The baking soda will help to deodorize the toilet, while the salt will provide gentle abrasion to remove stains. You can also add a cup of vinegar to the bowl for extra cleaning power.

Leave a Comment