
Baking Soda Coconut Oil DIY: Unlock the secrets to a naturally radiant you! Have you ever looked at the ingredient list of your favorite beauty products and felt a little… overwhelmed? I know I have! That’s why I’m so excited to share this simple, yet incredibly effective, DIY trick using just two ingredients you probably already have in your kitchen: baking soda and coconut oil.
While the modern beauty industry is a relatively recent phenomenon, the use of natural ingredients for skincare has a rich history spanning centuries and cultures. From ancient Egyptians using honey and milk to cleanse their skin to traditional Ayurvedic practices incorporating coconut oil for its moisturizing properties, people have long sought natural solutions for beauty and wellness. This baking soda coconut oil DIY is a modern take on these time-tested traditions.
In today’s world, we’re constantly bombarded with harsh chemicals and synthetic ingredients. Many people are looking for gentler, more natural alternatives for their skincare routines. This DIY trick offers a simple, affordable, and effective way to address common skin concerns like acne, blemishes, and dullness. Plus, it’s incredibly versatile! Whether you’re looking for a gentle exfoliator, a natural deodorant, or a teeth whitener, this baking soda coconut oil DIY can be tailored to your specific needs. So, ditch the harsh chemicals and embrace the power of nature with this easy-to-follow guide!
DIY Teeth Whitening with Baking Soda and Coconut Oil: A Natural Approach
Hey everyone! I’m so excited to share this simple and effective DIY teeth whitening method using just two ingredients you probably already have in your kitchen: baking soda and coconut oil. I’ve been using this method on and off for a while now, and I’ve definitely noticed a difference in the brightness of my smile. It’s a great alternative to harsh chemical treatments, and it’s super budget-friendly!
Why Baking Soda and Coconut Oil?
Before we dive into the how-to, let’s talk about why these two ingredients work so well together.
* **Baking Soda:** This is a mild abrasive that helps to gently scrub away surface stains from your teeth. Think of it as a natural exfoliant for your pearly whites! It also helps to neutralize acids in your mouth, which can contribute to tooth decay.
* **Coconut Oil:** This isn’t just a trendy health food; it has some amazing properties that benefit oral health. Coconut oil contains lauric acid, which has antimicrobial properties. This means it can help kill bacteria in your mouth that cause plaque, bad breath, and even gum disease. Plus, it tastes pretty good!
Things You’ll Need
Okay, let’s gather our supplies. This is a pretty minimal list, which is one of the things I love about this DIY.
* **Baking Soda:** Make sure you’re using regular baking soda, not baking powder.
* **Coconut Oil:** I prefer to use virgin, unrefined coconut oil. It usually comes in a solid form, but it melts easily.
* **A Small Bowl or Container:** For mixing the ingredients.
* **A Toothbrush:** You can use your regular toothbrush, but I recommend having a separate one specifically for this whitening treatment.
* **Water:** For rinsing.
* **Optional: Peppermint Essential Oil:** Just a drop or two can add a refreshing flavor.
Mixing the Magic Potion
This is where the fun begins! We’re going to create our whitening paste.
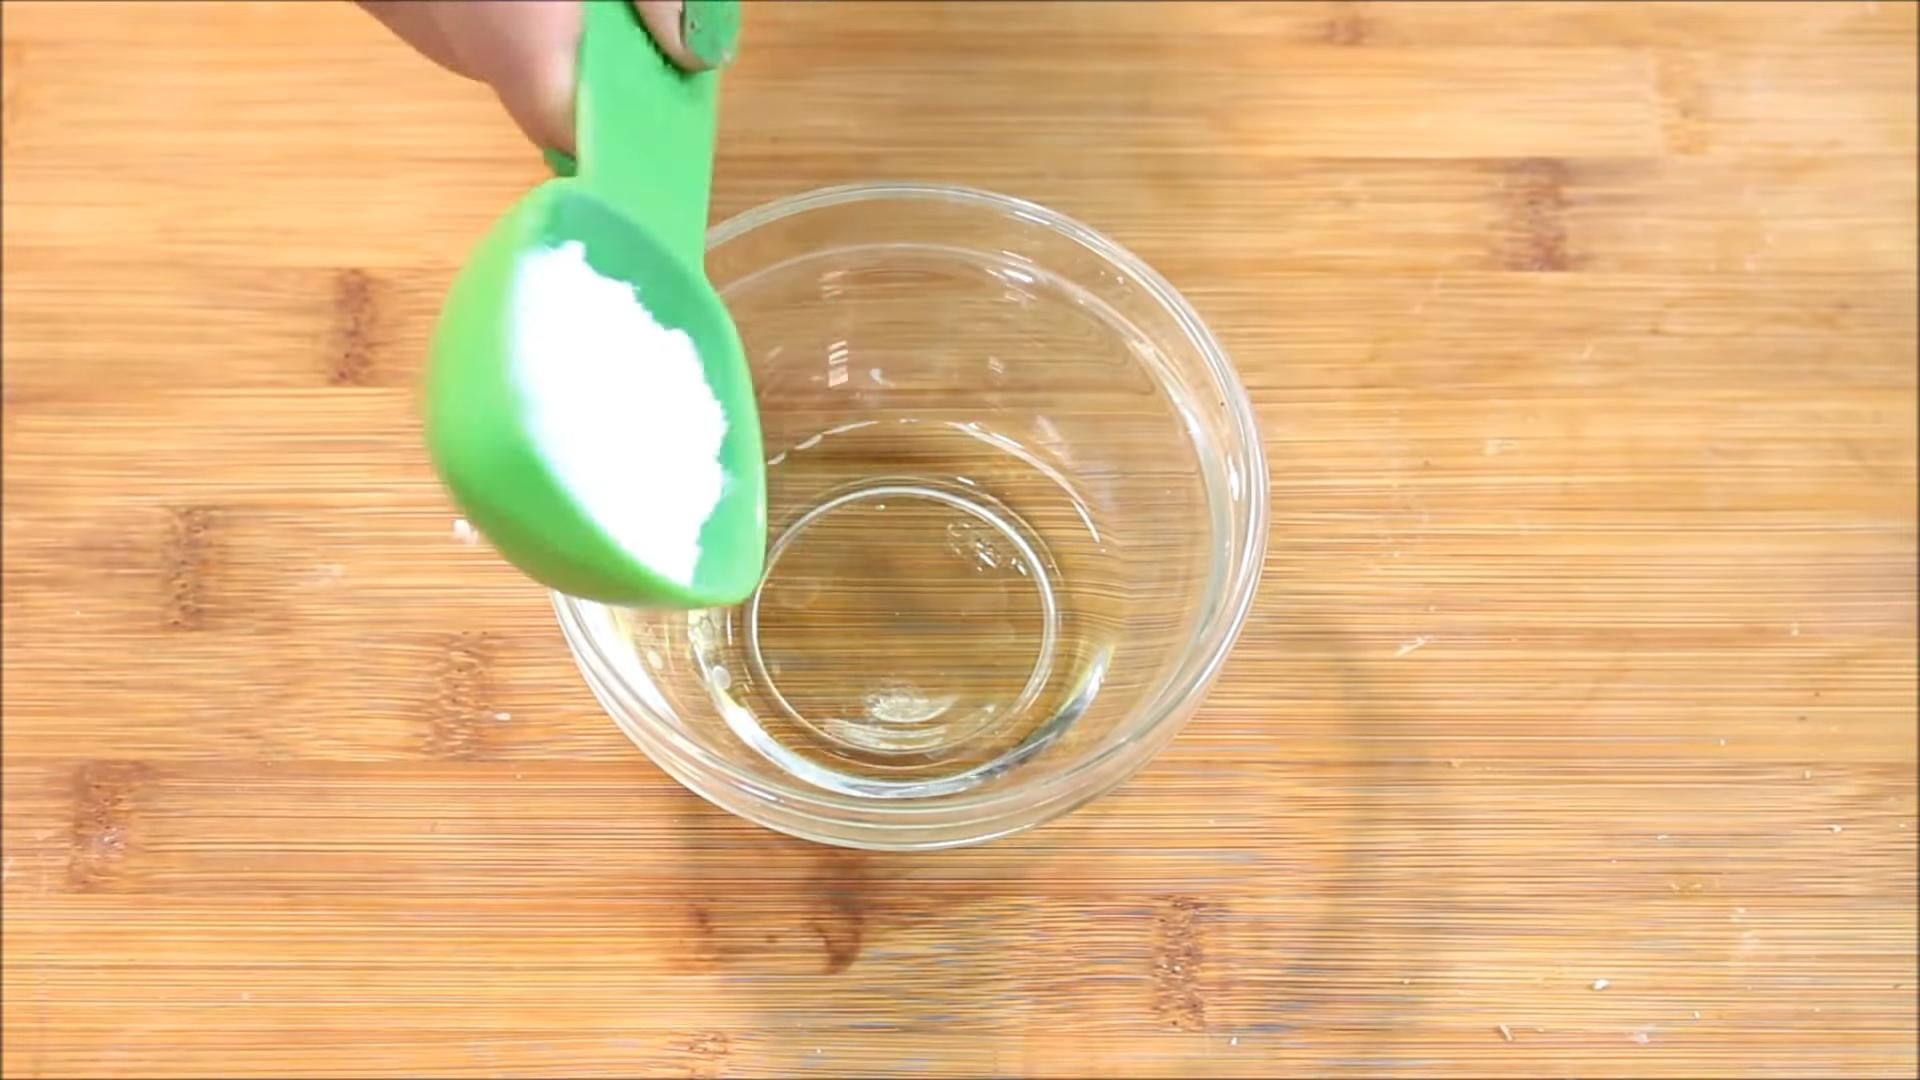
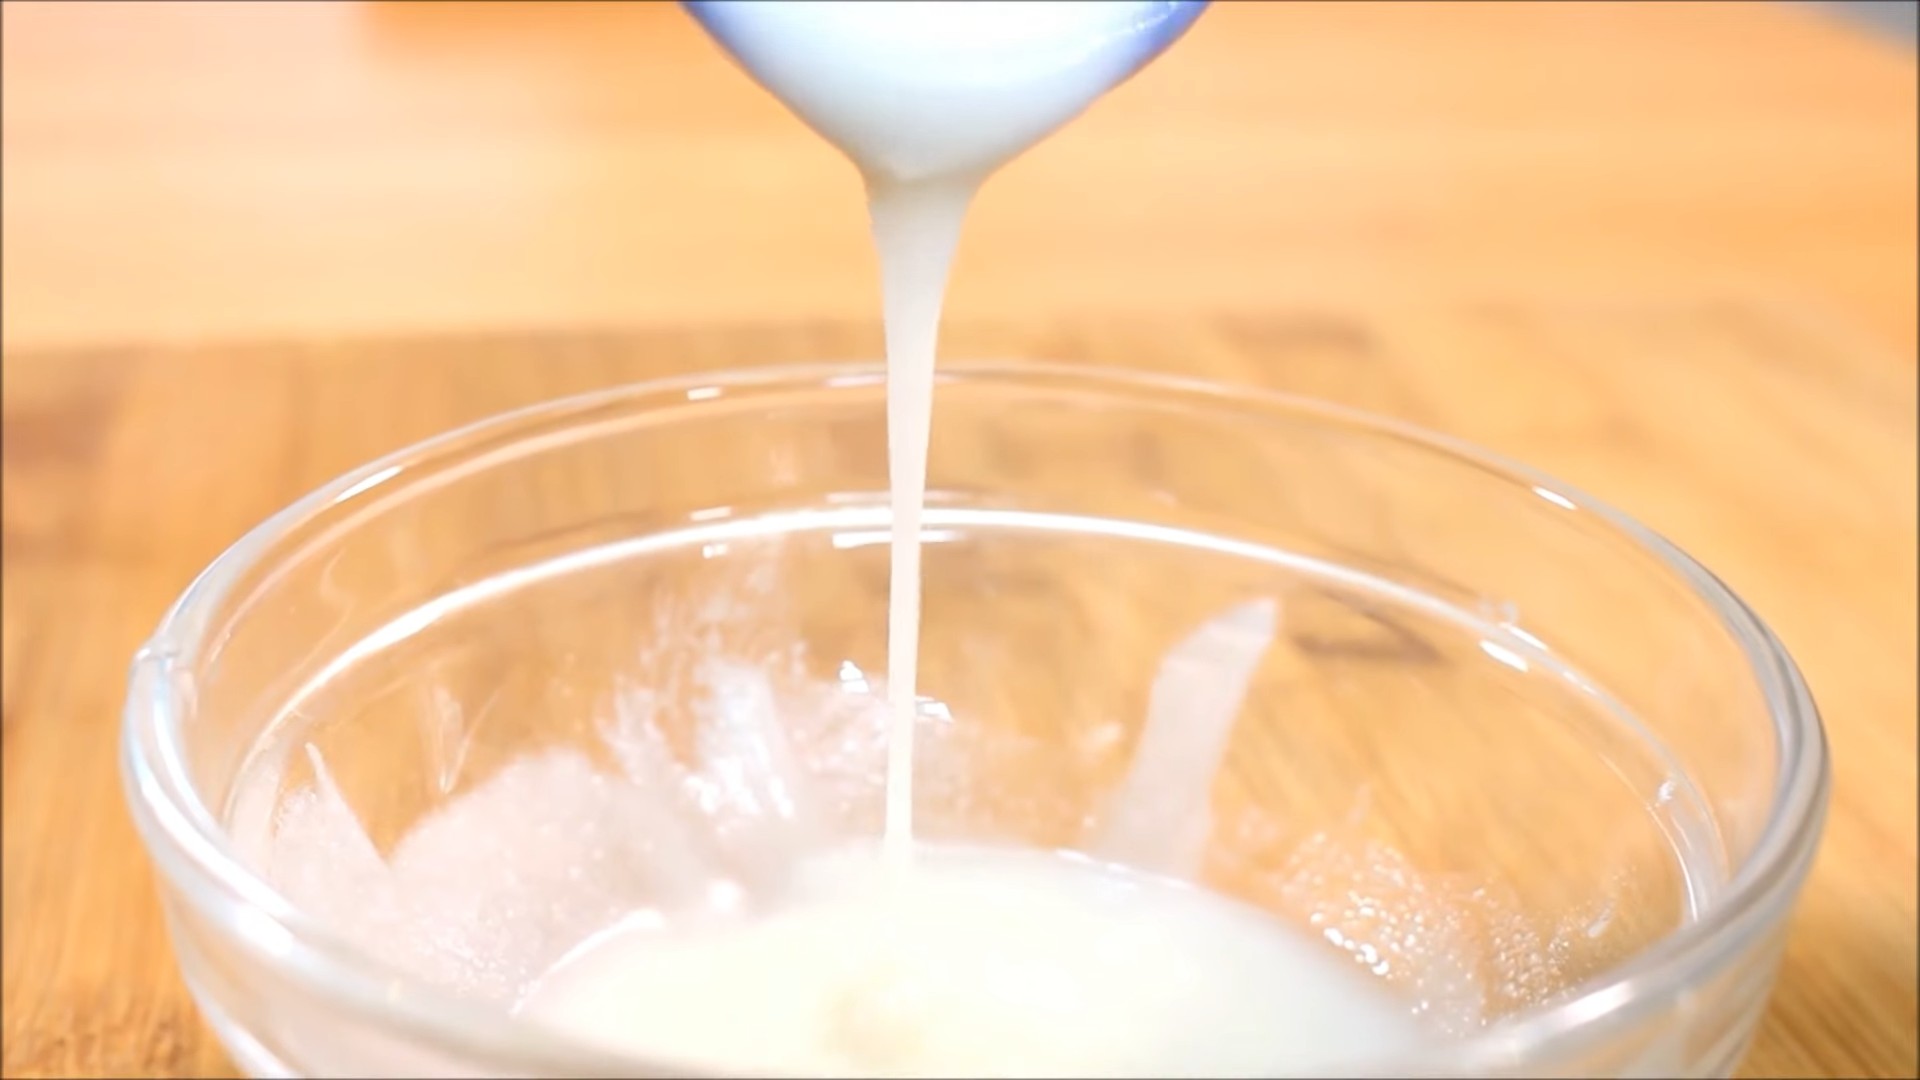
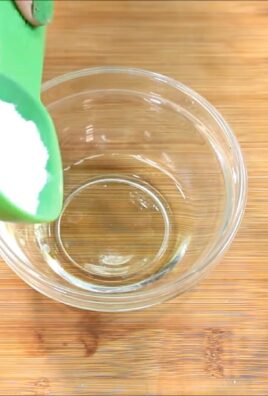
1. **Scoop Coconut Oil:** Start by scooping about 1-2 teaspoons of coconut oil into your small bowl or container. If your coconut oil is solid, you can microwave it for a few seconds to soften it, but don’t melt it completely. You want it to be soft enough to mix easily.
2. **Add Baking Soda:** Now, add about 1-2 teaspoons of baking soda to the coconut oil. The ratio should be roughly equal parts coconut oil and baking soda, but you can adjust it to your preference. I sometimes add a little more baking soda if I want a more abrasive scrub.
3. **Mix Thoroughly:** Use a spoon or your toothbrush to mix the coconut oil and baking soda together until you have a smooth paste. Make sure there are no clumps of baking soda.
4. **Optional: Add Peppermint Oil:** If you’re using peppermint essential oil, add just one or two drops to the mixture and stir well. Be careful not to add too much, as essential oils are very potent.
The Whitening Process: Step-by-Step
Now that we have our whitening paste, let’s get to the actual whitening!
1. **Wet Your Toothbrush:** Lightly wet your toothbrush with water. This will help the paste adhere to your teeth.
2. **Apply the Paste:** Scoop a generous amount of the baking soda and coconut oil paste onto your toothbrush. Make sure you cover all the bristles.
3. **Brush Gently:** Brush your teeth as you normally would, but be extra gentle. Remember, baking soda is a mild abrasive, so you don’t want to scrub too hard. Focus on areas where you have the most staining. I usually brush for about 2 minutes.
4. **Let it Sit (Optional):** For a more intense whitening effect, you can leave the paste on your teeth for a minute or two after brushing. This allows the baking soda and coconut oil to work their magic. However, don’t leave it on for too long, as prolonged exposure to baking soda can potentially erode enamel.
5. **Rinse Thoroughly:** After brushing and letting the paste sit (if you choose to), rinse your mouth thoroughly with water. Make sure you remove all traces of the baking soda and coconut oil.
6. **Brush with Regular Toothpaste (Optional):** Some people like to brush with their regular toothpaste after using the baking soda and coconut oil paste. This is optional, but it can help to remove any remaining residue and freshen your breath.
How Often Should You Do This?
This is a crucial question! While this DIY method is generally safe, it’s important not to overdo it. I recommend using this treatment no more than 1-2 times per week. Overusing baking soda can potentially damage your tooth enamel over time. Listen to your teeth and gums. If you experience any sensitivity, reduce the frequency or stop using the treatment altogether.
Tips and Tricks for Best Results
Here are a few extra tips to help you get the best results from this DIY teeth whitening method:
* **Be Consistent:** Like any whitening treatment, consistency is key. You won’t see results overnight, so stick with it for a few weeks to see a noticeable difference.
* **Avoid Staining Foods and Drinks:** While you’re trying to whiten your teeth, try to avoid foods and drinks that can stain them, such as coffee, tea, red wine, and berries.
* **Use a Soft-Bristled Toothbrush:** This will help to minimize any potential damage to your enamel.
* **Listen to Your Body:** If you experience any sensitivity or discomfort, stop using the treatment immediately.
* **Consider Oil Pulling:** In addition to using the baking soda and coconut oil paste, you can also try oil pulling with coconut oil. This involves swishing a tablespoon of coconut oil in your mouth for 15-20 minutes each day. It’s believed to help remove bacteria and toxins from your mouth, which can contribute to whiter teeth and healthier gums.
Addressing Common Concerns
I know some of you might have some questions or concerns about using baking soda and coconut oil on your teeth, so let’s address some of the most common ones:
* **Is baking soda safe for my enamel?** Baking soda is a mild abrasive, so it can potentially erode enamel if used too frequently or aggressively. That’s why it’s important to use it sparingly and gently.
* **Will this treatment work for everyone?** This DIY method is most effective for removing surface stains. It may not be as effective for intrinsic stains, which are stains that are deeper within the tooth.
* **Can I use this treatment if I have sensitive teeth?** If you have sensitive teeth, you may want to start by using this treatment less frequently or for a shorter amount of time. You can also try using a toothpaste specifically designed for sensitive teeth in between treatments.
* **Will this treatment damage my fillings or dental work?** Baking soda is generally safe for fillings and dental work, but it’s always a good idea to check with your dentist if you have any concerns.
Potential Side Effects
While this DIY method is generally safe, it’s important to be aware of potential side effects:
* **Tooth Sensitivity:** Some people may experience tooth sensitivity after using baking soda. This is usually temporary and should subside within a few days.
* **Gum Irritation:** If you brush too aggressively, you may experience gum irritation. Be sure to brush gently and use a soft-bristled toothbrush.
* **Enamel Erosion:** Overusing baking soda can potentially erode enamel over time. That’s why it’s important to use it sparingly and gently.
When to See a Dentist
It’s important to remember that this DIY method is not a substitute for professional dental care. You should still see your dentist for regular checkups and cleanings. If you have any concerns about your oral health, be sure to talk to your dentist.
You should consult your dentist if:
* You experience persistent tooth sensitivity or pain.
* You notice any changes in your gums, such as redness, swelling, or bleeding.
* You have any concerns about the health of your teeth or gums.
My Personal Experience
I’ve been using this baking soda and coconut oil method for a while now, and I’ve been really happy with the results. I’ve noticed a definite improvement in the brightness of my smile, and I love that it’s a natural and affordable alternative to commercial whitening products. I also appreciate that it’s so easy to do – I can whip up a batch of the paste in just a few minutes.
Of course, everyone’s experience is different, and what works for me may not work for you. But I encourage you to give it a try and see if it works for you! Just remember to be patient, be consistent, and listen to your body.
Final Thoughts
So there you have it – my simple and effective DIY teeth whitening method using baking soda and coconut oil. I hope you found this article helpful, and I encourage you to give it a try. Remember to be gentle, be consistent, and listen to your body.
Conclusion
So, there you have it! This simple yet incredibly effective Baking Soda Coconut Oil DIY trick is more than just a quick fix; it’s a game-changer for your personal care routine. We’ve explored how these two readily available ingredients can be combined to create a powerful and natural alternative to many commercial products, saving you money and reducing your exposure to potentially harmful chemicals.
Why is this a must-try? Because it’s versatile, affordable, and customizable. Whether you’re looking for a gentle exfoliant, a natural deodorant, or a teeth-whitening solution, this dynamic duo delivers. The beauty of this DIY approach lies in its simplicity. You control the ingredients, ensuring that what you’re putting on your body is safe and beneficial.
But the benefits don’t stop there. By making your own personal care products, you’re also contributing to a more sustainable lifestyle. You’re reducing plastic waste from store-bought containers and minimizing your carbon footprint. It’s a win-win for you and the environment.
Feeling adventurous? Consider these variations to tailor the recipe to your specific needs:
* **For Sensitive Skin:** Add a teaspoon of honey or aloe vera gel to the mixture for extra soothing and moisturizing properties.
* **For a Deeper Clean:** Incorporate a few drops of tea tree oil for its antibacterial and antifungal benefits (use with caution and always test on a small area first).
* **For a Refreshing Scent:** Infuse the coconut oil with your favorite essential oils, such as lavender, peppermint, or lemon.
We understand that trying something new can be daunting, but we encourage you to take the plunge and experience the transformative power of this Baking Soda Coconut Oil DIY. The results speak for themselves. You’ll be amazed at how soft, smooth, and healthy your skin feels.
Don’t just take our word for it. Experiment with different ratios and variations to find what works best for you. And most importantly, share your experience with us! We’d love to hear your success stories, tips, and tricks in the comments below. Let’s build a community of DIY enthusiasts who are passionate about natural and effective personal care.
Ready to ditch the chemicals and embrace the power of nature? Give this Baking Soda Coconut Oil DIY a try today. You won’t regret it!
Frequently Asked Questions (FAQ)
Is baking soda safe to use on my skin?
Baking soda, also known as sodium bicarbonate, is generally considered safe for topical use in small amounts and for short periods. However, it’s important to be aware that baking soda has a high pH level, which can disrupt the skin’s natural pH balance. This can lead to dryness, irritation, and even redness, especially for individuals with sensitive skin.
Therefore, it’s crucial to use baking soda sparingly and to dilute it properly with coconut oil or other moisturizing ingredients. Always perform a patch test on a small area of skin before applying it to larger areas. If you experience any adverse reactions, such as burning, itching, or redness, discontinue use immediately.
Can I use this mixture on my face?
While some people find baking soda and coconut oil beneficial for facial exfoliation and acne treatment, it’s essential to proceed with caution. The skin on your face is more delicate than the skin on your body, making it more susceptible to irritation from baking soda’s high pH.
If you choose to use this mixture on your face, use a very small amount of baking soda and mix it thoroughly with a generous amount of coconut oil. Gently massage the mixture onto your skin in circular motions for no more than 30 seconds, then rinse thoroughly with lukewarm water. Follow up with a moisturizer to replenish any lost hydration.
Individuals with sensitive skin, rosacea, or eczema should avoid using baking soda on their face altogether.
How often can I use this DIY mixture?
The frequency of use depends on your skin type and the specific purpose for which you’re using the mixture. For exfoliation, it’s generally recommended to use it no more than once or twice a week. Over-exfoliating can strip your skin of its natural oils and lead to dryness and irritation.
If you’re using the mixture as a deodorant, you can apply it daily or as needed. However, if you notice any signs of irritation, reduce the frequency of use or discontinue use altogether.
What type of coconut oil should I use?
It’s best to use unrefined, virgin coconut oil for this DIY recipe. Unrefined coconut oil is extracted from fresh coconut meat without the use of chemicals or high heat, preserving its natural nutrients and antioxidants. Refined coconut oil, on the other hand, is processed and may contain additives that can irritate the skin.
Look for coconut oil that is labeled as “virgin” or “unrefined” to ensure that you’re getting the purest and most beneficial product.
How long does this mixture last?
This DIY mixture doesn’t contain any preservatives, so it’s best to make it in small batches and use it within a few weeks. Store the mixture in an airtight container in a cool, dark place to prevent it from spoiling.
If you notice any changes in the color, smell, or texture of the mixture, discard it immediately.
Can I add essential oils to this mixture?
Yes, you can add essential oils to this mixture to enhance its benefits and create a pleasant scent. However, it’s important to use essential oils safely and responsibly.
Always dilute essential oils properly with a carrier oil, such as coconut oil, before applying them to your skin. A general guideline is to use a 1-3% dilution for topical application. This means adding 1-3 drops of essential oil per teaspoon of carrier oil.
Choose essential oils that are safe for topical use and that are appropriate for your skin type. Some popular options include lavender, tea tree, peppermint, and lemon.
Perform a patch test on a small area of skin before applying the mixture to larger areas. If you experience any adverse reactions, discontinue use immediately.
Can I use this mixture to whiten my teeth?
Some people use baking soda and coconut oil as a natural teeth-whitening remedy. Baking soda is a mild abrasive that can help remove surface stains from teeth, while coconut oil has antibacterial properties that can promote oral health.
However, it’s important to note that baking soda can be abrasive and may damage tooth enamel if used excessively. Therefore, it’s crucial to use this mixture sparingly and to avoid brushing too vigorously.
Consult with your dentist before using baking soda to whiten your teeth, especially if you have sensitive teeth or gum disease.
Is this mixture safe for pregnant or breastfeeding women?
While baking soda and coconut oil are generally considered safe for topical use, it’s always best to consult with your doctor before using any new products during pregnancy or breastfeeding. Some essential oils may not be safe for pregnant or breastfeeding women, so it’s important to do your research and choose essential oils that are known to be safe.
Leave a Comment