
Balcony Gardening Bell Peppers: Dreaming of fresh, crisp bell peppers straight from your own backyard? But wait, you live in an apartment with only a small balcony? Don’t let that stop you! You absolutely can grow delicious bell peppers, even without a sprawling garden. For centuries, people have found creative ways to cultivate food in limited spaces, from ancient rooftop gardens to modern-day urban farms. This DIY guide is your key to unlocking the secrets of successful balcony gardening, specifically focusing on those vibrant, flavorful bell peppers.
I know what you’re thinking: “Bell peppers are tricky!” And you’re right, they can be. But with the right knowledge and a few clever tricks, you’ll be harvesting your own peppers in no time. This article is packed with easy-to-follow instructions, insider tips, and DIY hacks that will transform your balcony into a thriving mini-farm. Imagine the satisfaction of adding your own homegrown bell peppers to your favorite recipes, knowing you nurtured them from seed to table.
Why do you need these balcony gardening bell peppers tricks? Because fresh, organic produce shouldn’t be a luxury! Growing your own food is not only rewarding but also a fantastic way to save money, reduce your carbon footprint, and connect with nature, even in the heart of the city. Let’s get started and turn your balcony into a bell pepper paradise!
Growing Bell Peppers on Your Balcony: A DIY Guide
Hey there, fellow balcony gardeners! I’m so excited to share my experience and guide you through growing your own delicious bell peppers right on your balcony. It’s easier than you think, and the satisfaction of harvesting your own peppers is truly rewarding. Let’s get started!
Choosing the Right Bell Pepper Variety
First things first, not all bell pepper varieties are created equal, especially when it comes to container gardening. You’ll want to choose varieties that are compact and well-suited for pots. Here are a few of my favorites:
* ‘Patio Bell’: As the name suggests, this variety is specifically bred for containers. It produces smaller, but still flavorful, peppers.
* ‘Mini Bell’: These are adorable and perfect for snacking! They come in various colors and are very productive.
* ‘Lunchbox Peppers’: Similar to mini bells, these are sweet and easy to grow in pots.
* ‘Sweet Palermo’: While technically not a bell pepper, these elongated, sweet peppers are fantastic for containers and offer a different flavor profile.
Gathering Your Supplies
Before we dive into the planting process, let’s make sure you have everything you need. This will save you time and frustration later on.
* Bell Pepper Seeds or Seedlings: You can start from seeds indoors or purchase seedlings from your local garden center. I usually opt for seedlings to get a head start.
* Large Containers: Bell peppers need plenty of room to grow. Choose containers that are at least 12 inches in diameter and depth. Bigger is always better!
* High-Quality Potting Mix: Don’t use garden soil! It’s too heavy and doesn’t drain well in containers. Opt for a well-draining potting mix specifically formulated for containers.
* Slow-Release Fertilizer: This will provide your pepper plants with a steady supply of nutrients throughout the growing season.
* Watering Can or Hose: Essential for keeping your plants hydrated.
* Plant Markers: To keep track of which variety you’re growing in each container.
* Optional: Stakes or Cages: Some bell pepper varieties can get quite tall and may need support.
* Gardening Gloves: To keep your hands clean and protected.
Planting Your Bell Peppers
Now for the fun part! Let’s get those bell peppers planted.
1. Prepare Your Containers: Make sure your containers have drainage holes. If not, drill some! Add a layer of gravel or broken pottery at the bottom of the container to improve drainage.
2. Fill with Potting Mix: Fill the container with your chosen potting mix, leaving a few inches of space at the top.
3. Plant Your Seedlings (or Seeds):
* Seedlings: Gently remove the seedling from its container. Loosen the roots slightly. Dig a hole in the potting mix that’s large enough to accommodate the root ball. Place the seedling in the hole and backfill with potting mix. Gently firm the soil around the base of the plant.
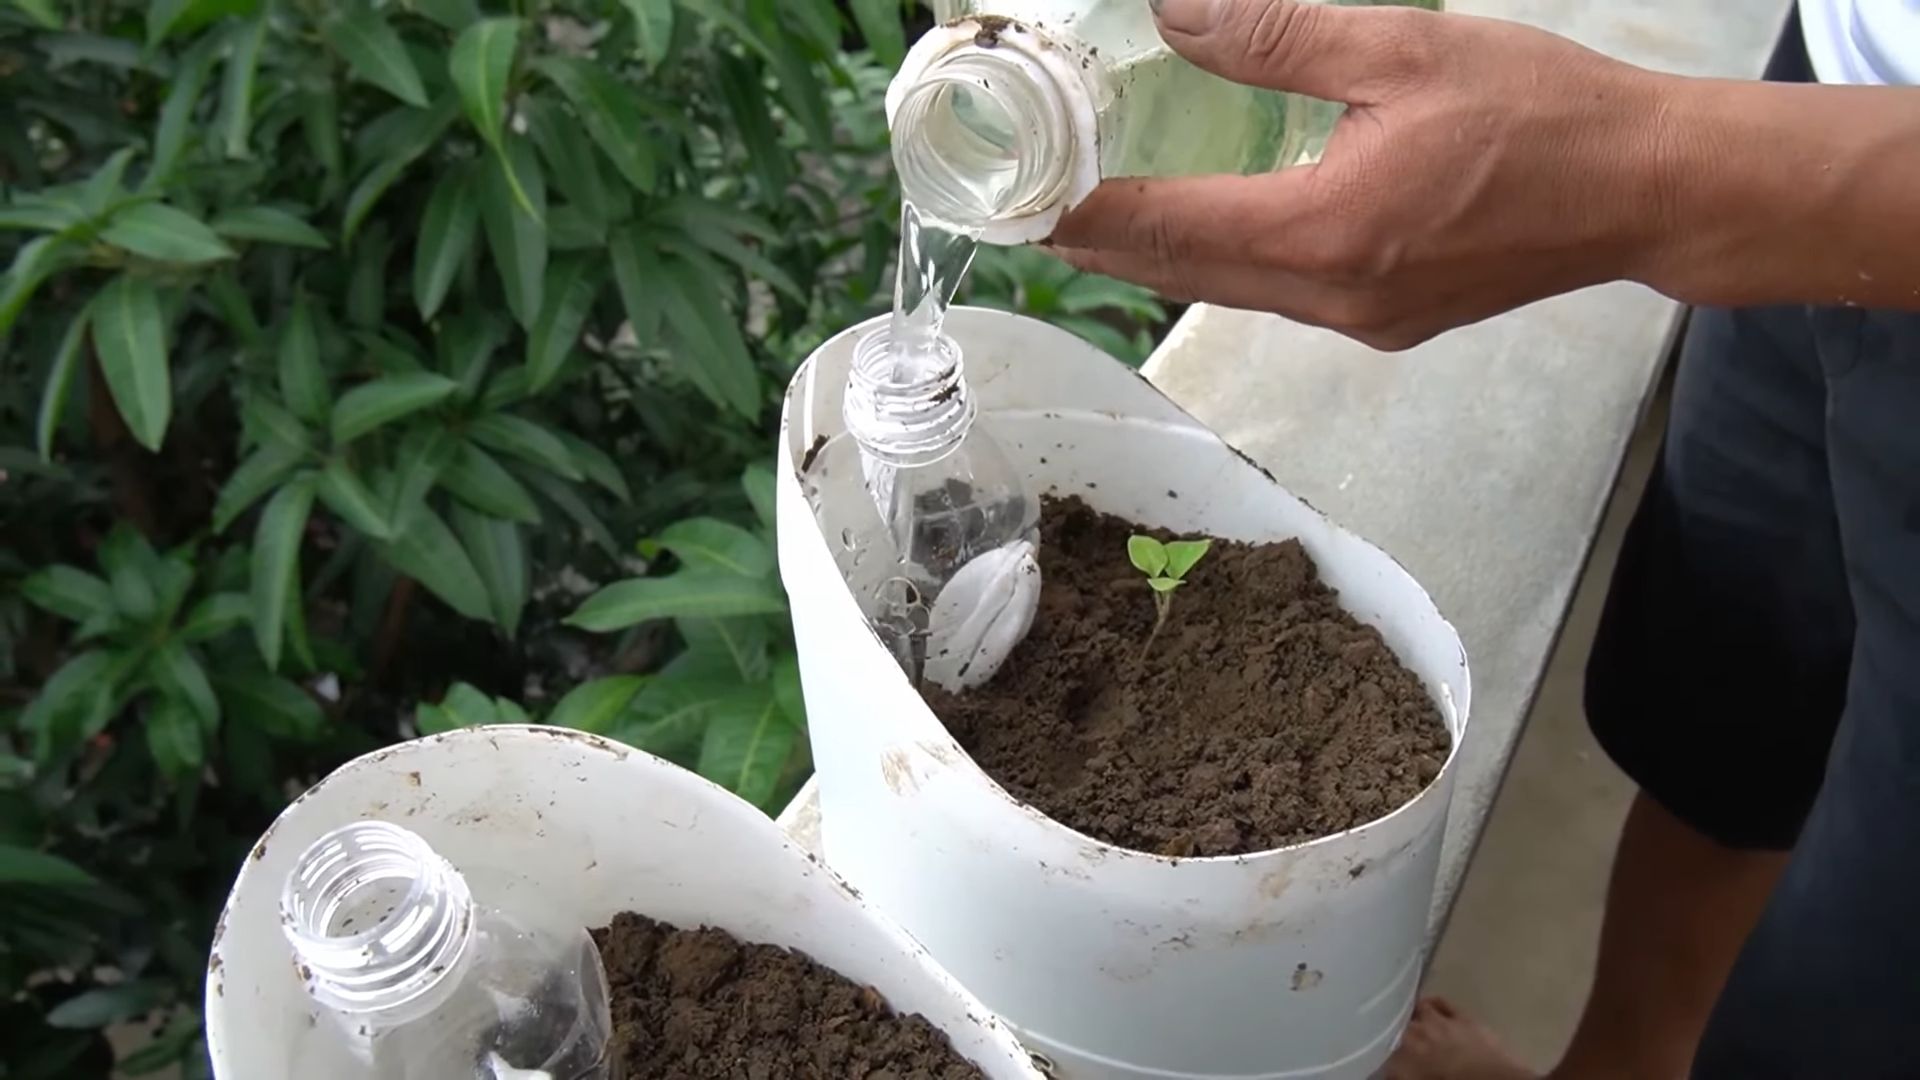
* Seeds: If starting from seeds, sow them about 1/4 inch deep and water gently. Keep the soil consistently moist until the seeds germinate.
4. Water Thoroughly: Water your newly planted bell peppers thoroughly until water drains out of the bottom of the container.
5. Add Slow-Release Fertilizer: Sprinkle slow-release fertilizer around the base of the plant, following the instructions on the fertilizer package.
6. Label Your Plants: Use plant markers to label each container with the variety of bell pepper you’re growing.
7. Choose a Sunny Location: Bell peppers need at least 6-8 hours of sunlight per day. Place your containers in the sunniest spot on your balcony.
Caring for Your Bell Pepper Plants
Once your bell peppers are planted, it’s important to provide them with the care they need to thrive.
1. Watering: Water your bell pepper plants regularly, especially during hot, dry weather. Check the soil moisture by sticking your finger into the soil. If the top inch of soil feels dry, it’s time to water. Avoid overwatering, as this can lead to root rot.
2. Fertilizing: In addition to the slow-release fertilizer, you can also supplement with a liquid fertilizer every 2-3 weeks. Choose a fertilizer that’s high in phosphorus and potassium, which are essential for fruit production.
3. Pruning: Pruning isn’t strictly necessary, but it can help to improve air circulation and encourage bushier growth. Remove any yellowing or dead leaves. You can also pinch off the suckers that grow between the main stem and the branches.
4. Supporting: As your bell pepper plants grow, they may need support to prevent them from toppling over. Use stakes or cages to support the plants.
5. Pest Control: Keep an eye out for pests such as aphids, whiteflies, and spider mites. If you notice any pests, treat them with an insecticidal soap or neem oil.
6. Pollination: Bell peppers are self-pollinating, but you can help them along by gently shaking the plants or using a small paintbrush to transfer pollen from one flower to another. This is especially important if you’re growing your bell peppers indoors.
Harvesting Your Bell Peppers
The moment you’ve been waiting for! Harvesting your own homegrown bell peppers is incredibly satisfying.
1. Timing: Bell peppers are typically ready to harvest about 60-80 days after transplanting. The exact timing will depend on the variety and the growing conditions.
2. Ripeness: Bell peppers can be harvested at any stage of ripeness, but they’re usually sweetest and most flavorful when they’re fully colored.
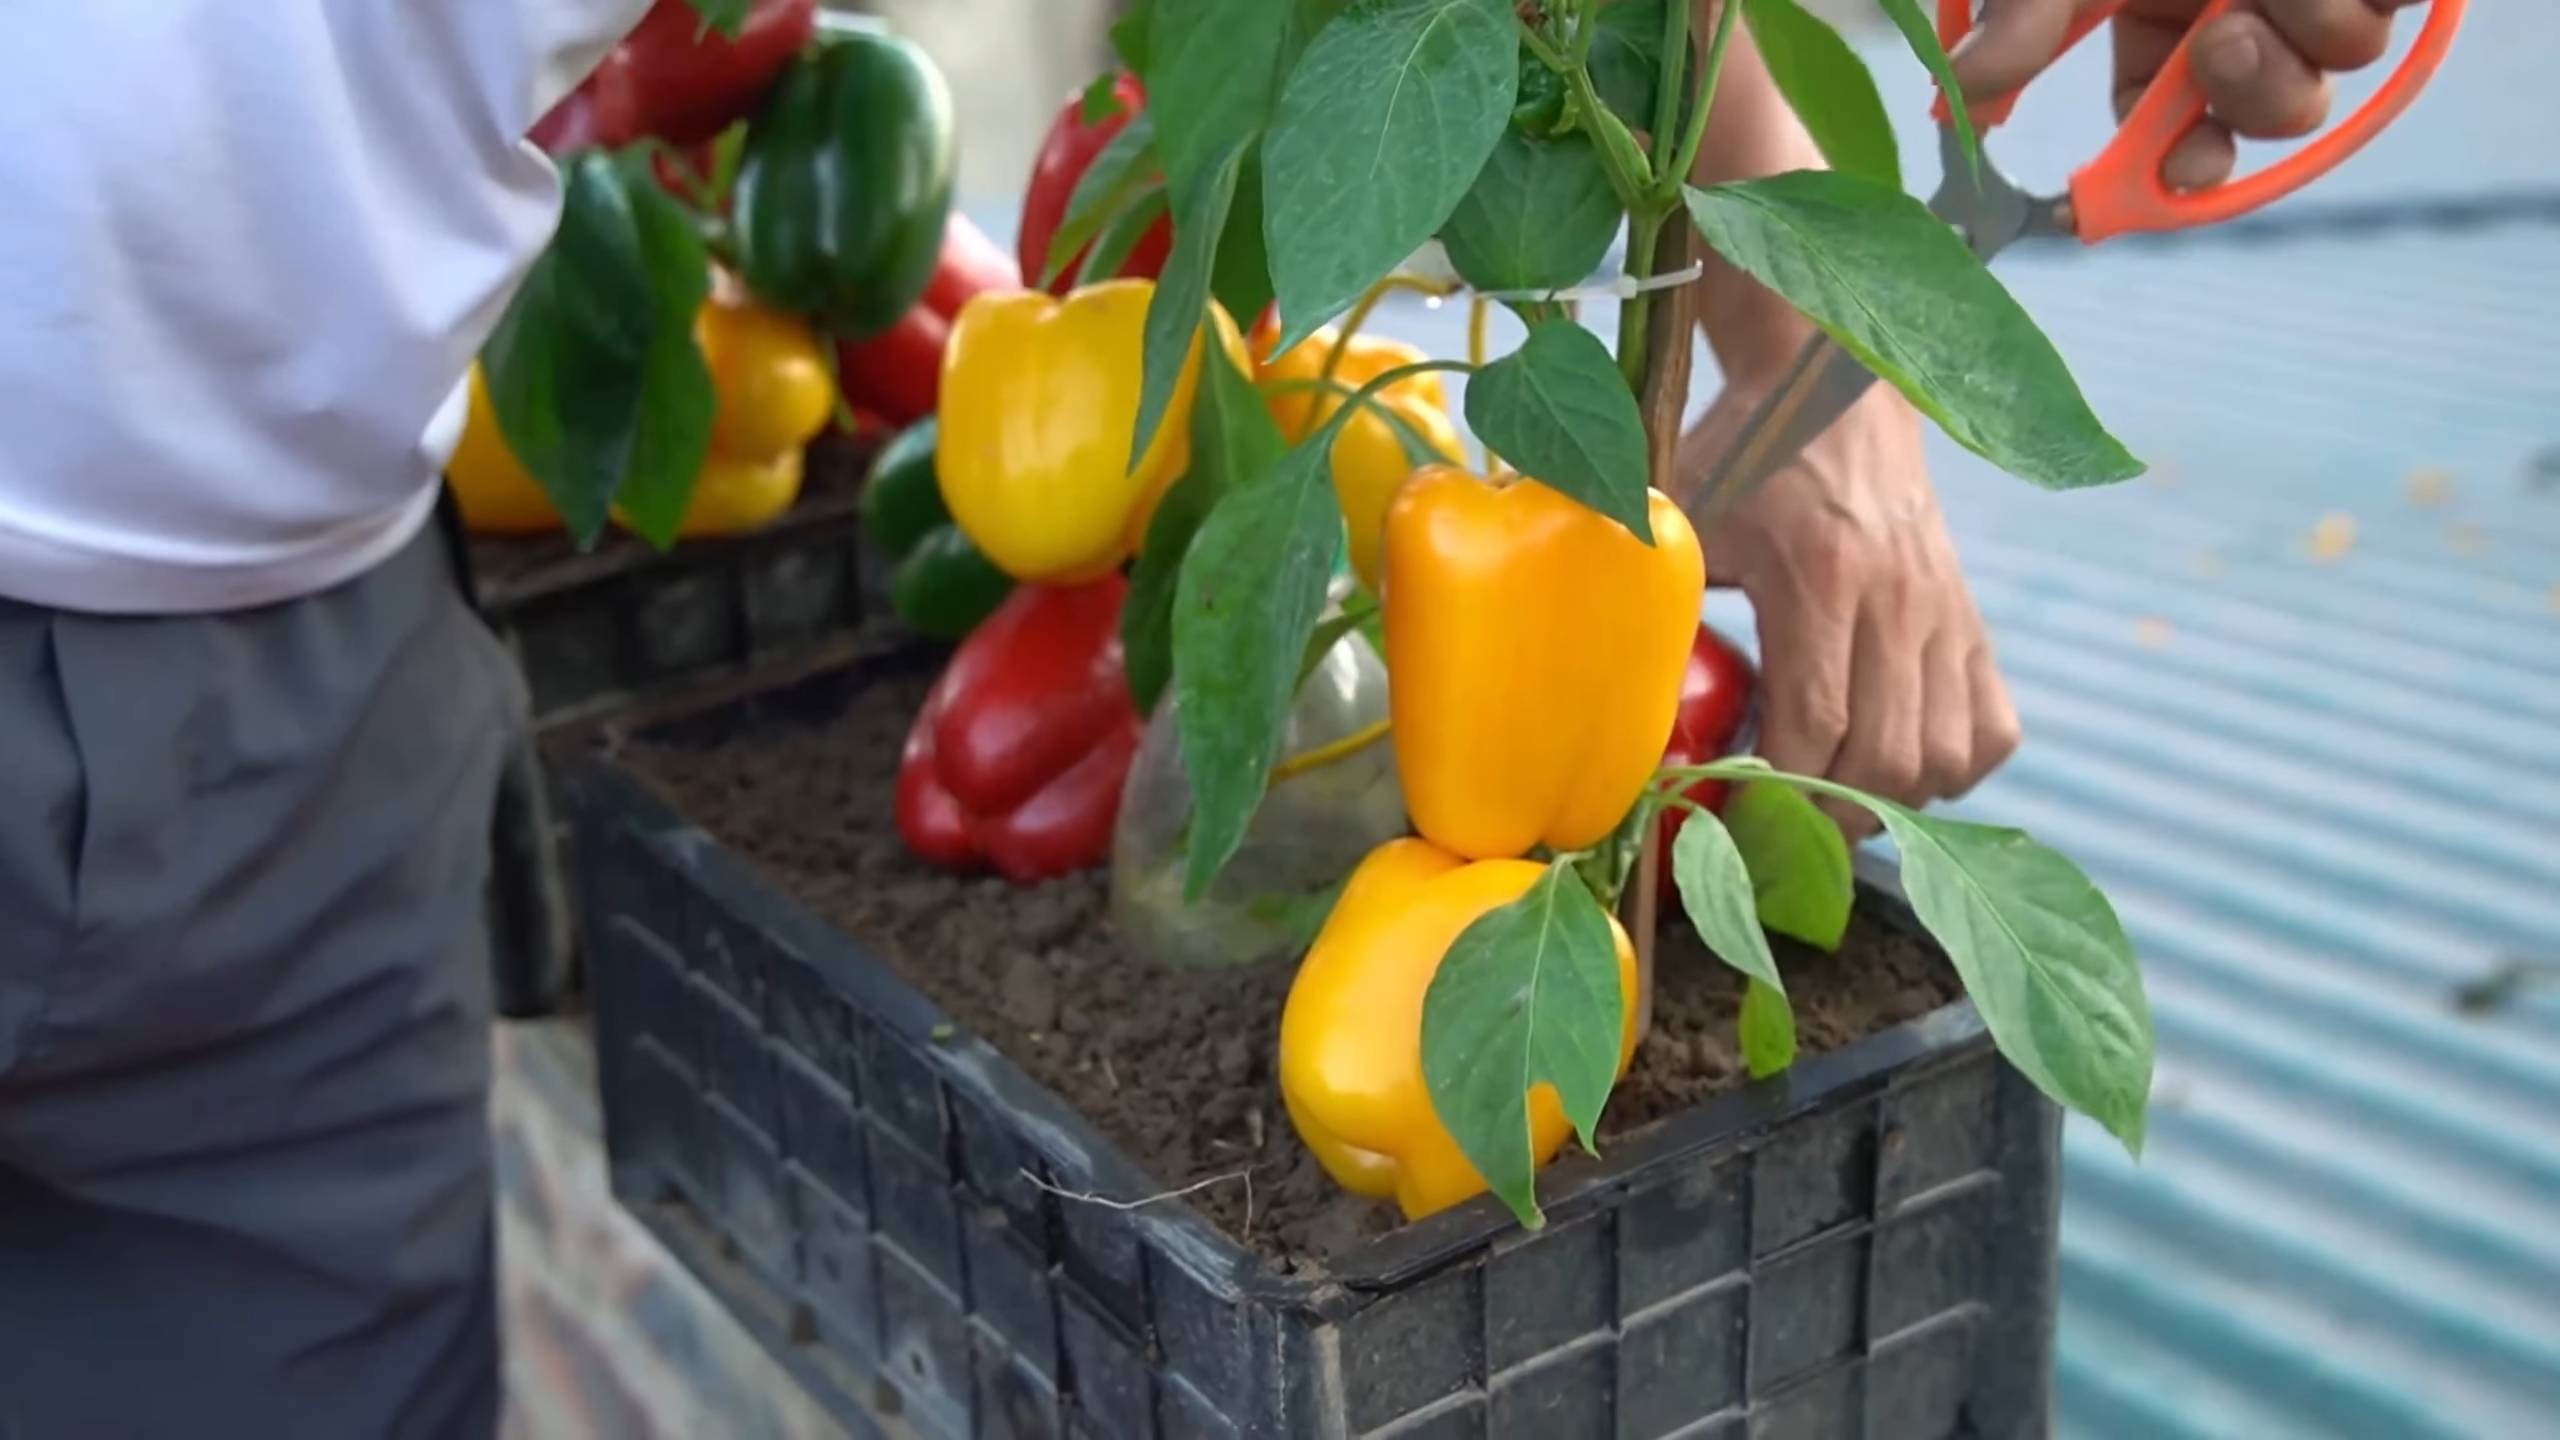
3. Harvesting Technique: Use a sharp knife or pruning shears to cut the bell pepper from the plant. Leave a small piece of stem attached to the pepper.
4. Enjoy! Wash your freshly harvested bell peppers and enjoy them in your favorite recipes. They’re delicious raw, grilled, roasted, or stuffed.
Troubleshooting Common Problems
Even with the best care, you may encounter some problems while growing bell peppers on your balcony. Here are a few common issues and how to address them:
* Blossom End Rot: This is a common problem that causes the bottom of the bell pepper to rot. It’s usually caused by a calcium deficiency. To prevent blossom end rot, make sure your soil is well-drained and that you’re watering your plants consistently. You can also add calcium to the soil by using bone meal or eggshells.
* Sunscald: This occurs when the bell peppers are exposed to too much direct sunlight, causing them to develop white or yellow patches. To prevent sunscald, provide your plants with some shade during the hottest part of the day.
* Lack of Fruit: If your bell pepper plants are producing flowers but not fruit, it could be due to a lack of pollination or a nutrient deficiency. Make sure you’re providing your plants with adequate water and fertilizer. You can also try hand-pollinating the flowers.
* Pest Infestations: As mentioned earlier, bell peppers can be susceptible to pests such as aphids, whiteflies, and spider mites. Treat these pests with an insecticidal soap or neem oil.
Tips for Success
Here are a few extra tips to help you succeed in growing bell peppers on your balcony:
* Choose the right container: Make sure your container is large enough to accommodate the plant’s root system.
* Use high-quality potting mix: Don’t use garden soil! It’s too heavy and doesn’t drain well in containers.
* Water regularly: Bell peppers need consistent moisture, especially during hot weather.
* Fertilize regularly: Provide your plants with a steady supply of nutrients.
* Provide support: Use stakes or cages to support the plants as they grow.
* Protect from pests: Keep an eye out for pests and treat them promptly.
* Be patient: It takes time for bell peppers to mature. Don’t get discouraged if you don’t see results immediately.
Extending the Growing Season
If you live in an area with a shorter growing season, you can extend the season by starting your bell pepper seeds indoors several weeks before the last expected frost. You can also use row covers or a greenhouse to protect your plants from frost.
Enjoying Your Harvest
Once you’ve harvested your bell peppers, there are endless ways to enjoy them. Here are a few ideas:
* Eat them raw: Bell peppers are delicious raw in salads, sandwiches, or as a snack.
* Grill them: Grilled bell peppers are a great addition to any barbecue.
* Roast them: Roasted bell peppers are sweet and flavorful.
* Stuff them: Stuffed bell peppers are a classic
Conclusion
So, there you have it! Cultivating your own vibrant, delicious bell peppers right on your balcony is not only achievable but incredibly rewarding. This DIY balcony gardening trick transforms even the smallest outdoor space into a productive and visually appealing edible landscape. Forget those bland, overpriced peppers from the grocery store; imagine stepping outside and harvesting your own sun-ripened, flavorful bell peppers whenever you need them.
This method, focusing on optimized container size, strategic sunlight placement, and consistent watering and feeding, unlocks the potential for a surprisingly bountiful harvest. The satisfaction of nurturing a plant from seedling to fruiting is unmatched, and the taste of homegrown bell peppers is simply superior. Plus, you’ll be reducing your carbon footprint by cutting down on transportation and packaging waste. It’s a win-win!
But the beauty of balcony gardening lies in its adaptability. Feel free to experiment with different bell pepper varieties. Perhaps you’d like to try growing sweet banana peppers for pickling, spicy jalapeños for adding a kick to your meals, or even colorful purple bell peppers for a visually stunning display. Consider companion planting with herbs like basil or marigolds to deter pests and enhance the flavor of your peppers. You can also explore different container materials, from terracotta pots to repurposed buckets, as long as they provide adequate drainage.
Don’t be afraid to get creative and personalize your balcony garden to suit your preferences and available space. Remember to monitor your plants regularly for any signs of pests or diseases and address them promptly. With a little care and attention, you’ll be enjoying a steady supply of fresh, homegrown bell peppers throughout the growing season.
We wholeheartedly encourage you to give this DIY balcony gardening trick a try. It’s a fantastic way to connect with nature, enjoy fresh produce, and add a touch of green to your urban environment. And most importantly, we want to hear about your experiences! Share your photos, tips, and challenges in the comments below. Let’s build a community of balcony gardeners and inspire others to embrace the joy of growing their own food. What are you waiting for? Grab some seeds or seedlings and start your balcony bell pepper adventure today!
Frequently Asked Questions (FAQ)
Q: What is the best size container for growing bell peppers on a balcony?
A: The ideal container size for growing bell peppers on a balcony is at least 5 gallons, but 7-10 gallons is even better. This provides ample space for the roots to develop and allows the plant to access sufficient nutrients and water. Smaller containers can restrict growth and lead to smaller, less productive plants. Make sure the container has drainage holes to prevent waterlogging, which can cause root rot.
Q: How much sunlight do bell peppers need when grown on a balcony?
A: Bell peppers thrive in full sun, requiring at least 6-8 hours of direct sunlight per day. If your balcony doesn’t receive that much sunlight, you can supplement with grow lights. Position your containers in the sunniest spot on your balcony and rotate them regularly to ensure even exposure to sunlight. Insufficient sunlight can result in leggy growth, reduced flowering, and smaller peppers.
Q: What type of soil should I use for growing bell peppers in containers?
A: Use a well-draining potting mix specifically formulated for containers. Avoid using garden soil, as it can become compacted in containers and hinder drainage. A good potting mix will retain moisture while allowing excess water to drain away, providing the ideal environment for root growth. You can also amend the potting mix with compost or other organic matter to improve its fertility and drainage.
Q: How often should I water my bell pepper plants on a balcony?
A: Water your bell pepper plants regularly, especially during hot, dry weather. Check the soil moisture level daily by sticking your finger about an inch into the soil. If the soil feels dry, it’s time to water. Water deeply, until water drains out of the drainage holes. Avoid overwatering, as this can lead to root rot. Mulching around the base of the plants can help retain moisture and reduce the need for frequent watering.
Q: What kind of fertilizer should I use for my balcony bell pepper plants?
A: Bell peppers are heavy feeders and require regular fertilization to produce a good crop. Use a balanced fertilizer with a ratio of 5-10-10 or 10-10-10, or a fertilizer specifically formulated for vegetables. Follow the instructions on the fertilizer package for application rates and frequency. You can also supplement with liquid seaweed or fish emulsion for added nutrients. Avoid over-fertilizing, as this can burn the roots and damage the plants.
Q: How do I prevent pests and diseases from affecting my bell pepper plants on a balcony?
A: Regularly inspect your plants for signs of pests or diseases. Common pests that affect bell peppers include aphids, whiteflies, and spider mites. You can control these pests with insecticidal soap, neem oil, or by handpicking them off the plants. Diseases such as blossom end rot and fungal infections can also affect bell peppers. Ensure proper watering and fertilization to prevent blossom end rot, and provide good air circulation to prevent fungal infections. You can also use organic fungicides if necessary. Companion planting with herbs like basil or marigolds can also help deter pests.
Q: When should I harvest my bell peppers?
A: Bell peppers are typically ready to harvest 60-90 days after transplanting, depending on the variety. The peppers should be firm, glossy, and fully colored. You can harvest them at any stage of ripeness, but they will be sweetest and most flavorful when fully ripe. Use a sharp knife or pruning shears to cut the peppers from the plant, leaving a short stem attached. Regular harvesting will encourage the plant to produce more peppers.
Q: Can I grow bell peppers on a balcony in a cold climate?
A: Yes, you can grow bell peppers on a balcony in a cold climate, but you may need to take some extra precautions. Start your seeds indoors 6-8 weeks before the last expected frost. Harden off the seedlings before transplanting them to your balcony containers. Choose a sunny, sheltered location for your plants. You may also need to provide protection from frost by covering the plants with blankets or moving them indoors on cold nights. Consider using a cold frame or greenhouse to extend the growing season.
Q: What are some good companion plants for bell peppers on a balcony?
A: Several plants make excellent companions for bell peppers, helping to deter pests, improve growth, or enhance flavor. Basil is a classic companion plant for bell peppers, repelling aphids and whiteflies. Marigolds also deter pests and attract beneficial insects. Carrots, onions, and garlic can also help to improve the growth of bell peppers. Avoid planting bell peppers near fennel or brassicas (such as cabbage and broccoli), as they can inhibit growth.

Leave a Comment