
Easy Bag Tying: Unlocking the Secrets of Effortless Gardening
I’ve always loved gardening, but let’s be honest, sometimes the simplest tasks can feel like a monumental struggle. One of those seemingly minor annoyances? Tying up those pesky plant bags! That’s why I’m thrilled to share some Easy Bag Tying techniques with you today – clever DIY tricks that will transform your gardening experience from frustrating to fun.
For years, I wrestled with flimsy twist ties, struggling to secure my plant bags properly, often ending up with messy, unraveling knots. It wasn’t just inconvenient; it also impacted the health of my plants. Improperly secured bags can lead to soil spillage, pest infestations, and even damage to delicate seedlings. The frustration was real!
A Little History (and a Lot of Practicality)
While the history of plant bags themselves is vast, spanning centuries of agricultural practices, the quest for easy bag tying is a more modern one. As we’ve become more conscious of sustainable gardening practices and the importance of protecting our plants, the need for simple, effective, and reusable bag-securing methods has grown. This article isn’t just about tying bags; it’s about making your gardening life easier and more efficient.
This DIY guide will show you several ingenious methods for securing your plant bags, saving you time, energy, and potentially even money. From repurposing everyday household items to discovering clever knotting techniques, you’ll find solutions that are both practical and environmentally friendly. So, ditch the frustrating twist ties and let’s dive into the world of easy bag tying!
Building a Custom Bookshelf from Reclaimed Wood
I love the look of reclaimed wood, and I’ve always wanted a unique bookshelf. So, I decided to build my own! This project took a bit of time, but the result is a beautiful, one-of-a-kind piece of furniture that I’m incredibly proud of. Here’s how I did it:
Gathering Your Materials
- Reclaimed wood planks (I used about 10, varying in width and length – aim for a total length that suits your space). Make sure the wood is clean and relatively dry.
- Wood glue
- Wood screws (various lengths, depending on the thickness of your planks)
- Wood filler
- Sandpaper (various grits, starting with coarser and moving to finer)
- Wood stain (your choice of color – I used a dark walnut)
- Polyurethane sealant (to protect the finish)
- Drill with various drill bits
- Level
- Measuring tape
- Safety glasses
- Work gloves
- Clamps (lots of them!)
Preparing the Wood
1. Clean the wood: Before you start, give your reclaimed wood planks a good cleaning. I used a stiff brush and a damp cloth to remove any dirt, debris, or loose bits of bark. Let them dry completely.
2. Assess and cut: Lay out your planks to get a feel for the overall design. You might need to cut some planks to size to create a visually appealing and structurally sound bookshelf. Use a saw (circular saw or hand saw, depending on your comfort level and the type of wood) to make your cuts. Remember to wear safety glasses!
3. Sanding is key: Sand each plank thoroughly, starting with a coarser grit sandpaper (around 80 grit) to remove any rough spots or splinters. Gradually move to finer grits (120, then 220) for a smooth finish. This step is crucial for a professional-looking result. Sanding along the grain is important to avoid scratches.
Assembling the Bookshelf
1. Plan your structure: Decide on the height and width of your shelves. I opted for three shelves, with varying heights to add visual interest. Sketch out a simple plan to help visualize the assembly process.
2. Glue and screw the vertical supports: Select two planks for the vertical supports of your bookshelf. Apply wood glue to the edges where the horizontal shelves will attach. Then, clamp the horizontal shelves to the vertical supports. Pre-drill pilot holes to prevent the wood from splitting when you screw them together. Use wood screws of appropriate length to securely fasten the shelves to the supports. Make sure everything is level as you go! Use your level frequently to check for any discrepancies.
3. Add additional shelves: Repeat step 2 for each additional shelf. Ensure that the shelves are evenly spaced and level. Take your time with this step – accuracy is key to a stable and attractive bookshelf.
4. Fill any gaps: Once all the shelves are attached, inspect the joints for any gaps. Use wood filler to fill any gaps or imperfections. Let the wood filler dry completely according to the manufacturer’s instructions.
5. Sand again: After the wood filler has dried, sand the filled areas smooth. Use finer grit sandpaper to blend the filler seamlessly with the surrounding wood.
Finishing Touches
1. Apply wood stain: Once the sanding is complete, apply your chosen wood stain. Follow the manufacturer’s instructions carefully. I applied two coats, allowing each coat to dry completely before applying the next.
2. Seal the wood: After the stain has dried, apply a coat of polyurethane sealant. This will protect the wood from moisture and wear. Again, follow the manufacturer’s instructions for drying time. I applied two coats of sealant for extra protection.
3. Let it cure: Allow the sealant to cure completely before placing any books on the shelves. This usually takes a few days.
Tips and Considerations
- Choose your wood carefully: The type of reclaimed wood you choose will affect the final look and feel of your bookshelf. Consider the color, texture, and overall condition of the wood.
- Pre-drill pilot holes: This is crucial to prevent the wood from splitting when you screw it together.
- Use clamps: Clamps are essential for keeping the pieces together while the glue dries.
- Take your time: This is a project that requires patience. Don’t rush the process, and take your time to ensure everything is done correctly.
- Safety first: Always wear safety glasses and work gloves when working with power tools and wood.
- Personalize it: Don’t be afraid to get creative! You can add your own personal touch to the bookshelf by adding decorative elements or using different types of wood.
And there you have it! My custom reclaimed wood bookshelf. It’s a rewarding project that adds a unique and beautiful piece to my home. I hope this guide helps you create your own masterpiece!
Conclusion
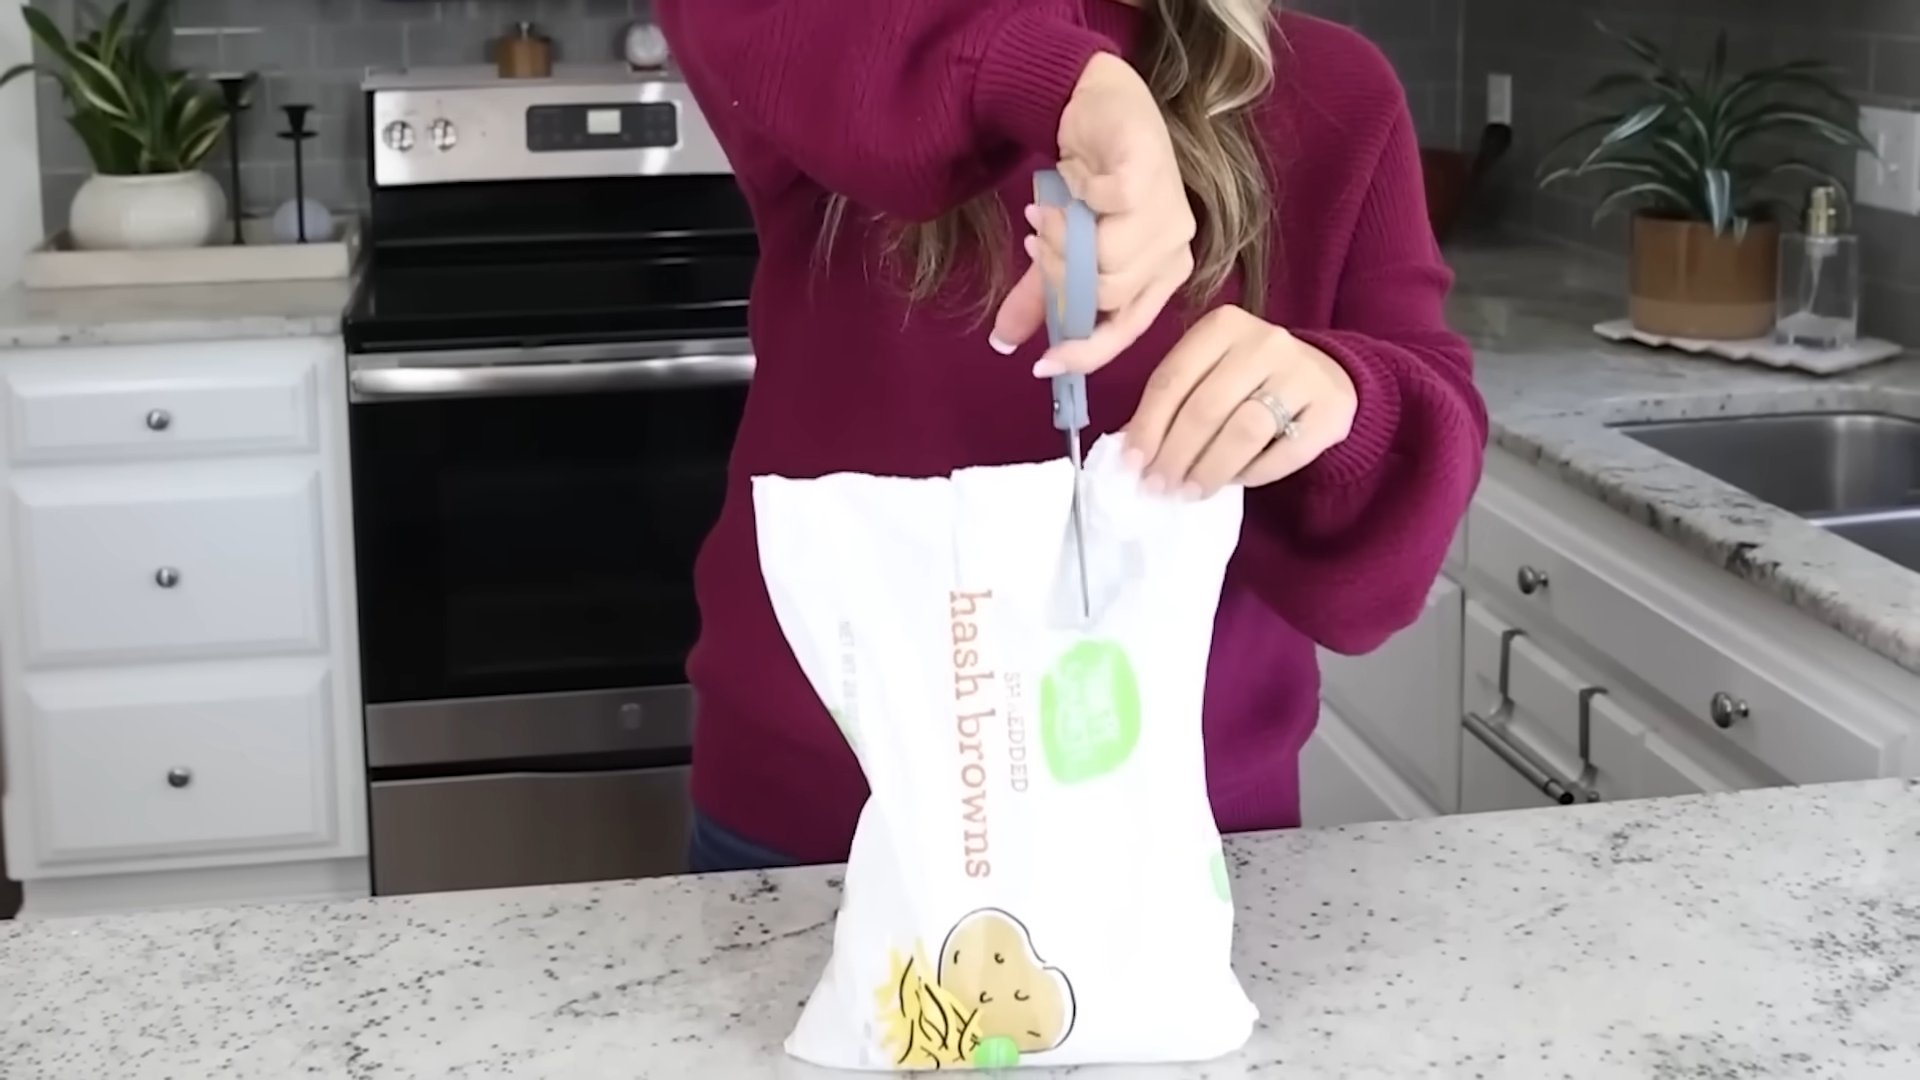
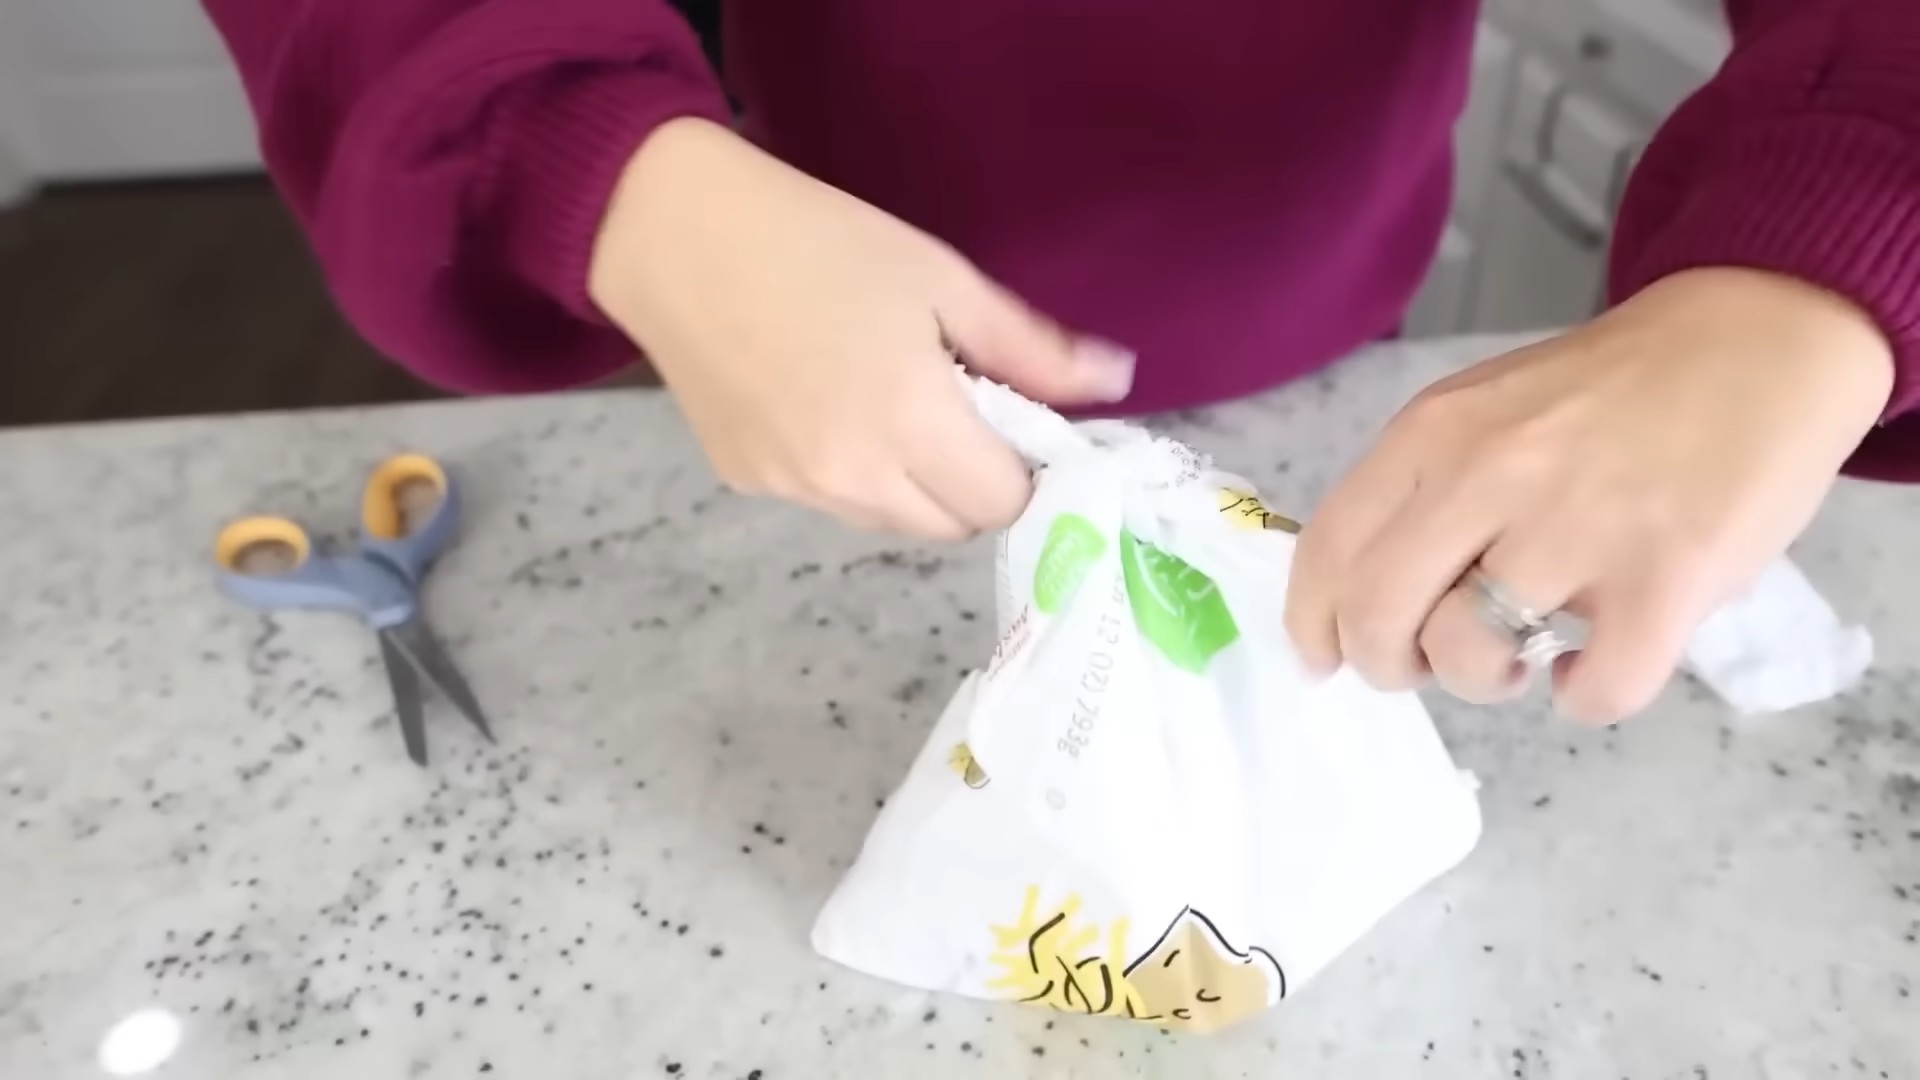
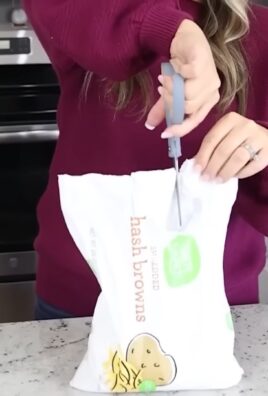
So there you have it – a simple yet incredibly effective method for conquering the age-old problem of unruly plastic bags. This Easy Bag Tying technique isn’t just about tidying up your kitchen; it’s about embracing a more organized and sustainable lifestyle. By mastering this simple knot, you’ll not only save valuable space and prevent frustrating tangles, but you’ll also contribute to a less cluttered environment. This DIY trick is a must-try because it’s quick, requires no special tools, and delivers consistently neat and manageable bag storage. Imagine the satisfaction of effortlessly accessing the bag you need, without the usual frustrating rummage through a knotted heap! The time saved alone makes this technique invaluable.
Beyond the basic method, there are several exciting variations you can explore. For instance, if you’re dealing with particularly thick or heavy-duty bags, you might find that a slightly tighter knot, or even a double knot, provides extra security. Experiment with different knotting techniques to find what works best for your specific bag type and personal preference. For those who prefer a more visually appealing solution, consider using colorful ribbon or twine to tie your bags. This adds a touch of personality to your storage and makes the process even more enjoyable. You could even color-code your bags based on their intended use – recycling, trash, or reusable shopping bags. The possibilities are endless!
We strongly encourage you to try this Easy Bag Tying method today. It’s a small change that can make a big difference in your daily routine. Share your experience with us! Let us know how this technique has improved your bag storage and organization. Post pictures of your neatly tied bags on social media using the hashtag #EasyBagTying and tag us – we’d love to see your results and celebrate your newfound organizational prowess. Don’t hesitate to share any tips or tricks you’ve discovered along the way. Together, we can create a community of organized individuals, one neatly tied bag at a time!
This simple knotting technique is not just about convenience; it’s about fostering a more mindful approach to everyday tasks. By taking a few extra seconds to tie your bags properly, you’re actively contributing to a more organized and sustainable home. So, ditch the frustrating tangles and embrace the simplicity and efficiency of this Easy Bag Tying method. You won’t regret it!
Frequently Asked Questions
What types of plastic bags does this method work for?
This Easy Bag Tying method works effectively on most types of plastic bags, including grocery bags, produce bags, and even some heavier-duty trash bags. However, extremely thick or unusually shaped bags might require slight adjustments to the technique. Experiment to find what works best for you.
How can I prevent the bags from unraveling?
To ensure your bags stay neatly tied, make sure you pull the knot tight after completing the tying process. For extra security, especially with heavier bags, consider using a double knot. You can also experiment with different knotting techniques to find one that provides the most secure hold for your specific bag type.
Is this method suitable for children?
Yes, this method is generally safe and easy enough for children to learn with adult supervision. It’s a great opportunity to teach children about organization and responsible waste management. Just ensure they are supervised to prevent accidental choking hazards.
What if I don’t have enough space to store my tied bags?
Once you’ve mastered the Easy Bag Tying technique, you’ll find that your bags take up significantly less space. However, if you still need more storage, consider using a designated bag holder, a drawer organizer, or even a repurposed container to keep your neatly tied bags organized and easily accessible.
Can I use this method for other types of bags, like paper bags?
While this method primarily focuses on plastic bags, you can adapt the technique for some types of paper bags. However, keep in mind that paper bags are more prone to tearing, so a gentler approach might be necessary. Experiment to see if it works for your specific paper bags.
What are some creative ways to use this technique?
Beyond simply organizing plastic bags, this knotting technique can be applied to other household items. For example, you can use it to tie up loose cords, organize ribbons, or even secure small packages. The possibilities are limited only by your imagination!
What if I accidentally make a mistake while tying the bag?
Don’t worry! If you make a mistake, simply undo the knot and try again. The beauty of this method is its simplicity and ease of correction. With a little practice, you’ll become a pro in no time.
Where can I find more information about sustainable waste management practices?
Many online resources and organizations offer valuable information on sustainable waste management practices. A quick online search will provide you with a wealth of information on recycling, reducing waste, and adopting eco-friendly habits. Consider exploring local initiatives and programs in your community as well.

Leave a Comment