
Bottle Gardening Peppers: Imagine plucking vibrant, sun-ripened peppers straight from your balcony, even if you don’t have a sprawling garden! For centuries, resourceful gardeners have found innovative ways to cultivate their favorite plants in limited spaces. From ancient rooftop gardens in bustling cities to modern-day apartment dwellers embracing vertical gardening, the desire to grow our own food is deeply ingrained in our human spirit.
But let’s face it, not everyone has the luxury of a backyard. That’s where the magic of DIY gardening comes in! I’m here to show you a super simple, budget-friendly, and incredibly effective method: bottle gardening peppers. This isn’t just about saving space; it’s about reducing waste, connecting with nature, and enjoying the unparalleled taste of homegrown produce.
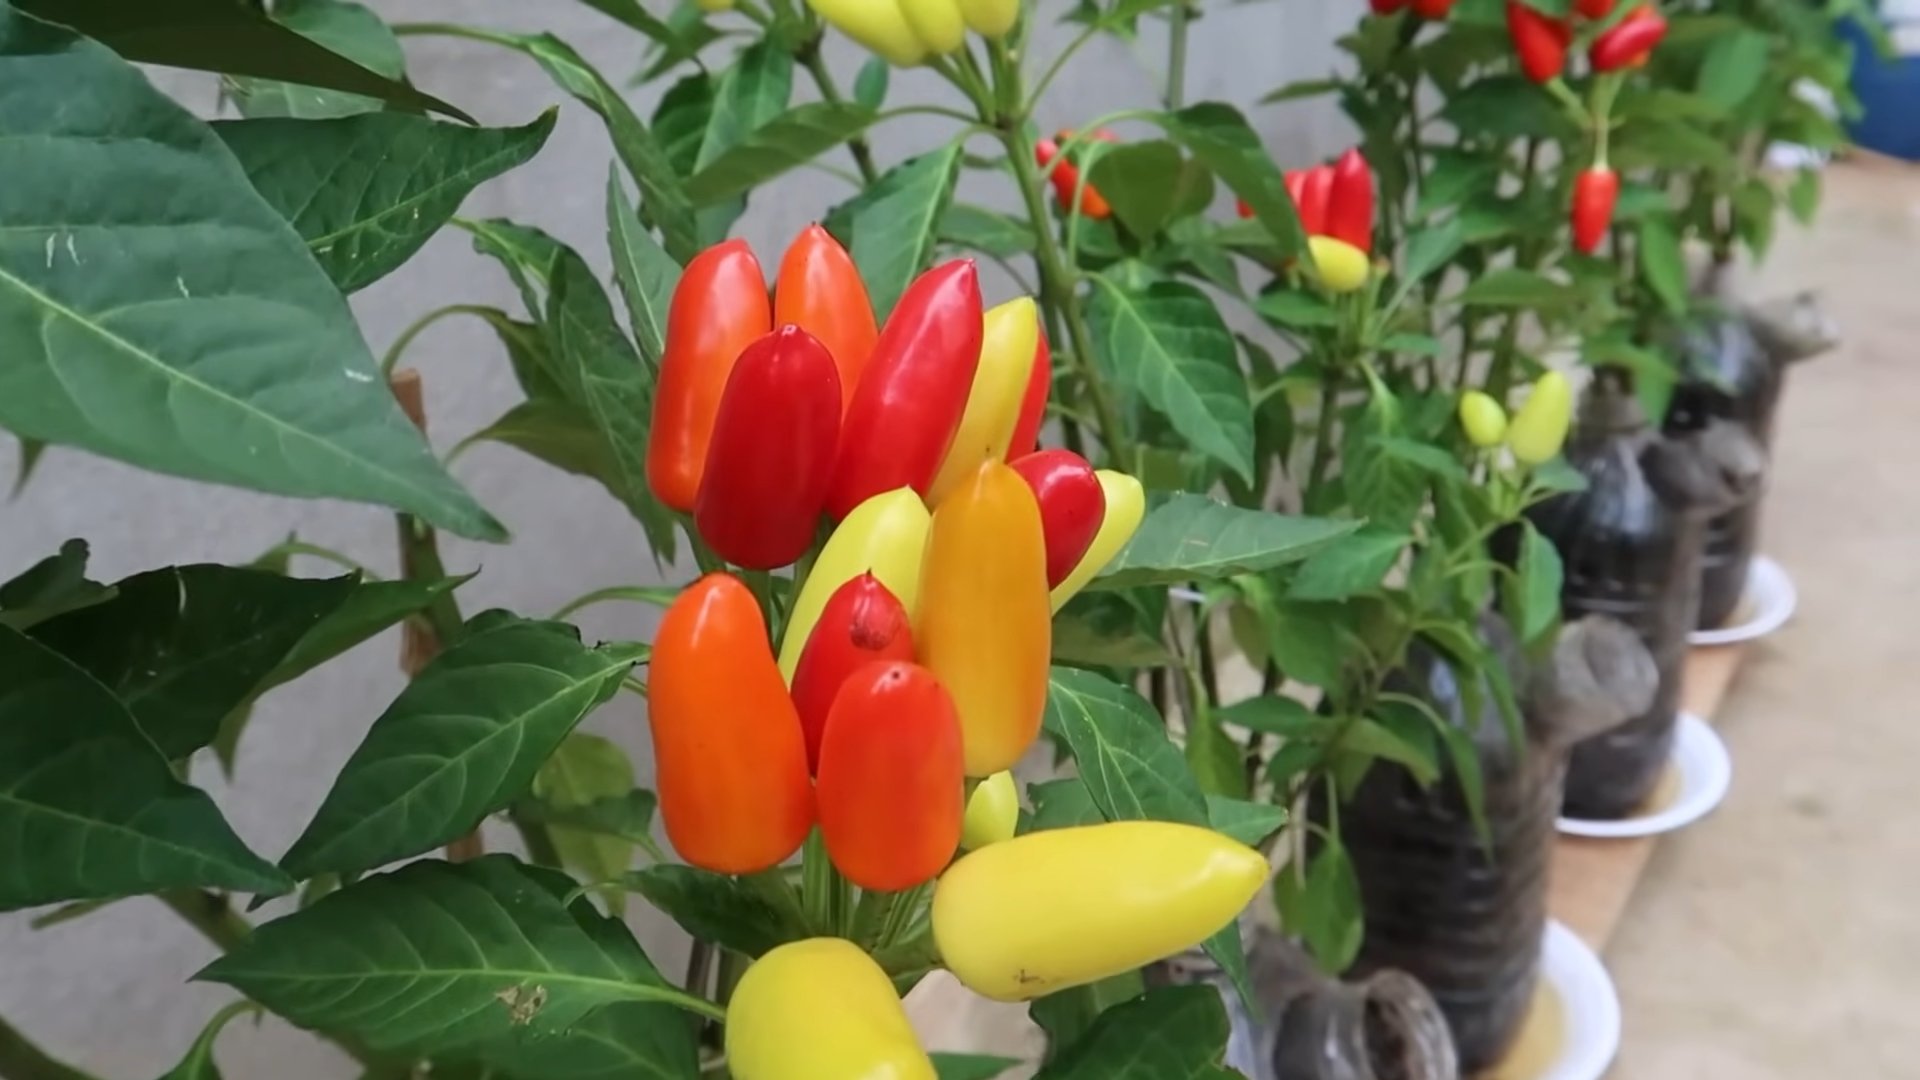
Why peppers, you ask? Well, they’re relatively easy to grow, come in a dazzling array of colors and flavors, and are packed with nutrients. Plus, they add a delightful pop of color to any space. This DIY trick is perfect for beginners, seasoned gardeners looking for a fun project, or anyone who wants to experience the joy of growing their own food, one bottle at a time. Let’s get started and transform those empty bottles into a thriving pepper paradise!
DIY Bottle Gardening: Grow Peppers Like a Pro!
Hey there, fellow gardening enthusiasts! I’m super excited to share one of my favorite DIY gardening hacks with you: growing peppers in plastic bottles! It’s a fantastic way to recycle, save space, and enjoy fresh, homegrown peppers, even if you don’t have a huge garden. Trust me, it’s easier than you think, and the results are incredibly rewarding. Let’s dive in!
Why Bottle Gardening for Peppers?
Before we get started, let’s talk about why this method is so awesome:
* Space-Saving: Perfect for balconies, patios, or small gardens. You can hang them, stack them, or simply place them on a sunny windowsill.
* Recycling: Give those plastic bottles a new life instead of tossing them in the trash.
* Cost-Effective: Minimal investment required. You probably already have most of the materials you need.
* Easy to Monitor: You can easily keep an eye on the soil moisture and plant health.
* Fun and Educational: A great project for kids and adults alike!
Materials You’ll Need
Alright, let’s gather our supplies. Here’s what you’ll need to get started:
* Plastic Bottles: 2-liter soda bottles or similar sizes work best. Make sure they’re clean and clear.
* Pepper Seeds or Seedlings: Choose your favorite pepper variety! Bell peppers, jalapenos, chili peppers – the choice is yours.
* Potting Soil: Use a good quality potting mix that drains well.
* Scissors or a Utility Knife: For cutting the bottles. Be careful!
* Drill or Nail: To create drainage holes.
* Water: For watering your pepper plants.
* Optional: Twine or rope for hanging the bottles, fertilizer for extra nutrients.
Step-by-Step Guide: Creating Your Bottle Garden
Okay, let’s get our hands dirty! Here’s how to transform those plastic bottles into mini pepper gardens:
Section 1: Preparing the Bottles
1. Clean the Bottles: Thoroughly wash the plastic bottles with soap and water to remove any residue. Rinse them well and let them dry completely. This is important to prevent any contamination that could harm your plants.
2. Cut the Bottles: This is where the scissors or utility knife comes in. You have a couple of options here:
* Option 1: Single Bottle Planter: Cut the bottle in half horizontally. You’ll use the bottom half as the planter and the top half (inverted) as a sort of self-watering system (more on that later).
* Option 2: Hanging Planter: Cut a large rectangular opening on one side of the bottle, leaving the top and bottom intact. This will be the opening for your pepper plant.
Important Safety Tip: Be extremely careful when using sharp objects. Always cut away from yourself and use a stable surface.
3. Create Drainage Holes: This is crucial for preventing waterlogging, which can kill your pepper plants. Use a drill or a nail to create several small drainage holes in the bottom of the bottle. Aim for at least 4-5 holes.
4. (Optional) Prepare for Hanging: If you’re making a hanging planter, drill two holes near the top of the bottle, on opposite sides. These will be for the twine or rope you’ll use to hang the planter.
Section 2: Planting Your Peppers
1. (If using Option 1) Assemble the Self-Watering System: If you cut the bottle in half, invert the top half and place it inside the bottom half. The neck of the bottle should be pointing downwards, but not touching the bottom of the lower half. This creates a reservoir for water.
2. Add Potting Soil: Fill the bottle (or the top half of the bottle if you’re using the self-watering system) with potting soil. Leave about an inch of space at the top.
3. Plant Your Pepper Seeds or Seedlings:
* Seeds: Make a small indentation in the soil (about 1/4 inch deep). Place 2-3 pepper seeds in the indentation and gently cover them with soil. Water lightly.
* Seedlings: Carefully remove the seedling from its container. Gently loosen the roots and place the seedling in the center of the bottle. Fill in around the seedling with potting soil, making sure the top of the root ball is level with the soil surface. Water thoroughly.
4. Water Thoroughly: After planting, water the soil until it’s evenly moist. Be careful not to overwater, especially if you’re using the self-watering system.
Section 3: Caring for Your Pepper Plants
1. Sunlight: Pepper plants need at least 6-8 hours of sunlight per day. Place your bottle garden in a sunny location, such as a windowsill, balcony, or patio. If you don’t have enough natural light, you can supplement with a grow light.
2. Watering: Water your pepper plants regularly, but don’t overwater. The soil should be moist, but not soggy. Check the soil moisture by sticking your finger into the soil. If the top inch of soil is dry, it’s time to water. If you’re using the self-watering system, refill the reservoir when it’s empty.
3. Fertilizing: Pepper plants are heavy feeders, so they need regular fertilization. Use a balanced fertilizer (e.g., 10-10-10) every 2-3 weeks. Follow the instructions on the fertilizer package. You can also use organic fertilizers, such as compost tea or fish emulsion.
4. Support: As your pepper plants grow, they may need support to prevent them from falling over. You can use small stakes or trellises to support the stems.
5. Pest Control: Keep an eye out for pests, such as aphids, spider mites, and whiteflies. If you see any pests, you can try spraying them with insecticidal soap or neem oil. You can also hand-pick the pests off the plants.
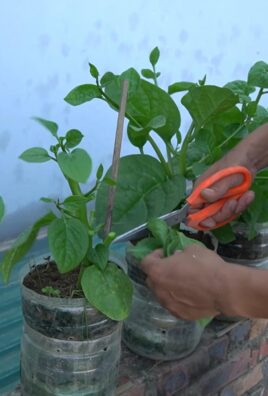
6. Pruning: Pruning can help to improve air circulation and encourage fruit production. Remove any yellow or brown leaves. You can also pinch off the tips of the branches to encourage bushier growth.
Troubleshooting Tips
* Yellowing Leaves: Could be a sign of overwatering, underwatering, or nutrient deficiency. Check the soil moisture and adjust your watering schedule accordingly. Fertilize your plants if necessary.
* Drooping Leaves: Could be a sign of underwatering or heat stress. Water your plants thoroughly and move them to a cooler location if necessary.
* No Flowers or Fruit: Could be a sign of insufficient sunlight or nutrient deficiency. Make sure your plants are getting enough sunlight and fertilize them regularly.
* Pests: Regularly inspect your plants for pests and take action immediately if you see any.
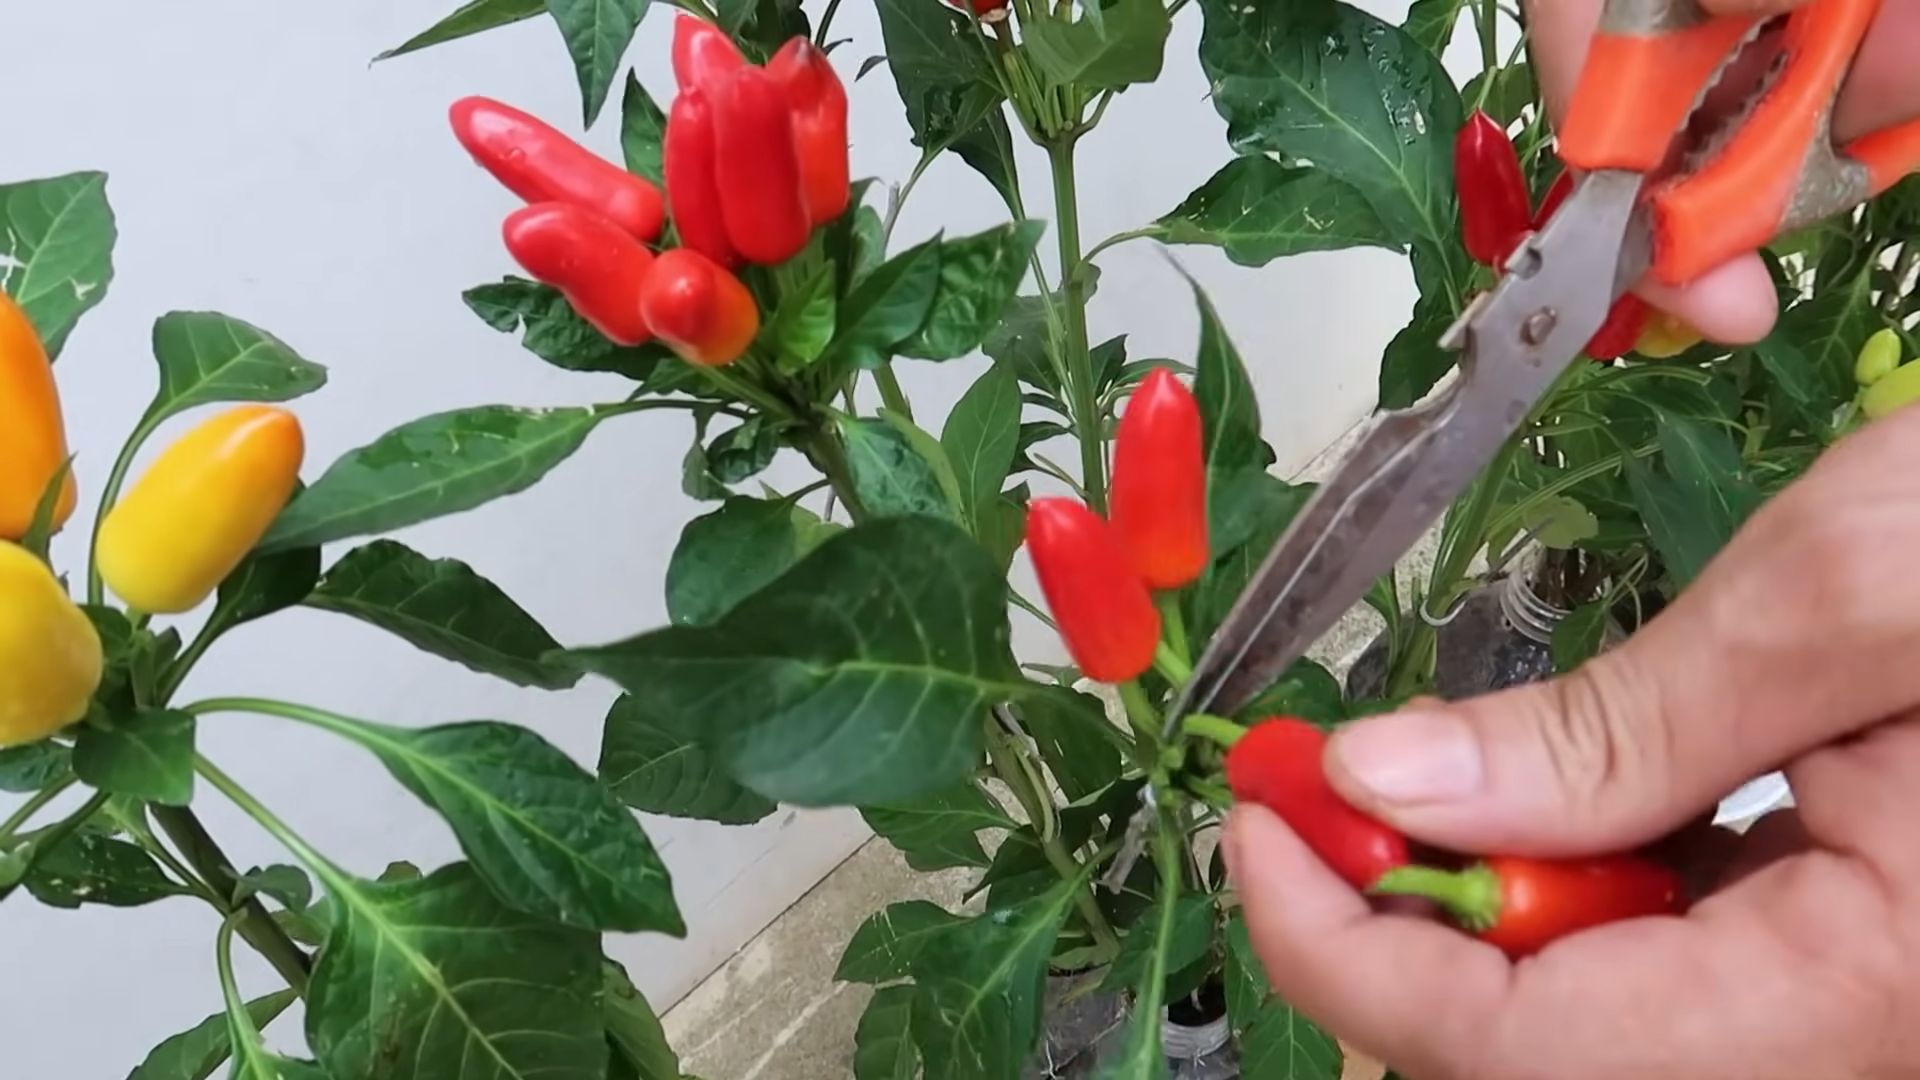
Harvesting Your Peppers
The best part! You’ll know your peppers are ready to harvest when they’ve reached their mature size and color. Gently twist the pepper off the plant, being careful not to damage the stem. Enjoy your fresh, homegrown peppers in your favorite recipes!
Extra Tips for Success
* Choose the Right Pepper Variety: Some pepper varieties are better suited for container gardening than others. Look for compact or dwarf varieties.
* Use Good Quality Potting Soil: Don’t skimp on the potting soil. Use a good quality potting mix that drains well.
* Don’t Overcrowd: Don’t plant too many pepper plants in one bottle. One plant per bottle is usually sufficient.
* Rotate Your Plants: Rotate your plants regularly to ensure they get even sunlight exposure.
* Have Fun! Gardening should be enjoyable. Don’t be afraid to experiment and try new things.
Growing peppers in plastic bottles is a fun, rewarding, and eco-friendly way to enjoy fresh, homegrown peppers. With a little bit of effort, you can transform those empty plastic bottles into thriving mini gardens. So, grab your bottles, seeds, and potting soil, and let’s get gardening! Happy growing!
Conclusion
So, there you have it! Transforming a simple plastic bottle into a thriving pepper garden is not just a fun project; it’s a sustainable, space-saving, and incredibly rewarding way to grow your own fresh produce. We’ve walked you through the process, highlighting the ease and accessibility of this DIY trick. But why is this method a must-try?
Firstly, it’s incredibly eco-friendly. Reusing plastic bottles reduces waste and gives these materials a new lease on life. Secondly, it’s perfect for those with limited space. Whether you have a small balcony, a patio, or even just a sunny windowsill, bottle gardening allows you to cultivate your own peppers without needing a large garden plot. Thirdly, it’s a fantastic learning experience, especially for children. It teaches them about plant life cycles, responsibility, and the joy of growing their own food.
But the beauty of this DIY project lies in its adaptability. Feel free to experiment with different types of peppers. From sweet bell peppers to fiery habaneros, the choice is yours! You can also explore different soil mixes to find what works best for your climate and pepper variety. Consider adding organic fertilizers or compost to boost growth and yield.
For a visually appealing touch, paint the bottles with vibrant colors or decorate them with creative designs. This not only adds personality to your mini-garden but also helps protect the roots from direct sunlight. You can also create a vertical garden by hanging the bottles from a fence or railing, maximizing space and creating a stunning display.
Don’t be afraid to get creative with your watering system. While we’ve outlined a simple method, you can explore self-watering options by adding a wick system or using a larger reservoir. This is especially helpful if you travel frequently or tend to forget to water your plants regularly.
The key to successful bottle gardening peppers is consistent care and attention. Regularly check the soil moisture, provide adequate sunlight, and protect your plants from pests and diseases. With a little effort, you’ll be rewarded with a bountiful harvest of delicious, homegrown peppers.
We wholeheartedly encourage you to try this DIY trick and experience the satisfaction of growing your own peppers in recycled bottles. It’s a simple, sustainable, and incredibly rewarding project that anyone can undertake.
Once you’ve given it a try, we’d love to hear about your experience! Share your photos, tips, and challenges in the comments section below. Let’s create a community of bottle gardeners and inspire others to embrace this eco-friendly and rewarding way to grow their own food. Your insights and experiences can help others succeed and further refine this fantastic DIY method. Happy gardening!
Frequently Asked Questions (FAQ)
What type of plastic bottle is best for bottle gardening peppers?
Ideally, you should use PET (Polyethylene Terephthalate) plastic bottles, which are commonly used for water and soda. These bottles are generally considered safe for growing plants as they are relatively inert and don’t leach harmful chemicals into the soil. Avoid using bottles made from PVC (Polyvinyl Chloride) or other plastics that may contain BPA or other potentially harmful substances. Ensure the bottles are clean and free of any residue before using them. A good size is a 2-liter bottle, as it provides enough space for the pepper plant’s root system to develop.
How often should I water my pepper plants in bottle gardens?
The frequency of watering depends on several factors, including the climate, the type of soil you’re using, and the size of the bottle. As a general rule, check the soil moisture daily by sticking your finger about an inch into the soil. If the soil feels dry to the touch, it’s time to water. Water thoroughly until excess water drains out of the drainage holes. Avoid overwatering, as this can lead to root rot. During hot and dry weather, you may need to water more frequently, possibly even twice a day. In cooler or more humid conditions, you can water less often.
What kind of soil should I use for growing peppers in bottles?
A well-draining potting mix is essential for growing healthy peppers in bottles. Avoid using garden soil, as it tends to be too heavy and compact, which can hinder root growth and drainage. A good potting mix should contain a blend of peat moss, perlite, and vermiculite. You can also add compost or other organic matter to improve soil fertility and drainage. Consider using a potting mix specifically formulated for vegetables, as these mixes often contain added nutrients that are beneficial for pepper plants.
How much sunlight do pepper plants need in bottle gardens?
Pepper plants thrive in full sunlight, meaning they need at least 6-8 hours of direct sunlight per day. Place your bottle gardens in a sunny location, such as a south-facing balcony or windowsill. If you don’t have access to enough natural sunlight, you can supplement with artificial grow lights. LED grow lights are a good option as they are energy-efficient and provide the full spectrum of light that pepper plants need to grow. Rotate the bottles regularly to ensure that all sides of the plants receive adequate sunlight.
How do I fertilize my pepper plants in bottle gardens?
Pepper plants are heavy feeders and require regular fertilization to produce a bountiful harvest. Start fertilizing your plants a few weeks after transplanting them into the bottles. Use a balanced fertilizer with an NPK ratio of 10-10-10 or 14-14-14. You can also use a fertilizer specifically formulated for vegetables. Follow the instructions on the fertilizer package for application rates. Fertilize every 2-3 weeks during the growing season. You can also supplement with organic fertilizers, such as compost tea or fish emulsion. Avoid over-fertilizing, as this can burn the roots and damage the plants.
How do I protect my pepper plants from pests and diseases in bottle gardens?
Regularly inspect your pepper plants for signs of pests and diseases. Common pests that affect pepper plants include aphids, spider mites, and whiteflies. You can control these pests by spraying the plants with insecticidal soap or neem oil. Diseases that can affect pepper plants include powdery mildew, blossom end rot, and fungal infections. Prevent these diseases by providing good air circulation, avoiding overwatering, and using a fungicide if necessary. You can also use companion planting to deter pests and diseases. For example, planting basil near your pepper plants can help repel aphids and other pests.
Can I grow different varieties of peppers in bottle gardens?
Yes, you can grow different varieties of peppers in bottle gardens. However, it’s important to choose varieties that are well-suited for container gardening. Smaller pepper varieties, such as chili peppers and bell peppers, tend to do well in bottles. Larger pepper varieties may require larger bottles or more frequent watering and fertilization. When growing multiple varieties of peppers, be sure to label each bottle clearly to avoid confusion.
How do I transplant my pepper seedlings into bottle gardens?
Once your pepper seedlings have developed a few sets of true leaves, they are ready to be transplanted into the bottle gardens. Carefully remove the seedlings from their starter containers, being careful not to damage the roots. Gently loosen the roots and place the seedlings in the prepared bottles. Fill the bottles with potting mix, leaving about an inch of space at the top. Water thoroughly after transplanting. Provide the seedlings with plenty of sunlight and warmth.
What do I do if my pepper plants outgrow the bottles?
If your pepper plants outgrow the bottles, you can either transplant them into larger containers or prune them to control their size. If you choose to transplant them, select a container that is at least twice the size of the bottle. Gently remove the plant from the bottle and transplant it into the larger container. If you choose to prune the plants, use sharp, clean pruning shears to trim back the stems and leaves. Pruning can help to encourage bushier growth and more fruit production.
How long does it take for pepper plants to produce fruit in bottle gardens?
The time it takes for pepper plants to produce fruit depends on the variety of pepper, the growing conditions, and the care you provide. Generally, pepper plants start producing fruit within 60-90 days after transplanting. Provide your plants with plenty of sunlight, water, and fertilizer to encourage fruit production. Harvest the peppers when they are fully ripe and have reached their desired color and size. Regular harvesting can also encourage the plants to produce more fruit.
Leave a Comment