
Bottle Grown Tomatoes Harvest: Imagine plucking juicy, sun-ripened tomatoes straight from a recycled bottle hanging on your balcony! Sounds like something out of a futuristic garden, right? Well, it’s not! It’s a surprisingly simple and rewarding DIY project that brings the joy of fresh, homegrown tomatoes to even the smallest of spaces.
For centuries, humans have cultivated tomatoes, tracing their origins back to the Andean regions of South America. From humble beginnings, they’ve become a global staple, a symbol of summer abundance and culinary delight. But what if you don’t have a sprawling backyard to dedicate to these vibrant fruits? That’s where the magic of bottle gardening comes in!
Let’s be honest, store-bought tomatoes often lack that intense, fresh-from-the-vine flavor. And with concerns about pesticides and food miles, growing your own produce is becoming increasingly appealing. This DIY bottle grown tomatoes harvest trick is perfect for apartment dwellers, urban gardeners, or anyone looking for a fun and sustainable way to enjoy delicious, homegrown tomatoes. I’m going to show you how to transform ordinary plastic bottles into mini-tomato havens, allowing you to enjoy a bountiful harvest without breaking the bank or requiring extensive gardening knowledge. Get ready to unlock the secrets to a thriving bottle garden and savor the taste of truly fresh, homegrown tomatoes!

Bottle-Grown Tomatoes: A DIY Guide to Bountiful Harvests
Hey there, fellow gardening enthusiasts! Ever dreamt of fresh, juicy tomatoes right outside your door, even if you don’t have a sprawling garden? Well, I’m here to tell you it’s totally possible, and surprisingly easy, with a little DIY magic using plastic bottles! I’ve been growing tomatoes in bottles for a few seasons now, and let me tell you, the results are amazing. It’s a fantastic way to recycle, save space, and enjoy homegrown goodness. So, grab your supplies, and let’s get started!
What You’ll Need
Before we dive in, let’s gather our supplies. This is a pretty low-cost project, which is always a win in my book!
* Large Plastic Bottles: Think 2-liter soda bottles, juice bottles, or even larger water bottles. The bigger, the better, as it gives the roots more room to grow. Make sure they are clean and clear.
* Tomato Seedlings: You can start your own from seeds (which I highly recommend for the full DIY experience!), or you can purchase seedlings from your local garden center. Choose determinate varieties (bush tomatoes) for best results in containers, as they stay more compact. Indeterminate varieties (vining tomatoes) can also work, but you’ll need to provide more support.
* Potting Mix: Don’t skimp on the potting mix! Use a high-quality, well-draining mix specifically formulated for containers. Avoid using garden soil, as it can compact and not drain properly.
* Drill or Utility Knife: For creating drainage holes and a watering reservoir.
* Gravel or Small Rocks: For drainage at the bottom of the bottle.
* Scissors: For trimming and cutting the bottle.
* Water: Of course!
* Optional:
* Fertilizer: A slow-release fertilizer or liquid tomato feed.
* Twine or Stakes: For supporting the tomato plants as they grow, especially if you’re using indeterminate varieties.
* Gloves: To keep your hands clean.
Preparing the Bottles
This is a crucial step, as it sets the stage for healthy tomato growth. We need to create a suitable environment for the roots to thrive.
1. Clean the Bottles: Thoroughly wash the plastic bottles with soap and water to remove any residue. Rinse them well and let them dry completely. This prevents any unwanted chemicals from leaching into the soil.
2. Cut the Bottle: This is where the scissors or utility knife comes in. There are two main ways to cut the bottle, and I’ll explain both:
* Method 1: Upside-Down Planter: Cut the bottle in half horizontally. Remove the cap. Invert the top half of the bottle and nest it inside the bottom half. This creates a self-watering system. The neck of the bottle should be close to the bottom of the lower half, but not touching.
* Method 2: Standard Planter: Cut off the top third of the bottle. You won’t be inverting anything. This is a simpler method, but you’ll need to water more frequently.
3. Drill Drainage Holes: Regardless of which method you choose, drainage is essential. Drill several drainage holes in the bottom of the bottle (or the bottom half of the bottle if you’re using the upside-down method). I usually make about 5-6 holes, each about ¼ inch in diameter.
4. Create a Watering Reservoir (Upside-Down Method Only): If you’re using the upside-down method, drill a few small holes (about 1/8 inch in diameter) in the neck of the bottle. These holes will allow water to wick up into the soil.
Planting the Tomato Seedlings
Now for the fun part – planting our little tomato babies!
1. Add Drainage Material: Place a layer of gravel or small rocks at the bottom of the bottle (or the bottom half if using the upside-down method). This helps with drainage and prevents the roots from sitting in water. I usually add about an inch or two of gravel.
2. Add Potting Mix: Fill the bottle with potting mix, leaving about an inch or two of space at the top. If you’re using the upside-down method, fill both the top and bottom halves with potting mix.
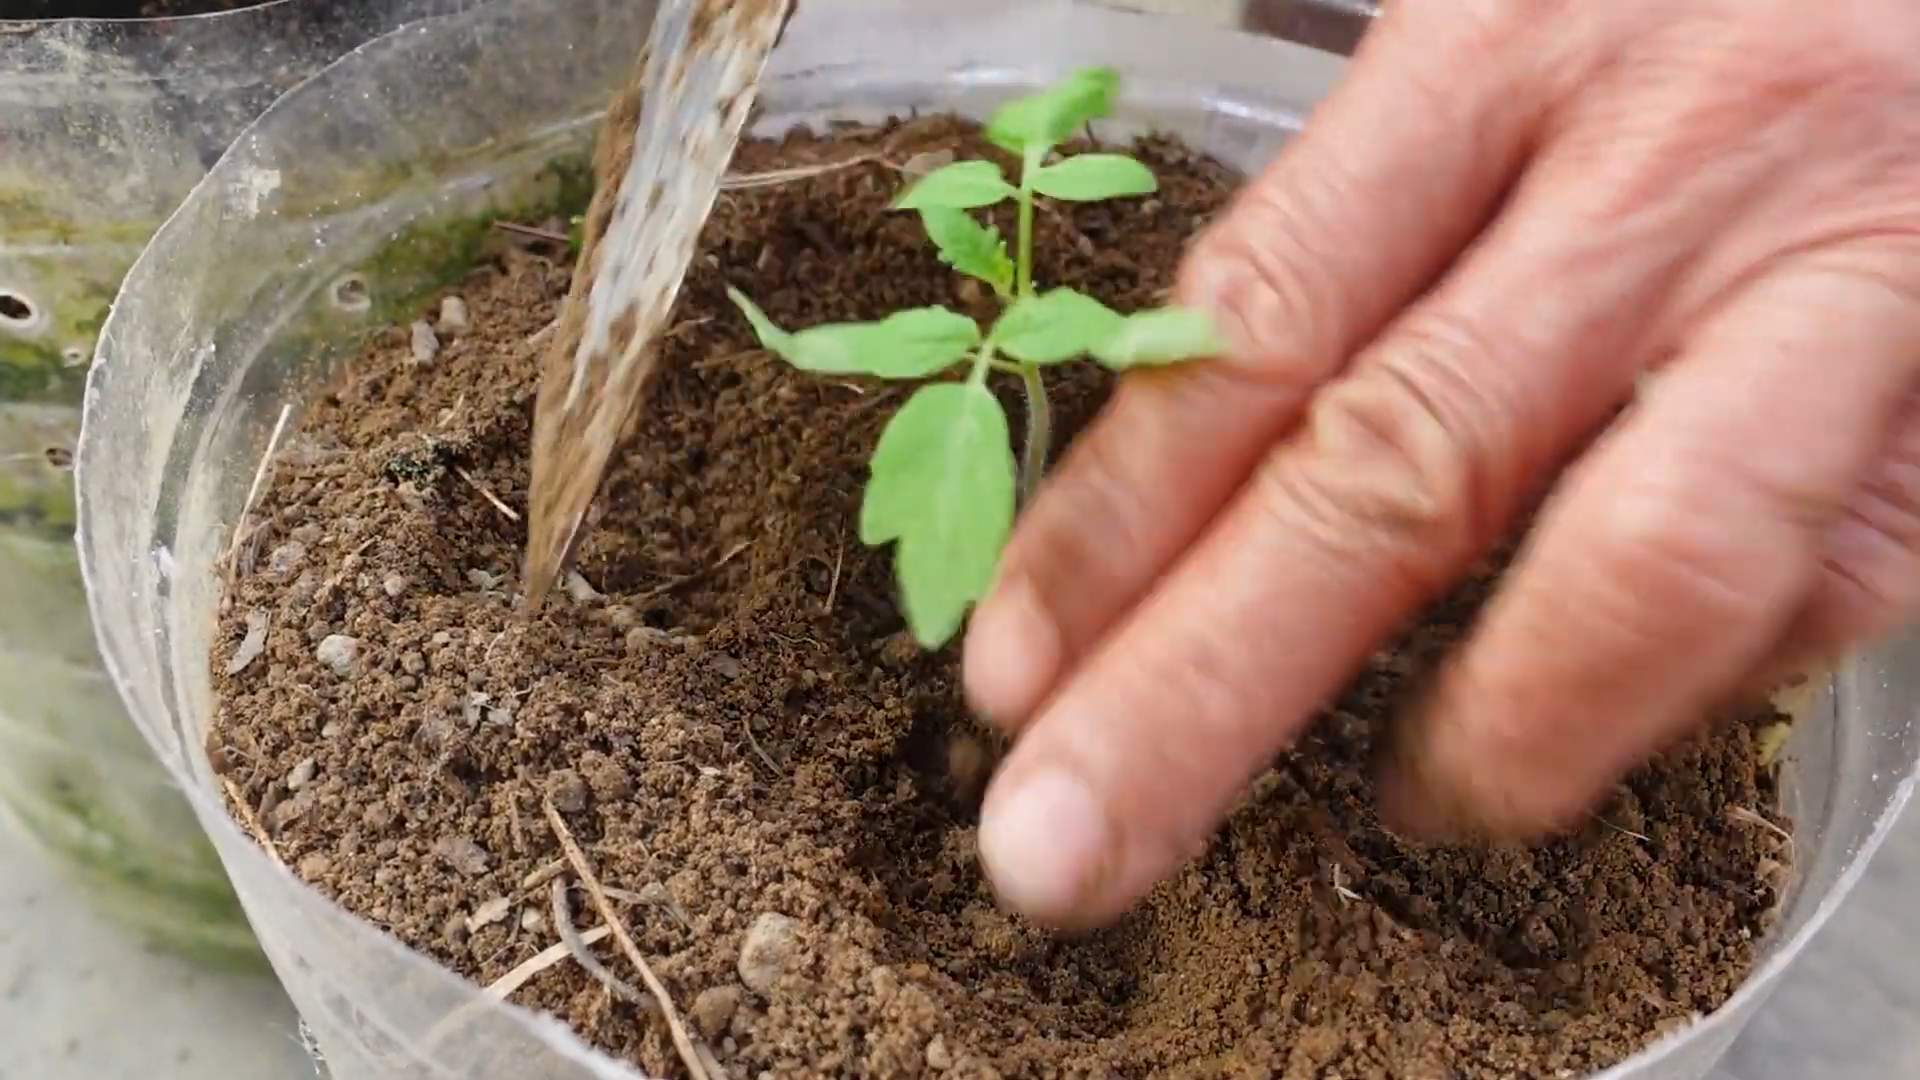
3. Plant the Seedling: Gently remove the tomato seedling from its container. Loosen the roots slightly. Dig a small hole in the potting mix and carefully place the seedling in the hole. The top of the root ball should be level with the surface of the potting mix.
4. Backfill and Water: Gently backfill the hole with potting mix, pressing lightly to secure the seedling. Water thoroughly until water drains out of the drainage holes.
Caring for Your Bottle-Grown Tomatoes
Now that your tomatoes are planted, it’s time to provide them with the care they need to thrive.
1. Sunlight: Tomatoes need at least 6-8 hours of sunlight per day. Place your bottle-grown tomatoes in a sunny location, such as a patio, balcony, or windowsill. If you don’t have enough natural sunlight, you can supplement with grow lights.
2. Watering: Water regularly, especially during hot weather. Check the soil moisture by sticking your finger into the soil. If the top inch of soil feels dry, it’s time to water. With the upside-down method, you’ll fill the bottom reservoir with water, and the soil will wick up the moisture as needed. With the standard planter method, you’ll need to water from the top. Avoid overwatering, as this can lead to root rot.
3. Fertilizing: Tomatoes are heavy feeders, so they need regular fertilization. You can use a slow-release fertilizer at planting time, or you can feed them with a liquid tomato feed every 2-3 weeks. Follow the instructions on the fertilizer label.
4. Support: As your tomato plants grow, they may need support. You can use twine or stakes to support the stems and prevent them from breaking. This is especially important for indeterminate varieties, which can grow quite tall.
5. Pruning: Pruning can help improve air circulation and encourage fruit production. Remove any suckers (small shoots that grow between the main stem and the branches). You can also remove any yellowing or dead leaves.
6. Pest and Disease Control: Keep an eye out for pests and diseases. Common tomato pests include aphids, whiteflies, and tomato hornworms. Common diseases include early blight, late blight, and blossom end rot. Treat any problems promptly with appropriate organic or chemical controls.
Harvesting Your Tomatoes
The moment we’ve all been waiting for – harvesting those delicious, homegrown tomatoes!
1. Ripeness: Tomatoes are ready to harvest when they are fully colored and slightly soft to the touch. The color will depend on the variety of tomato you’re growing.
2. Harvesting Technique: Gently twist or cut the tomato from the vine, leaving a small piece of stem attached.
3. Enjoy! Enjoy your fresh, homegrown tomatoes in salads, sandwiches, sauces, or just eat them straight off the vine!
Troubleshooting
Even with the best care, you might encounter a few challenges along the way. Here are some common problems and how to address them:
* Yellowing Leaves: This could be a sign of overwatering, underwatering, nutrient deficiency, or disease. Check the soil moisture and adjust your watering accordingly. Fertilize regularly. Inspect the leaves for signs of disease.
* Blossom End Rot: This is caused by a calcium deficiency. Make sure your potting mix contains enough calcium, and water regularly to prevent the soil from drying out. You can also add calcium to the soil by mixing in crushed eggshells or bone meal.
* Pests: Inspect your plants regularly for pests. Treat any infestations promptly with appropriate organic or chemical controls.
* Lack of Fruit: This could be due to a lack of pollination, insufficient sunlight, or nutrient deficiency. Hand-pollinate the flowers by gently shaking the plants. Make sure your plants are getting enough sunlight. Fertilize regularly.
Tips for Success
Here are a few extra tips to help you achieve a bountiful harvest:
* Choose the Right Variety: As I mentioned earlier, determinate varieties are generally better suited for container gardening.
* Use High-Quality Potting Mix: Don’t skimp on the potting mix! It’s the foundation for healthy tomato growth.
* Water Consistently: Consistent watering is key to preventing blossom end rot and other problems.
* Fertilize Regularly: Tomatoes are heavy feeders, so they need regular fertilization.
* Provide Support: Support the plants as they grow to prevent the stems from breaking.
* Monitor for Pests and Diseases: Catch problems early and treat them promptly.
* Don
Conclusion
So, there you have it! Transforming ordinary plastic bottles into thriving tomato havens is not just a quirky gardening experiment; it’s a game-changer for anyone looking to maximize their yield, minimize their space, and embrace a more sustainable approach to growing. This method of bottle grown tomatoes harvest offers a unique blend of convenience, resourcefulness, and environmental consciousness that’s hard to beat.
Why is this a must-try? Because it democratizes gardening. You don’t need acres of land or a green thumb passed down through generations. All you need are some empty plastic bottles, a sunny spot, and a little bit of patience. It’s perfect for apartment dwellers with balconies, urban gardeners with limited space, or anyone who simply wants to add a touch of homegrown goodness to their meals.
Beyond the space-saving benefits, bottle gardening offers superior control over your growing environment. You can easily move your tomato plants to chase the sun, protect them from unexpected frosts, or shield them from heavy rains. The enclosed environment also helps to retain moisture, reducing the need for frequent watering. Plus, the plastic bottles act as mini-greenhouses, warming the soil and promoting faster growth, especially in cooler climates.
But the real magic lies in the harvest. Imagine plucking ripe, juicy tomatoes from your own bottle garden, knowing that you nurtured them from seed to table. The taste of homegrown tomatoes is simply unparalleled, bursting with flavor and sunshine. And the satisfaction of knowing that you’ve reduced waste and grown your own food is an added bonus.
Ready to take your bottle gardening to the next level? Consider these variations:
* Vertical Gardens: Stack your bottle gardens vertically to create a stunning green wall. This is a fantastic way to maximize space and add a touch of visual appeal to your balcony or patio.
* Herb Gardens: Don’t limit yourself to tomatoes! Use the same bottle gardening technique to grow herbs like basil, oregano, and thyme.
* Different Tomato Varieties: Experiment with different tomato varieties to find your favorites. Cherry tomatoes, Roma tomatoes, and even larger beefsteak tomatoes can thrive in bottle gardens.
* Companion Planting: Plant basil or marigolds alongside your tomatoes to deter pests and attract beneficial insects.
We’re confident that once you try this DIY trick, you’ll be hooked. It’s a rewarding, sustainable, and delicious way to grow your own food. So, gather your empty plastic bottles, grab some tomato seeds, and get ready to embark on a bottle gardening adventure.
Don’t forget to share your experiences with us! We’d love to see your bottle gardens in action and hear about your successes (and challenges). Post photos and stories on social media using #BottleGrownTomatoesHarvest. Let’s inspire others to embrace this innovative and eco-friendly gardening technique. Happy growing!
Frequently Asked Questions (FAQ)
Q: What kind of plastic bottles are best for growing tomatoes?
A: Ideally, you should use PET (polyethylene terephthalate) plastic bottles, which are commonly used for water and soda. These bottles are durable, lightweight, and recyclable. Avoid using bottles that have contained harsh chemicals or cleaning products. Thoroughly wash and rinse the bottles before using them for planting. The size of the bottle depends on the tomato variety. Larger varieties will need larger bottles. A 2-liter bottle is a good starting point for most tomato plants.
Q: How do I prepare the plastic bottles for planting?
A: First, thoroughly clean the bottles with soap and water to remove any residue. Then, cut off the top portion of the bottle, leaving enough space for the tomato plant to grow. Make drainage holes in the bottom of the bottle to prevent waterlogging. You can use a drill, a nail, or even a hot skewer to create the holes. Consider painting the outside of the bottle white or covering it with reflective material to help reflect sunlight and prevent the soil from overheating, especially in hotter climates.
Q: What type of soil should I use for bottle grown tomatoes?
A: Use a well-draining potting mix specifically formulated for vegetables. Avoid using garden soil, as it can be too heavy and compact, hindering root growth. A good potting mix will provide the necessary nutrients and aeration for healthy tomato plants. You can also amend the potting mix with compost or other organic matter to improve its fertility and water retention.
Q: How often should I water my bottle grown tomatoes?
A: The frequency of watering will depend on the weather conditions and the size of the bottle. Generally, you should water your tomato plants when the top inch of soil feels dry to the touch. Avoid overwatering, as this can lead to root rot. Water deeply, allowing the water to drain out of the drainage holes. During hot weather, you may need to water your plants more frequently.
Q: How much sunlight do bottle grown tomatoes need?
A: Tomatoes need at least 6-8 hours of direct sunlight per day to thrive. Place your bottle gardens in a sunny location where they will receive ample sunlight. If you don’t have a sunny spot, you can supplement with grow lights. Rotate the bottles regularly to ensure that all sides of the plant receive equal sunlight.
Q: Do I need to fertilize my bottle grown tomatoes?
A: Yes, tomatoes are heavy feeders and will benefit from regular fertilization. Use a balanced fertilizer specifically formulated for tomatoes, following the instructions on the package. You can also use organic fertilizers like compost tea or fish emulsion. Fertilize your plants every 2-3 weeks during the growing season.
Q: How do I support my tomato plants as they grow?
A: As your tomato plants grow, they will need support to prevent them from toppling over. You can use stakes, trellises, or cages to support the plants. Insert the support structure into the bottle before planting the tomato seedling. Tie the plant to the support structure as it grows, using soft twine or plant ties.
Q: How do I protect my bottle grown tomatoes from pests and diseases?
A: Regularly inspect your tomato plants for signs of pests or diseases. Common tomato pests include aphids, whiteflies, and tomato hornworms. You can control these pests with insecticidal soap, neem oil, or by handpicking them off the plants. Common tomato diseases include blight and powdery mildew. Prevent these diseases by providing good air circulation, avoiding overhead watering, and using disease-resistant tomato varieties.
Q: When can I harvest my bottle grown tomatoes?
A: Tomatoes are typically ready to harvest when they are fully colored and slightly soft to the touch. Gently twist the tomato off the vine, being careful not to damage the plant. The time from planting to harvest will vary depending on the tomato variety and the growing conditions.
Q: Can I reuse the plastic bottles for future plantings?
A: Yes, you can reuse the plastic bottles for future plantings. However, it’s important to thoroughly clean and disinfect the bottles before reusing them to prevent the spread of diseases. Wash the bottles with soap and water, and then soak them in a solution of 1 part bleach to 9 parts water for 30 minutes. Rinse the bottles thoroughly before using them again.
Leave a Comment