
Calendula Planter Growing Guide: Unlock the secrets to vibrant blooms and a thriving garden with this ultimate DIY guide! Have you ever dreamed of a garden bursting with color and natural remedies, all nurtured by your own hands? Well, you’re in the right place! For centuries, Calendula, also known as pot marigold, has been cherished for its medicinal properties and cheerful disposition. From ancient Egyptians using it for skin healing to medieval cooks adding its petals to dishes, Calendula boasts a rich history of practical and aesthetic value.
But why should you embark on this Calendula journey? In today’s fast-paced world, reconnecting with nature is more important than ever. Growing your own Calendula offers a therapeutic escape, a chance to cultivate beauty, and a source of natural remedies right at your doorstep. Plus, with our easy-to-follow Calendula Planter Growing Guide, even beginners can achieve stunning results. I’m going to show you how to create the perfect environment for your Calendula to flourish, from choosing the right planter to mastering the art of watering and pest control. Get ready to transform your space into a haven of sunshine and healing!

DIY Calendula Planter: A Beginner’s Guide to Sunshine Blooms
Hey there, fellow gardening enthusiasts! I’m so excited to share my tried-and-true method for creating a vibrant and thriving calendula planter. Calendula, also known as pot marigold, is not only beautiful with its cheerful orange and yellow flowers, but it’s also incredibly useful in the garden and even in homemade remedies. Plus, it’s super easy to grow, making it perfect for beginners. Let’s get our hands dirty!
What You’ll Need: The Essential Supplies
Before we dive in, let’s gather all the necessary supplies. Having everything ready will make the process smooth and enjoyable.
* **A Container:** Choose a pot or container that’s at least 12 inches in diameter and 12 inches deep. This gives the calendula roots plenty of room to grow. Make sure it has drainage holes! Trust me, drainage is key to preventing root rot.
* **Potting Mix:** Use a high-quality potting mix, not garden soil. Potting mix is lighter and provides better drainage and aeration, which calendula loves.
* **Calendula Seeds or Seedlings:** You can start from seeds or buy seedlings from a local nursery. Starting from seeds is more economical, but seedlings give you a head start. I personally love starting from seeds; it’s so rewarding to watch them sprout!
* **Watering Can or Hose:** For watering your calendula plants. A gentle watering can is ideal, especially for seedlings.
* **Trowel or Small Shovel:** For transferring soil and seedlings.
* **Optional: Slow-Release Fertilizer:** This will provide a steady supply of nutrients to your plants.
* **Optional: Mulch:** Mulch helps retain moisture, suppress weeds, and regulate soil temperature. I like using straw or wood chips.
* **Gardening Gloves:** To keep your hands clean and protected.
Step-by-Step Planting Guide: From Seed to Bloom
Now that we have our supplies, let’s get planting! I’ll walk you through each step, making sure you have all the information you need for success.
1. **Prepare the Container:**
* First, make sure your container is clean.
* If you’re using a new pot, great! If it’s a used pot, give it a good scrub with soap and water to remove any lingering dirt or pathogens.
* Place a layer of gravel or broken pottery shards at the bottom of the container to improve drainage. This is especially important if your pot has limited drainage holes.
2. **Fill with Potting Mix:**
* Fill the container with potting mix, leaving about an inch or two of space at the top.
* Gently pat down the soil to remove any air pockets.
* Don’t compact it too much, though; you want the roots to be able to breathe.
3. **Planting Seeds (if starting from seed):**
* Moisten the soil slightly before planting.
* Sprinkle the calendula seeds evenly over the surface of the soil.
* Cover the seeds with a thin layer of potting mix (about ¼ inch).
* Gently water the soil using a watering can with a fine rose attachment to avoid disturbing the seeds.
* Keep the soil consistently moist but not soggy.
* Germination usually takes about 7-14 days.
4. **Planting Seedlings (if using seedlings):**
* Gently remove the calendula seedlings from their nursery containers.
* Loosen the roots slightly with your fingers.
* Dig small holes in the potting mix, spacing the seedlings about 8-12 inches apart.
* Place the seedlings in the holes, making sure the top of the root ball is level with the soil surface.
* Fill in the holes with potting mix and gently pat down the soil around the seedlings.
* Water thoroughly after planting.
5. **Watering:**
* Water your calendula plants regularly, especially during dry periods.
* Check the soil moisture by sticking your finger into the soil. If the top inch feels dry, it’s time to water.
* Avoid overwatering, as this can lead to root rot.
* Water deeply, allowing the water to drain out of the bottom of the container.
6. **Fertilizing (Optional):**
* If you’re using a slow-release fertilizer, mix it into the potting mix before planting.
* Alternatively, you can use a liquid fertilizer every few weeks during the growing season.
* Follow the instructions on the fertilizer packaging for proper dosage.
* I personally prefer organic fertilizers, as they’re gentler on the plants and the environment.
7. **Mulching (Optional):**
* Apply a layer of mulch around the base of the calendula plants.
* This will help retain moisture, suppress weeds, and regulate soil temperature.
* Make sure the mulch doesn’t touch the stems of the plants, as this can promote rot.
8. **Sunlight:**
* Calendula thrives in full sun (6-8 hours of direct sunlight per day).
* If you live in a hot climate, provide some afternoon shade to prevent the plants from scorching.
* Place your container in a sunny location, such as a patio, balcony, or garden.
9. **Deadheading:**
* Regularly deadhead (remove) spent flowers to encourage more blooms.
* This will also prevent the plants from going to seed too quickly.
* Simply pinch or cut off the dead flowers just below the flower head.
10. **Pest and Disease Control:**
* Calendula is generally pest-resistant, but it can sometimes be affected by aphids or powdery mildew.
* Inspect your plants regularly for signs of pests or diseases.
* If you find aphids, you can spray them off with a strong stream of water or use insecticidal soap.
* For powdery mildew, improve air circulation around the plants and apply a fungicide if necessary.
Troubleshooting: Common Issues and Solutions
Even with the best care, you might encounter some challenges. Here are a few common issues and how to address them:
* **Yellowing Leaves:** This could be a sign of overwatering, underwatering, or nutrient deficiency. Check the soil moisture and adjust your watering accordingly. If the problem persists, try fertilizing with a balanced fertilizer.
* **Leggy Growth:** This usually indicates insufficient sunlight. Move your container to a sunnier location.
* **Lack of Blooms:** This could be due to insufficient sunlight, over-fertilizing with nitrogen, or not deadheading regularly. Make sure your plants are getting enough sun, use a fertilizer with a lower nitrogen content, and deadhead spent flowers.
* **Root Rot:** This is caused by overwatering and poor drainage. Make sure your container has drainage holes and avoid overwatering. If you suspect root rot, you may need to repot the plant with fresh potting mix.
Harvesting and Using Calendula: From Garden to Home
One of the best things about growing calendula is that you can harvest the flowers and use them in various ways.
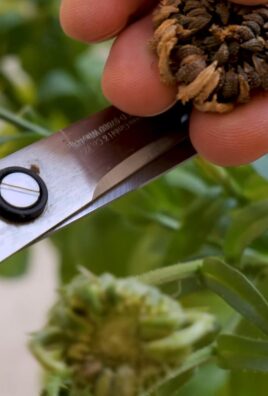
* **Harvesting:** Harvest the flowers in the morning after the dew has dried. Choose flowers that are fully open. Simply pinch or cut off the flower heads.
* **Drying:** To dry calendula flowers, spread them out on a screen or tray in a cool, dark, and well-ventilated area. Allow them to dry completely, which usually takes about 1-2 weeks. Once dried, store them in an airtight container.
* **Uses:**
* **Herbal Remedies:** Calendula has anti-inflammatory and wound-healing properties. You can use it to make salves, creams, and teas.
* **Culinary Uses:** Calendula petals are edible and can be used to add color and flavor to salads, soups, and rice dishes.
* **Natural Dye:** Calendula can be used to make a natural yellow dye for fabrics.
* **Companion Planting:** Calendula attracts beneficial insects to the garden, such as ladybugs and hoverflies, which help control pests.
Enjoying Your Calendula Planter: A Burst of Color and Benefits
Growing calendula in a container is a rewarding experience. Not only will you have a beautiful display of flowers, but you’ll also have access to a versatile herb that can be used in various ways. With a little care and attention, your calendula planter will thrive and bring you joy for months to come. Happy gardening!

Conclusion
So, there you have it! A comprehensive guide to creating your very own thriving calendula planter. We’ve walked through everything from selecting the right container and soil to nurturing your plants and harvesting their vibrant blooms. But why should you bother with this DIY project when you could just buy calendula products at the store? The answer is simple: control, freshness, and a deep connection to the natural world.
Growing your own calendula allows you to ensure that your plants are free from harmful pesticides and chemicals, resulting in a purer, more potent product for your homemade skincare remedies, teas, or culinary creations. Imagine the satisfaction of knowing exactly where your ingredients come from and the care that went into cultivating them. Plus, freshly harvested calendula blossoms boast a vibrancy and potency that store-bought dried flowers simply can’t match.
Beyond the practical benefits, creating a calendula planter is a deeply rewarding experience. It’s a chance to connect with nature, nurture life, and witness the beauty of the natural world unfold right before your eyes. The vibrant orange and yellow hues of the calendula flowers will brighten your garden, balcony, or windowsill, bringing a touch of sunshine to your everyday life.
Don’t be afraid to experiment with variations! Try companion planting your calendula with other herbs like chamomile or lavender to create a fragrant and beneficial garden. You could also explore different container options, from rustic terracotta pots to upcycled containers, to add a personal touch to your planter. Consider adding a small trellis for support if your calendula plants become particularly tall and leggy.
This DIY calendula planter guide is more than just a set of instructions; it’s an invitation to embrace a more sustainable, self-sufficient lifestyle. It’s a chance to tap into your inner gardener and discover the joy of growing your own medicine and beauty products.
We wholeheartedly encourage you to give this project a try. Whether you’re a seasoned gardener or a complete beginner, we believe that you can successfully create a thriving calendula planter. And once you do, we’d love to hear about your experience! Share your photos, tips, and stories with us in the comments below. Let’s create a community of calendula enthusiasts and inspire others to embrace the magic of homegrown herbs. So, grab your seeds, soil, and a container, and get ready to embark on a rewarding gardening adventure. Happy planting!
Frequently Asked Questions (FAQ)
What is the best time of year to plant calendula?
Calendula can be planted in early spring or late summer/early fall. For a spring planting, start seeds indoors 6-8 weeks before the last expected frost. You can transplant them outdoors once the danger of frost has passed. For a fall planting, sow seeds directly into the garden in late summer or early fall, allowing them to establish before the winter months. In warmer climates, calendula can be grown year-round.
What kind of soil is best for calendula?
Calendula prefers well-draining soil that is rich in organic matter. A slightly acidic to neutral pH (around 6.0-7.0) is ideal. You can amend your soil with compost, aged manure, or other organic materials to improve its fertility and drainage. Avoid heavy clay soils, as they can become waterlogged and lead to root rot. A good potting mix specifically formulated for flowers and herbs will work well in containers.
How much sunlight does calendula need?
Calendula thrives in full sun, which means at least 6 hours of direct sunlight per day. However, in hotter climates, it can benefit from some afternoon shade to prevent the flowers from scorching. If you’re growing calendula indoors, place it near a sunny window or use grow lights to provide adequate illumination. Insufficient sunlight can result in leggy growth and fewer flowers.
How often should I water my calendula plants?
Water your calendula plants regularly, especially during dry periods. The soil should be kept consistently moist but not waterlogged. Check the soil moisture by sticking your finger about an inch deep into the soil. If it feels dry, it’s time to water. Avoid overhead watering, as this can promote fungal diseases. Instead, water at the base of the plant. Reduce watering during the winter months when the plants are not actively growing.
How do I harvest calendula flowers?
Harvest calendula flowers in the morning, after the dew has dried. Choose flowers that are fully open and have vibrant color. Gently pluck the entire flower head from the stem. You can use scissors or pruning shears if you prefer. Harvest regularly to encourage more blooms. The more you harvest, the more flowers your plants will produce.
How do I dry calendula flowers?
There are several ways to dry calendula flowers. One method is to spread them out on a screen or tray in a cool, dry, and well-ventilated area. Turn them occasionally to ensure even drying. Another method is to hang them upside down in small bunches. You can also use a dehydrator set to a low temperature. The flowers are dry when they are brittle and easily crumble. Store dried calendula flowers in an airtight container in a cool, dark place.
What are some common pests and diseases that affect calendula?
Calendula is generally a hardy plant, but it can be susceptible to certain pests and diseases. Aphids, spider mites, and whiteflies are common pests that can infest calendula plants. You can control these pests with insecticidal soap or neem oil. Fungal diseases such as powdery mildew and botrytis can also affect calendula, especially in humid conditions. To prevent these diseases, ensure good air circulation around the plants and avoid overhead watering. Remove any infected leaves or flowers promptly.
Can I eat calendula flowers?
Yes, calendula flowers are edible and have a slightly peppery flavor. They can be used to add color and flavor to salads, soups, stews, and other dishes. The petals can also be used as a natural food coloring. However, it’s important to only consume calendula flowers that have been grown organically and are free from pesticides and herbicides.
Is calendula safe for pets?
Calendula is generally considered safe for pets, but it’s always best to consult with your veterinarian before giving it to your animals. Some pets may be allergic to calendula. If you notice any adverse reactions, such as skin irritation or digestive upset, discontinue use immediately.
How can I use my homegrown calendula?
The possibilities are endless! You can use your homegrown calendula to make infused oils, salves, creams, teas, and tinctures. Calendula is known for its anti-inflammatory, wound-healing, and skin-soothing properties. It can be used to treat minor cuts, burns, scrapes, rashes, and eczema. You can also use it to make a soothing bath soak or facial steam. Experiment and discover your favorite ways to incorporate calendula into your wellness routine. Remember to research proper preparation and usage guidelines before using calendula for medicinal purposes.
Leave a Comment