
Chili planting simple method – ever dreamt of spicing up your life, literally, with homegrown chilies? I know I have! There’s something incredibly satisfying about nurturing a tiny seed into a vibrant plant that yields fiery peppers. But let’s be honest, the thought of starting a chili garden can feel a bit daunting, right?
Chili peppers have a rich history, dating back thousands of years in South America, where they were not only a food source but also held medicinal and even spiritual significance. Today, they’re a staple in cuisines worldwide, adding zest and flavor to countless dishes. But why rely solely on store-bought chilies when you can cultivate your own, bursting with freshness and flavor?
That’s where this DIY guide comes in! I’m going to share a chili planting simple method that’s perfect for beginners. Whether you have a sprawling garden or just a sunny windowsill, you can successfully grow your own chilies. This isn’t just about saving money; it’s about connecting with nature, enjoying the therapeutic benefits of gardening, and having a constant supply of fresh, flavorful chilies at your fingertips. Plus, imagine the bragging rights when you serve up a dish made with your very own homegrown peppers!
So, ditch the intimidation and get ready to embark on a fun and rewarding gardening adventure. Let’s unlock the secrets to successful chili planting, one simple step at a time!
DIY Chili Planting: A Simple Method for a Spicy Harvest
Hey there, fellow chili enthusiasts! Are you ready to bring the heat to your garden (or even your windowsill)? I’m going to walk you through a super simple method for planting chili peppers that I’ve used for years with great success. Get ready for a bountiful harvest of spicy goodness!
Choosing Your Chili Varieties
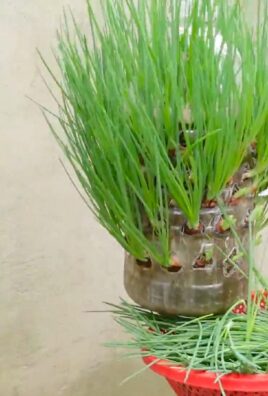
Before we dive into the planting process, let’s talk about chili varieties. The world of chili peppers is vast and exciting! From mild bell peppers (yes, they’re technically chilies!) to scorching habaneros, there’s a chili out there for every palate.
* Mild Chilies: If you’re new to chili growing or prefer a milder flavor, consider varieties like Anaheim, Poblano, or even sweet bell peppers.
* Medium Chilies: For a bit more kick, try Jalapeños, Serrano, or Cayenne peppers. These are versatile and great for adding a moderate amount of heat to your dishes.
* Hot Chilies: If you’re a true chili head, you’ll want to explore varieties like Habaneros, Scotch Bonnets, or even Ghost Peppers. Be warned – these pack a serious punch!
When choosing your chili varieties, think about how you plan to use them. Do you want to make salsa? Dry them for chili powder? Or just add a spicy kick to your meals? This will help you narrow down your choices.
Gathering Your Supplies
Okay, now that you’ve chosen your chili varieties, let’s gather the supplies you’ll need. This is a pretty straightforward process, and you probably have many of these items already.
* Chili Seeds: You can purchase chili seeds online, at your local garden center, or even save them from your favorite chili peppers.
* Seed Starting Trays or Small Pots: These will be used to start your chili seeds indoors. I prefer seed starting trays with a clear plastic dome to help retain moisture.
* Seed Starting Mix: This is a light and airy soil mix specifically designed for starting seeds. It’s important to use a seed starting mix rather than regular potting soil, as it’s less likely to compact and hinder germination.
* Watering Can or Spray Bottle: You’ll need a gentle way to water your seedlings without disturbing them.
* Grow Lights (Optional): If you don’t have a sunny windowsill, grow lights can provide the necessary light for your seedlings to thrive.
* Larger Pots or Garden Bed: Once your seedlings are big enough, you’ll need to transplant them into larger pots or directly into your garden bed.
* Potting Soil or Garden Soil: Choose a high-quality potting soil for containers or amend your garden soil with compost and other organic matter.
* Fertilizer: A balanced fertilizer will help your chili plants grow strong and produce plenty of peppers.
* Gardening Gloves: Protect your hands from dirt and potential irritants.
* Trowel or Small Shovel: For transplanting your seedlings.
Starting Your Chili Seeds Indoors
Starting your chili seeds indoors gives them a head start on the growing season, especially if you live in a cooler climate. I usually start my seeds about 6-8 weeks before the last expected frost.
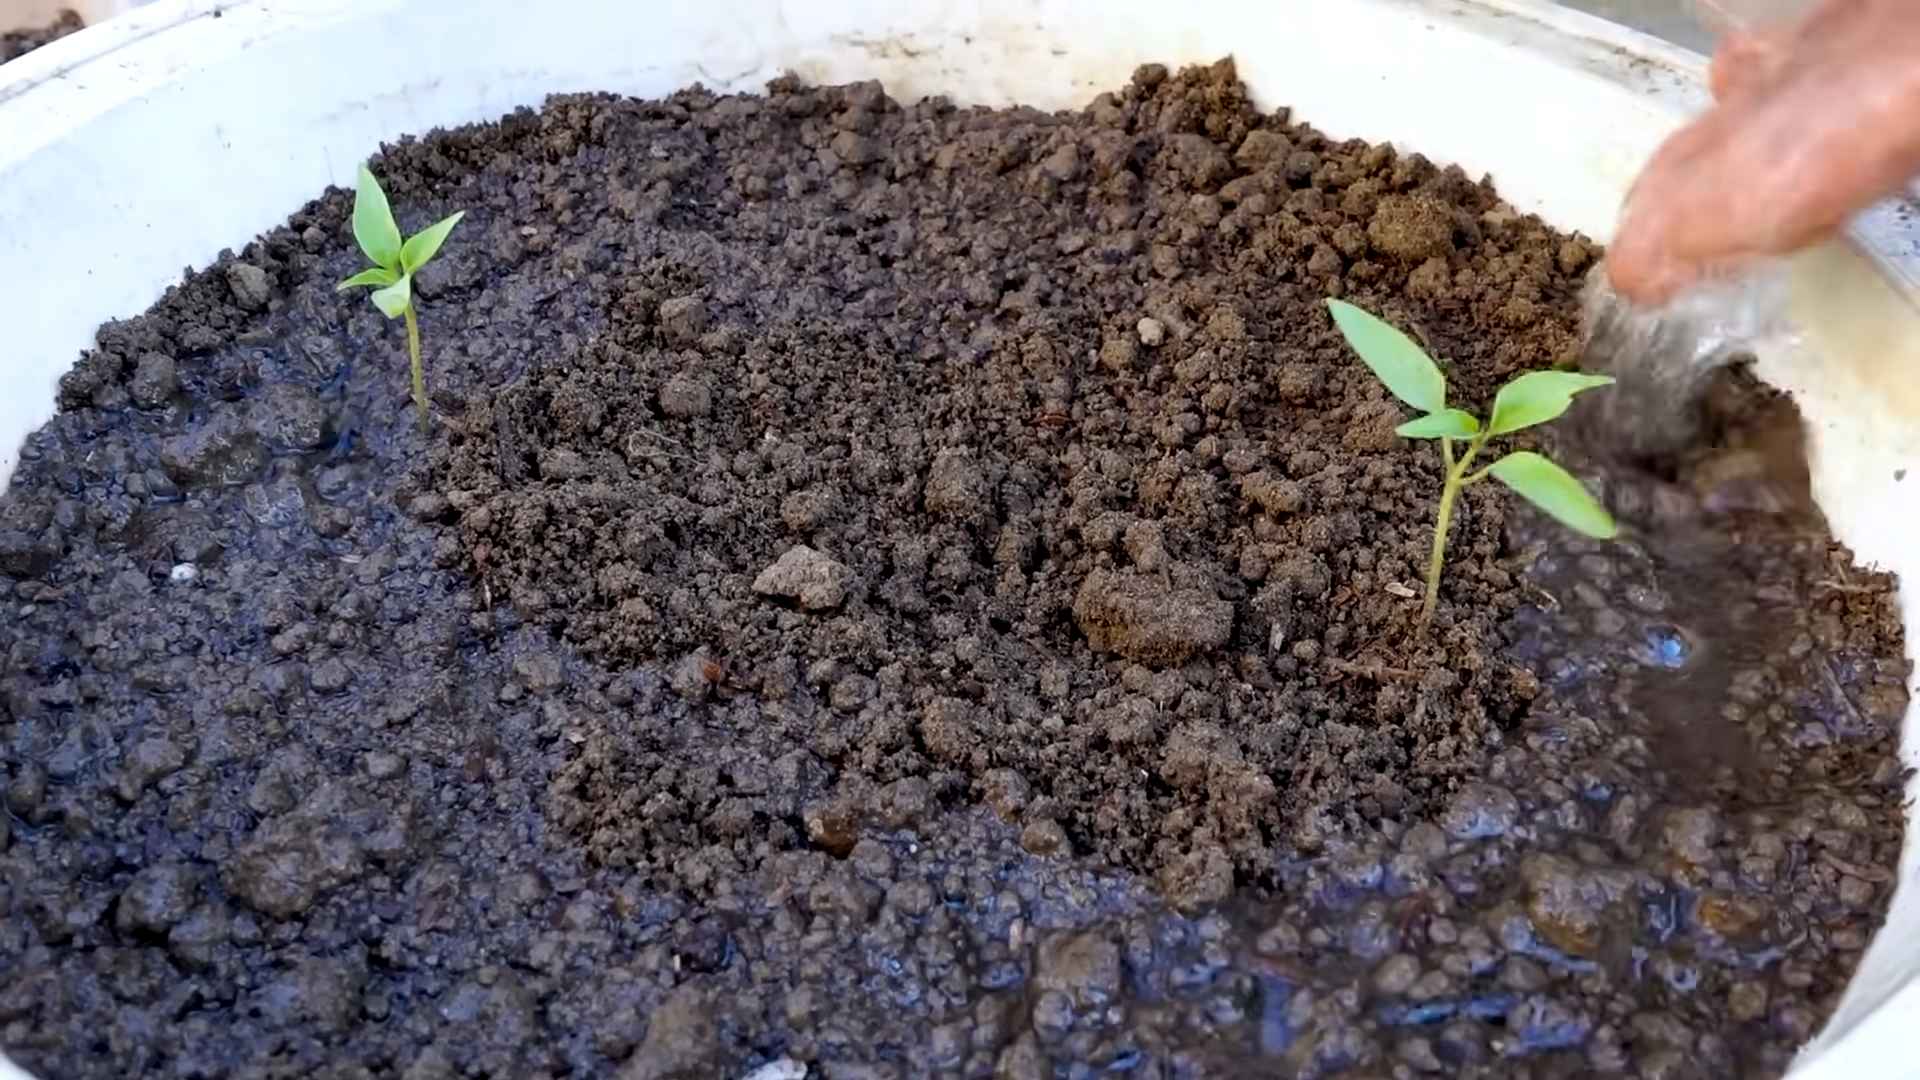
1. Prepare Your Seed Starting Trays: Fill your seed starting trays or small pots with seed starting mix. Gently press down on the soil to remove any air pockets.
2. Sow Your Seeds: Make a small indentation in the soil (about ¼ inch deep) and drop in 2-3 chili seeds. Cover the seeds with soil and gently water them.
3. Water Thoroughly: Use a watering can or spray bottle to thoroughly moisten the soil. Be careful not to overwater, as this can lead to damping off (a fungal disease that can kill seedlings).
4. Provide Warmth and Light: Chili seeds need warmth to germinate. Place your seed starting trays in a warm location, such as on top of a refrigerator or near a heat vent. If you’re using grow lights, position them a few inches above the trays.
5. Maintain Moisture: Keep the soil consistently moist, but not soggy. You can cover the seed starting trays with a clear plastic dome to help retain moisture.
6. Wait for Germination: Chili seeds can take anywhere from 7 to 21 days to germinate, depending on the variety and temperature. Be patient!
7. Thin Seedlings: Once your seedlings have emerged and have a few sets of true leaves, thin them out by snipping off the weaker seedlings at the soil line. Leave only the strongest seedling in each cell or pot.
Transplanting Your Chili Seedlings
Once your chili seedlings have grown to a decent size (about 4-6 inches tall) and the weather has warmed up, it’s time to transplant them into larger pots or your garden bed.
1. Harden Off Your Seedlings: Before transplanting, you need to harden off your seedlings. This means gradually exposing them to outdoor conditions to help them adjust. Start by placing them outside for a few hours each day, gradually increasing the amount of time they spend outdoors over the course of a week.
2. Prepare Your Planting Location: Choose a sunny location with well-drained soil. If you’re planting in containers, use a high-quality potting soil. If you’re planting in your garden bed, amend the soil with compost and other organic matter.
3. Dig Your Holes: Dig holes that are slightly larger than the root balls of your seedlings. Space the holes about 18-24 inches apart.
4. Carefully Remove Seedlings: Gently remove your seedlings from their seed starting trays or pots. Be careful not to damage the roots.
5. Plant Your Seedlings: Place the seedlings in the holes and backfill with soil. Gently firm the soil around the base of the plants.
6. Water Thoroughly: Water your newly transplanted seedlings thoroughly.
7. Mulch Around Plants: Apply a layer of mulch around your chili plants to help retain moisture, suppress weeds, and regulate soil temperature.
Caring for Your Chili Plants
Now that your chili plants are in their permanent homes, it’s important to provide them with the care they need to thrive.
* Watering: Water your chili plants regularly, especially during hot, dry weather. Water deeply and allow the soil to dry out slightly between waterings.
* Fertilizing: Fertilize your chili plants every 2-3 weeks with a balanced fertilizer. You can also use a fertilizer specifically formulated for tomatoes and peppers.
* Pruning: Pruning your chili plants can help them produce more peppers. Remove any suckers (small shoots that grow from the base of the plant) and any yellowing or dead leaves.
* Pest Control: Keep an eye out for pests such as aphids, whiteflies, and spider mites. If you notice any pests, treat them with an insecticidal soap or neem oil.
* Support: As your chili plants grow, they may need support to prevent them from falling over. You can use stakes, cages, or trellises to provide support.
Harvesting Your Chili Peppers
The moment you’ve been waiting for! Harvesting your chili peppers is the most rewarding part of the process.
* When to Harvest: The best time to harvest your chili peppers depends on the variety and your personal preference. Generally, you can harvest them when they’ve reached their mature size and color.
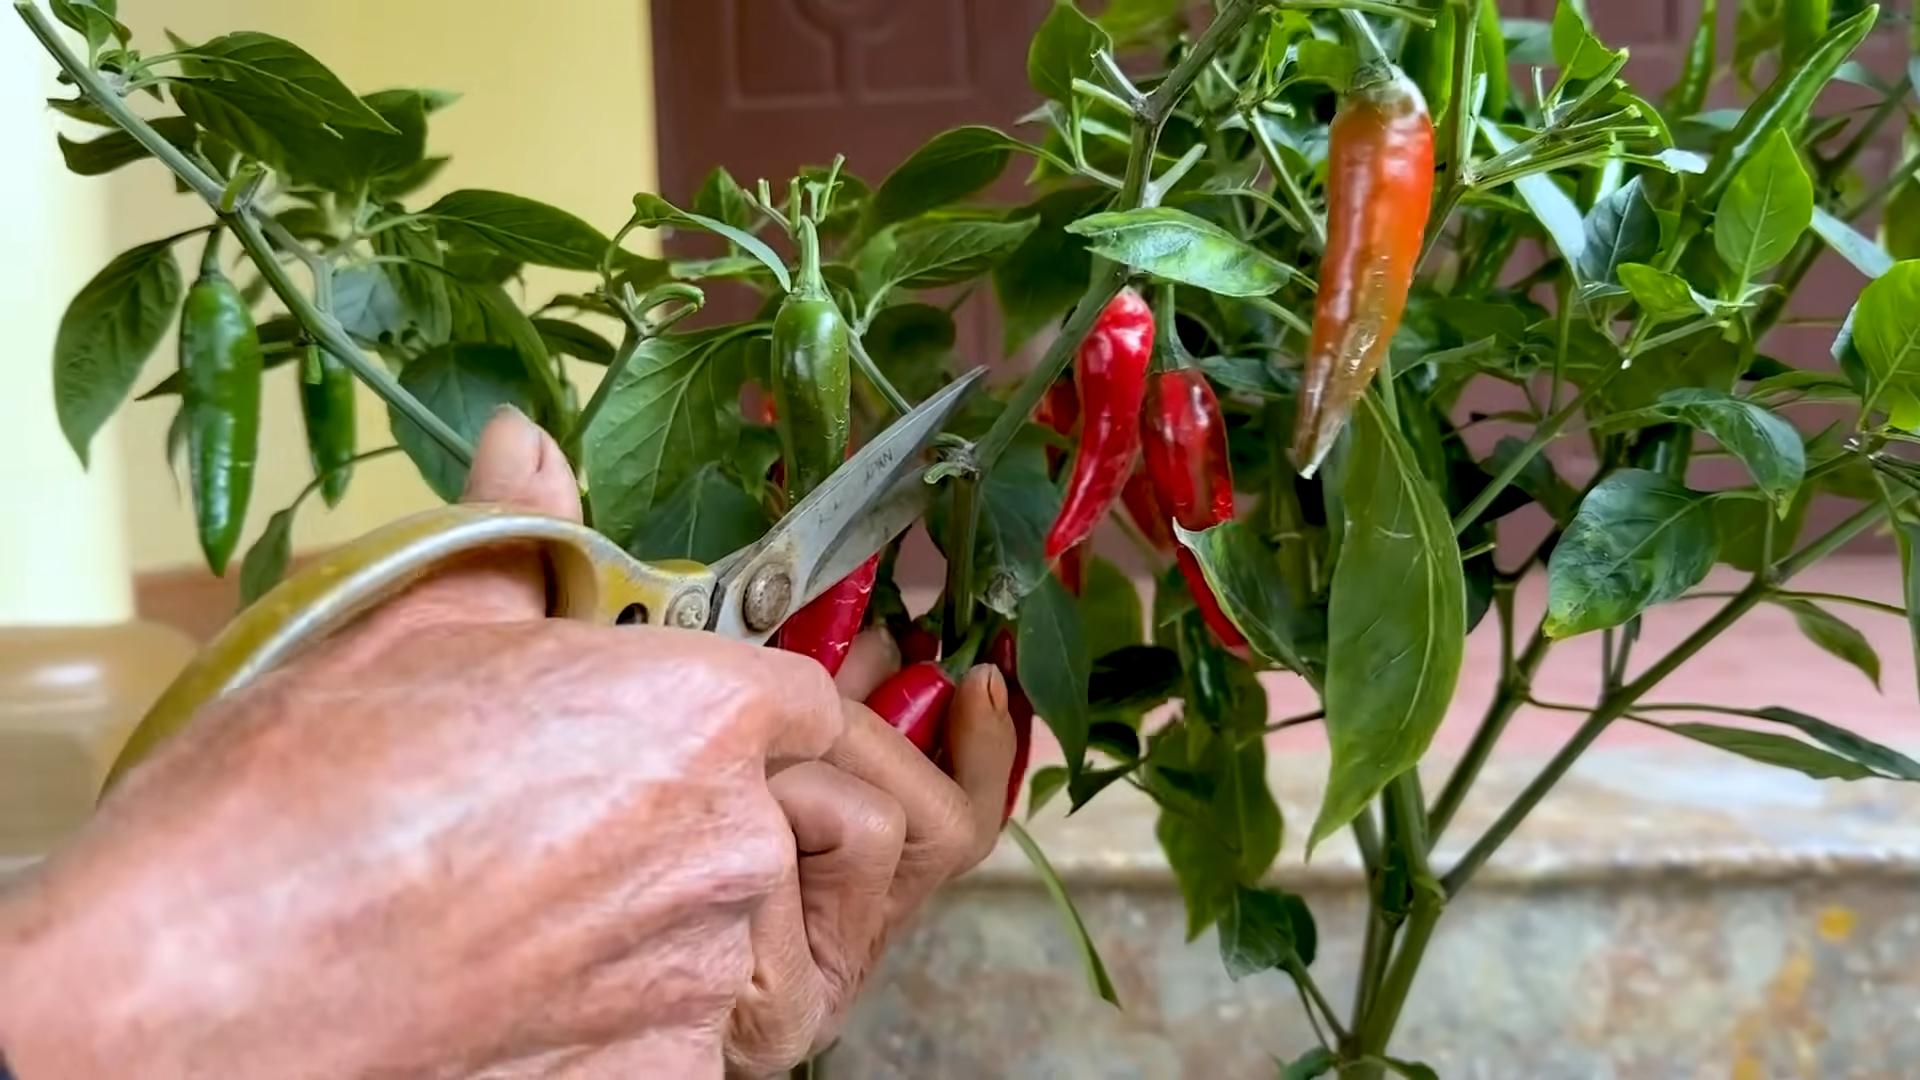
* How to Harvest: Use a sharp knife or scissors to cut the peppers from the plant. Be careful not to damage the plant.
* Handling Hot Peppers: If you’re harvesting hot peppers, wear gloves to protect your hands from the capsaicin (the compound that makes chilies hot). Avoid touching your eyes or face after handling hot peppers.
Enjoying Your Spicy Harvest
Congratulations! You’ve successfully grown your own chili peppers. Now it’s time to enjoy the fruits (or should I say, peppers?) of your labor.
* Fresh Use: Use your fresh chili peppers in your favorite recipes, such as salsa, chili, stir-fries, and more.
* Drying: Dry your chili peppers to make chili powder or chili flakes. You can dry them in a dehydrator, in the oven, or by hanging them in a well-ventilated area.
* Pickling: Pickle your chili peppers to preserve them and add a spicy kick to your meals.
* Freezing: Freeze your chili peppers to use them later. Simply wash and dry the peppers, then place them in a freezer bag.
Growing your own chili peppers is a fun and rewarding experience. With a little bit of effort, you can enjoy a bountiful harvest of spicy goodness all season long. Happy gardening!
Conclusion
So, there you have it! This simple yet effective DIY trick for chili planting is a game-changer for anyone looking to cultivate a thriving chili garden, regardless of space or experience. We’ve walked you through a method that prioritizes efficiency, resourcefulness, and ultimately, a bountiful harvest of those fiery peppers we all crave.
Why is this a must-try? Because it addresses some of the most common challenges faced by chili growers: limited space, inconsistent watering, and the dreaded transplant shock. By starting your chili seeds in a controlled environment and utilizing a self-watering system, you’re giving your seedlings the best possible start in life. This translates to stronger, healthier plants that are more resistant to pests and diseases, and ultimately, produce more chilies.
But the beauty of this method lies in its adaptability. Feel free to experiment with different types of containers. Upcycle plastic bottles, yogurt containers, or even egg cartons – the possibilities are endless! Just ensure they have adequate drainage. You can also tailor the soil mix to your specific needs. Adding compost or worm castings will enrich the soil and provide your chili plants with essential nutrients.
Consider these variations to further enhance your chili planting experience:
* Hydroponic Adaptation: For the truly adventurous, adapt this method to a hydroponic system. Use inert growing media like coco coir or perlite and provide nutrient-rich water.
* Vertical Gardening: If space is truly limited, create a vertical chili garden using stacked containers or hanging planters. This is a fantastic way to maximize your yield in a small area.
* Companion Planting: Plant basil, marigolds, or other companion plants alongside your chilies to deter pests and attract beneficial insects.
* Chili Variety: Don’t limit yourself to just one type of chili! Experiment with different varieties to discover your favorites. From mild bell peppers to scorching habaneros, there’s a chili out there for everyone.
This DIY chili planting method is more than just a technique; it’s an invitation to connect with nature, nurture your own food, and experience the satisfaction of growing your own chilies. It’s about taking control of your food source and enjoying the freshest, most flavorful ingredients possible.
We are confident that this method will revolutionize your chili growing experience. But don’t just take our word for it – try it yourself! We encourage you to embrace this simple yet powerful technique and witness the difference it makes.
And most importantly, we want to hear about your experience! Share your photos, tips, and variations in the comments below. Let’s create a community of chili enthusiasts who are passionate about growing their own food. Your insights could inspire others to embark on their own chili planting journey. So, get your hands dirty, plant those seeds, and let the chili growing adventure begin! We can’t wait to see what you create. Remember, successful chili planting starts with a little ingenuity and a lot of passion.
Frequently Asked Questions (FAQ)
What type of soil is best for chili planting using this method?
The ideal soil for chili planting is a well-draining, nutrient-rich mix. A combination of potting soil, compost, and perlite or vermiculite works well. The potting soil provides a base, the compost adds essential nutrients, and the perlite or vermiculite improves drainage and aeration. Avoid using heavy clay soil, as it can become waterlogged and suffocate the roots. You can also purchase specialized seed starting mixes for the initial germination phase. Remember to amend the soil with additional compost or fertilizer as the plants grow to ensure they receive adequate nutrients.
How often should I water my chili seedlings using the self-watering method?
The beauty of the self-watering method is that it minimizes the need for frequent watering. The wick system draws water up from the reservoir as needed, keeping the soil consistently moist but not waterlogged. Initially, check the water reservoir every few days and refill it as needed. As the seedlings grow larger and their roots develop, they will require more water. Monitor the soil moisture level by gently pressing your finger into the soil near the base of the plant. If the soil feels dry to the touch, it’s time to refill the reservoir. In general, you may need to refill the reservoir every 2-3 days, depending on the size of the container, the temperature, and the humidity.
What kind of fertilizer should I use for my chili plants?
Chili plants are heavy feeders and require a balanced fertilizer to thrive. A fertilizer with an NPK ratio (nitrogen, phosphorus, potassium) of 5-10-5 or 10-10-10 is a good starting point. Nitrogen promotes leafy growth, phosphorus encourages root development and flowering, and potassium contributes to overall plant health and fruit production. You can use a liquid fertilizer diluted according to the package instructions or a slow-release granular fertilizer. Apply fertilizer every 2-3 weeks during the growing season, starting after the seedlings have developed their first true leaves. Avoid over-fertilizing, as this can burn the roots and damage the plants. Organic options like compost tea or fish emulsion are also excellent choices.
How much sunlight do chili plants need?
Chili plants require at least 6-8 hours of direct sunlight per day to produce a bountiful harvest. Choose a location that receives plenty of sunlight throughout the day. If you are growing your chilies indoors, supplement with grow lights to ensure they receive adequate light. Insufficient sunlight can result in leggy plants with poor fruit production. Rotate your plants regularly to ensure all sides receive equal exposure to sunlight.
What are some common pests and diseases that affect chili plants, and how can I prevent them?
Common pests that affect chili plants include aphids, spider mites, whiteflies, and thrips. These pests can suck the sap from the leaves, causing them to become yellow and distorted. To prevent pest infestations, inspect your plants regularly for signs of pests. You can also use insecticidal soap or neem oil to control pests. Diseases that can affect chili plants include fungal diseases like powdery mildew and blossom end rot. Powdery mildew appears as a white powdery coating on the leaves, while blossom end rot causes the bottom of the fruits to become black and rotten. To prevent fungal diseases, ensure good air circulation around your plants and avoid overwatering. You can also use a fungicide to control fungal diseases. Blossom end rot is often caused by calcium deficiency, so amend the soil with calcium-rich amendments like bone meal or eggshells.
When is the best time to transplant my chili seedlings outdoors?
The best time to transplant your chili seedlings outdoors is after the last frost has passed and the soil has warmed up to at least 60°F (15°C). Harden off your seedlings before transplanting them by gradually exposing them to outdoor conditions for a week or two. Start by placing them in a sheltered location for a few hours each day, gradually increasing the amount of time they spend outdoors. This will help them acclimate to the sun, wind, and temperature changes. When transplanting, choose a sunny location with well-draining soil. Dig a hole slightly larger than the root ball and gently remove the seedling from its container. Place the seedling in the hole and backfill with soil, gently firming it around the base of the plant. Water thoroughly after transplanting.
How long does it take for chili plants to produce fruit?
The time it takes for chili plants to produce fruit varies depending on the variety, but generally, it takes about 60-90 days from transplanting to harvest. Some varieties may mature faster, while others may take longer. Factors such as sunlight, temperature, and soil fertility can also affect the time it takes for chili plants to produce fruit. Be patient and continue to care for your plants, and you will eventually be rewarded with a bountiful harvest of delicious chilies.
Can I grow chili plants in containers?
Yes, chili plants thrive in containers, making them ideal for gardeners with limited space. Choose a container that is at least 12 inches in diameter and has good drainage. Use a well-draining potting mix and fertilize regularly. Place the container in a sunny location that receives at least 6-8 hours of direct sunlight per day. Water regularly, especially during hot weather. Container-grown chili plants may require more frequent watering and fertilization than those grown in the ground.
How do I know when my chilies are ripe?
The color of the chili is the best indicator of ripeness. Most chilies will turn from green to red, yellow, orange, or brown when they are ripe, depending on the variety. The fruit should also feel firm and slightly heavy for its size. You can also test the ripeness by tasting a small piece of the chili. If it has the desired level of heat and flavor, it is ready to harvest. Use pruning shears or scissors to cut the chilies from the plant, leaving a small stem attached.
What can I do with my harvested chilies?
The possibilities are endless! You can use your harvested chilies fresh in salsas, sauces, and other dishes. You can also dry them, pickle them, or freeze them for later use. Dried chilies can be ground into chili powder or used to make chili flakes. Pickled chilies are a delicious condiment that can be added to sandwiches, tacos, and other dishes. Frozen chilies can be added to soups, stews, and sauces. Experiment with different ways to use
Leave a Comment