
Clever cleaning tricks – who doesn’t want a few of those up their sleeve? Let’s be honest, cleaning isn’t usually anyone’s favorite pastime. But what if I told you that with a few simple DIY hacks, you could transform your cleaning routine from a dreaded chore into a satisfying, almost enjoyable, experience?
For centuries, resourceful homemakers have been passing down cleaning secrets, often born out of necessity and a desire to keep their homes sparkling with limited resources. Think about it – before the age of mass-produced cleaning products, people relied on natural ingredients like vinegar, baking soda, and lemon juice to tackle dirt and grime. These time-tested methods are not only effective but also often gentler on the environment and your wallet!
In today’s busy world, we’re all looking for ways to save time and effort. That’s where these clever cleaning tricks come in. Whether you’re battling stubborn stains, tackling a grimy bathroom, or simply trying to maintain a tidy home, these DIY solutions can make a huge difference. I’m excited to share some of my favorite and most effective cleaning hacks that will leave your home sparkling and give you back some precious free time. Get ready to ditch the harsh chemicals and embrace a smarter, more sustainable approach to cleaning!
DIY Cleaning Hacks That Will Blow Your Mind (and Save You Time!)
Okay, let’s be honest, cleaning isn’t exactly anyone’s favorite pastime. But a clean home is a happy home, right? So, I’ve compiled some of my absolute favorite DIY cleaning hacks that are not only super effective but also use ingredients you probably already have in your pantry. Get ready to ditch those harsh chemicals and embrace a sparkling clean space the natural way!
Cleaning Your Microwave Like a Pro (Without Scrubbing!)
This is a game-changer, I promise! No more endless scrubbing to get rid of splattered food.
- The Problem: Baked-on food splatters in your microwave.
- The Solution: Steam cleaning with lemon or vinegar.
- What You’ll Need: A microwave-safe bowl, water, lemon (or vinegar).
- Prepare the Cleaning Solution: Fill your microwave-safe bowl with about 1 cup of water. If you’re using lemon, slice it in half and squeeze the juice into the water. Then, drop the lemon halves into the bowl as well. If you’re using vinegar, add 2 tablespoons of white vinegar to the water.
- Microwave Magic: Place the bowl in the microwave and heat it on high for 3-5 minutes. You want the water to boil and create steam.
- Let it Steam: Once the timer goes off, DO NOT open the microwave door immediately! Let the steam work its magic for another 5-10 minutes. This will loosen all the grime.
- Wipe it Clean: Carefully remove the bowl (it will be hot!). Use a clean cloth or sponge to easily wipe away all the loosened food particles. You’ll be amazed at how easily everything comes off!
- Final Touches: For any stubborn spots, you can dip your cloth in the remaining lemon/vinegar water and give them a little extra attention.
De-Gunking Your Showerhead for Better Water Pressure
Hard water and mineral buildup can wreak havoc on your showerhead, reducing water pressure and making your showers less enjoyable. Here’s how to fix it:
- The Problem: Clogged showerhead with reduced water pressure.
- The Solution: Soaking the showerhead in vinegar.
- What You’ll Need: A plastic bag, white vinegar, a rubber band or twist tie.
- Vinegar Bath: Fill the plastic bag with enough white vinegar to completely submerge the showerhead.
- Secure the Bag: Carefully attach the bag to the showerhead, making sure the showerhead is fully immersed in the vinegar. Use a rubber band or twist tie to secure the bag tightly around the showerhead’s neck.
- Soak Overnight: Let the showerhead soak in the vinegar overnight (or for at least a few hours). This will allow the vinegar to dissolve the mineral deposits.
- Remove and Rinse: Remove the bag and discard the vinegar. Turn on the shower and let the water run for a few minutes to flush out any remaining debris.
- Scrub Stubborn Spots (If Needed): If you still see some stubborn buildup, use an old toothbrush to gently scrub it away.
Cleaning Your Grout Like a Boss (Goodbye, Grime!)
Dirty grout can make even the cleanest tiles look dingy. This simple paste will bring your grout back to life.
- The Problem: Dirty, stained grout.
- The Solution: A baking soda and vinegar paste.
- What You’ll Need: Baking soda, white vinegar, an old toothbrush, water.
- Make the Paste: In a small bowl, mix baking soda and white vinegar until you form a thick paste. It will fizz, so don’t be alarmed!
- Apply the Paste: Apply the paste generously to the grout lines.
- Let it Sit: Let the paste sit for about 5-10 minutes to allow it to penetrate the grime.
- Scrub-a-Dub-Dub: Use an old toothbrush to scrub the grout lines thoroughly. You’ll see the dirt and grime start to lift.
- Rinse and Repeat: Rinse the area with clean water. If the grout is particularly dirty, you may need to repeat the process.
Freshening Up Your Mattress (For a Better Night’s Sleep!)
We often forget about cleaning our mattresses, but they can accumulate dust mites, dead skin cells, and other allergens. This simple trick will freshen it up and help you sleep better.
- The Problem: Stale, dusty mattress.
- The Solution: Baking soda and essential oils.
- What You’ll Need: Baking soda, essential oil (lavender, eucalyptus, or tea tree are great choices), a vacuum cleaner.
- Prepare the Baking Soda: In a bowl, mix about 1 cup of baking soda with 10-15 drops of your favorite essential oil. Lavender is great for relaxation, eucalyptus is refreshing, and tea tree has antibacterial properties.
- Sprinkle and Wait: Sprinkle the baking soda mixture evenly over the entire surface of your mattress.
- Let it Sit: Let the baking soda sit for at least 30 minutes, or even better, a few hours. This will allow it to absorb odors and moisture.
- Vacuum Thoroughly: Use the upholstery attachment on your vacuum cleaner to thoroughly vacuum the entire mattress, removing all the baking soda.
Unclogging Drains the Natural Way (No Harsh Chemicals Needed!)
Clogged drains are a common household problem, but you don’t need to resort to harsh chemicals to fix them. This natural solution is effective and eco-friendly.
- The Problem: Clogged drain.
- The Solution: Baking soda and vinegar followed by boiling water.
- What You’ll Need: Baking soda, white vinegar, boiling water.
- Baking Soda First: Pour about 1 cup of baking soda down the drain.
- Vinegar Chaser: Follow the baking soda with 1 cup of white vinegar.
- Fizzing Action: Let the mixture fizz and bubble for about 30 minutes. This will help to break down the clog.
- Boiling Water Flush: After 30 minutes, pour a pot of boiling water down the drain.
- Repeat if Necessary: If the drain is still clogged, repeat the process. For stubborn clogs, you may need to use a plunger after the boiling water.
Cleaning Your Blender Like a Pro (Seriously Easy!)
Cleaning a blender can be a pain, especially if you’ve made something sticky or thick. This hack makes it a breeze.
- The Problem: Difficult-to-clean blender.
- The Solution: Soap and water blend.
- What You’ll Need: Dish soap, water.
- Rinse First: Rinse out any large chunks of food from the blender.
- Soap and Water: Fill the blender halfway with warm water and add a squirt of dish soap.
- Blend Away: Put the lid on the blender and blend on high speed for about 30-60 seconds.
- Rinse Thoroughly: Pour out the soapy water and rinse the blender thoroughly with clean water.
- Air Dry: Let the blender air dry completely.
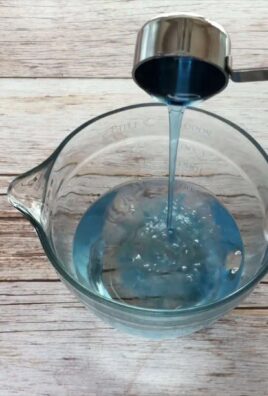
Making Your Own All-Purpose Cleaner (Save Money and the Environment!)
Why buy expensive all-purpose cleaners when you can easily make your own with just a few simple ingredients?
- The Problem: Need for an all-purpose cleaner.
- The Solution: A vinegar and water solution with essential oils.
- What You’ll Need: White vinegar, water, essential oil (optional), a spray bottle.
- Mix the Solution: In a spray bottle, combine equal parts white vinegar and water.
- Add Essential Oils (Optional): If you want to add a pleasant scent and some extra cleaning power, add 10-20 drops of your favorite essential oil. Lemon, tea tree, and lavender are all great choices.
- Shake Well: Shake the bottle well to combine the ingredients.
- Spray and Wipe: Spray the cleaner onto surfaces and wipe clean with a cloth
Conclusion
So, there you have it! This simple yet incredibly effective DIY cleaning trick is more than just a way to save money; it’s a pathway to a cleaner, healthier, and more sustainable home. We’ve walked you through the steps, highlighted the benefits, and hopefully, inspired you to ditch those harsh chemicals and embrace a more natural approach to cleaning.
Why is this a must-try? Because it’s economical, environmentally friendly, and surprisingly powerful. Store-bought cleaners often contain ingredients that can irritate skin, trigger allergies, and even contribute to indoor air pollution. This DIY alternative allows you to control exactly what goes into your cleaning solutions, ensuring a safer environment for you, your family, and your pets. Plus, let’s be honest, there’s a certain satisfaction that comes from creating something yourself, especially when it yields such impressive results.
But don’t just take our word for it. The real magic happens when you put this cleaning trick to the test in your own home. Imagine effortlessly wiping away grime from your countertops, leaving them sparkling clean and smelling fresh. Think about the peace of mind knowing that you’re not exposing your loved ones to harmful chemicals. Envision the money you’ll save by reducing your reliance on expensive store-bought products.
Ready to take it a step further? Here are a few suggestions and variations to personalize this cleaning trick to your specific needs:
* **Infused Vinegar:** For an extra boost of cleaning power and a pleasant scent, infuse your vinegar with citrus peels (lemon, orange, grapefruit) or herbs (lavender, rosemary, thyme) for a few weeks before using it in your cleaning solution. Simply place the peels or herbs in a jar, cover them with vinegar, and let them steep in a cool, dark place.
* **Essential Oil Enhancement:** Add a few drops of your favorite essential oils to your cleaning solution for added fragrance and antibacterial properties. Lemon, tea tree, eucalyptus, and lavender are all excellent choices.
* **Baking Soda Boost:** For stubborn stains or grime, create a paste of baking soda and water and apply it to the affected area before cleaning with your DIY solution. The baking soda will act as a gentle abrasive, helping to lift away dirt and debris.
* **Different Ratios:** Experiment with the ratio of ingredients to find what works best for your specific cleaning needs. You might find that a stronger vinegar solution is needed for tackling tough grease, while a milder solution is sufficient for everyday cleaning.We are confident that once you experience the effectiveness and simplicity of this DIY cleaning trick, you’ll never go back to store-bought cleaners again. It’s a game-changer for anyone looking to create a cleaner, healthier, and more sustainable home.
So, what are you waiting for? Gather your ingredients, mix up a batch of this amazing cleaning solution, and prepare to be amazed. And most importantly, we want to hear about your experience! Share your results, tips, and variations in the comments below. Let’s build a community of DIY cleaning enthusiasts and spread the word about this incredible cleaning trick. Your feedback will not only help others discover the benefits of this method but also inspire us to continue sharing innovative and effective cleaning solutions. Let’s make our homes cleaner, greener, and healthier, one DIY cleaning trick at a time!
Frequently Asked Questions (FAQ)
What exactly is this “DIY cleaning trick” you keep mentioning?
This article focuses on a simple, homemade cleaning solution using common household ingredients like vinegar, water, and optionally, essential oils or citrus peels. It’s a natural alternative to commercial cleaners, designed to be effective, economical, and environmentally friendly. The exact recipe will vary depending on the specific cleaning task, but the core principle remains the same: harnessing the power of natural ingredients to achieve a sparkling clean home.
Is vinegar safe to use on all surfaces?
While vinegar is a fantastic cleaning agent, it’s not suitable for all surfaces. Avoid using it on natural stone surfaces like marble, granite, and limestone, as the acidity can etch and damage them. It’s also best to avoid using vinegar on waxed furniture, as it can strip the wax finish. Always test the cleaning solution in an inconspicuous area before applying it to the entire surface. For delicate surfaces, dilute the vinegar solution further or consider using a different cleaning agent altogether.
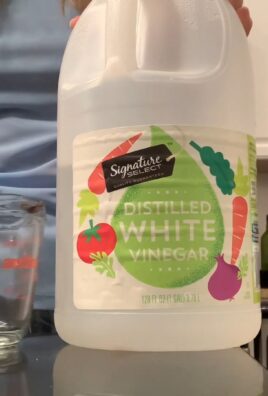
Can I use any type of vinegar?
White distilled vinegar is generally recommended for cleaning due to its high acidity and lack of color, which minimizes the risk of staining. However, you can also use apple cider vinegar, although it may leave a slight odor. Avoid using balsamic vinegar or other colored vinegars, as they can stain surfaces.
How long will the DIY cleaning solution last?
The DIY cleaning solution typically lasts for several weeks when stored in a cool, dark place. However, it’s best to use it within a month to ensure optimal effectiveness. If you notice any changes in color, odor, or consistency, discard the solution and make a fresh batch.
What essential oils are best for cleaning?
Several essential oils possess antibacterial, antiviral, and antifungal properties, making them excellent additions to your DIY cleaning solution. Some popular choices include:
* **Lemon:** A natural degreaser and disinfectant with a refreshing scent.
* **Tea Tree:** A powerful antiseptic and antifungal agent.
* **Eucalyptus:** Effective against bacteria and viruses, with a strong, invigorating aroma.
* **Lavender:** Known for its calming properties, lavender also has antibacterial and antifungal benefits.
* **Peppermint:** A natural insect repellent with a refreshing scent.When using essential oils, always dilute them properly and avoid direct contact with skin and eyes.
Can I use this DIY cleaning solution to clean my bathroom?
Yes, this DIY cleaning solution is excellent for cleaning bathrooms. It can effectively remove soap scum, mildew, and hard water stains from showers, tubs, sinks, and toilets. For tough stains, you can create a paste of baking soda and water and apply it to the affected area before cleaning with the vinegar solution.
Is this cleaning solution safe for pets and children?
Yes, this DIY cleaning solution is generally safe for pets and children, as it doesn’t contain harsh chemicals or toxic ingredients. However, it’s still important to keep the solution out of reach of children and pets to prevent accidental ingestion. If you’re using essential oils, be sure to choose pet-safe options and dilute them properly.
How can I make the cleaning solution smell better?
There are several ways to enhance the scent of your DIY cleaning solution:
* **Infuse the vinegar:** As mentioned earlier, infusing vinegar with citrus peels or herbs can impart a pleasant aroma.
* **Add essential oils:** A few drops of your favorite essential oils can add a refreshing and therapeutic scent.
* **Use scented water:** Instead of plain water, you can use distilled water that has been infused with herbs or flowers.What if the vinegar smell is too strong?
The vinegar smell will dissipate quickly after cleaning. However, if you find the odor too strong, you can try the following:
* **Dilute the vinegar solution further.**
* **Add a few drops of essential oils to mask the smell.**
* **Ventilate the area well after cleaning.**
* **Rinse the cleaned surface with plain water.**Can this DIY cleaning trick replace all my store-bought cleaners?
While this DIY cleaning trick is incredibly versatile, it may not be suitable for all cleaning tasks. For example, you may still need specialized cleaners for certain appliances or surfaces. However, it can significantly reduce your reliance on store-bought cleaners and provide a safer, more sustainable cleaning solution for most of your household needs.
Leave a Comment