
Clorox grout cleaning hack: Are you tired of staring at dingy, discolored grout lines that make your otherwise sparkling clean tiles look…well, less than sparkling? I know I was! For years, I battled stubborn stains, trying every cleaner under the sun with minimal success. It felt like a never-ending chore, a constant reminder that my bathroom wasn’t as pristine as I wanted it to be. But then, I stumbled upon a game-changing solution – a simple, yet incredibly effective Clorox grout cleaning hack that transformed my cleaning routine (and my grout!).
Grout, that porous material nestled between your tiles, has been a part of our homes for centuries. From the intricate mosaics of ancient Rome to the modern kitchens of today, grout has served a vital purpose. However, its very nature makes it a magnet for dirt, grime, and mildew, turning it into a breeding ground for unsightly stains. This is where my Clorox grout cleaning hack comes in.
This isn’t just another cleaning tip; it’s a way to reclaim your time and energy. Imagine spending less time scrubbing and more time enjoying your beautifully clean home. This DIY trick is perfect for anyone who wants to achieve professional-level results without breaking the bank or resorting to harsh chemicals. I’m going to show you how to use a common household product – Clorox – in a way you probably haven’t thought of before, to achieve grout so clean, it’ll look brand new. Get ready to say goodbye to stubborn stains and hello to sparkling grout with this easy and effective Clorox grout cleaning hack!
DIY Grout Cleaning Hack: Sparkling Clean Grout with Clorox!
Okay, let’s face it: grout is the bane of every homeowner’s existence. It gets grimy, stained, and just plain gross. And those expensive grout cleaners? Sometimes they work, sometimes they don’t, and they always seem to smell awful. But fear not! I’m going to share my super simple, surprisingly effective, and budget-friendly grout cleaning hack using something you probably already have in your house: Clorox bleach.
Important Safety First!
Before we dive in, let’s talk safety. Bleach is powerful stuff, so we need to be careful.
* Ventilation is Key: Open windows and doors to ensure good airflow. We don’t want to be breathing in those fumes.
* Protective Gear: Wear rubber gloves to protect your hands from the bleach. Eye protection, like safety glasses or goggles, is also a good idea.
* Avoid Mixing: Never, ever mix bleach with ammonia or other cleaning products. This can create dangerous and potentially deadly gases.
* Test in an Inconspicuous Area: Before applying the bleach solution to your entire grout area, test it in a small, hidden spot to make sure it doesn’t discolor your tiles or grout.
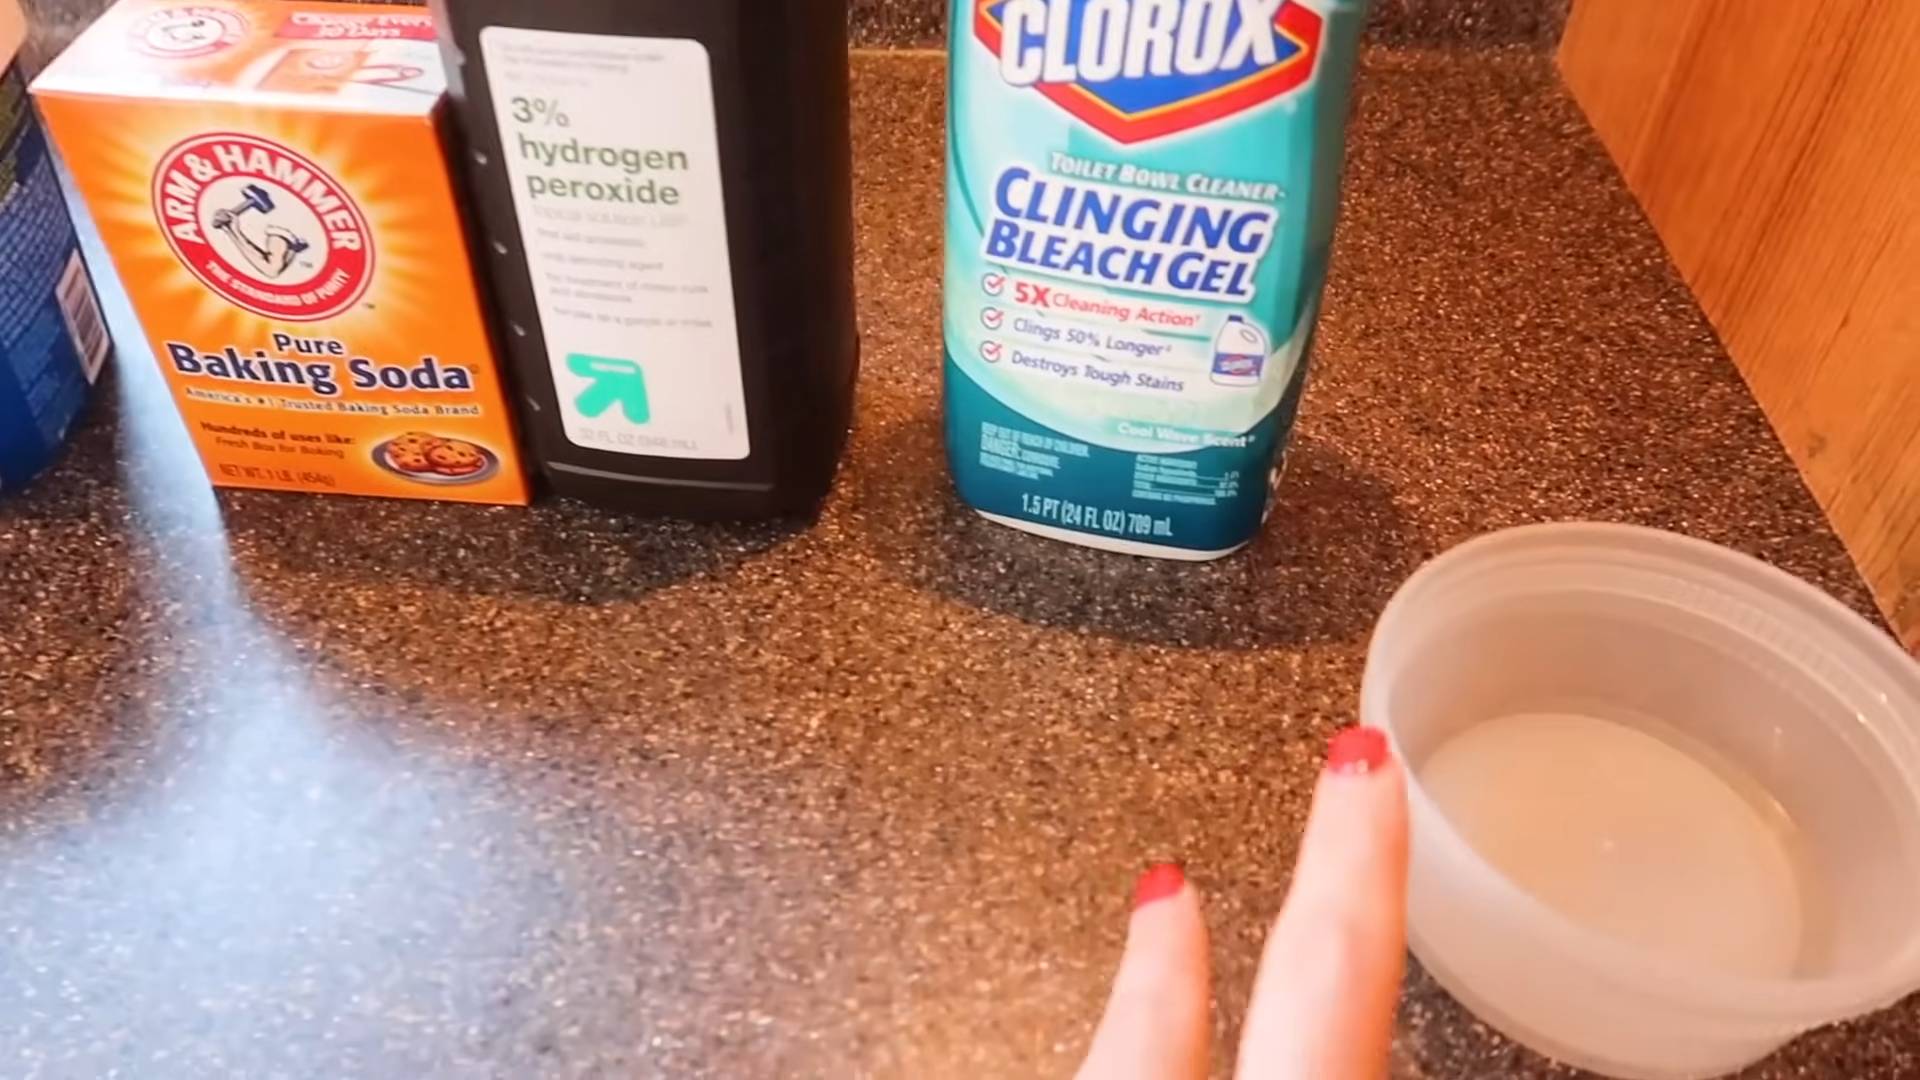
What You’ll Need:
* Clorox bleach (regular strength)
* Water
* Spray bottle
* Old toothbrush or grout brush
* Small bowl or container
* Clean cloths or paper towels
* Rubber gloves
* Eye protection (optional, but recommended)
* Optional: Baking soda
Preparing the Bleach Solution
This is where the magic begins! We’re going to create a bleach solution that’s strong enough to tackle the grime but not so strong that it damages your grout or tiles.
1. Mix the Solution: In your small bowl or container, mix equal parts Clorox bleach and water. For example, you could use 1/2 cup of bleach and 1/2 cup of water. I usually start with a smaller amount and mix more if needed.
2. Pour into Spray Bottle: Carefully pour the bleach solution into your spray bottle. Make sure the bottle is clean and doesn’t contain any residue from other cleaning products.
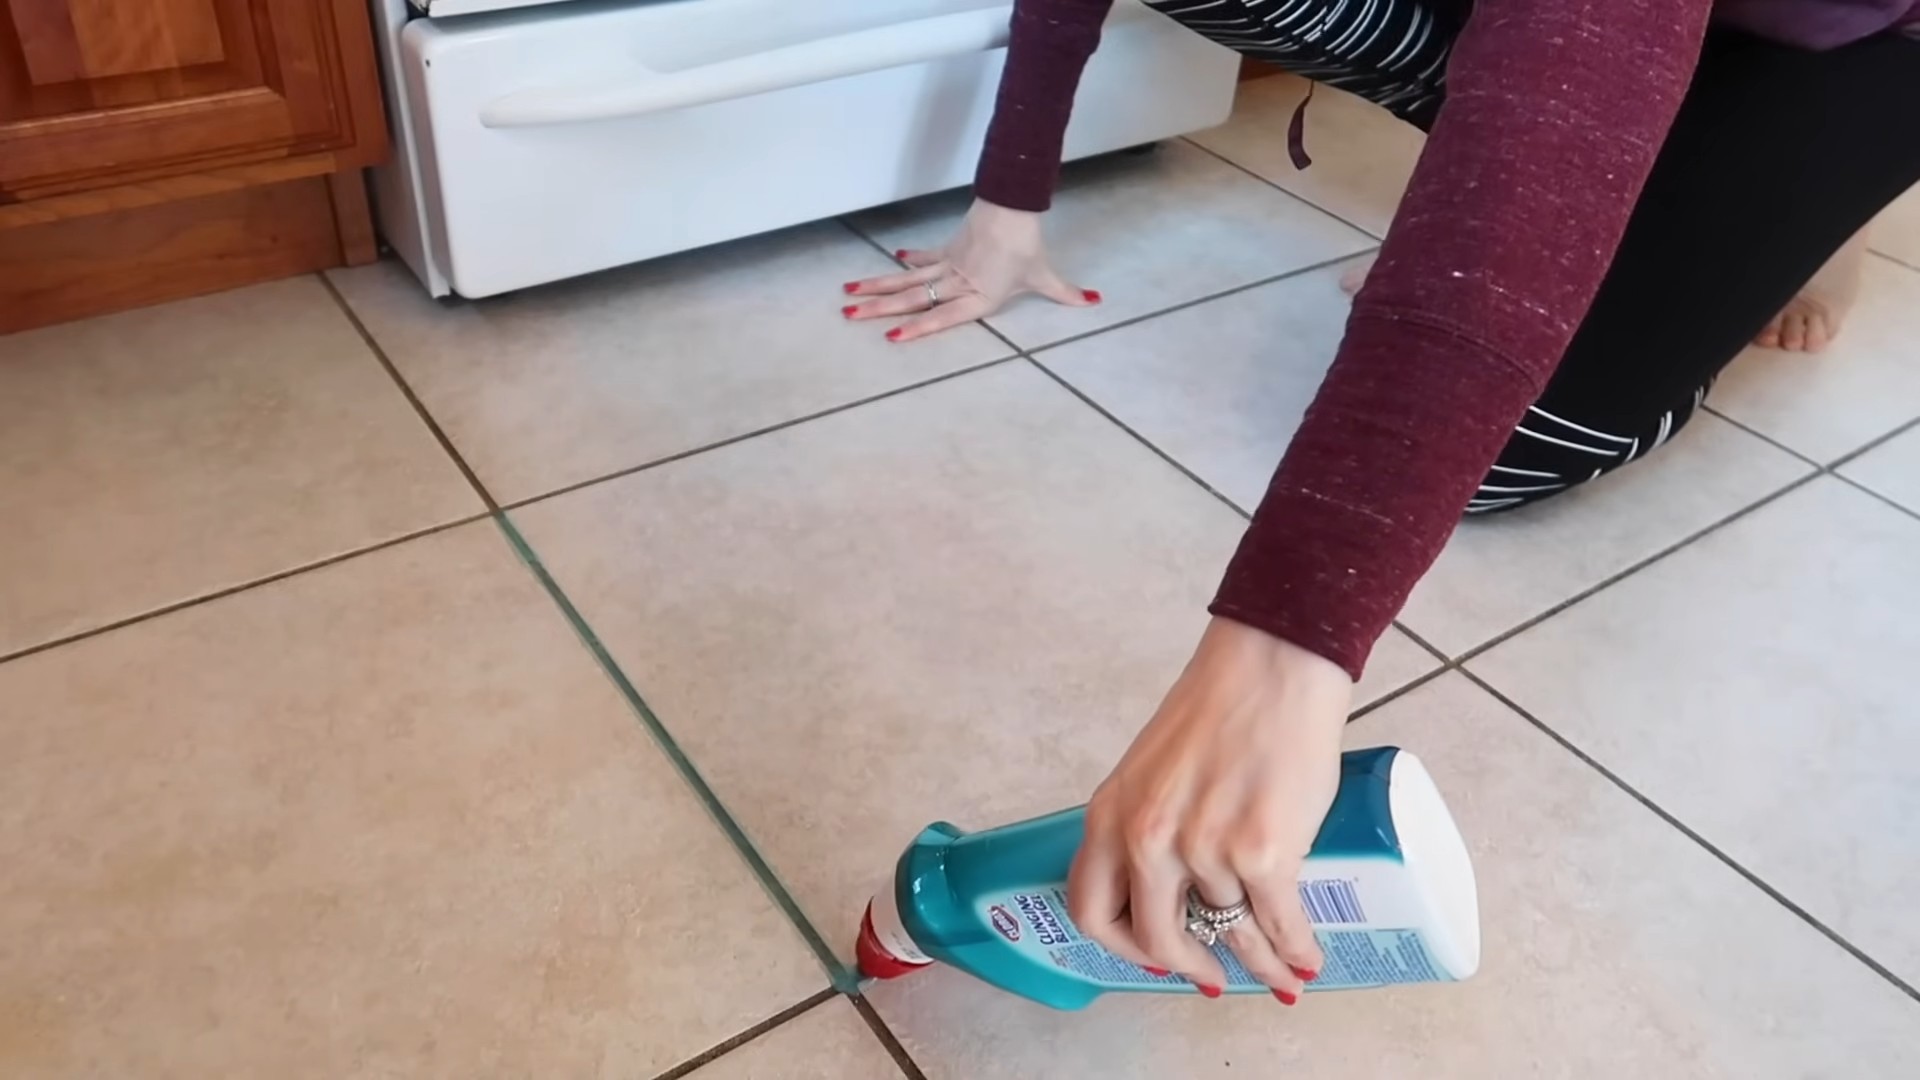
Cleaning the Grout
Now for the fun part – actually cleaning the grout!
1. Spray the Grout: Generously spray the bleach solution onto the grout lines you want to clean. Make sure the grout is thoroughly saturated.
2. Let it Sit: Allow the bleach solution to sit on the grout for about 10-15 minutes. This gives the bleach time to penetrate the grime and stains. Don’t let it dry completely.
3. Scrub-a-dub-dub: Using your old toothbrush or grout brush, scrub the grout lines in a back-and-forth motion. Apply some pressure to loosen the dirt and grime. You’ll probably see the grout start to lighten up as you scrub.
4. Rinse Thoroughly: After scrubbing, rinse the grout lines thoroughly with clean water. You can use a damp cloth or sponge to wipe away the bleach solution. Make sure you remove all traces of bleach.
5. Dry the Area: Use a clean cloth or paper towels to dry the cleaned grout lines. This will help prevent water spots and mildew growth.
Tackling Stubborn Stains (The Baking Soda Boost!)
Sometimes, the bleach solution alone isn’t enough to remove really stubborn stains. That’s where baking soda comes in!
1. Create a Baking Soda Paste: In a small bowl, mix baking soda with a little bit of water to create a thick paste. The consistency should be similar to toothpaste.
2. Apply the Paste: Apply the baking soda paste directly to the stained grout lines.
3. Let it Sit: Allow the paste to sit on the grout for about 30 minutes to an hour. This gives the baking soda time to absorb the stain.
4. Scrub Again: After letting the paste sit, scrub the grout lines again with your toothbrush or grout brush.
5. Rinse and Dry: Rinse the grout lines thoroughly with clean water and dry with a clean cloth or paper towels.
Dealing with Different Types of Grout
Not all grout is created equal! Here’s a quick guide to cleaning different types of grout:
* Cement Grout: This is the most common type of grout and is generally safe to clean with bleach. However, always test in an inconspicuous area first.
* Epoxy Grout: Epoxy grout is more resistant to stains and chemicals than cement grout. While bleach can be used, it’s often not necessary. Try a milder cleaner first.
* Colored Grout: Bleach can sometimes fade or discolor colored grout. Test in an inconspicuous area before cleaning the entire area. You might want to consider using a color-safe grout cleaner instead.
Tips and Tricks for Sparkling Grout
Here are a few extra tips and tricks to help you achieve sparkling clean grout:
* Clean Regularly: The best way to keep your grout clean is to clean it regularly. Wipe up spills immediately and clean the grout lines at least once a month.
* Use a Grout Sealer: Applying a grout sealer after cleaning can help protect the grout from stains and make it easier to clean in the future.
* Steam Cleaning: A steam cleaner can also be effective at cleaning grout. The hot steam helps to loosen dirt and grime.
* Magic Eraser: For small areas of stained grout, a magic eraser can sometimes work wonders. Just wet the magic eraser and gently rub it over the grout lines.
* Be Patient: Cleaning grout can be a time-consuming process, especially if it’s heavily stained. Don’t get discouraged if it doesn’t come clean immediately. Keep scrubbing and rinsing, and you’ll eventually see results.
* Consider a Grout Pen: If your grout is permanently stained or discolored, you can use a grout pen to restore its original color. These pens are available at most home improvement stores.
* Preventative Measures: After cleaning, consider using a squeegee after showering to remove excess water and prevent mildew growth. Good ventilation in bathrooms is also crucial.
* Vinegar Alternative (Use with Caution): Some people suggest using vinegar as a grout cleaner. While vinegar is a natural cleaner, it’s acidic and can damage certain types of grout over time. If you choose to use vinegar, dilute it with water and test it in an inconspicuous area first. Never mix vinegar with bleach, as this creates toxic fumes.
* Don’t Forget the Corners: Pay special attention to the corners of your tiled areas, as these are often the dirtiest spots. Use a small brush or cotton swab to clean these areas thoroughly.
* Multiple Applications: For heavily soiled grout, you may need to repeat the cleaning process several times to achieve the desired results. Don’t be afraid to reapply the bleach solution and scrub again.
* Proper Tools: Investing in a good quality grout brush can make the cleaning process much easier and more effective. Look for a brush with stiff bristles that can reach into the grout lines.
* Avoid Abrasive Cleaners: Avoid using abrasive cleaners or scouring pads on your grout, as these can scratch the surface and make it more susceptible to staining.
* Consider Professional Cleaning: If you’ve tried everything and your grout still isn’t clean, you may want to consider hiring a professional grout cleaning service. They have specialized equipment and cleaning solutions that can effectively remove even the most stubborn stains.
I hope this guide helps you achieve sparkling clean grout! Remember to always prioritize safety and test in an inconspicuous area before cleaning your entire grout area. Happy cleaning!
Conclusion
So, there you have it! This simple yet incredibly effective Clorox grout cleaning hack is a game-changer for anyone battling stubborn stains and discoloration in their tiled spaces. Forget spending hours scrubbing with minimal results or investing in expensive, harsh chemicals. This method leverages the power of readily available household items to deliver truly remarkable results.
Why is this a must-try? Because it’s efficient, cost-effective, and surprisingly easy. The combination of baking soda and Clorox creates a powerful cleaning paste that penetrates deep into the grout lines, lifting away dirt, grime, and mildew that regular cleaners often miss. The visual transformation is often dramatic, restoring your grout to its original brightness and leaving your tiles looking fresh and revitalized.
But the beauty of this Clorox grout cleaning hack lies not only in its effectiveness but also in its adaptability. Feel free to experiment with variations to suit your specific needs and preferences. For instance, if you’re dealing with particularly stubborn stains, you can let the paste sit for a longer period, perhaps even overnight, before scrubbing. Alternatively, for more delicate surfaces, you might consider diluting the Clorox slightly with water to reduce its potency. You can also add a few drops of your favorite essential oil, like tea tree or eucalyptus, for an added boost of antibacterial power and a pleasant scent. Just be sure to test any variation on a small, inconspicuous area first to ensure it doesn’t damage the tile or grout.
Beyond the basic method, consider the tools you use. While a toothbrush is a classic choice for scrubbing grout, you might find that a grout brush with stiffer bristles provides even better results, especially for heavily soiled areas. For larger tiled surfaces, an electric grout brush can significantly reduce the amount of time and effort required.
Ultimately, the best way to discover the full potential of this Clorox grout cleaning hack is to try it yourself. We’re confident that you’ll be amazed by the difference it makes. Don’t just take our word for it – give it a go and see for yourself!
We’re eager to hear about your experiences with this DIY cleaning solution. Did it work wonders on your grout? Did you try any variations that you found particularly effective? Share your tips, tricks, and before-and-after photos in the comments below. Let’s create a community of sparkling clean tiles and happy homeowners! Your insights could help others achieve the same fantastic results. So, grab your baking soda, Clorox, and a toothbrush, and get ready to transform your tiled spaces. You won’t regret it!
Frequently Asked Questions (FAQs)
1. Is this Clorox grout cleaning hack safe for all types of grout?
While this method is generally safe for most common types of grout, it’s always best to exercise caution and test it on a small, inconspicuous area first. Different types of grout can react differently to Clorox, and you want to ensure that it doesn’t cause any discoloration or damage. If you have colored grout, pay particular attention, as Clorox can sometimes lighten the color. If you’re unsure about the type of grout you have, consult with a professional tile installer or cleaning specialist before proceeding. Natural stone tiles with grout may require special cleaners and should be tested carefully.
2. How long should I leave the Clorox and baking soda paste on the grout?
The recommended time is typically 5-10 minutes. However, for heavily soiled grout, you can leave the paste on for up to 30 minutes, or even overnight, for a more intensive cleaning. Just be sure to monitor the area closely and rinse thoroughly afterward. Leaving the paste on for extended periods can potentially damage the grout or tile, so it’s important to strike a balance between effectiveness and safety. If you are leaving it on for an extended period, ensure the area is well-ventilated.
3. What safety precautions should I take when using Clorox?
Clorox is a powerful cleaning agent, so it’s essential to take proper safety precautions when using it. Always wear gloves to protect your skin from irritation. Work in a well-ventilated area to avoid inhaling the fumes. Avoid contact with your eyes, and if contact occurs, rinse immediately with plenty of water. Never mix Clorox with ammonia or other cleaning products, as this can create dangerous and potentially deadly fumes. Keep Clorox out of reach of children and pets. When you are done, make sure to rinse the area thoroughly to remove any residue.
4. Can I use this Clorox grout cleaning hack on vertical surfaces, like shower walls?
Yes, you can use this method on vertical surfaces. However, the paste may be more difficult to apply and keep in place. To help the paste adhere to the vertical surface, you can make it slightly thicker by adding more baking soda. You can also use a sponge or cloth to apply the paste and gently press it into the grout lines. Be prepared for some dripping, and protect the surrounding surfaces with towels or plastic sheeting.
5. What if the Clorox and baking soda paste doesn’t completely remove the stains?
If the stains are particularly stubborn, you may need to repeat the process several times. You can also try using a more abrasive scrubbing tool, such as a stiff-bristled brush or a scouring pad. For extremely difficult stains, you might consider using a commercial grout cleaner specifically designed for removing tough stains. However, always follow the manufacturer’s instructions and test the cleaner on a small, inconspicuous area first. In some cases, the grout may be permanently stained and require professional cleaning or replacement.
6. How often should I clean my grout using this method?
The frequency of cleaning depends on the amount of traffic and exposure to dirt and grime. In high-traffic areas, such as kitchens and bathrooms, you may need to clean your grout every few weeks. In less frequently used areas, you can clean it every few months. Regular cleaning will help prevent the buildup of dirt and grime and make it easier to maintain clean and bright grout. You can also incorporate preventative measures, such as wiping up spills immediately and using a grout sealer to protect the grout from stains.
7. Can I use this method on colored grout?
Using Clorox on colored grout carries a risk of fading or discoloration. It’s crucial to test the solution on a hidden area first to observe any adverse effects. If you notice any color change, dilute the Clorox solution significantly or opt for a grout cleaner specifically designed for colored grout. These cleaners are formulated to clean without bleaching or altering the grout’s color.
8. What are some alternative cleaning solutions if I want to avoid using Clorox?
If you prefer to avoid using Clorox, there are several alternative cleaning solutions you can try. A mixture of vinegar and baking soda can be effective for removing mild stains. You can also use a paste of hydrogen peroxide and baking soda. For more stubborn stains, you might consider using a commercial grout cleaner that is specifically formulated for your type of grout. Steam cleaning is another effective and eco-friendly option that uses high-pressure steam to lift away dirt and grime.
9. How can I prevent grout from getting dirty in the first place?
Prevention is key to keeping your grout clean and bright. Seal your grout with a grout sealer to protect it from stains and moisture. Wipe up spills immediately to prevent them from soaking into the grout. Use mats and rugs in high-traffic areas to reduce the amount of dirt and grime that gets tracked onto the tile. Regularly sweep or vacuum your tiled floors to remove loose dirt and debris. By taking these preventative measures, you can significantly reduce the amount of cleaning required and keep your grout looking its best.
10. What type of brush is best for scrubbing grout?
The best type of brush for scrubbing grout depends on the severity of the staining and the type of grout. For general cleaning, a toothbrush or a grout brush with nylon bristles is a good choice. For more stubborn stains, you might need a brush with stiffer bristles, such as a wire brush or a scrub brush with abrasive pads. Be careful when using abrasive brushes, as they can potentially damage the grout or tile. Always test the brush on a small, inconspicuous area first to ensure it doesn’t cause any scratches or discoloration. Electric grout brushes can also be a great option for larger areas, as they provide more power and reduce the amount of manual effort required.


Leave a Comment