
Coffee and dish soap mix – sounds like an odd combination, right? But trust me, this unlikely duo is about to become your new best friend in the garden! For generations, gardeners have relied on clever, often unconventional, methods to keep their plants thriving. Think of it as a time-honored tradition, passed down through families, a secret weapon against common garden woes.
I know what you’re thinking: why would I ever mix coffee and dish soap? Well, the answer is simple: it’s an incredibly effective and surprisingly gentle way to tackle some of the most frustrating garden pests. We all want a lush, vibrant garden, bursting with healthy plants. But pesky aphids, scale, and other critters can quickly turn our green dreams into a brown nightmare. That’s where this DIY trick comes in!
This coffee and dish soap mix offers a natural alternative to harsh chemical pesticides. It’s a budget-friendly, eco-conscious solution that’s easy to whip up with ingredients you probably already have in your kitchen. So, ditch the expensive store-bought sprays and let’s dive into this simple yet powerful gardening hack that will help you reclaim your garden and enjoy the fruits (and vegetables!) of your labor. Get ready to learn how this simple concoction can transform your gardening game!
Planting Peanuts: From Seed to Snack in Your Own Backyard!
Hey there, fellow gardening enthusiasts! Ever thought about growing your own peanuts? It’s surprisingly easy and incredibly rewarding. Imagine the satisfaction of harvesting your own homegrown peanuts, roasting them up, and enjoying a delicious, healthy snack. I’m going to walk you through the whole process, step-by-step, so you can experience the joy of growing peanuts right in your own backyard (or even in containers!).
Choosing Your Peanut Variety
Before we get our hands dirty, let’s talk about peanut varieties. There are four main types, and each has its own characteristics:
* Runner Peanuts: These are the most common type grown commercially. They have a uniform size and shape, making them ideal for peanut butter. They typically mature in 120-130 days.
* Virginia Peanuts: These are the largest peanuts and are often roasted and sold as gourmet snacks. They take around 130-150 days to mature.
* Spanish Peanuts: These have smaller kernels and a reddish-brown skin. They’re often used in candies and peanut brittle. They mature relatively quickly, in about 110-120 days.
* Valencia Peanuts: These have three or more kernels per shell and are known for their sweet flavor. They’re great for boiling or roasting. They mature in about 90-110 days, making them a good choice for shorter growing seasons.
I personally love Virginia peanuts for their size and flavor, but choose the variety that best suits your climate and taste preferences. You can usually find peanut seeds (or raw, unsalted peanuts in the shell) at your local garden center or online. Just make sure they’re intended for planting and haven’t been roasted or treated with anything that would prevent germination.
Preparing for Planting: Location, Soil, and Timing
Peanuts need a few key things to thrive:
* Sunlight: They need at least 6-8 hours of direct sunlight per day. The more sun, the better!
* Well-Drained Soil: Peanuts don’t like soggy feet! The soil needs to drain well to prevent root rot. Sandy loam is ideal, but you can amend heavier soils with compost and other organic matter.
* Warm Temperatures: Peanuts are warm-weather crops. Wait until the soil temperature reaches at least 65°F (18°C) before planting. This is usually a couple of weeks after the last frost in your area.
* Slightly Acidic Soil: Peanuts prefer a soil pH between 6.0 and 6.5. You can test your soil pH with a kit from your local garden center.
Preparing the Soil
1. Clear the Area: Remove any weeds, rocks, or debris from the planting area.
2. Till or Dig: Loosen the soil to a depth of at least 12 inches. This will help the peanut roots grow easily.
3. Amend the Soil: Mix in plenty of compost or other organic matter to improve drainage and fertility. I like to add a couple of inches of compost to the topsoil and till it in.
4. Level the Soil: Rake the soil smooth to create a level planting surface.
Planting Your Peanuts: Getting Started
Now for the fun part! Here’s how to plant your peanut seeds:
1. Shell the Peanuts (Optional): You can plant peanuts in the shell, but they’ll germinate faster if you shell them first. Be careful not to damage the kernels when shelling. I usually crack the shell gently with my fingers.
2. Soak the Seeds (Optional): Soaking the seeds in water for a few hours before planting can also speed up germination. I usually soak them for about 2-4 hours.
3. Planting Depth: Plant the peanut kernels about 1-2 inches deep.
4. Spacing: Space the plants about 6-8 inches apart in rows that are 2-3 feet apart. This gives them enough room to spread out and develop properly.
5. Water Thoroughly: After planting, water the area thoroughly to settle the soil and provide moisture for germination.
Caring for Your Peanut Plants: Watering, Weeding, and Hilling
Once your peanut plants start to grow, they’ll need regular care to thrive.
* Watering: Water regularly, especially during dry periods. Peanuts need consistent moisture, but avoid overwatering, which can lead to root rot. I usually water deeply once or twice a week, depending on the weather.
* Weeding: Keep the area around your peanut plants free of weeds. Weeds compete with the peanuts for nutrients and water. Hand-pulling weeds is the best option, as herbicides can damage the peanut plants.
* Fertilizing: Peanuts are legumes, which means they can fix nitrogen from the air. However, they still benefit from a balanced fertilizer. I usually apply a fertilizer with a ratio of 5-10-10 (nitrogen-phosphorus-potassium) about a month after planting. Follow the instructions on the fertilizer package.
* Hilling: This is a crucial step for peanut production. As the peanut plants grow, they’ll produce “pegs” that grow downward from the base of the plant into the soil. These pegs are where the peanuts develop. To encourage peanut production, you need to “hill” the soil around the base of the plants. This means gently mounding soil around the base of the plants to cover the pegs. I usually do this a couple of times during the growing season, starting when the plants are about 6 inches tall.
Harvesting Your Peanuts: The Grand Finale
Harvesting is the most exciting part! Here’s how to know when your peanuts are ready and how to harvest them:
1. Timing: Peanuts are usually ready to harvest about 1
Hey there, fellow gardening enthusiasts! Ever thought about growing your own peanuts? It’s surprisingly easy and incredibly rewarding. Imagine the satisfaction of harvesting your own homegrown peanuts, roasting them up, and enjoying a delicious, healthy snack. I’m going to walk you through the whole process, step-by-step, so you can experience the joy of growing peanuts right in your own backyard (or even in containers!).
Choosing Your Peanut Variety
Before we get our hands dirty, let’s talk about peanut varieties. There are four main types, and each has its own characteristics:
* Runner Peanuts: These are the most common type grown commercially. They have a uniform size and shape, making them ideal for peanut butter. They typically mature in 120-130 days.
* Virginia Peanuts: These are the largest peanuts and are often roasted and sold as gourmet snacks. They take around 130-150 days to mature.
* Spanish Peanuts: These have smaller kernels and a reddish-brown skin. They’re often used in candies and peanut brittle. They mature relatively quickly, in about 110-120 days.
* Valencia Peanuts: These have three or more kernels per shell and are known for their sweet flavor. They’re great for boiling or roasting. They mature in about 90-110 days, making them a good choice for shorter growing seasons.
I personally love Virginia peanuts for their size and flavor, but choose the variety that best suits your climate and taste preferences. You can usually find peanut seeds (or raw, unsalted peanuts in the shell) at your local garden center or online. Just make sure they’re intended for planting and haven’t been roasted or treated with anything that would prevent germination.
Preparing for Planting: Location, Soil, and Timing
Peanuts need a few key things to thrive:
* Sunlight: They need at least 6-8 hours of direct sunlight per day. The more sun, the better!
* Well-Drained Soil: Peanuts don’t like soggy feet! The soil needs to drain well to prevent root rot. Sandy loam is ideal, but you can amend heavier soils with compost and other organic matter.
* Warm Temperatures: Peanuts are warm-weather crops. Wait until the soil temperature reaches at least 65°F (18°C) before planting. This is usually a couple of weeks after the last frost in your area.
* Slightly Acidic Soil: Peanuts prefer a soil pH between 6.0 and 6.5. You can test your soil pH with a kit from your local garden center.
Preparing the Soil
1. Clear the Area: Remove any weeds, rocks, or debris from the planting area.
2. Till or Dig: Loosen the soil to a depth of at least 12 inches. This will help the peanut roots grow easily.
3. Amend the Soil: Mix in plenty of compost or other organic matter to improve drainage and fertility. I like to add a couple of inches of compost to the topsoil and till it in.
4. Level the Soil: Rake the soil smooth to create a level planting surface.
Planting Your Peanuts: Getting Started
Now for the fun part! Here’s how to plant your peanut seeds:
1. Shell the Peanuts (Optional): You can plant peanuts in the shell, but they’ll germinate faster if you shell them first. Be careful not to damage the kernels when shelling. I usually crack the shell gently with my fingers.
2. Soak the Seeds (Optional): Soaking the seeds in water for a few hours before planting can also speed up germination. I usually soak them for about 2-4 hours.
3. Planting Depth: Plant the peanut kernels about 1-2 inches deep.
4. Spacing: Space the plants about 6-8 inches apart in rows that are 2-3 feet apart. This gives them enough room to spread out and develop properly.
5. Water Thoroughly: After planting, water the area thoroughly to settle the soil and provide moisture for germination.
Caring for Your Peanut Plants: Watering, Weeding, and Hilling
Once your peanut plants start to grow, they’ll need regular care to thrive.
* Watering: Water regularly, especially during dry periods. Peanuts need consistent moisture, but avoid overwatering, which can lead to root rot. I usually water deeply once or twice a week, depending on the weather.
* Weeding: Keep the area around your peanut plants free of weeds. Weeds compete with the peanuts for nutrients and water. Hand-pulling weeds is the best option, as herbicides can damage the peanut plants.
* Fertilizing: Peanuts are legumes, which means they can fix nitrogen from the air. However, they still benefit from a balanced fertilizer. I usually apply a fertilizer with a ratio of 5-10-10 (nitrogen-phosphorus-potassium) about a month after planting. Follow the instructions on the fertilizer package.
* Hilling: This is a crucial step for peanut production. As the peanut plants grow, they’ll produce “pegs” that grow downward from the base of the plant into the soil. These pegs are where the peanuts develop. To encourage peanut production, you need to “hill” the soil around the base of the plants. This means gently mounding soil around the base of the plants to cover the pegs. I usually do this a couple of times during the growing season, starting when the plants are about 6 inches tall.
Harvesting Your Peanuts: The Grand Finale
Harvesting is the most exciting part! Here’s how to know when your peanuts are ready and how to harvest them:
1. Timing: Peanuts are usually ready to harvest about 120-150 days after planting, depending on the variety. A good indicator is when the leaves start to turn yellow and the plants begin to die back.
2. Test Dig: Dig up a few plants to check the peanuts. The shells should be well-formed and the kernels should be plump and full.
3. Digging: Use a garden fork or shovel to carefully dig up the peanut plants. Be gentle to avoid damaging the peanuts.
4. Shaking: Shake off as much soil as possible from the plants.
5. Drying: Hang the plants upside down in a well-ventilated area to dry for about 2-4 weeks. This allows the peanuts to cure and develop their flavor. I usually hang them in my garage.
Curing and Storing Your Peanuts: Preserving Your Harvest
After drying, you’ll need to cure your peanuts properly to ensure they store well.
1. Shelling (Optional): You can shell the peanuts after they’re dried, or you can store them in the shell. I usually shell them because it takes up less space.
2. Sorting: Discard any peanuts that are moldy or damaged.
3. Storing: Store the peanuts in an airtight container in a cool, dry place. They can be stored for several months. I like to store mine in the refrigerator to keep them fresh longer.
Roasting Your Peanuts: The Perfect Snack
Now for the best part: roasting your homegrown peanuts!
1. Preheat Oven: Preheat your oven to 350°F (175°C).
2. Spread Peanuts: Spread the peanuts in a single layer on a baking sheet.
3. Roast: Roast for 15-20 minutes, or until the peanuts are golden brown and fragrant. Stir them occasionally to ensure even roasting.
4. Cool: Let the peanuts cool completely before eating.
And there you have it! You’ve successfully grown and roasted your own peanuts. Enjoy your delicious, homegrown snack! I hope you found this guide helpful, and happy gardening!
Conclusion
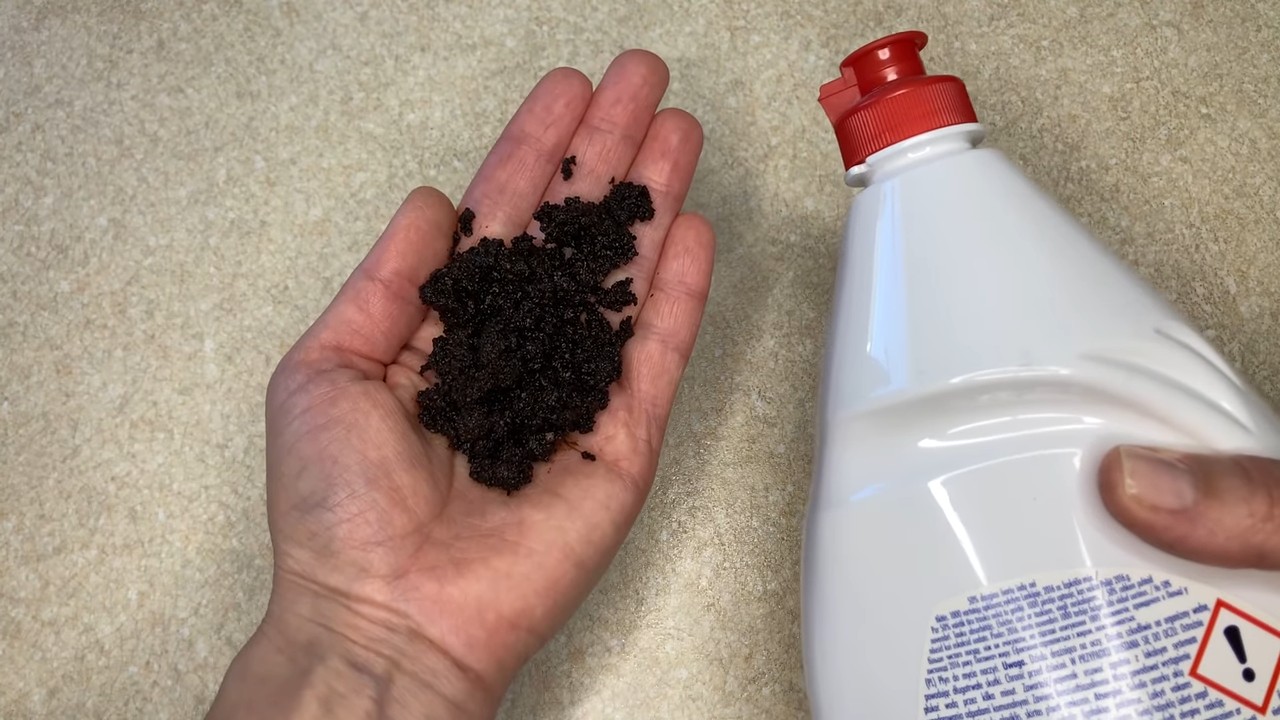
So, there you have it! This simple yet surprisingly effective DIY trick using coffee and dish soap is more than just a cleaning hack; it’s a game-changer for anyone battling stubborn grime and grease. We’ve explored how the abrasive nature of coffee grounds, combined with the degreasing power of dish soap, creates a potent cleaning solution that’s both eco-friendly and readily available in most households.
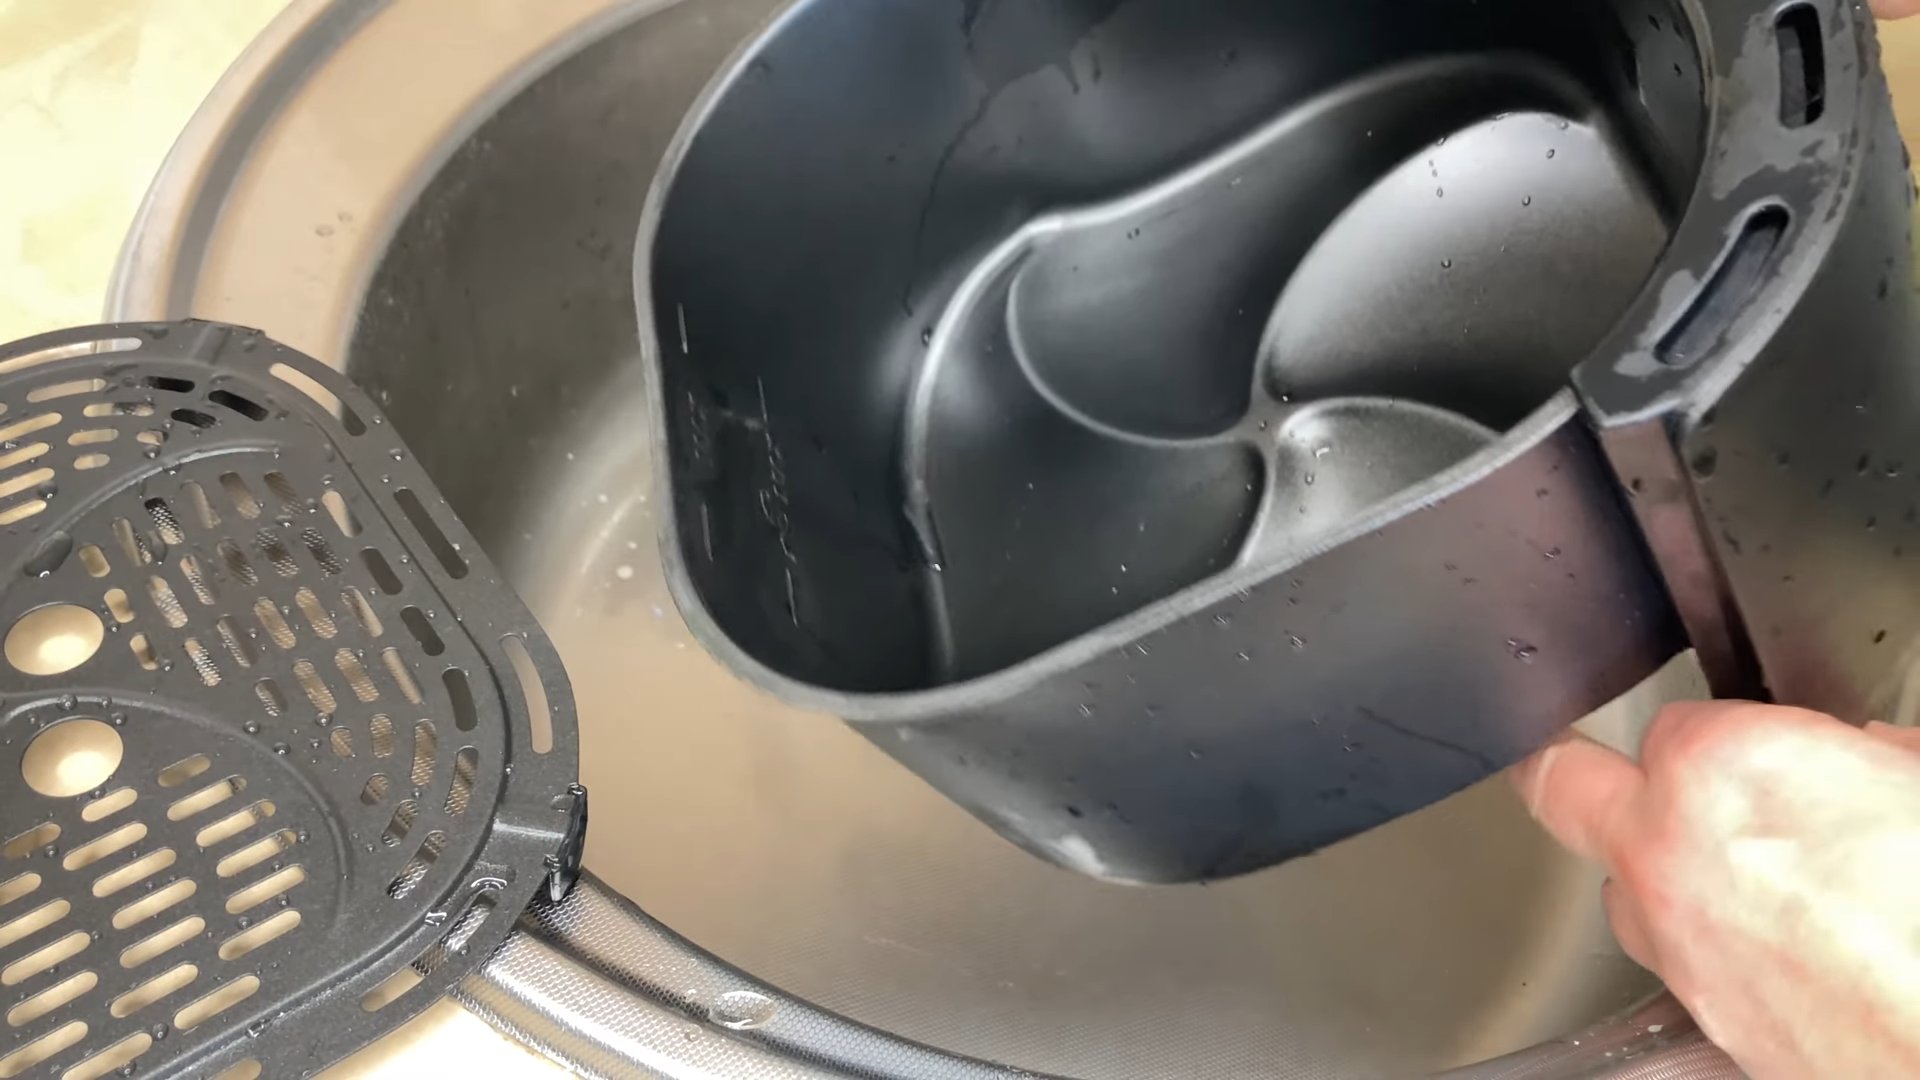
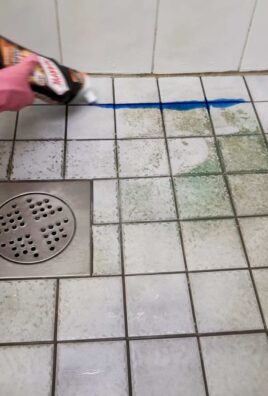
Why is this a must-try? Because it’s incredibly versatile. From scrubbing burnt food off your pots and pans to revitalizing your grimy stovetop, this mixture tackles messes that other cleaners often struggle with. It’s also a fantastic alternative to harsh chemical cleaners, making it a safer option for your family and the environment. Plus, let’s be honest, who doesn’t love the smell of coffee while cleaning? It adds a touch of aromatherapy to your chores!
But the benefits don’t stop there. Think about the money you’ll save by repurposing used coffee grounds instead of constantly buying expensive cleaning products. It’s a win-win situation for your wallet and the planet.
Variations and Suggestions:
* For extra stubborn stains: Let the coffee and dish soap mixture sit on the affected area for 10-15 minutes before scrubbing. This allows the solution to penetrate the grime and loosen it for easier removal.
* For delicate surfaces: While coffee grounds are generally safe, test the mixture on an inconspicuous area first to ensure it doesn’t scratch or damage the surface. You can also use finely ground coffee for a gentler abrasive action.
* Add essential oils: Boost the cleaning power and fragrance by adding a few drops of your favorite essential oil, such as lemon, tea tree, or eucalyptus. These oils have natural antibacterial and antifungal properties.
* Coffee Paste: For vertical surfaces, create a thicker paste by using less dish soap. This will help the mixture cling to the surface and prevent it from running.
* Coffee infused dish soap: You can even create a coffee infused dish soap by adding coffee grounds to your dish soap bottle and letting it sit for a few days. Strain the grounds out before using.
We’re confident that once you try this DIY cleaning trick, you’ll be amazed by the results. It’s a simple, effective, and eco-friendly way to tackle tough cleaning challenges around your home. So, ditch the harsh chemicals and embrace the power of coffee and dish soap!
Now, it’s your turn! We encourage you to try this coffee and dish soap cleaning hack and share your experience with us. Let us know what surfaces you cleaned, what challenges you faced, and what tips you discovered along the way. Your feedback will help us refine this method and make it even better for everyone. Share your photos and stories in the comments below – we can’t wait to hear from you!
Frequently Asked Questions (FAQ)
Q: What kind of coffee grounds should I use?
A: You can use any type of coffee grounds, whether they’re from regular brewed coffee, espresso, or even instant coffee. However, used coffee grounds are ideal because they’re less abrasive than fresh grounds. This reduces the risk of scratching delicate surfaces. If you’re concerned about scratching, opt for finely ground coffee.
Q: What type of dish soap works best?
A: Any standard dish soap will work well with this DIY cleaning trick. Choose a dish soap that you typically use for cleaning dishes, as it’s likely to be effective at cutting through grease and grime. For an extra boost of cleaning power, consider using a dish soap that contains degreasers or enzymes.
Q: Can I use this mixture on all surfaces?
A: While this mixture is generally safe for most surfaces, it’s always a good idea to test it on an inconspicuous area first, especially on delicate surfaces like polished wood, painted surfaces, or stainless steel. Avoid using it on surfaces that are easily scratched, such as glass or mirrors.
Q: How do I store the coffee and dish soap mixture?
A: It’s best to use the coffee and dish soap mixture immediately after preparing it. However, if you have leftover mixture, you can store it in an airtight container in a cool, dry place for up to a week. Be sure to label the container clearly to avoid any confusion.
Q: Will the coffee grounds clog my drain?
A: While small amounts of coffee grounds are unlikely to clog your drain, it’s best to avoid pouring large quantities of the mixture down the drain. Instead, wipe up the excess mixture with a paper towel or cloth and dispose of it in the trash. You can also compost the coffee grounds if you have a compost bin.
Q: Can I use this mixture to clean my oven?
A: Yes, this mixture can be used to clean your oven, but it’s important to follow a few precautions. First, make sure the oven is completely cool before applying the mixture. Second, remove any loose debris or food particles from the oven. Third, apply the coffee and dish soap mixture to the affected areas and let it sit for 15-20 minutes. Finally, scrub the oven with a sponge or brush and rinse thoroughly with water.
Q: Is this mixture safe for septic systems?
A: While coffee grounds are generally considered safe for septic systems in small amounts, it’s best to avoid pouring large quantities of the mixture down the drain if you have a septic system. As mentioned earlier, wipe up the excess mixture and dispose of it in the trash or compost bin.
Q: Can I add other ingredients to the mixture?
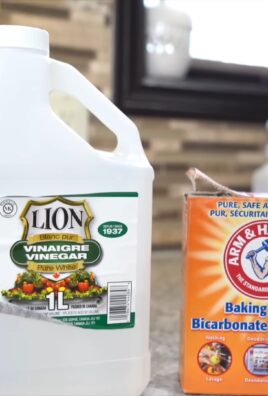
A: Yes, you can add other ingredients to the mixture to boost its cleaning power or fragrance. Some popular additions include essential oils (such as lemon, tea tree, or eucalyptus), vinegar, or baking soda. However, be sure to research the compatibility of these ingredients before adding them to the mixture.
Q: How often can I use this cleaning trick?
A: You can use this cleaning trick as often as needed, depending on the severity of the grime and grease. However, it’s important to avoid overusing it on delicate surfaces, as excessive scrubbing can cause damage.
Q: What if the coffee grounds stain the surface I’m cleaning?
A: In rare cases, coffee grounds may stain light-colored surfaces. If this happens, try rinsing the surface with a mixture of water and vinegar. You can also use a mild bleach solution to remove the stain, but be sure to test it on an inconspicuous area first.
Q: Can I use this to clean my coffee maker?
A: While you can use diluted vinegar to clean your coffee maker, using coffee grounds and dish soap is not recommended. The grounds can clog the small parts of the machine. Stick to manufacturer recommendations for cleaning your coffee maker.
Q: Is this mixture safe for pets?
A: While the ingredients themselves are not highly toxic, it’s best to keep pets away from the mixture while you’re cleaning. The dish soap can cause stomach upset if ingested, and the coffee grounds may contain caffeine, which can be harmful to pets in large quantities. Rinse the cleaned area thoroughly after using the mixture to remove any residue.
Leave a Comment