
DIY Laundry Soap and Vinegar Cleaner: Tired of spending a fortune on laundry detergents and cleaners filled with harsh chemicals? I get it! I was too. That’s why I dove headfirst into the world of homemade cleaning solutions, and let me tell you, it’s been a game-changer for my wallet and my peace of mind.
For generations, resourceful homemakers have relied on simple, natural ingredients to keep their homes sparkling. Think back to your grandmother’s era – vinegar and soap were staples, not just for cleaning, but for overall well-being. This isn’t just a trend; it’s a return to time-tested wisdom!
In today’s world, we’re bombarded with products promising the moon, but often delivering questionable ingredients. Many people are looking for ways to reduce their exposure to synthetic chemicals, save money, and embrace a more sustainable lifestyle. That’s where this DIY Laundry Soap and Vinegar Cleaner comes in. I’m going to show you how to create effective, eco-friendly alternatives that are gentle on your clothes, safe for your family, and kind to the environment. Plus, you’ll be amazed at how much money you can save! So, let’s ditch the expensive store-bought stuff and unlock the secrets to a cleaner, greener home, shall we?

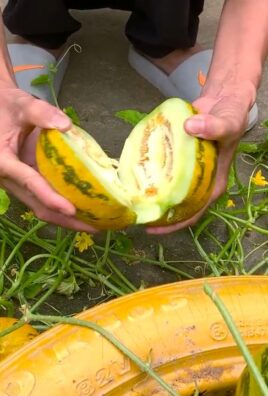
Growing Radishes in Pots: A Beginner’s Guide
Hey there, fellow gardening enthusiasts! Ever thought about growing your own radishes but don’t have a sprawling garden? No problem! Radishes are surprisingly easy to grow in pots, even if you’re a complete beginner. I’m going to walk you through the whole process, from choosing the right pot to harvesting those peppery little gems. Get ready to enjoy fresh, homegrown radishes in just a few weeks!
Choosing the Right Pot and Soil
Before we even think about seeds, let’s talk about the foundation of our radish garden: the pot and the soil.
* Pot Size: Radishes don’t need a ton of space, but they do need some depth. I recommend a pot that’s at least 6 inches deep and 6 inches wide. A wider pot will allow you to plant more radishes. You can use individual pots for each radish, but that’s not really necessary. A single pot can easily accommodate several plants.
* Drainage: This is crucial! Radishes hate soggy soil. Make sure your pot has drainage holes at the bottom. If it doesn’t, you can drill some yourself.
* Material: The material of the pot is less important than size and drainage. You can use terracotta, plastic, ceramic, or even repurposed containers like buckets or tubs. Just make sure they’re clean and have drainage.
* Soil: Radishes prefer loose, well-draining soil that’s rich in organic matter. Avoid heavy clay soils, as they can become compacted and hinder root growth. I like to use a mix of:
* Potting mix (this provides good drainage and aeration)
* Compost (for nutrients and moisture retention)
* Perlite or vermiculite (to further improve drainage)
You can buy pre-mixed potting soil, but I find that making my own gives me more control over the quality and composition.
Planting Your Radish Seeds
Now for the fun part: planting!
1. Prepare the Soil: Fill your pot with your chosen soil mix, leaving about an inch of space at the top. Gently pat the soil down to remove any large air pockets.
2. Sow the Seeds: Radish seeds are small, so you don’t need to plant them very deep. I usually sow them about ½ inch deep and about 1 inch apart. If you’re using a larger pot, you can plant them in rows or scatter them evenly across the surface.
3. Cover the Seeds: Gently cover the seeds with a thin layer of soil.
4. Water Thoroughly: Water the soil gently but thoroughly until it’s evenly moist. Avoid overwatering, which can cause the seeds to rot.
5. Label Your Pot: It’s always a good idea to label your pot with the type of radish you’re growing and the date you planted them. This will help you keep track of your progress.
Caring for Your Radish Plants
Radishes are relatively low-maintenance, but they do need a few things to thrive.
1. Sunlight: Radishes need at least 6 hours of sunlight per day. If you don’t have a sunny spot, you can use a grow light.
2. Watering: Keep the soil consistently moist, but not soggy. Water when the top inch of soil feels dry to the touch. Avoid letting the soil dry out completely, as this can cause the radishes to become tough and bitter.
3. Thinning: Once your seedlings have emerged and have a few true leaves, you’ll need to thin them out. This means removing some of the seedlings to give the remaining plants enough space to grow. I usually thin them to about 2 inches apart. Don’t just yank them out! Gently snip them off at the soil line with scissors to avoid disturbing the roots of the remaining plants.
4. Fertilizing: Radishes don’t need a lot of fertilizer, but a light feeding every few weeks can help them grow faster. I like to use a balanced liquid fertilizer diluted to half strength. You can also add compost tea to the soil.
5. Weed Control: Keep an eye out for weeds and remove them promptly. Weeds can compete with your radishes for nutrients and water.
6. Pest Control: Radishes are generally pest-resistant, but they can sometimes be attacked by flea beetles or aphids. If you notice any pests, you can try spraying them with insecticidal soap or neem oil.
Harvesting Your Radishes
This is the moment you’ve been waiting for! Radishes are fast growers, and you can usually harvest them in about 3-4 weeks after planting.
1. Check for Maturity: The best way to tell if your radishes are ready to harvest is to check the size of the root. Gently brush away some of the soil around the base of the plant to see how big the radish is. Most radish varieties are ready to harvest when they’re about 1 inch in diameter.
2. Harvesting: To harvest your radishes, gently pull them out of the soil. If the soil is dry, you may need to loosen it first with a trowel.
3. Cleaning: Wash the radishes thoroughly to remove any dirt.
4. Storage: Store your radishes in the refrigerator in a plastic bag or container. They’ll keep for about a week.
Troubleshooting
Even with the best care, things can sometimes go wrong. Here are a few common problems you might encounter when growing radishes in pots:
* Radishes are too small: This could be due to several factors, including overcrowding, lack of sunlight, or poor soil. Make sure you thin your seedlings properly, provide them with enough sunlight, and use a good quality soil mix.
* Radishes are tough and bitter: This is usually caused by letting the soil dry out too much or by harvesting them too late. Keep the soil consistently moist and harvest your radishes when they’re the right size.
* Radishes are splitting: This can be caused by inconsistent watering. Try to water your radishes evenly and avoid letting the soil dry out completely.
* Radishes are bolting (going to seed): This is usually caused by hot weather. Radishes are cool-season crops and don’t do well in hot temperatures. If you live in a warm climate, try planting your radishes in the fall or winter.
Choosing Your Radish Variety
There are tons of different radish varieties to choose from, each with its own unique flavor, color, and shape. Here are a few of my favorites:
* Cherry Belle: A classic red radish with a mild, slightly sweet flavor.
* French Breakfast: An elongated radish with a red top and a white bottom. It has a crisp texture and a slightly peppery flavor.
* Easter Egg: A mix of radishes in different colors, including red, pink, purple, and white. They’re fun to grow and add a splash of color to your salads.
* Black Spanish: A large, round radish with a black skin and a white flesh. It has a strong, pungent flavor.
* Watermelon Radish: A beautiful radish with a green skin and a bright pink interior. It has a mild, slightly sweet flavor.
Succession Planting for Continuous Harvests
To enjoy a continuous supply of radishes throughout the growing season, try succession planting. This means planting a new batch of seeds every 1-2 weeks. This way, you’ll always have radishes ready to harvest.
Creative Uses for Your Homegrown Radishes
Okay, so you’ve got a bunch of radishes. Now what? Here are a few ideas:
* Salads: Radishes add a peppery crunch to salads. Slice them thinly or grate them.
* Snacks: Eat them raw with a sprinkle of salt.
* Sandwiches: Add sliced radishes to sandwiches for a bit of zing.
* Pickled Radishes: A great way to preserve your radishes and add a tangy flavor to your meals.
* Radish Greens: Don’t throw away the radish greens! They’re edible and nutritious. You can add them to salads, stir-fries, or soups. They have a slightly peppery flavor, similar to arugula.
Extra Tips for Radish Growing Success
* Rotate your crops: Don’t plant radishes in the same spot year after year. This can help prevent soilborne diseases.
* Companion planting: Radishes are good companions for carrots, lettuce, and spinach.
* Don’t overwater: Overwatering can lead to root rot.
* Harvest promptly: Radishes can become tough and bitter if they’re left in the ground too long.
Growing radishes in pots is a rewarding experience. It’s a great way to enjoy fresh, homegrown vegetables, even if you don’t

Conclusion
So, there you have it! Ditching the store-bought detergents and embracing this DIY laundry soap and vinegar cleaner is more than just a trend; it’s a conscious choice for a cleaner home, a healthier planet, and a happier wallet. We’ve walked you through the simple steps, highlighting the cost-effectiveness and the sheer satisfaction of creating something beneficial with your own hands.
But why is this DIY trick a must-try? Beyond the obvious savings, you’re gaining complete control over the ingredients that come into contact with your clothes and your skin. No more deciphering confusing labels filled with harsh chemicals and synthetic fragrances. You know exactly what’s going into your laundry, allowing you to tailor the recipe to your specific needs and sensitivities. This is especially crucial for families with young children, individuals with allergies, or anyone simply seeking a more natural lifestyle.
Furthermore, the environmental impact of switching to DIY laundry soap and vinegar cleaner is significant. By reducing your reliance on commercially produced detergents, you’re minimizing plastic waste from packaging and decreasing the amount of harmful chemicals released into our waterways. It’s a small change that can make a big difference.
Looking for variations? Absolutely! For an extra boost of cleaning power, consider adding a tablespoon of borax to your laundry soap recipe. If you prefer a scented laundry experience, experiment with different essential oils. Lavender, lemon, and tea tree oil are popular choices, not only for their pleasant aromas but also for their antibacterial properties. Remember to use high-quality, pure essential oils for the best results and to avoid any potential skin irritations. You can also infuse your vinegar with citrus peels for a naturally scented and even more potent cleaning solution. Simply add citrus peels to a jar of vinegar and let it sit for a few weeks before straining and using.
Don’t be afraid to experiment with the ratios of ingredients to find what works best for your washing machine and water hardness. Some users find that they need to adjust the amount of soap or vinegar depending on the load size and the level of dirtiness. Start with the recommended amounts and adjust accordingly until you achieve the desired results.
We understand that trying something new can be a little daunting, but we encourage you to take the plunge and give this DIY laundry soap and vinegar cleaner a try. The process is simple, the ingredients are readily available, and the benefits are undeniable. You might be surprised at how easy and rewarding it is to create your own effective and eco-friendly laundry solution.
We’re confident that you’ll love the results! Once you’ve tried it, we’d love to hear about your experience. Share your tips, variations, and any challenges you encountered in the comments below. Let’s build a community of DIY enthusiasts who are passionate about creating a cleaner, healthier, and more sustainable world, one load of laundry at a time. Let us know if you found this DIY laundry soap and vinegar cleaner recipe helpful!
Frequently Asked Questions
What type of washing machine is this DIY laundry soap safe for?
This DIY laundry soap and vinegar cleaner is generally safe for both standard and high-efficiency (HE) washing machines. However, it’s crucial to use the correct amount of soap, especially in HE machines. Overuse of any detergent, including DIY versions, can lead to buildup and reduced efficiency. Start with a smaller amount than you would typically use with commercial detergents and adjust as needed. The vinegar acts as a natural fabric softener and helps to prevent soap buildup. Always consult your washing machine’s manual for specific recommendations regarding detergent usage.
Will the vinegar smell linger on my clothes?
No, the vinegar smell will not linger on your clothes once they are dry. The vinegar odor dissipates during the washing and drying process. In fact, vinegar helps to neutralize odors and leaves your clothes smelling fresh and clean. If you are particularly sensitive to smells, you can add a few drops of your favorite essential oil to the vinegar before adding it to the washing machine.
How much DIY laundry soap should I use per load?
The amount of DIY laundry soap you should use per load depends on the size of the load and the level of dirtiness. As a general guideline, start with 1-2 tablespoons for a regular load and adjust accordingly. For heavily soiled loads, you may need to use slightly more. For HE machines, start with 1 tablespoon and increase if necessary. It’s always better to start with less and add more if needed to avoid soap buildup.
Can I use this DIY laundry soap on all types of fabrics?
This DIY laundry soap is generally safe for most types of fabrics, including cotton, linen, and synthetic blends. However, it’s always a good idea to test it on a small, inconspicuous area of the fabric first, especially for delicate fabrics like silk or wool. Avoid using this soap on fabrics that require special care, such as dry-clean-only items. The vinegar is safe for most fabrics and can even help to brighten colors.
How do I store the DIY laundry soap?
Store your DIY laundry soap in an airtight container in a cool, dry place. This will help to prevent clumping and maintain its effectiveness. You can use a glass jar, a plastic container, or any other container that seals tightly. Make sure to label the container clearly so that you don’t accidentally mistake it for something else.
What are the benefits of using vinegar in laundry?
Vinegar offers several benefits when used in laundry. It acts as a natural fabric softener, helping to keep your clothes soft and fluffy. It also helps to remove odors, brighten colors, and prevent soap buildup. Vinegar can also help to kill bacteria and germs, making it a great addition to your laundry routine, especially for items like towels and bedding.
Can I add essential oils to my DIY laundry soap?
Yes, you can add essential oils to your DIY laundry soap for a pleasant scent and added benefits. Lavender, lemon, tea tree, and eucalyptus are popular choices. Add a few drops of your favorite essential oil to the laundry soap or directly to the washing machine. Be sure to use high-quality, pure essential oils and avoid using too much, as some essential oils can be irritating to the skin.
What if my DIY laundry soap clumps up?
If your DIY laundry soap clumps up, it’s likely due to moisture. You can break up the clumps by using a fork or spoon. To prevent clumping in the future, make sure to store the soap in an airtight container in a cool, dry place. You can also add a desiccant packet to the container to absorb any excess moisture.
Is this DIY laundry soap safe for septic systems?
Yes, this DIY laundry soap is generally safe for septic systems. The ingredients are biodegradable and less likely to cause problems than many commercial detergents. However, it’s still important to use the correct amount of soap and avoid overuse, as excessive amounts of any detergent can potentially disrupt the balance of your septic system.
Where can I find the ingredients for this DIY laundry soap?
The ingredients for this DIY laundry soap are readily available at most grocery stores and online retailers. Washing soda and borax can usually be found in the laundry aisle. Vinegar is a common household item and can be found in the vinegar and oil section. Essential oils can be found at health food stores or online retailers specializing in aromatherapy products.
Leave a Comment