
Giant Watermelon Growing: Your Guide to a Bountiful Harvest
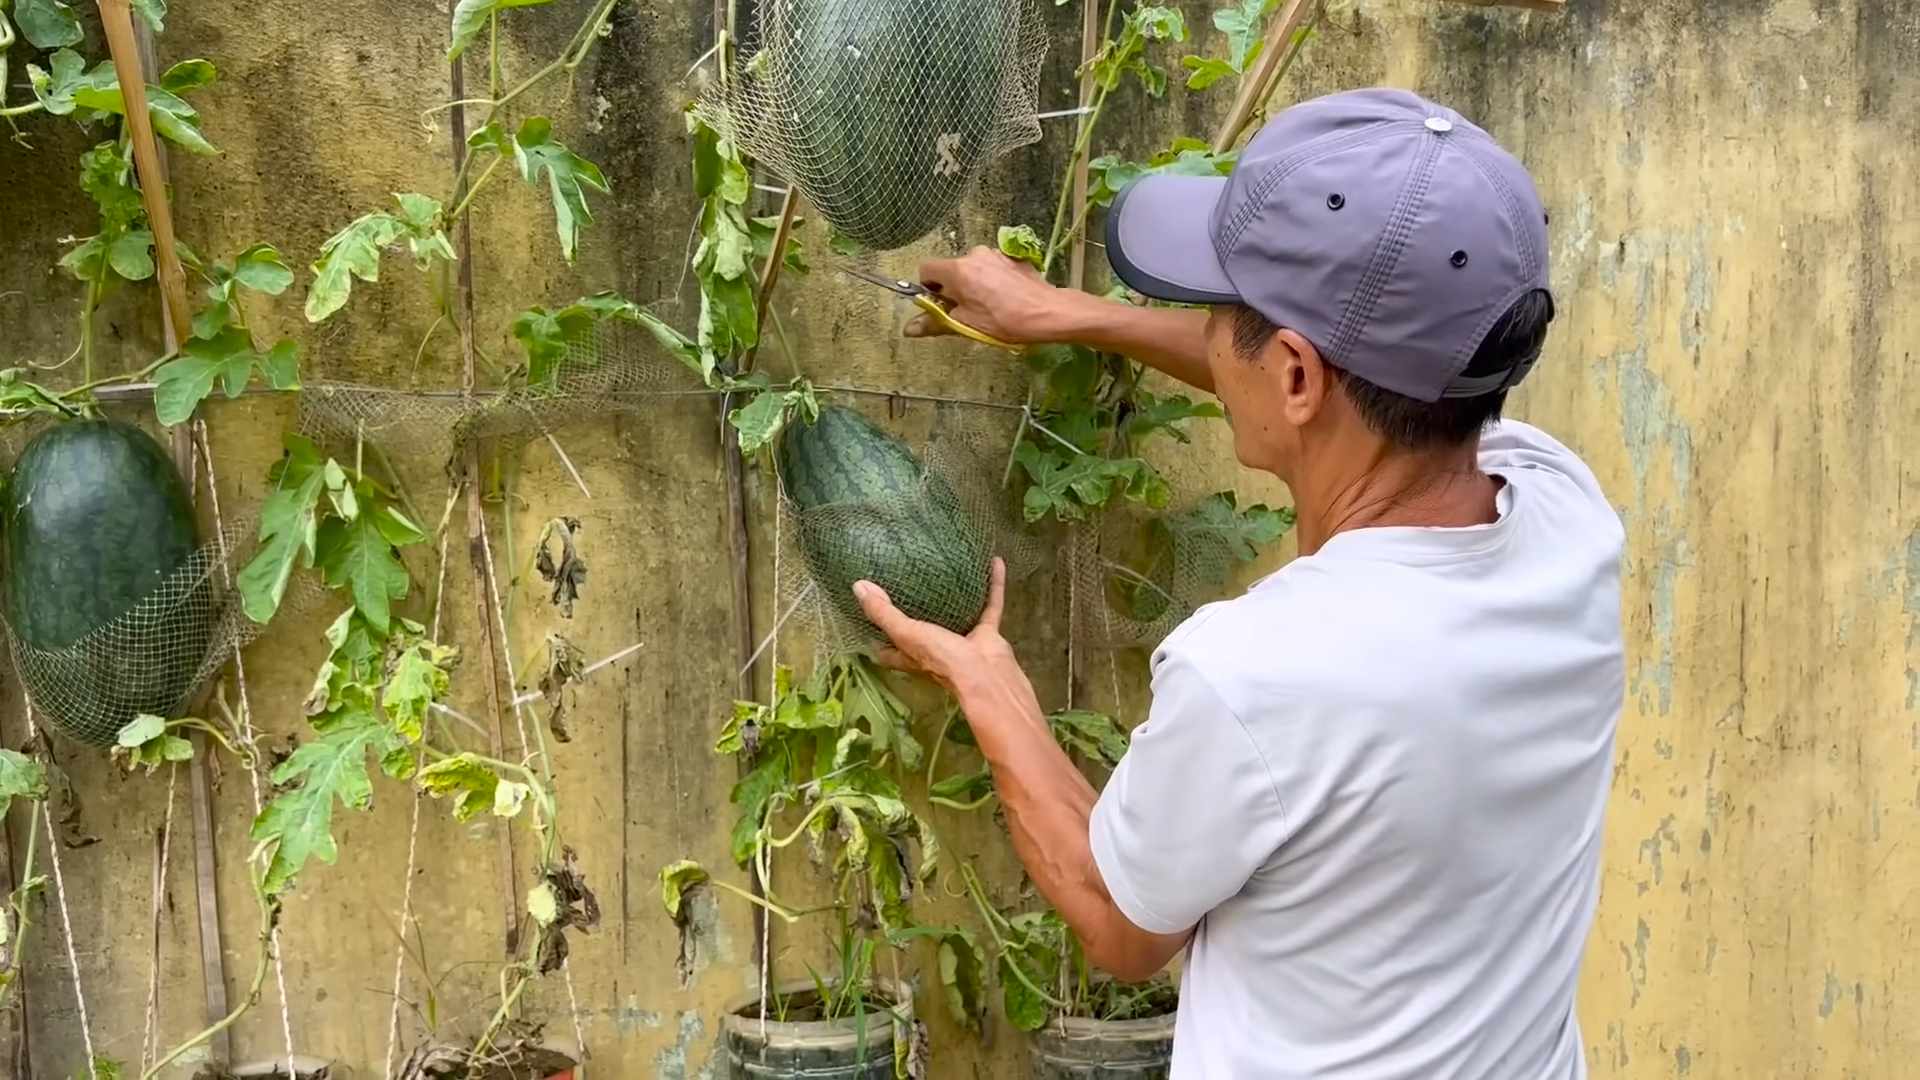
Giant watermelon growing isn’t just about producing oversized fruit; it’s about the sheer satisfaction of nurturing a plant from seed to a massive, juicy reward. I’ve always loved the challenge of growing things, and nothing quite compares to the thrill of harvesting a watermelon so large it requires two people to lift! This passion, combined with years of experimenting in my own garden, led me to develop these simple yet effective Giant Watermelon Growing techniques I’m excited to share with you.
The history of watermelon cultivation is fascinating, stretching back thousands of years to ancient Egypt. These weren’t the massive watermelons we see today, but their cultivation speaks to our enduring connection with this refreshing fruit. Today, growing giant watermelons has become a popular hobby, a testament to our desire to connect with nature and achieve something truly impressive. But let’s be honest, the real reason we’re all here is for the delicious, juicy payoff!
Why You Need These Giant Watermelon Growing Tricks
Whether you’re a seasoned gardener or just starting out, mastering the art of Giant Watermelon Growing offers numerous benefits. Imagine the pride of presenting your friends and family with a watermelon so big it’s almost unbelievable! Beyond the bragging rights, these techniques will help you maximize your yield, ensuring you have plenty of delicious watermelon to enjoy throughout the summer. Plus, you’ll learn valuable gardening skills applicable to other crops, making your entire garden more productive.
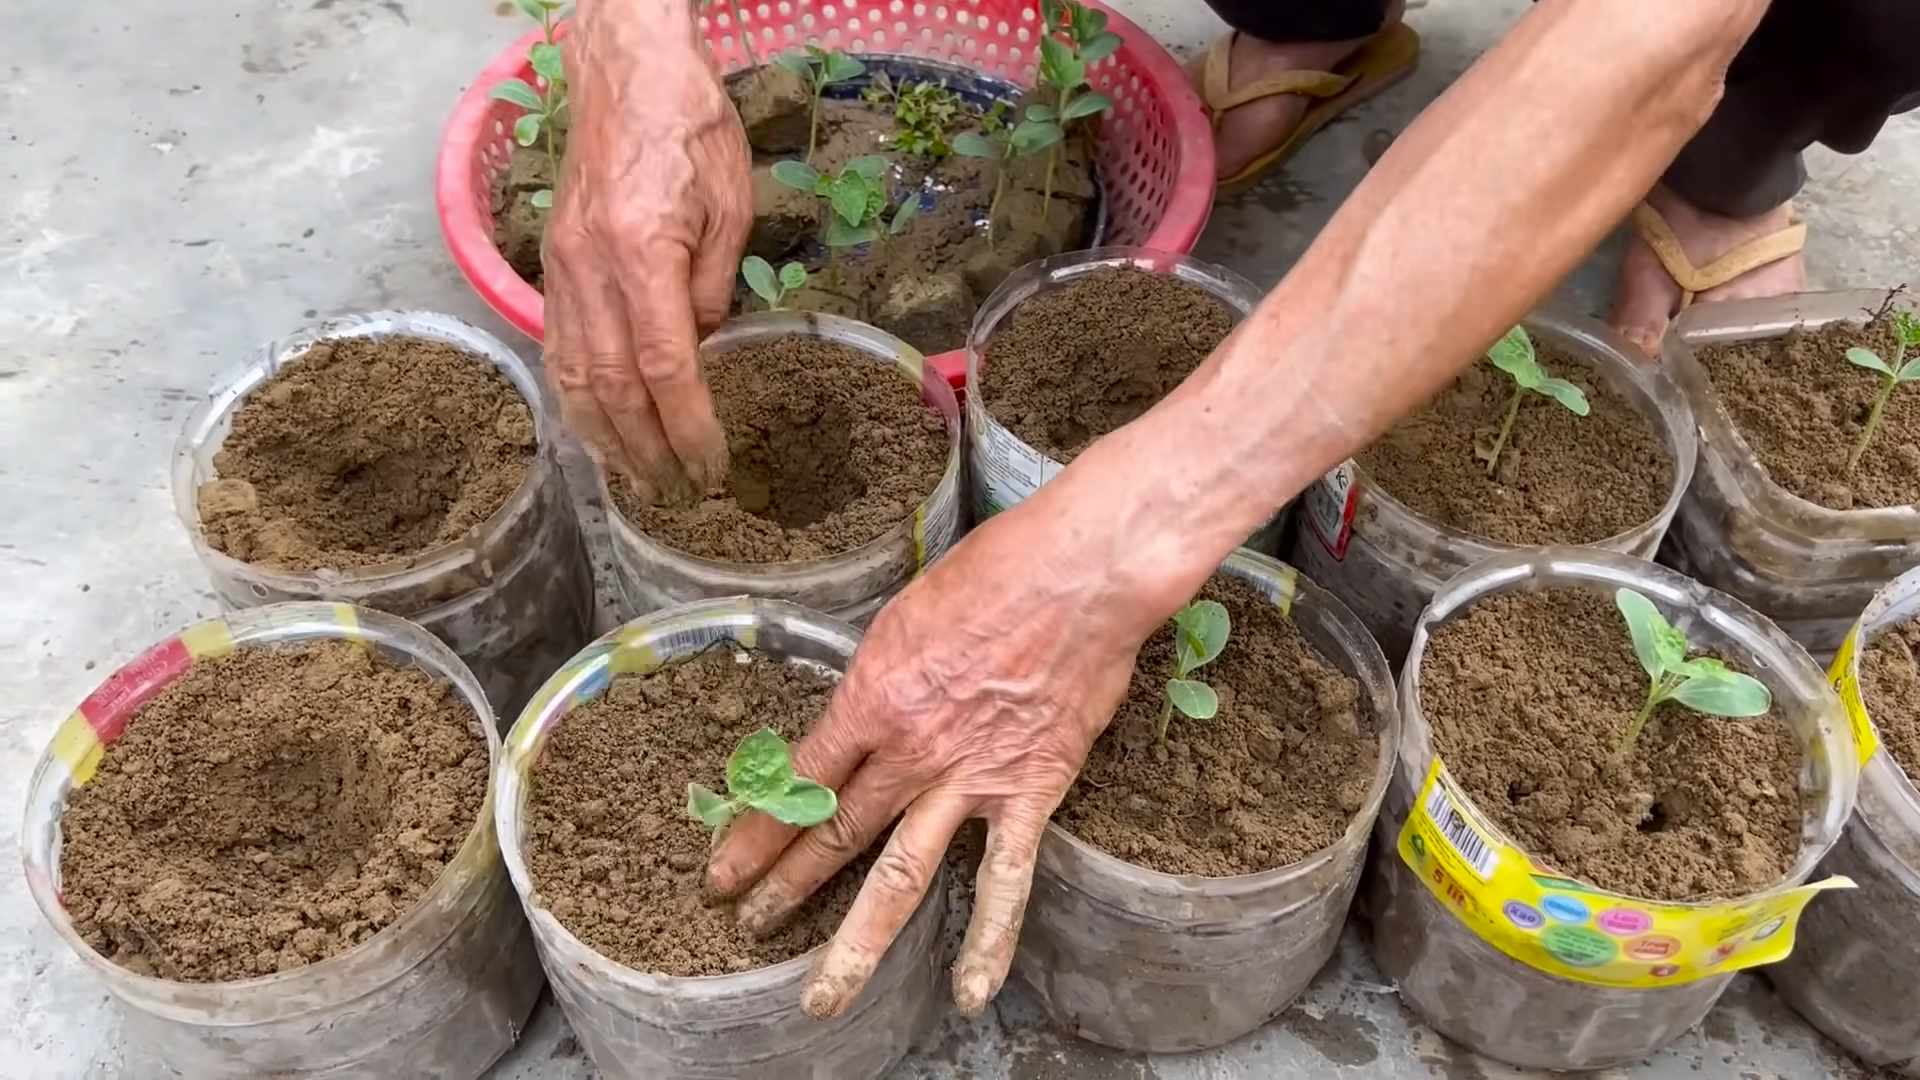
So, are you ready to embark on this exciting journey? Let’s dive into the secrets of growing giant watermelons, transforming your garden into a haven of juicy, refreshing delights. Get ready to experience the joy of harvesting a watermelon that truly lives up to its name!
Amazing Rubber Band Life Hacks You Need to Know!
Rubber bands. We all have them lying around, usually in a tangled mess. But these humble little things are surprisingly versatile! Let’s explore some awesome DIY hacks that’ll make you rethink their potential.
Section 1: Organizing Your Life with Rubber Bands
- Bundle Cords and Cables: Keep your charging cables, headphones, and other cords neatly organized and tangle-free.
- Secure Loose Items: From grocery bags to stacks of papers, rubber bands are your quick-fix solution for keeping things together.
- DIY Drawer Organizers: Create custom dividers in your drawers using rubber bands to separate items and prevent them from shifting.
- Organize Craft Supplies: Keep your buttons, beads, and other small craft supplies neatly sorted using rubber bands to bundle similar items.
- Bundling Cords: Gather your tangled cords. Wrap a rubber band tightly around the bundle, near the ends. For extra security, use two or three rubber bands, overlapping them slightly. You can even label the bundle with a small piece of tape.
- Securing Grocery Bags: After unloading your groceries, use a rubber band to secure the tops of the plastic bags. This prevents spills and keeps them from opening unexpectedly.
- Creating Drawer Organizers: Measure the width of your drawer and the space you want to divide. Cut cardboard or sturdy foam board to the appropriate size. Place the dividers in your drawer and use rubber bands to hold them in place. Experiment with different placements to find the best organization for your items.
- Organizing Craft Supplies: Gather similar craft supplies, such as buttons of the same size and color. Wrap a rubber band around the bundle to keep them together. You can use different colored rubber bands to further categorize your supplies.
Section 2: Rubber Band Repairs and Fixes
- Temporary Shoe Repair: A broken shoelace? A loose button? Rubber bands can provide a temporary fix until you can get a proper repair.
- Strengthening Weak Packaging: Reinforce a box or package that’s starting to come apart with strategically placed rubber bands.
- Emergency Tool Handle Grip: Improve your grip on a slippery tool handle by wrapping a rubber band around it.
- Securing Loose Parts: Use rubber bands to temporarily hold loose parts on furniture or appliances while you find a more permanent solution.
- Temporary Shoe Repair (Broken Shoelace): If a shoelace breaks, wrap a rubber band tightly around the broken area to temporarily hold the lace together. This will allow you to tie your shoe until you can replace the lace.
- Temporary Shoe Repair (Loose Button): If a button is loose, wrap a rubber band around the button and the corresponding buttonhole to secure it temporarily. This is a great quick fix until you can sew the button back on properly.
- Strengthening Weak Packaging: Identify the weak points on the box or package. Wrap rubber bands tightly around these areas to reinforce them and prevent them from opening further. For added strength, use multiple rubber bands, overlapping them.
- Emergency Tool Handle Grip: Wrap a rubber band or two around the handle of the tool to improve your grip. This is especially helpful when working with slippery or oily tools.
- Securing Loose Parts: Identify the loose part and determine where it needs to be secured. Wrap a rubber band around the part and the area where it should be attached. This is a temporary solution, so remember to find a more permanent fix later.
Section 3: Rubber Band Fun and Games
- DIY Cat Toys: Create simple and engaging toys for your feline friend using rubber bands and other household items.
- Rubber Band Ball: Make a fun, bouncy ball using only rubber bands.
- Rubber Band Powered Car: A fun project for kids (and adults!) to learn about simple mechanics.
- DIY Cat Toys: Tie several rubber bands together to create a small, bouncy toy. You can also attach them to a stick or other object to create a more interactive toy. Always supervise your cat when playing with rubber bands to prevent ingestion.
- Rubber Band Ball: This requires a large quantity of rubber bands. Start by tightly wrapping a small number of rubber bands together to form a small core. Continue adding layers of rubber bands, wrapping them tightly around the core. The more rubber bands you use, the larger and bouncier the ball will be. This process takes time and patience.
- Rubber Band Powered Car: This project requires more advanced materials and instructions, but you can find many tutorials online. Essentially, you’ll build a small car chassis and use a mechanism to release the tension of stretched rubber bands to propel the car forward. This is a great project to teach kids about energy and motion.
Section 4: Advanced Rubber Band Techniques
- Creating intricate woven patterns: With practice, you can create surprisingly complex and beautiful designs using rubber bands.
- Making rubber band bracelets: There are countless tutorials online for creating various styles of rubber band bracelets, from simple to intricate.
- Using rubber bands for plant support: Gently tie up climbing plants or support weak stems using rubber bands.
- Intricate Woven Patterns: This requires significant practice and patience. Start with simple patterns and gradually increase the complexity. There are many online tutorials and videos that can guide you through the process. You’ll need a loom or a similar framework to create these patterns.
- Making Rubber Band Bracelets: There are numerous techniques and designs for making rubber band bracelets. You’ll need a loom or your fingers, and specialized tools are often used for more intricate designs. Search online for tutorials on specific bracelet styles, such as the Rainbow Loom bracelets.
- Using Rubber Bands for Plant Support: Gently wrap rubber bands around the stems of plants to provide support. Avoid wrapping too tightly, as this could damage the plant. Use this technique for climbing plants or plants with weak stems that need extra support.
Remember to always prioritize safety when using rubber bands. Avoid stretching them too tightly, and keep them away from small children who might put them in their mouths.
Conclusion
So there you have it – your comprehensive guide to achieving truly giant watermelons! This DIY trick isn’t just about growing a larger-than-life fruit; it’s about understanding the nuances of watermelon cultivation and harnessing nature’s power to achieve extraordinary results. By carefully selecting your seeds, optimizing soil conditions, employing proper watering techniques, and diligently managing pests and diseases, you can unlock the potential for truly impressive growth. This method, focusing on consistent care and attention to detail, is a must-try for any serious gardener or anyone who simply dreams of harvesting a watermelon so big it requires a wheelbarrow! The satisfaction of nurturing a tiny seed into a colossal fruit is unparalleled. The sheer size and impressive yield are rewards in themselves, but the knowledge gained and the pride in your accomplishment are even more fulfilling.
Beyond the basic techniques outlined, there’s a world of experimentation waiting for you. Consider experimenting with different watermelon varieties known for their rapid growth and large size. Some varieties are naturally predisposed to larger sizes, making them ideal candidates for this giant watermelon growing technique. You can also explore different soil amendments to further enhance nutrient availability and drainage. Adding compost or other organic matter can significantly improve soil structure and fertility, leading to healthier plants and larger fruits. Furthermore, consider using trellises or other support systems to help manage the weight of the growing watermelon, preventing damage to the vine and ensuring even ripening. Don’t be afraid to get creative! Try different mulching techniques to regulate soil moisture and temperature, or experiment with different fertilizer blends to find what works best for your specific growing conditions. The possibilities are endless, and each experiment brings you closer to mastering the art of giant watermelon growing.
Ultimately, the success of this method hinges on your dedication and attention to detail. It requires consistent effort and observation, but the rewards are well worth the investment of time and energy. We strongly encourage you to try this DIY trick and experience the thrill of growing your own giant watermelon. Share your experiences, photos, and tips with us and the wider gardening community. Let’s inspire each other and collectively push the boundaries of what’s possible in the world of watermelon cultivation. Document your progress, share your challenges, and celebrate your successes. The journey of growing a giant watermelon is as rewarding as the final harvest itself. Join the community, share your knowledge, and let’s grow some truly impressive giant watermelons together! Remember to tag us in your photos on social media – we can’t wait to see your amazing results!
Frequently Asked Questions
What type of watermelon is best for growing giant watermelons?
While any watermelon variety can be grown using this method, certain varieties are naturally predisposed to larger sizes. Look for varieties known for their high yield and large fruit size. Seed catalogs and online resources often provide information on the expected size of different watermelon varieties. Experimentation is key; try different varieties to see which performs best in your specific growing conditions.
How much water do giant watermelons need?
Consistent watering is crucial for growing giant watermelons. The soil should be kept consistently moist but not waterlogged. Overwatering can lead to root rot, while underwatering can stunt growth. Monitor the soil moisture regularly and adjust your watering schedule accordingly. Consider using a soil moisture meter to ensure you’re providing the optimal amount of water.
What are the common problems encountered when growing giant watermelons?
Common problems include pests (like aphids, squash bugs, and vine borers), diseases (like powdery mildew and anthracnose), and insufficient pollination. Regularly inspect your plants for signs of pests and diseases, and take appropriate action if necessary. Ensure adequate pollination by hand-pollinating the flowers if necessary, especially in areas with limited bee activity.
How long does it take to grow a giant watermelon?
The time it takes to grow a giant watermelon varies depending on the variety and growing conditions. Generally, it takes around 70-90 days from planting to harvest. However, with optimal conditions and the techniques described in this article, you can potentially shorten this timeframe slightly.
Can I grow a giant watermelon in a container?
While it’s possible to grow a watermelon in a container, it’s more challenging to achieve truly giant sizes. Containers restrict root growth, limiting the plant’s overall size and yield. For the best results in growing a giant watermelon, it’s recommended to plant directly in the ground where the roots have ample space to spread.
What should I do if my watermelon is not growing as expected?
If your watermelon is not growing as expected, consider the following factors: soil quality, watering frequency, sunlight exposure, fertilization, and pest/disease control. Review each aspect of your growing process and make adjustments as needed. Consulting with local gardening experts or online forums can also provide valuable insights and troubleshooting advice.
What are the best fertilizers for giant watermelon growing?
Watermelons are heavy feeders and benefit from regular fertilization. A balanced fertilizer with a higher nitrogen content during the early growth stages and a higher potassium content as the fruit develops is ideal. Organic fertilizers, such as compost and manure, can also provide essential nutrients and improve soil health. Always follow the fertilizer instructions carefully to avoid over-fertilizing, which can damage the plant.
How do I know when my giant watermelon is ripe?
A ripe watermelon will have a dull, not shiny, skin. The tendril closest to the watermelon will be brown and dry. When you thump it, it will have a deep, hollow sound. The bottom of the watermelon will have a yellowish patch. These are all indicators that your giant watermelon is ready for harvest.


Leave a Comment