
Easy Indoor Kale Growing – sounds like a dream, right? Imagine fresh, vibrant kale readily available, even when the snow’s piling up outside! Forget those sad, wilted bunches at the grocery store. This isn’t just about having fresh greens; it’s about reclaiming control over your food source and adding a touch of green therapy to your living space.
For centuries, cultivating kale has been a cornerstone of healthy diets across various cultures. From its humble beginnings in the Mediterranean to its adoption as a superfood staple today, kale boasts a rich history. But let’s be honest, not everyone has the space or climate for a sprawling outdoor garden. That’s where the magic of indoor gardening comes in!
I know what you’re thinking: “Indoor gardening? Sounds complicated!” But trust me, it doesn’t have to be. This DIY guide is designed to demystify the process of easy indoor kale growing, offering simple, actionable steps that even the most novice gardener can follow. We’ll cover everything from choosing the right container and soil to providing adequate light and nutrients.
Why do you need this DIY trick? Because access to fresh, nutritious food shouldn’t be limited by location or season. Growing your own kale indoors is not only incredibly rewarding but also a fantastic way to boost your health, reduce your carbon footprint, and add a splash of vibrant green to your home. So, let’s ditch the grocery store kale and embark on this exciting indoor gardening adventure together!
Grow Your Own Kale Indoors: A Beginner’s Guide
Hey there, fellow plant enthusiasts! Ever dreamt of having fresh, vibrant kale right at your fingertips, no matter the season? Well, you’re in luck! Growing kale indoors is surprisingly easy and rewarding. I’m going to walk you through everything you need to know to cultivate your own little kale haven inside your home. Get ready to enjoy delicious, homegrown kale in your salads, smoothies, and more!
What You’ll Need
Before we dive in, let’s gather our supplies. This is a pretty straightforward project, so you probably have some of these items already.
* Kale Seeds: Choose a variety that suits your taste. Dwarf Blue Curled Vates and Red Russian are popular choices for indoor growing because they tend to stay smaller.
* Seed Starting Tray or Small Pots: These are perfect for getting your seeds germinated.
* Seed Starting Mix: This is a light, airy soil mix that’s ideal for delicate seedlings.
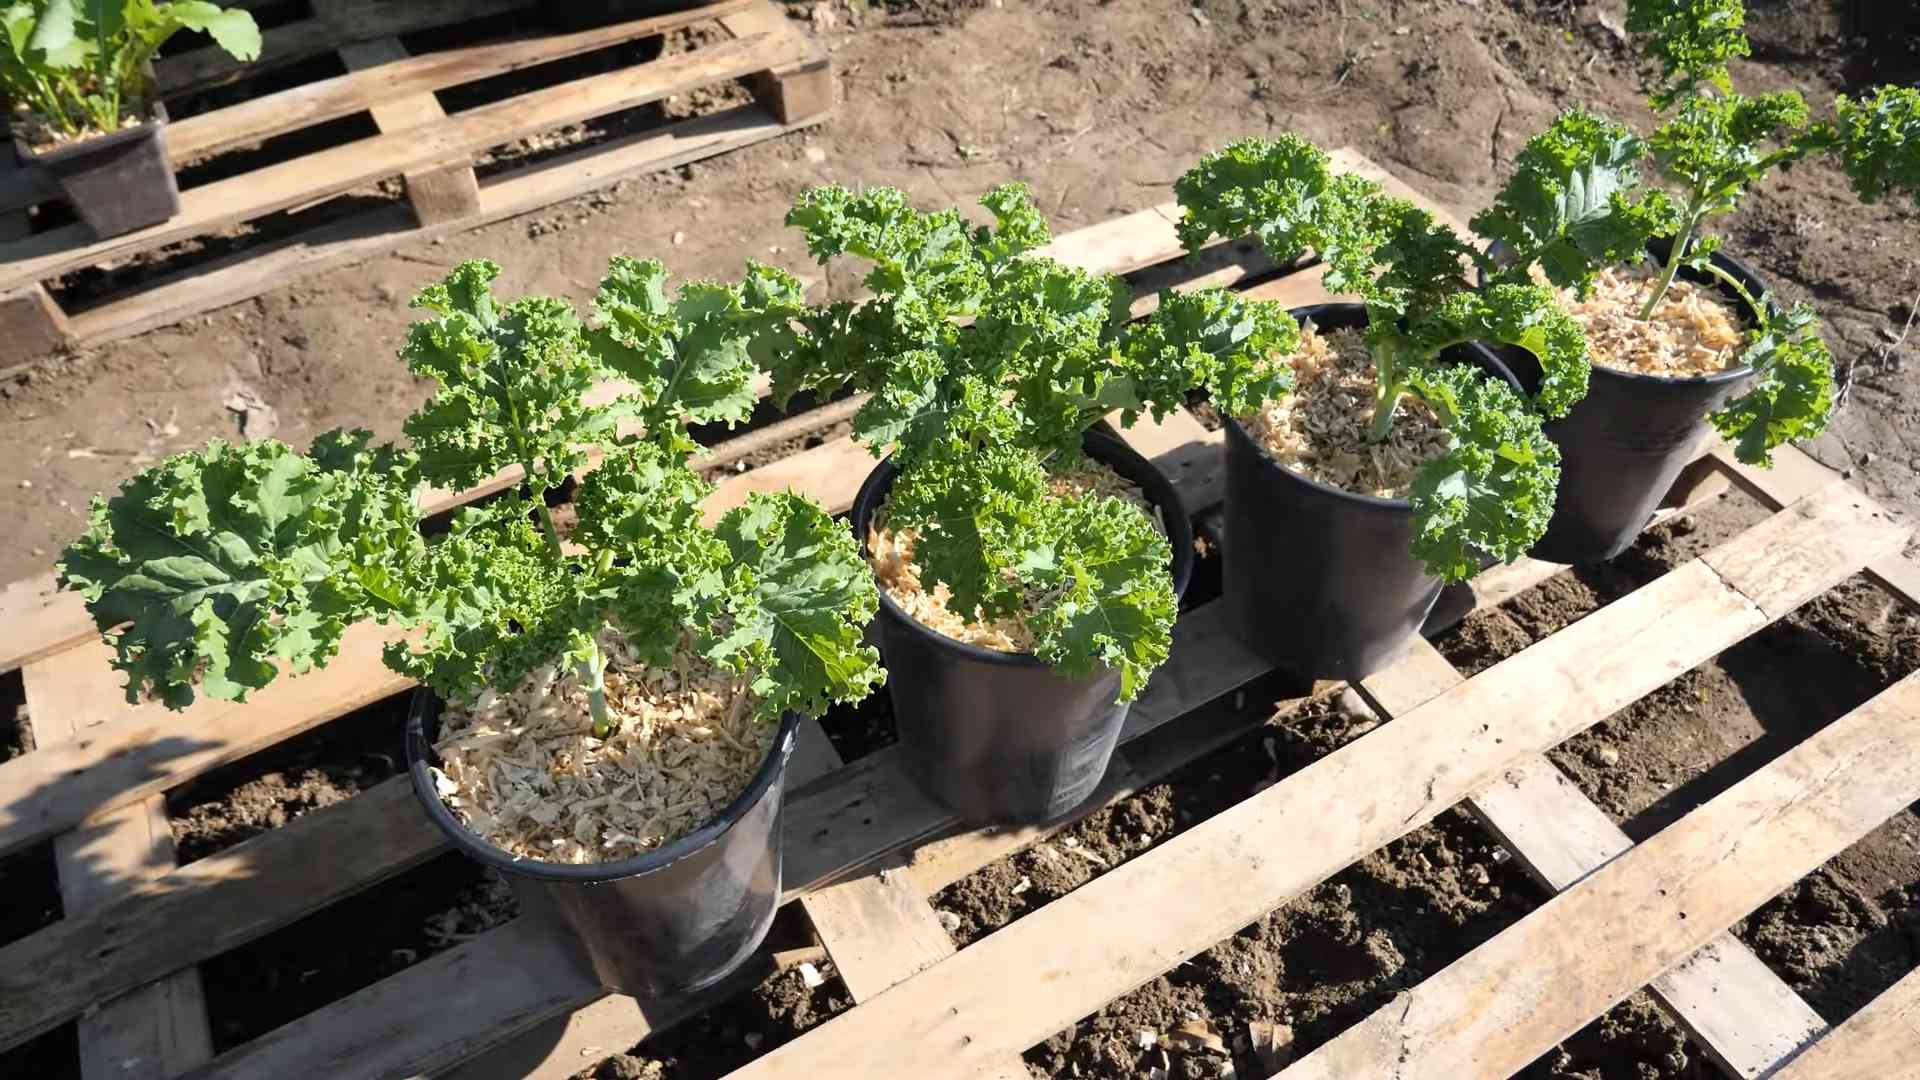
* Larger Pots (6-8 inches): Once your seedlings are big enough, they’ll need a bigger home.
* Potting Soil: A good quality potting mix will provide the nutrients your kale needs to thrive.
* Grow Lights (Optional but Recommended): Kale needs plenty of light, especially indoors. Grow lights will ensure they get enough, especially during the winter months.
* Watering Can or Spray Bottle: For gentle watering.
* Fertilizer: A balanced liquid fertilizer will help keep your kale healthy and productive.
* Spray Bottle with Water: For misting the leaves.
Getting Started: Sowing Your Kale Seeds
This is where the magic begins! We’re going to start by planting our kale seeds in a seed starting tray or small pots.
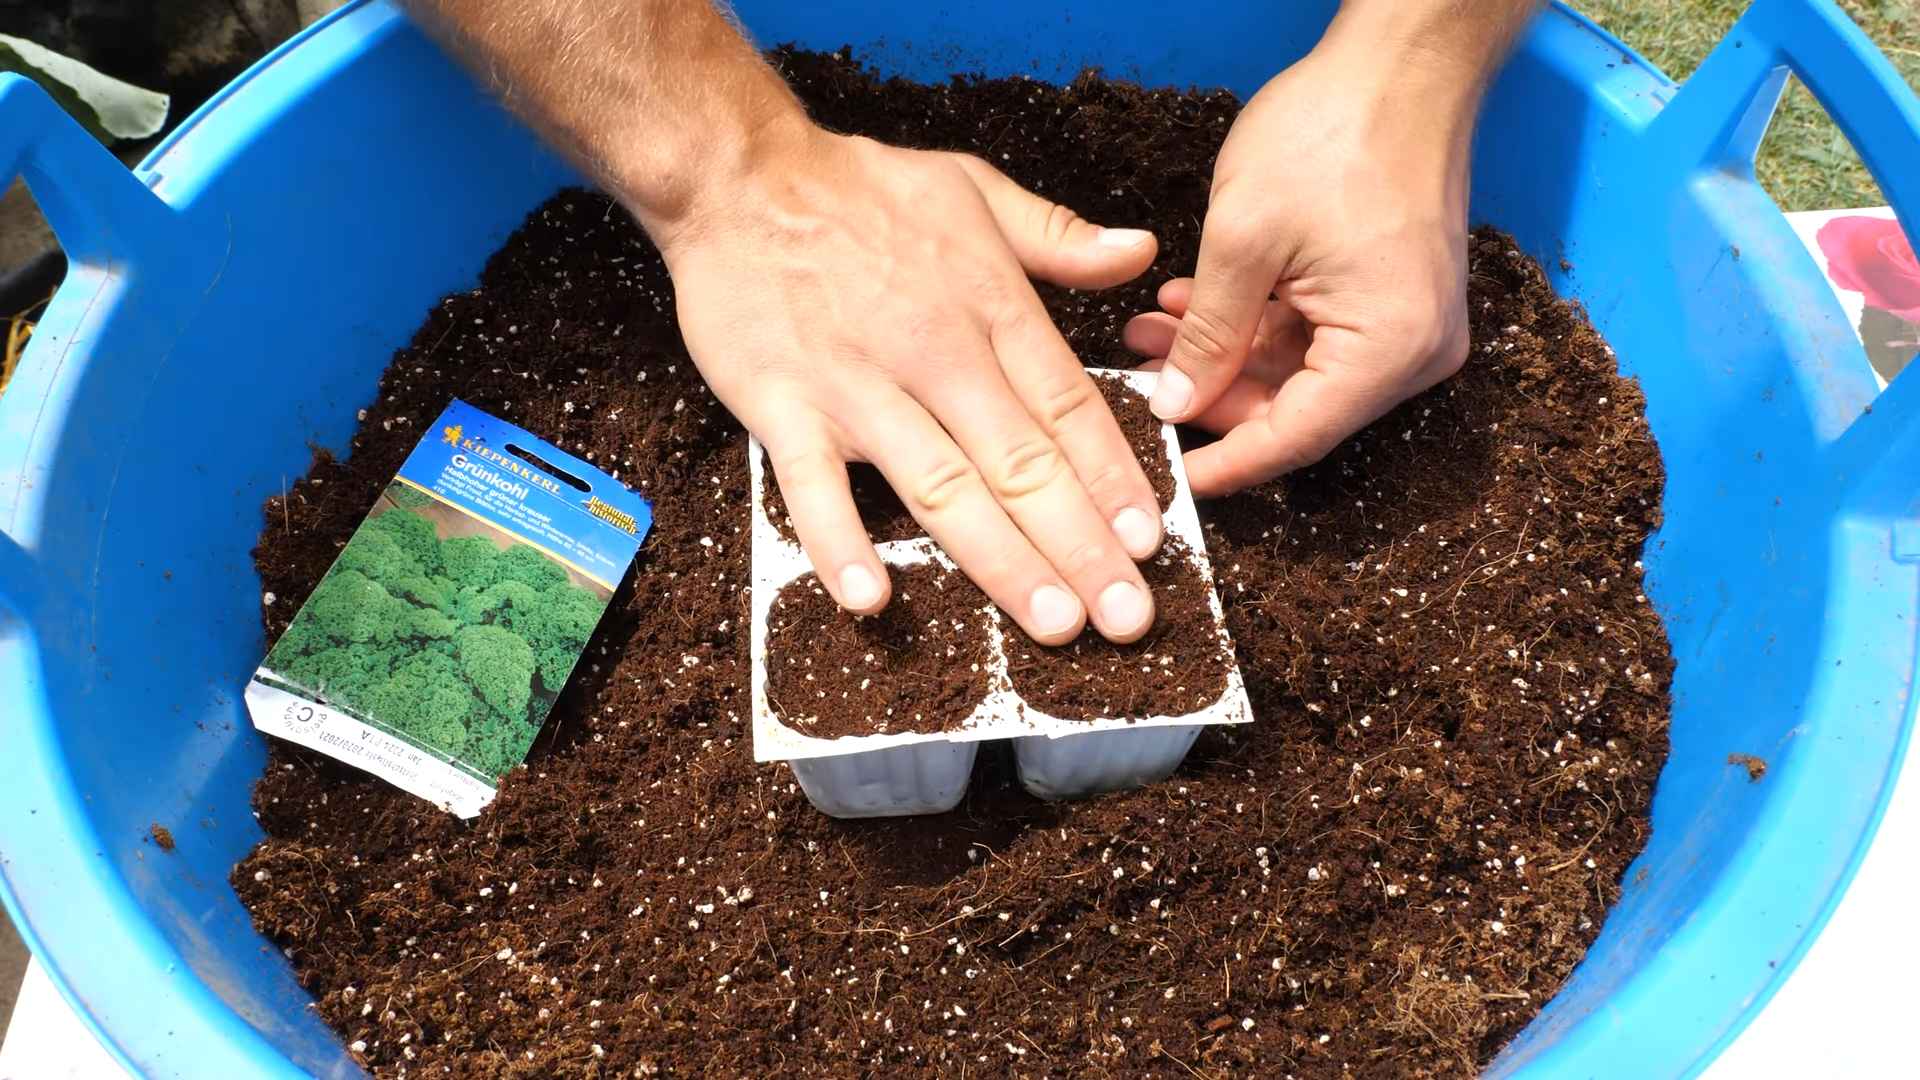
1. Prepare Your Seed Starting Tray: Fill your seed starting tray or small pots with seed starting mix. Gently pat it down to remove any large air pockets.
2. Sow the Seeds: Sprinkle a few kale seeds (2-3) on top of the soil in each cell or pot. Don’t overcrowd them!
3. Cover the Seeds: Lightly cover the seeds with a thin layer of seed starting mix (about ¼ inch).
4. Water Gently: Use a spray bottle or watering can with a gentle nozzle to moisten the soil. You want it damp, but not soggy.
5. Create a Humid Environment: Cover the seed starting tray with a clear plastic lid or plastic wrap to create a humid environment. This will help the seeds germinate.
6. Find a Warm Spot: Place the tray in a warm location (around 65-75°F). A heat mat can be helpful if your home is cooler.
7. Wait Patiently: Keep the soil consistently moist and wait for the seeds to germinate. This usually takes about 5-10 days.
Transplanting Your Seedlings
Once your seedlings have developed a few sets of true leaves (the leaves that look like miniature kale leaves), it’s time to transplant them into larger pots.
1. Prepare Your Larger Pots: Fill your 6-8 inch pots with potting soil. Leave about an inch of space at the top.
2. Gently Remove the Seedlings: Carefully remove the seedlings from the seed starting tray or small pots. Be gentle to avoid damaging the roots. You can use a small spoon or fork to help loosen the soil around the roots. If you planted multiple seeds in one cell, choose the strongest seedling and gently separate it from the others.
3. Plant the Seedlings: Make a small hole in the center of the potting soil in each pot. Place the seedling in the hole and gently cover the roots with soil.
4. Water Thoroughly: Water the seedlings thoroughly after transplanting.
5. Provide Support (Optional): If your seedlings are a bit leggy (tall and spindly), you can use a small stake to provide support.
Caring for Your Indoor Kale
Now that your kale is happily transplanted, it’s time to provide the care it needs to thrive.
* Light: Kale needs at least 6 hours of direct sunlight per day. If you don’t have a sunny window, use grow lights. Position the grow lights a few inches above the plants. I usually keep my grow lights on for about 12-14 hours a day.
* Watering: Water your kale when the top inch of soil feels dry to the touch. Avoid overwatering, as this can lead to root rot. Make sure your pots have drainage holes.
* Fertilizing: Feed your kale with a balanced liquid fertilizer every 2-3 weeks. Follow the instructions on the fertilizer label.
* Temperature: Kale prefers cooler temperatures (60-70°F). Avoid placing your plants near heat sources.
* Humidity: Kale likes humidity. Mist the leaves with water regularly, especially during dry winter months. You can also place a tray of water near the plants to increase humidity.
* Air Circulation: Good air circulation is important to prevent fungal diseases. Make sure your plants have enough space between them. You can also use a small fan to improve air circulation.
* Pest Control: Keep an eye out for pests like aphids, spider mites, and whiteflies. If you spot any pests, treat them with insecticidal soap or neem oil. I prefer to use organic pest control methods whenever possible.
* Pruning: As your kale grows, you can prune off any yellowing or damaged leaves. This will help keep the plant healthy and encourage new growth.
Harvesting Your Kale
The best part! You can start harvesting your kale leaves when they are about 4-6 inches long.
1. Harvest Outer Leaves: Harvest the outer leaves first, leaving the inner leaves to continue growing.
2. Cut or Snap Off Leaves: You can either cut the leaves off with scissors or snap them off with your fingers.
3. Harvest Regularly: Harvest your kale regularly to encourage continued production.
4. Enjoy Your Harvest: Wash your kale leaves thoroughly before eating. You can use them in salads, smoothies, soups, stews, and more!
Troubleshooting
Even with the best care, you might encounter a few challenges along the way. Here are some common problems and how to fix them:
* Yellowing Leaves: This could be a sign of overwatering, underwatering, nutrient deficiency, or pest infestation. Check the soil moisture, fertilize your plants, and inspect them for pests.
* Leggy Growth: This is usually caused by insufficient light. Move your plants to a sunnier location or use grow lights.
* Slow Growth: This could be due to a variety of factors, including insufficient light, poor soil, or nutrient deficiency. Make sure your plants are getting enough light, water, and fertilizer.
* Pest Infestation: Treat pests with insecticidal soap or neem oil.
* Fungal Diseases: Improve air circulation and avoid overwatering.
Choosing the Right Kale Variety
While I mentioned a couple of popular choices earlier, let’s delve a little deeper into selecting the perfect kale variety for your indoor garden.
* Dwarf Blue Curled Vates: This is a classic choice for indoor growing. It’s compact, cold-hardy, and produces delicious, crinkled leaves. It’s also relatively quick to mature.
* Red Russian: This variety has flat, reddish-purple leaves with a mild, slightly sweet flavor. It’s also relatively compact and easy to grow indoors.
* Lacinato (Dinosaur Kale): While it can grow a bit taller than the other two, Lacinato kale is still manageable indoors. It has dark green, almost black, leaves with a slightly nutty flavor.
* Baby Kale Mixes: These mixes often contain a variety of kale types, providing a diverse range of flavors and textures. They’re also a good option if you want to try different types of kale without committing to a full packet of seeds.
When choosing a variety, consider your personal preferences, the amount of space you have available, and the growing conditions in your home.
Extending Your Harvest
Want to keep the kale coming? Here are a few tips for extending your harvest:
* Succession Planting: Sow new seeds every few weeks to ensure a continuous supply of kale.
* Cut-and-Come-Again Harvesting: Harvest the outer leaves regularly, leaving the inner leaves to continue growing. This will encourage the plant to produce new leaves.
* Overwintering: With proper care, you can overwinter your kale plants indoors. Provide them with plenty of light and water, and protect them from extreme temperatures.
Growing kale indoors is a fun and rewarding experience. With a little bit of care and attention, you can enjoy fresh, homegrown kale all year round. Happy gardening!
Conclusion
So, there you have it! Growing your own kale indoors is not only achievable, but it’s also incredibly rewarding. Imagine stepping into your kitchen and snipping fresh, vibrant kale leaves for your morning smoothie, lunchtime salad, or evening stir-fry. No more trips to the grocery store for wilted, overpriced greens. No more wondering about the pesticides used on commercially grown kale. Just pure, organic goodness right at your fingertips.
This easy indoor kale growing method is a must-try for several reasons. First, it provides a consistent supply of fresh, nutritious greens, regardless of the season or your outdoor space. Second, it’s a sustainable and eco-friendly way to reduce your carbon footprint. Third, it’s a fantastic way to connect with nature and experience the joy of nurturing your own food. And finally, it’s surprisingly simple and inexpensive to get started.
But the beauty of this DIY project lies in its adaptability. Feel free to experiment with different varieties of kale. Curly kale, Lacinato kale (also known as dinosaur kale), and Red Russian kale all thrive indoors. You can also adjust the lighting and watering schedule to suit your specific environment and preferences. Consider adding a small fan to improve air circulation and prevent fungal diseases. If you’re feeling adventurous, try companion planting with herbs like basil or rosemary to deter pests and enhance the flavor of your kale.
Don’t be afraid to get creative with your indoor kale garden. Use repurposed containers, build a vertical growing system, or even incorporate your kale into a decorative display. The possibilities are endless!
We wholeheartedly encourage you to give this easy indoor kale growing method a try. It’s a simple, satisfying, and sustainable way to enjoy fresh, healthy greens all year round. Once you’ve harvested your first batch of homegrown kale, we’d love to hear about your experience. Share your tips, tricks, and photos in the comments below. Let’s build a community of indoor kale growers and inspire others to embrace the joys of homegrown food! We are confident that you will find that **easy indoor kale growing** is a game changer for your health and your wallet.
Frequently Asked Questions (FAQ)
Q: What kind of kale is best for growing indoors?
A: While most kale varieties can be grown indoors, some tend to thrive better than others. Curly kale is a popular choice due to its compact size and resilience. Lacinato kale (dinosaur kale) is another excellent option, known for its distinctive texture and mild flavor. Red Russian kale is also a good choice, adding a splash of color to your indoor garden. Ultimately, the best kale variety for you will depend on your personal preferences and the specific conditions of your indoor growing environment. Experiment with different varieties to see which ones perform best for you.
Q: How much light does indoor kale need?
A: Kale requires a significant amount of light to grow properly, ideally 6-8 hours of direct sunlight per day. If you don’t have access to a sunny windowsill, you can supplement with artificial grow lights. LED grow lights are a great option, as they are energy-efficient and provide the full spectrum of light that kale needs. Position the grow lights a few inches above the kale plants and adjust the height as they grow. Insufficient light can lead to leggy, weak plants with pale leaves.
Q: How often should I water my indoor kale?
A: The watering frequency will depend on several factors, including the size of your container, the type of potting mix you’re using, and the temperature and humidity of your environment. As a general rule, water your kale when the top inch of soil feels dry to the touch. Avoid overwatering, as this can lead to root rot. Ensure that your container has drainage holes to allow excess water to escape. During warmer months, you may need to water more frequently.
Q: What kind of soil should I use for growing kale indoors?
A: Use a well-draining potting mix that is rich in organic matter. A mix of peat moss, perlite, and vermiculite is a good option. You can also add compost or other organic amendments to improve the soil’s fertility and drainage. Avoid using garden soil, as it can be too heavy and may contain pests or diseases.
Q: Do I need to fertilize my indoor kale?
A: Yes, kale is a heavy feeder and will benefit from regular fertilization. Use a balanced organic fertilizer, such as fish emulsion or compost tea, every 2-3 weeks. Follow the instructions on the fertilizer packaging carefully. Avoid over-fertilizing, as this can burn the roots of the plants.
Q: How do I harvest my indoor kale?
A: You can start harvesting kale leaves when they are about 4-6 inches long. Harvest the outer leaves first, leaving the inner leaves to continue growing. Use a sharp knife or scissors to cut the leaves close to the stem. Avoid tearing the leaves, as this can damage the plant. Regular harvesting will encourage the plant to produce more leaves.
Q: How do I deal with pests on my indoor kale?
A: Indoor kale is generally less susceptible to pests than outdoor kale, but it can still be affected by aphids, spider mites, or whiteflies. Inspect your plants regularly for signs of pests. If you find any, you can try washing them off with a strong stream of water or using an insecticidal soap. Neem oil is another effective organic pest control option.
Q: Can I grow kale indoors year-round?
A: Yes, one of the biggest advantages of growing kale indoors is that you can enjoy fresh greens year-round, regardless of the weather outside. Just make sure to provide adequate light, water, and nutrients, and your kale will thrive.
Q: My kale leaves are turning yellow. What’s wrong?
A: Yellowing leaves can be a sign of several problems, including overwatering, underwatering, nutrient deficiency, or pest infestation. Check the soil moisture and adjust your watering schedule accordingly. Fertilize your kale with a balanced organic fertilizer. Inspect the plants for pests and treat them as needed. If the problem persists, try moving the plants to a different location with more light.
Q: How long will my indoor kale plant last?
A: With proper care, an indoor kale plant can last for several months, or even a year or more. However, the plant’s productivity may decline over time. You can extend the life of your kale plant by regularly pruning it, fertilizing it, and providing it with adequate light and water. You can also propagate new plants from cuttings to ensure a continuous supply of fresh kale.
Leave a Comment