
Easy life cleaning tips are something we all crave, aren’t they? Let’s face it, nobody *really* enjoys spending hours scrubbing and polishing. We’d all rather be relaxing, pursuing hobbies, or spending time with loved ones. But what if I told you that a sparkling clean home doesn’t have to be a chore? What if I could share some simple, effective, and even *fun* DIY cleaning hacks that will transform your cleaning routine?
The desire for a clean and organized living space is nothing new. Throughout history, different cultures have developed unique cleaning methods, often relying on natural ingredients and resourceful techniques. Think of ancient Egyptians using natron (a naturally occurring salt mixture) for cleaning, or the traditional Japanese practice of *ōsōji*, a thorough year-end cleaning to purify the home and welcome good fortune. These traditions highlight the enduring importance of cleanliness in our lives.
In today’s fast-paced world, finding the time and energy for cleaning can be a real challenge. That’s where these easy life cleaning tips come in! I’m going to share some of my favorite DIY cleaning solutions and clever hacks that will save you time, money, and effort. From tackling stubborn stains to creating your own eco-friendly cleaning products, these tips will help you maintain a clean and healthy home without sacrificing your precious free time. Get ready to say goodbye to endless scrubbing and hello to a sparkling clean home, the easy way!

DIY Magic: Transforming Your Home with Simple Cleaning Hacks
Hey everyone! I’m so excited to share some of my favorite DIY cleaning hacks that have seriously revolutionized my cleaning routine. Forget spending a fortune on fancy cleaning products – these tips use everyday items you probably already have in your pantry! Let’s dive in and make your home sparkle!
The Ultimate Guide to Sparkling Clean with DIY Solutions
Here’s a breakdown of the cleaning hacks we’ll be covering:
* Microwave Magic: Steam cleaning your microwave with lemon.
* Grime-Busting Oven Cleaner: A natural paste to tackle baked-on messes.
* Shower Power: Keeping your shower sparkling with vinegar.
* Grout Goals: Brightening grout lines with baking soda.
* Mattress Refresh: Deodorizing and sanitizing your mattress.
* Wood Furniture Polish: Reviving your wood furniture with olive oil and lemon juice.
* Window Wonder: Achieving streak-free windows with vinegar and water.
* Garbage Disposal Refresh: Eliminating odors with citrus peels and ice.
* Cutting Board Sanitizer: Cleaning and sanitizing wooden cutting boards.
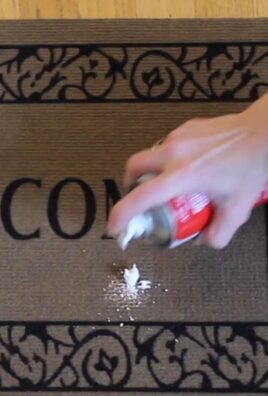
* Carpet Stain Remover: Removing stains from carpets with vinegar and baking soda.
Microwave Magic: Steam Cleaning with Lemon
This is one of my go-to hacks for a quick and easy microwave clean. The steam loosens up all the splatters and grime, making it a breeze to wipe away.
What you’ll need:
* 1 lemon
* 1/2 cup water
* Microwave-safe bowl
Step-by-step instructions:
1. Prepare the Lemon Solution: Cut the lemon in half and squeeze the juice into the microwave-safe bowl. Drop the lemon halves into the bowl as well.
2. Add Water: Pour the water into the bowl with the lemon juice and halves.
3. Microwave: Place the bowl in the microwave and heat on high for 3 minutes. Let the steam work its magic!
4. Let it Sit: After microwaving, leave the door closed for another 5 minutes to allow the steam to further loosen the grime.
5. Wipe Clean: Carefully remove the bowl (it will be hot!). Use a clean cloth or sponge to easily wipe away the loosened food particles. The lemon scent will leave your microwave smelling fresh and clean!
Grime-Busting Oven Cleaner: A Natural Paste
Commercial oven cleaners can be harsh and full of chemicals. This natural paste is just as effective and much safer for you and your family.
What you’ll need:
* 1/2 cup baking soda
* 3 tablespoons water (adjust as needed)
* Spray bottle filled with white vinegar
* Sponge or scrub brush
Step-by-step instructions:
1. Prepare the Oven: Remove the oven racks and any loose debris.
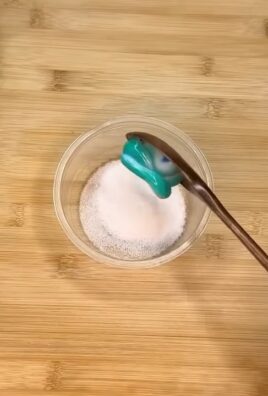
2. Make the Paste: In a bowl, mix the baking soda and water until you form a thick paste. You might need to add a little more water to get the right consistency.
3. Apply the Paste: Spread the paste evenly over the interior surfaces of your oven, avoiding the heating elements. I usually wear gloves for this step.
4. Let it Sit: This is the key! Let the paste sit for at least 12 hours, or even overnight. The longer it sits, the easier it will be to remove the grime.
5. Spray with Vinegar: After the waiting period, spray the baking soda paste with white vinegar. This will cause a fizzing reaction that helps to loosen the grime even further.
6. Scrub and Wipe: Use a sponge or scrub brush to scrub away the loosened grime. You may need to use a little elbow grease for stubborn spots.
7. Rinse Thoroughly: Wipe down the oven with a damp cloth to remove any remaining baking soda residue. You may need to rinse several times to get it all.
8. Replace Racks: Once the oven is completely dry, replace the oven racks.
Shower Power: Keeping Your Shower Sparkling with Vinegar
Hard water stains and soap scum can make your shower look dingy. This vinegar trick is a simple and effective way to keep your shower sparkling.
What you’ll need:
* White vinegar
* Spray bottle
* Sponge or scrub brush
Step-by-step instructions:
1. Heat the Vinegar: Pour white vinegar into a microwave-safe container and heat it in the microwave for about 2 minutes, or until it’s warm but not boiling. Heating the vinegar makes it more effective at dissolving soap scum and hard water stains.
2. Pour into Spray Bottle: Carefully pour the warm vinegar into a spray bottle.
3. Spray the Showe
Hey everyone! I’m so excited to share some of my favorite DIY cleaning hacks that have seriously revolutionized my cleaning routine. Forget spending a fortune on fancy cleaning products – these tips use everyday items you probably already have in your pantry! Let’s dive in and make your home sparkle!
The Ultimate Guide to Sparkling Clean with DIY Solutions
Here’s a breakdown of the cleaning hacks we’ll be covering:
* Microwave Magic: Steam cleaning your microwave with lemon.
* Grime-Busting Oven Cleaner: A natural paste to tackle baked-on messes.
* Shower Power: Keeping your shower sparkling with vinegar.
* Grout Goals: Brightening grout lines with baking soda.
* Mattress Refresh: Deodorizing and sanitizing your mattress.
* Wood Furniture Polish: Reviving your wood furniture with olive oil and lemon juice.
* Window Wonder: Achieving streak-free windows with vinegar and water.
* Garbage Disposal Refresh: Eliminating odors with citrus peels and ice.
* Cutting Board Sanitizer: Cleaning and sanitizing wooden cutting boards.
* Carpet Stain Remover: Removing stains from carpets with vinegar and baking soda.
Microwave Magic: Steam Cleaning with Lemon
This is one of my go-to hacks for a quick and easy microwave clean. The steam loosens up all the splatters and grime, making it a breeze to wipe away.
What you’ll need:
* 1 lemon
* 1/2 cup water
* Microwave-safe bowl
Step-by-step instructions:
1. Prepare the Lemon Solution: Cut the lemon in half and squeeze the juice into the microwave-safe bowl. Drop the lemon halves into the bowl as well.
2. Add Water: Pour the water into the bowl with the lemon juice and halves.
3. Microwave: Place the bowl in the microwave and heat on high for 3 minutes. Let the steam work its magic!
4. Let it Sit: After microwaving, leave the door closed for another 5 minutes to allow the steam to further loosen the grime.
5. Wipe Clean: Carefully remove the bowl (it will be hot!). Use a clean cloth or sponge to easily wipe away the loosened food particles. The lemon scent will leave your microwave smelling fresh and clean!
Grime-Busting Oven Cleaner: A Natural Paste
Commercial oven cleaners can be harsh and full of chemicals. This natural paste is just as effective and much safer for you and your family.
What you’ll need:
* 1/2 cup baking soda
* 3 tablespoons water (adjust as needed)
* Spray bottle filled with white vinegar
* Sponge or scrub brush
Step-by-step instructions:
1. Prepare the Oven: Remove the oven racks and any loose debris.
2. Make the Paste: In a bowl, mix the baking soda and water until you form a thick paste. You might need to add a little more water to get the right consistency.
3. Apply the Paste: Spread the paste evenly over the interior surfaces of your oven, avoiding the heating elements. I usually wear gloves for this step.
4. Let it Sit: This is the key! Let the paste sit for at least 12 hours, or even overnight. The longer it sits, the easier it will be to remove the grime.
5. Spray with Vinegar: After the waiting period, spray the baking soda paste with white vinegar. This will cause a fizzing reaction that helps to loosen the grime even further.
6. Scrub and Wipe: Use a sponge or scrub brush to scrub away the loosened grime. You may need to use a little elbow grease for stubborn spots.
7. Rinse Thoroughly: Wipe down the oven with a damp cloth to remove any remaining baking soda residue. You may need to rinse several times to get it all.
8. Replace Racks: Once the oven is completely dry, replace the oven racks.
Shower Power: Keeping Your Shower Sparkling with Vinegar
Hard water stains and soap scum can make your shower look dingy. This vinegar trick is a simple and effective way to keep your shower sparkling.
What you’ll need:
* White vinegar
* Spray bottle
* Sponge or scrub brush
Step-by-step instructions:
1. Heat the Vinegar: Pour white vinegar into a microwave-safe container and heat it in the microwave for about 2 minutes, or until it’s warm but not boiling. Heating the vinegar makes it more effective at dissolving soap scum and hard water stains.
2. Pour into Spray Bottle: Carefully pour the warm vinegar into a spray bottle.
3. Spray the Shower: Spray the warm vinegar liberally onto the shower walls, door, and fixtures.
4. Let it Sit: Allow the vinegar to sit for at least 30 minutes. For stubborn stains, you can let it sit for a few hours.
5. Scrub and Rinse: Use a sponge or scrub brush to scrub away the loosened soap scum and hard water stains. Rinse the shower thoroughly with water.
6. Preventative Measures: To prevent future buildup, spray your shower with vinegar after each use and wipe it down with a squeegee.
Grout Goals: Brightening Grout Lines with Baking Soda
Dirty grout lines can make your entire bathroom look unclean. This baking soda paste is a natural and effective way to brighten them up.
What you’ll need:
* Baking soda
* Water
* Old toothbrush or grout brush
Step-by-step instructions:
1. Make the Paste: In a small bowl, mix baking soda and water until you form a thick paste.
2. Apply the Paste: Apply the paste to the grout lines, making sure to cover them completely.
3. Let it Sit: Allow the paste to sit for at least 10 minutes. For stubborn stains, you can let it sit for longer.
4. Scrub: Use an old toothbrush or grout brush to scrub the grout lines.
5. Rinse: Rinse the grout lines thoroughly with water.
6. Repeat if Necessary: If the grout lines are still stained, repeat the process.
Mattress Refresh: Deodorizing and Sanitizing Your Mattress
We often forget to clean our mattresses, but they can harbor dust mites and odors. This simple trick will leave your mattress feeling fresh and clean.
What you’ll need:
* Baking soda
* Essential oil (optional, I like lavender or eucalyptus)
* Vacuum cleaner with upholstery attachment
Step-by-step instructions:
1. Prepare the Mattress: Remove all bedding from the mattress.
2. Mix Baking Soda and Essential Oil (Optional): In a bowl, mix baking soda with a few drops of your favorite essential oil. This will add a pleasant scent to your mattress.
3. Sprinkle the Mattress: Sprinkle the baking soda mixture evenly over the entire surface of the mattress.
4. Let it Sit: Allow the baking soda to sit for at least 30 minutes, or even longer for a deeper clean. The baking soda will absorb odors and moisture.
5. Vacuum: Use a vacuum cleaner with an upholstery attachment to thoroughly vacuum the mattress, removing all traces of baking soda.
Wood Furniture Polish: Reviving Your Wood Furniture
This simple polish will bring back the shine to your wood furniture and protect it from drying out.
What you’ll need:
* Olive oil
* Lemon juice
* Soft cloth
Step-by-step instructions:
1. Mix the Polish: In a small bowl, mix 1/4 cup olive oil with 1 tablespoon lemon juice.
2. Apply the Polish: Dip a soft cloth into the polish and apply it to the wood furniture in a circular motion.
3. Buff: Use a clean, dry cloth to buff the furniture until it shines.
Window Wonder: Achieving Streak-Free Windows
Forget expensive window cleaners! This vinegar and water solution will leave your windows sparkling and streak-free.
What you’ll need:
* White vinegar
* Water
* Spray bottle
* Microfiber cloth or newspaper
Step-by-step instructions:
1. Mix the Solution: In a spray bottle, mix equal parts white vinegar and water.
2. Spray the Windows: Spray the window with the vinegar and water solution.
3. Wipe Clean: Use a microfiber cloth or crumpled newspaper to wipe the window clean. Wipe in a circular motion, then wipe vertically and horizontally to remove any streaks.
Garbage Disposal Refresh: Eliminating Odors
A smelly garbage

Conclusion
So there you have it! This simple yet incredibly effective DIY cleaning trick is a game-changer for anyone looking to simplify their cleaning routine and achieve sparkling results without breaking the bank. We’ve shown you how to harness the power of readily available ingredients to create a potent cleaning solution that tackles grime, eliminates odors, and leaves your home feeling fresh and revitalized.
Why is this a must-try? Because it’s economical, eco-friendly, and incredibly versatile. Forget about expensive, chemical-laden cleaning products that can irritate your skin and pollute the environment. This DIY approach allows you to control exactly what goes into your cleaning solutions, ensuring a safer and healthier home for you and your family. Plus, the satisfaction of creating something yourself that works so well is truly rewarding.
But the beauty of this DIY cleaning trick lies in its adaptability. Feel free to experiment with different essential oils to create your own signature scent. Lavender, lemon, tea tree, and eucalyptus are all excellent choices, each offering unique aromatherapy benefits in addition to their cleaning properties. You can also adjust the concentration of ingredients to suit your specific needs. For tougher stains, try increasing the amount of vinegar or baking soda. For more delicate surfaces, dilute the solution further with water.
Consider these variations to further enhance your cleaning experience:
* Infused Vinegar: Infuse your vinegar with citrus peels (lemon, orange, grapefruit) for a few weeks before using it in your cleaning solution. This adds a pleasant fragrance and boosts the cleaning power.
* Herbal Power: Add dried herbs like rosemary or thyme to your vinegar infusion for their antibacterial and antifungal properties.
* DIY Cleaning Paste: Combine baking soda with a small amount of water to create a paste for scrubbing stubborn stains on sinks, tubs, and ovens.
* Essential Oil Blends: Experiment with different essential oil blends to create custom cleaning solutions for specific areas of your home. For example, a blend of tea tree and eucalyptus is great for bathrooms, while a blend of lavender and chamomile is perfect for bedrooms.
We are confident that once you try this DIY cleaning trick, you’ll be amazed by the results. It’s a simple, effective, and sustainable way to keep your home clean and healthy. So, ditch the harsh chemicals and embrace the power of natural cleaning.
We encourage you to give this easy life cleaning tips a try and share your experiences with us! Let us know what variations you’ve tried, what scents you love, and how this DIY trick has transformed your cleaning routine. Your feedback is invaluable and helps us create even better content for our readers. Share your tips and tricks in the comments section below – we can’t wait to hear from you! Let’s build a community of clean-living enthusiasts who are passionate about creating healthy and sustainable homes.
FAQ
Q: Is this DIY cleaning solution safe for all surfaces?
A: While this DIY cleaning solution is generally safe for most surfaces, it’s always a good idea to test it in an inconspicuous area first, especially on delicate materials like marble, granite, or wood. The acidity of vinegar can potentially damage certain surfaces, so caution is advised. For these surfaces, consider using a milder solution of baking soda and water. Always check the manufacturer’s recommendations for cleaning specific surfaces.
Q: Can I use this cleaning solution on my hardwood floors?
A: Vinegar can be harsh on hardwood floors, potentially stripping away the finish over time. If you choose to use this solution on hardwood floors, dilute it significantly with water (a ratio of 1 part vinegar to 10 parts water) and use a microfiber mop to avoid excessive moisture. Alternatively, consider using a cleaning solution specifically designed for hardwood floors.
Q: How long will this DIY cleaning solution last?
A: This DIY cleaning solution can typically last for several weeks when stored in a cool, dark place in an airtight container. However, it’s best to use it within a month to ensure its effectiveness. If you notice any changes in color, odor, or consistency, discard the solution and make a fresh batch.
Q: What essential oils are best to use in this cleaning solution?
A: The best essential oils to use in this cleaning solution depend on your personal preferences and the desired cleaning benefits. Some popular choices include:
* Lemon: Known for its degreasing and disinfecting properties, as well as its uplifting scent.
* Lavender: Offers a calming and relaxing aroma, while also possessing antibacterial and antifungal properties.
* Tea Tree: A powerful antiseptic and antifungal agent, ideal for cleaning bathrooms and kitchens.
* Eucalyptus: Provides a refreshing and invigorating scent, while also helping to clear congestion and kill germs.
* Peppermint: Offers a cooling and refreshing aroma, while also acting as a natural insect repellent.
Experiment with different essential oils to find your favorite combinations. Remember to use pure, therapeutic-grade essential oils for the best results.
Q: Can I use this cleaning solution to clean my oven?
A: Yes, you can use a variation of this cleaning solution to clean your oven. Create a paste of baking soda and water and apply it to the interior of your oven. Let it sit overnight, then scrub away the grime with a sponge or cloth. For stubborn stains, you can spray the area with a mixture of vinegar and water before scrubbing.
Q: Is this DIY cleaning solution safe for pets and children?
A: While this DIY cleaning solution is generally safer than commercial cleaning products, it’s still important to exercise caution when using it around pets and children. Keep the solution out of their reach and ensure that surfaces are thoroughly dry before allowing them to come into contact with them. If your pet or child ingests the solution, contact a veterinarian or medical professional immediately.
Q: Can I use this cleaning solution to clean my windows and mirrors?
A: Yes, this DIY cleaning solution can be used to clean windows and mirrors. Mix equal parts vinegar and water in a spray bottle and use it to clean the glass surfaces. Wipe with a clean microfiber cloth for a streak-free finish.
Q: What are the benefits of using DIY cleaning solutions over commercial cleaning products?
A: There are several benefits to using DIY cleaning solutions over commercial cleaning products:
* Cost-effective: DIY cleaning solutions are typically much cheaper to make than buying commercial cleaning products.
* Eco-friendly: DIY cleaning solutions are often made with natural, biodegradable ingredients, which are better for the environment.
* Safer: DIY cleaning solutions are less likely to contain harsh chemicals that can be harmful to your health.
* Customizable: You can customize DIY cleaning solutions to suit your specific needs and preferences.
* Reduces Waste: By making your own cleaning solutions, you reduce the amount of plastic waste generated from commercial cleaning product bottles.
Q: What if I don’t have vinegar? Can I substitute it with something else?
A: While vinegar is a key ingredient in this DIY cleaning solution due to its acidity and cleaning properties, you can try substituting it with lemon juice in a pinch. Lemon juice also has acidic properties and a pleasant scent. However, vinegar is generally more effective for cleaning and disinfecting. If you’re looking for a non-acidic alternative, consider using a solution of baking soda and water.
Leave a Comment