
Grow Arugula Indoors Easily and unlock a world of peppery freshness right on your windowsill! Imagine, even in the dead of winter, you can snip vibrant, flavorful arugula leaves to add a zesty kick to your salads, sandwiches, and pizzas. No more bland meals – just a burst of homegrown goodness at your fingertips.
For centuries, arugula, also known as rocket, has been cherished for its distinctive taste and nutritional benefits. From ancient Roman gardens to modern-day kitchens, this leafy green has held a special place in culinary traditions. Historically, it was even believed to be an aphrodisiac! While we can’t promise that, we *can* guarantee that learning to grow arugula indoors easily will spice up your cooking and bring a touch of nature into your home.
Let’s face it, not everyone has a sprawling backyard or the time for extensive gardening. That’s where this DIY guide comes in. I’m going to show you simple, effective tricks and hacks to cultivate your own thriving arugula patch indoors, regardless of your experience level. Forget expensive grocery store greens that wilt before you can use them. With a few basic supplies and my easy-to-follow instructions, you’ll be enjoying fresh, organic arugula in no time. Ready to get started? Let’s dive in!
Grow Arugula Indoors: A Beginner’s Guide
Hey there, fellow plant enthusiasts! Ever craved a peppery, fresh salad but didn’t want to brave the grocery store? Or maybe you just want to add a touch of green to your indoor space? Well, I’ve got the perfect solution: growing arugula indoors! It’s surprisingly easy, even if you don’t have a green thumb. I’m going to walk you through everything you need to know to have a thriving arugula patch right in your home.
Why Grow Arugula Indoors?
Before we dive in, let’s talk about why growing arugula indoors is such a great idea.
* Freshness at Your Fingertips: Imagine snipping fresh arugula leaves right before adding them to your salad or pizza. The flavor is unbeatable!
* Year-Round Harvest: No need to wait for spring or summer. You can enjoy fresh arugula all year long, regardless of the weather outside.
* Space-Saving: Arugula doesn’t need a lot of space, making it perfect for apartments, condos, or any small living space.
* Easy to Grow: Seriously, it’s one of the easiest greens to grow indoors. Even if you’re a beginner, you’ll be successful.
* Cost-Effective: Growing your own arugula is much cheaper than buying it from the store, especially if you eat it regularly.
* Pesticide-Free: You control what goes on your plants, so you can be sure your arugula is free of harmful pesticides.
What You’ll Need
Okay, let’s gather our supplies. Here’s what you’ll need to get started:
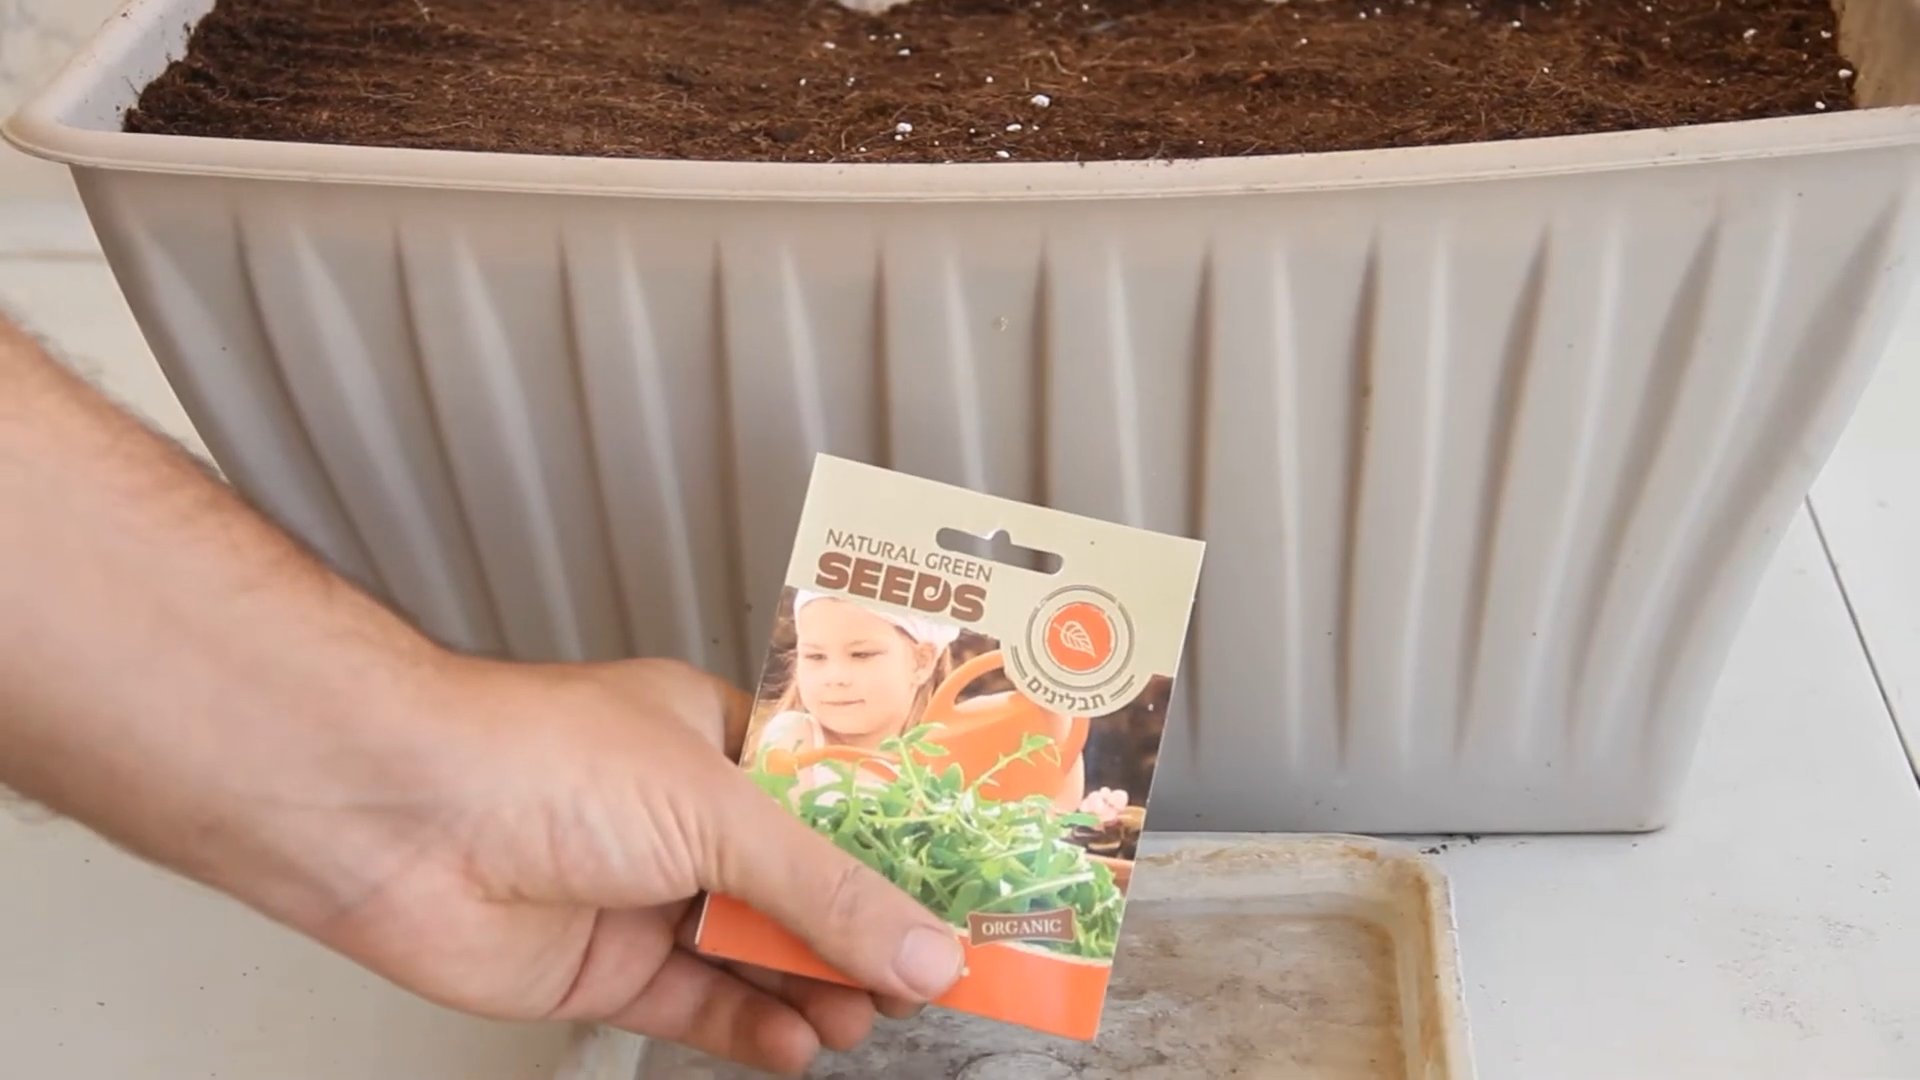
* Arugula Seeds: You can find these at most garden centers or online. Look for varieties specifically labeled for “baby greens” or “salad greens” for faster growth.
* Containers: Choose containers that are at least 6 inches deep. You can use pots, window boxes, or even recycled containers like yogurt tubs (just make sure to poke drainage holes!).
* Potting Mix: Use a high-quality potting mix that drains well. Avoid using garden soil, as it can compact and prevent proper drainage.
* Grow Lights (Optional but Recommended): While arugula can grow in a sunny window, grow lights will provide consistent light and result in a better harvest. I highly recommend investing in a simple LED grow light.
* Watering Can or Spray Bottle: For gentle watering.
* Spray Bottle with Water: For misting the seedlings.
* Small Shovel or Spoon: For handling the potting mix.
* Seed Starting Tray (Optional): If you want to start your seeds indoors before transplanting them to larger containers.
Step-by-Step Instructions: Planting Your Arugula
Now for the fun part! Let’s get those seeds in the soil.
1. Prepare Your Containers: Fill your chosen containers with potting mix, leaving about an inch of space at the top. Gently pat down the soil to create a level surface.
2. Sow the Seeds: Sprinkle the arugula seeds evenly over the surface of the soil. You don’t need to bury them too deep; just lightly press them into the soil. Arugula seeds need light to germinate, so don’t cover them completely.
3. Water Gently: Use a watering can or spray bottle to gently water the soil. You want to moisten the soil without disturbing the seeds.
4. Cover (Optional): To help retain moisture and speed up germination, you can cover the containers with a clear plastic wrap or a humidity dome. Make sure to remove the cover once the seedlings emerge.
5. Provide Light: Place your containers in a sunny window that receives at least 6 hours of direct sunlight per day. If you’re using grow lights, position them a few inches above the soil surface and keep them on for 12-14 hours per day.
6. Keep the Soil Moist: Check the soil moisture daily and water when the top inch of soil feels dry to the touch. Avoid overwatering, as this can lead to root rot.
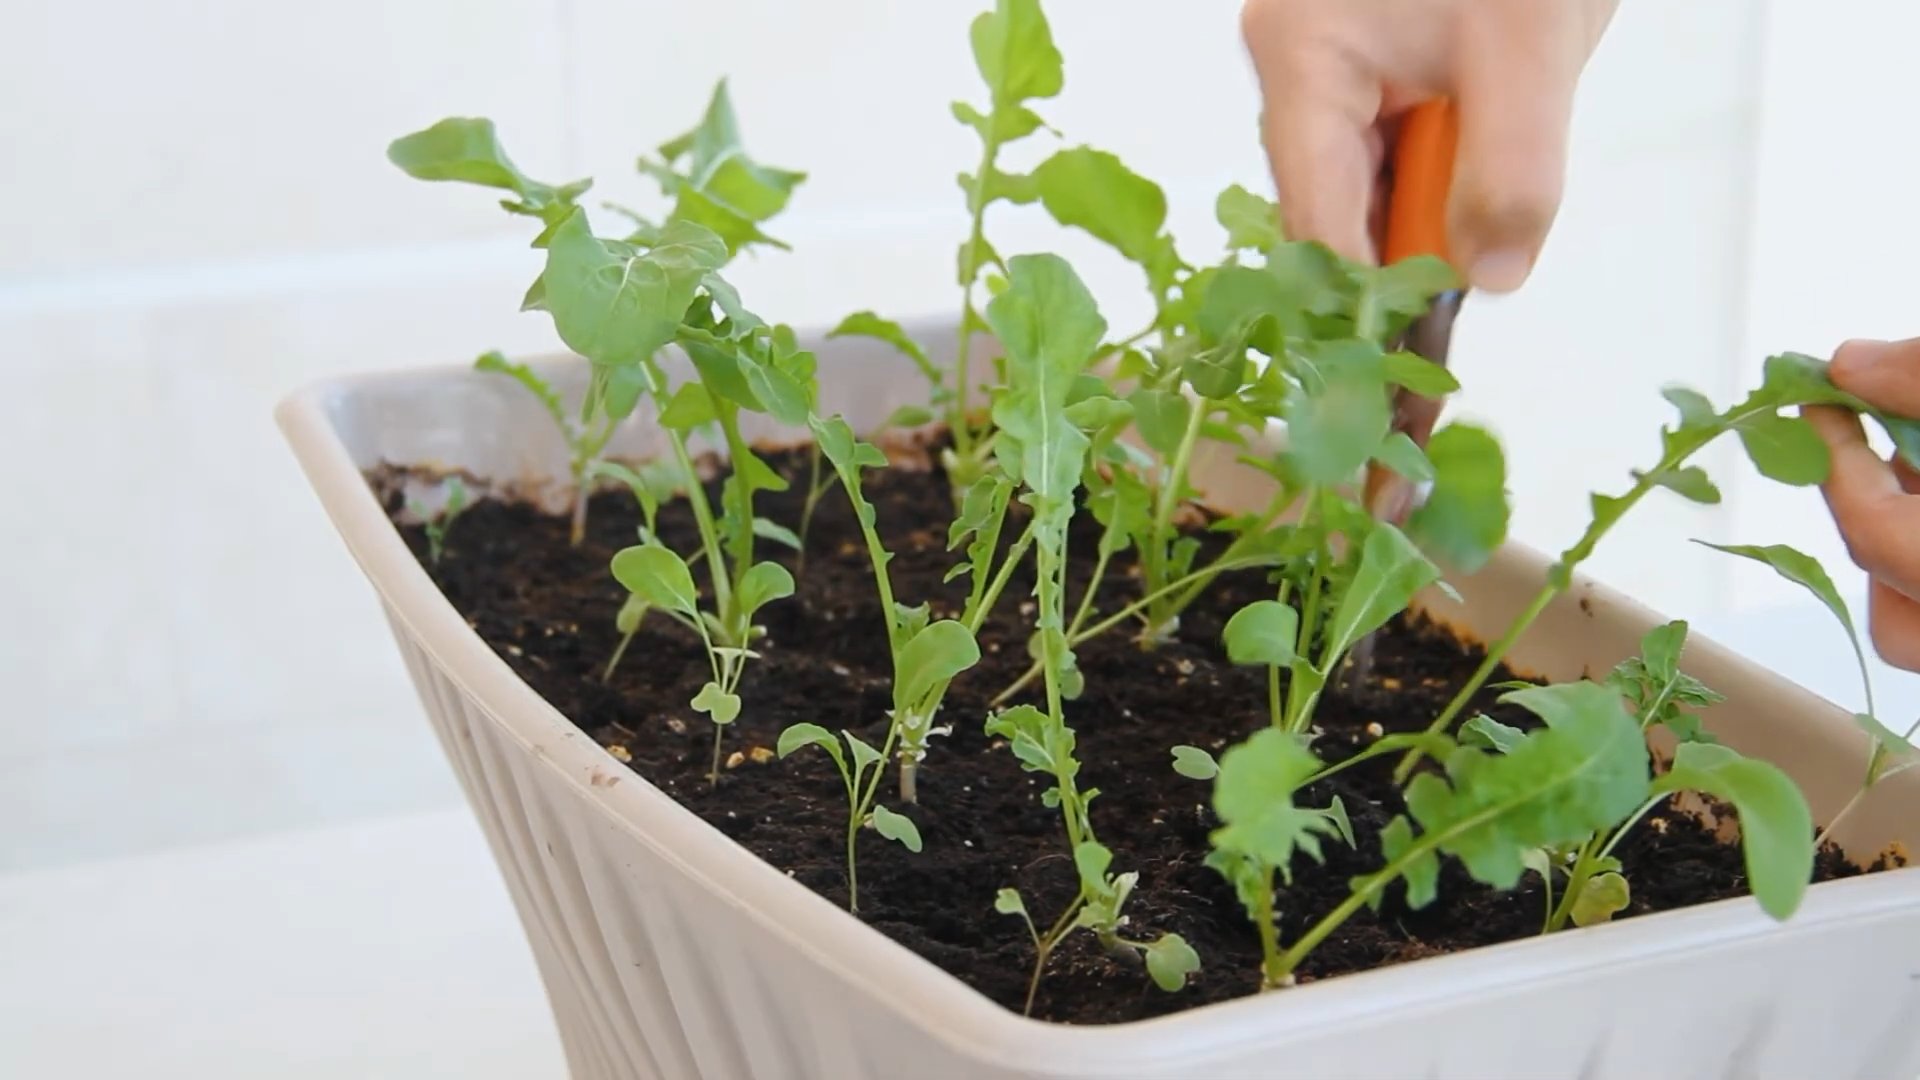
7. Thin Seedlings (If Necessary): Once the seedlings have a few sets of true leaves (the leaves that look like miniature arugula leaves), you may need to thin them out. This means removing some of the seedlings to give the remaining ones more space to grow. Aim for about 1-2 inches between plants. I know it feels harsh, but it’s necessary for healthy growth!
Caring for Your Arugula Plants
Once your arugula seedlings have sprouted, it’s important to provide them with the right care to ensure a bountiful harvest.
1. Watering: As I mentioned before, keep the soil consistently moist but not soggy. Water when the top inch of soil feels dry.
2. Light: Arugula needs plenty of light to thrive. If you’re using a sunny window, rotate the containers regularly to ensure that all sides of the plants receive equal light. If you’re using grow lights, adjust the height as the plants grow to keep them a few inches away from the light source.
3. Fertilizing (Optional): Arugula doesn’t need a lot of fertilizer, but you can give it a boost by feeding it with a diluted liquid fertilizer every few weeks. Look for a fertilizer that’s specifically formulated for leafy greens. I personally like using fish emulsion.
4. Temperature: Arugula prefers cooler temperatures, ideally between 60-70°F (15-21°C). Avoid placing your plants near heat sources, such as radiators or vents.
5. Air Circulation: Good air circulation helps prevent fungal diseases. Make sure your plants have enough space between them and that the air is circulating freely around them. A small fan can help with this.
Harvesting Your Arugula
The best part! You can start harvesting your arugula leaves when they are about 2-3 inches long.
1. Harvesting Technique: Use scissors or your fingers to snip off the outer leaves, leaving the inner leaves to continue growing. This is known as a “cut-and-come-again” harvesting method, which allows you to harvest multiple times from the same plant.
2. Harvesting Frequency: You can harvest arugula leaves as needed, typically every few days or once a week.
3. Harvesting Time: Harvest in the morning for the best flavor.
4. Storage: Store harvested arugula leaves in a plastic bag in the refrigerator. They will stay fresh for several days.
Troubleshooting
Even with the best care, you might encounter a few problems along the way. Here are some common issues and how to address them:
* Leggy Seedlings: If your seedlings are tall and spindly, they’re not getting enough light. Move them to a sunnier location or use grow lights.
* Yellowing Leaves: Yellowing leaves can be a sign of overwatering, underwatering, or nutrient deficiency. Check the soil moisture and adjust your watering accordingly. If you suspect a nutrient deficiency, try fertilizing with a diluted liquid fertilizer.
* Pests: Arugula is generally pest-resistant, but you might occasionally encounter aphids or other small pests. You can usually get rid of them by spraying the plants with a strong stream of water or using an insecticidal soap.
* Fungal Diseases: Fungal diseases can be caused by excessive moisture and poor air circulation. Make sure your plants have enough space between them and that the air is circulating freely around them. Avoid overwatering and consider using a fungicide if necessary.
Tips for Success
Here are a few extra tips to help you grow the best arugula possible:
* Succession Planting: To ensure a continuous harvest, sow new seeds every few weeks. This is called succession planting.
* Choose the Right Variety: Some arugula varieties are more heat-tolerant than others. If you live in a warm climate, choose a heat-tolerant variety.
* Don’t Let It Bolt: Bolting is when the plant starts to flower, which can make the leaves taste bitter. To prevent bolting, keep the soil consistently moist and provide plenty of shade during hot weather.
* Experiment: Don’t be afraid to experiment with different growing techniques and varieties to find what works best for you.
Enjoy Your Homegrown Arugula!
And there you have it! You’re now equipped with the knowledge and skills to grow your own delicious arugula indoors. Enjoy the fresh, peppery flavor in your salads, sandwiches, pizzas, and more. Happy gardening! I hope you found this guide helpful, and I’m excited for you to enjoy the fruits (or rather, leaves!) of your labor.
Conclusion
So, there you have it! Growing arugula indoors easily is not just a possibility; it’s a delicious reality waiting to happen in your own home. We’ve walked through the simple steps, from selecting the right container and soil to nurturing your tiny seedlings into a vibrant, peppery harvest. Why is this a must-try? Because fresh, organic arugula at your fingertips, whenever you crave it, is a game-changer. Think of the salads bursting with flavor, the pizzas elevated with a spicy kick, and the sandwiches transformed into gourmet delights. All thanks to your own green thumb and a little indoor gardening magic.
But the fun doesn’t stop there! Feel free to experiment with different varieties of arugula. Some are milder, some are spicier, and some even have unique leaf shapes. Try a ‘Slow Bolt’ variety if you’re worried about your arugula going to seed too quickly in warmer indoor conditions. You can also play around with companion planting. Try interspersing your arugula with radishes, which can help deter pests and improve soil health. Or, for a beautiful and edible display, plant your arugula alongside colorful edible flowers like pansies or nasturtiums.
Don’t be afraid to get creative with your container choices, too. While we recommended a simple pot or container, you could also use a repurposed window box, a hanging basket, or even a vertical garden system for a more dramatic display. Just ensure that whatever you choose has adequate drainage.
The beauty of growing arugula indoors easily is its accessibility and rewarding nature. It’s a project that’s perfect for beginners, yet offers endless opportunities for experimentation and customization for experienced gardeners. It’s a way to connect with nature, even in the heart of the city, and to enjoy the freshest, most flavorful greens imaginable.
We truly believe that everyone can experience the joy of growing their own food, and arugula is the perfect place to start. So, grab your seeds, gather your supplies, and get ready to embark on your indoor gardening adventure. We’re confident that you’ll be amazed at how easy and rewarding it is to grow your own delicious arugula.
Now, we want to hear from you! Have you tried growing arugula indoors? What tips and tricks have you discovered? What challenges have you faced? Share your experiences in the comments below. Let’s create a community of indoor gardeners, sharing our knowledge and inspiring each other to grow more of our own food. We can’t wait to see your arugula growing success stories!
Frequently Asked Questions (FAQ)
What kind of soil is best for growing arugula indoors?
Arugula thrives in well-draining soil that is rich in organic matter. A good starting point is a standard potting mix amended with compost or other organic materials. Avoid using garden soil, as it can be too heavy and may contain pests or diseases. Look for a potting mix that contains ingredients like peat moss, perlite, and vermiculite, which will help with drainage and aeration. You can also create your own custom mix by combining equal parts potting soil, compost, and perlite. The ideal pH for arugula is between 6.0 and 7.0, which is slightly acidic to neutral.
How much sunlight does indoor arugula need?
Arugula needs at least 6 hours of sunlight per day to thrive. If you don’t have a sunny windowsill, you can supplement with grow lights. Fluorescent or LED grow lights are excellent choices for indoor gardening. Position the lights a few inches above the plants and keep them on for 12-14 hours per day. Rotate your plants regularly to ensure that all sides receive adequate light. Insufficient light can lead to leggy growth and a less flavorful harvest.
How often should I water my indoor arugula?
Water your arugula regularly, keeping the soil consistently moist but not waterlogged. Check the soil moisture by sticking your finger about an inch deep. If the soil feels dry, it’s time to water. Water deeply, allowing the excess water to drain out of the bottom of the pot. Avoid overwatering, as this can lead to root rot. During warmer months or in drier indoor environments, you may need to water more frequently.
When can I harvest my indoor arugula?
You can start harvesting arugula leaves as soon as they are large enough to eat, typically about 3-4 weeks after planting. Harvest the outer leaves first, allowing the inner leaves to continue growing. You can harvest arugula multiple times from the same plant. To encourage continued growth, avoid harvesting more than one-third of the plant at a time. Regular harvesting will also help prevent the arugula from bolting (going to seed), which can make the leaves bitter.
How do I prevent pests and diseases from affecting my indoor arugula?
While indoor gardening is generally less susceptible to pests and diseases than outdoor gardening, it’s still important to take precautions. Inspect your plants regularly for signs of pests, such as aphids, spider mites, or whiteflies. If you find any pests, you can try washing them off with a strong stream of water or using insecticidal soap. To prevent fungal diseases, ensure good air circulation around your plants and avoid overwatering. If you notice any signs of disease, remove the affected leaves immediately.
What causes arugula to taste bitter, and how can I prevent it?
Arugula can become bitter if it’s stressed by heat, lack of water, or bolting. To prevent bitterness, keep your arugula well-watered, especially during hot weather. Provide adequate shade or move your plants to a cooler location if they are exposed to excessive heat. Harvest your arugula regularly to prevent it from bolting. If your arugula does start to bolt, you can still harvest the leaves, but they may be more bitter.
Can I grow arugula indoors year-round?
Yes, you can grow arugula indoors year-round, provided you have adequate light and temperature control. Arugula prefers cooler temperatures, so avoid placing your plants near heat sources. If your indoor environment is too warm, you may need to provide additional ventilation or use a fan to cool the plants down. With proper care, you can enjoy fresh arugula from your indoor garden all year long.
What are some good companion plants for arugula?
Arugula benefits from being planted alongside certain companion plants. Radishes are a classic companion plant for arugula, as they help deter pests and improve soil health. Carrots, cucumbers, and tomatoes are also good companions for arugula. Avoid planting arugula near fennel, as it can inhibit its growth.
How do I save arugula seeds for future planting?
If you want to save arugula seeds, allow a few plants to bolt and flower. Once the flowers have dried and the seed pods have turned brown, you can harvest the seeds. Cut the seed pods from the plant and allow them to dry completely. Then, gently crush the pods to release the seeds. Store the seeds in an airtight container in a cool, dark, and dry place. Arugula seeds can remain viable for several years if stored properly.
Is growing arugula indoors easily organic?
Yes, growing arugula indoors easily can be organic. By using organic potting mix, organic fertilizers (if needed), and avoiding synthetic pesticides and herbicides, you can ensure that your arugula is grown organically. Look for potting mixes and fertilizers that are certified organic by a reputable organization.

Leave a Comment