
Grow baby carrots at home? Absolutely! Forget those pre-packaged, often bland baby carrots from the store. I’m here to tell you that cultivating your own sweet, crunchy, and perfectly petite carrots is not only achievable, but surprisingly simple and incredibly rewarding.
For centuries, home gardening has been a source of sustenance and joy. From ancient Roman kitchen gardens to the victory gardens of World War II, growing your own food connects you to a rich history of self-sufficiency and a deeper appreciation for the natural world. And while carrots themselves have been cultivated for over a thousand years, the “baby carrot” as we know it is a relatively modern invention, born out of a desire to reduce food waste. But why settle for mass-produced when you can have something far superior, grown with your own two hands?
In today’s busy world, finding moments of peace and connection with nature can be a challenge. That’s where the magic of grow baby carrots at home comes in. This DIY guide will provide you with easy-to-follow steps, clever hacks, and insider tips to ensure a bountiful harvest, even if you’re a complete beginner. Imagine the satisfaction of plucking those vibrant orange gems from your own garden, knowing exactly where they came from and how they were grown. Plus, homegrown baby carrots taste infinitely better – sweeter, crisper, and bursting with flavor. So, grab your gardening gloves, and let’s get started on this exciting journey to fresh, delicious, and homegrown baby carrots!
Grow Your Own Sweet and Crunchy Baby Carrots: A DIY Guide
Hey there, fellow gardening enthusiasts! Ever dreamt of popping a perfectly petite, homegrown baby carrot straight from your garden into your mouth? Well, dream no more! Growing your own baby carrots is surprisingly easy and incredibly rewarding. Forget those bland, store-bought bags – get ready for a burst of fresh, sweet flavor that only comes from carrots you’ve nurtured yourself. I’m going to walk you through every step, from choosing the right seeds to harvesting your miniature masterpieces. Let’s get digging!
Choosing the Right Carrot Variety
Not all carrots are created equal, especially when it comes to baby carrots. Some varieties are naturally smaller and sweeter, making them ideal for this project. Here’s what I recommend:
* ‘Parisian’ or ‘Thumbelina’: These are round, almost golf-ball shaped carrots that are perfect for containers or raised beds. They mature quickly and have a delightful sweetness.
* ‘Little Finger’: As the name suggests, these are slender and finger-sized, making them a classic baby carrot shape.
* ‘Short n Sweet’: Another great option for shorter carrots, known for its sweet flavor.
* ‘Amsterdam Forcing’: This variety is known for its early maturity and smooth skin, perfect for baby carrots.
Pro Tip: Always check the seed packet for the “days to maturity.” Shorter maturity times are better for baby carrots, as you’ll be harvesting them before they reach full size.
Preparing Your Growing Space
Carrots need loose, well-drained soil to thrive. Rocky or compacted soil will result in stunted or misshapen carrots, and nobody wants that! Here’s how to get your soil ready:
* Choose a Sunny Spot: Carrots need at least 6 hours of direct sunlight per day.
* Loosen the Soil: Use a garden fork or tiller to loosen the soil to a depth of at least 12 inches. This is crucial for allowing the carrots to grow long and straight.
* Remove Rocks and Debris: Pick out any rocks, stones, or other debris that could impede root growth. Even small pebbles can cause carrots to fork or split.
* Amend the Soil: Carrots prefer slightly acidic soil with a pH between 6.0 and 6.8. Amend the soil with compost or well-rotted manure to improve drainage and fertility. Avoid adding too much nitrogen, as this can lead to excessive foliage growth at the expense of root development.
* Create Raised Beds (Optional): Raised beds are an excellent option for growing carrots, as they provide excellent drainage and allow you to control the soil quality.
Container Gardening: If you’re growing in containers, choose a pot that is at least 8-10 inches deep and wide. Use a high-quality potting mix that is specifically formulated for vegetables.
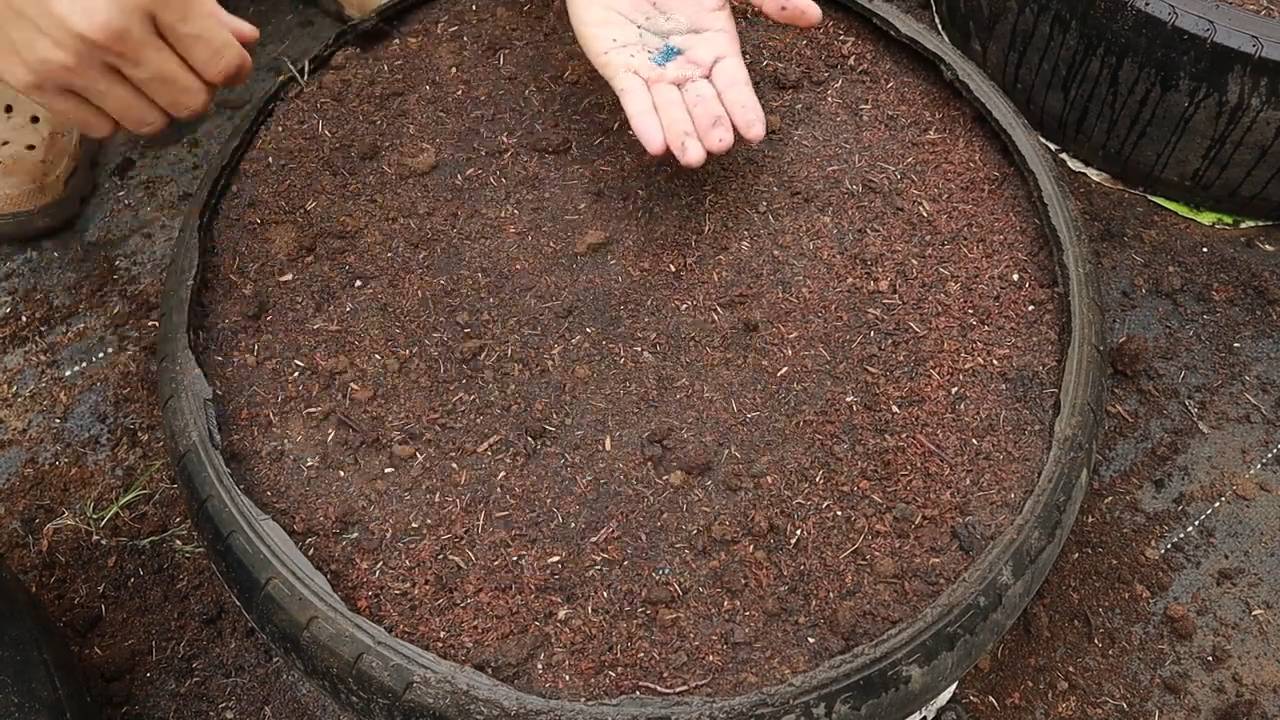
Planting Your Carrot Seeds
Now for the fun part – planting those tiny seeds! Carrot seeds are notoriously small and can be tricky to handle, but don’t worry, I’ve got some tips to make it easier.
1. Water the Soil: Before planting, thoroughly water the soil in your garden bed or container. This will help the seeds germinate and prevent them from being washed away.
2. Create Shallow Furrows: Use your finger or a small tool to create shallow furrows in the soil, about 1/4 to 1/2 inch deep. Space the furrows about 2-3 inches apart.
3. Sow the Seeds: Sprinkle the carrot seeds evenly along the furrows. Carrot seeds are tiny, so it’s easy to sow them too thickly. Try to space them about 1/2 inch apart. If you sow them too close together, you’ll need to thin them later.
4. Cover the Seeds: Gently cover the seeds with a thin layer of soil or vermiculite.
5. Water Gently: Water the soil gently with a watering can or hose with a gentle spray nozzle. Avoid washing the seeds away.
6. Keep the Soil Moist: Keep the soil consistently moist until the seeds germinate. This may require watering daily, especially in hot or dry weather.
Pro Tip: Mixing the tiny carrot seeds with sand before sowing can help you distribute them more evenly.
Caring for Your Carrot Plants
Once your carrot seeds have germinated, it’s important to provide them with the right care to ensure a bountiful harvest.
1. Thin the Seedlings: When the seedlings are about 1-2 inches tall, thin them to about 1-2 inches apart. This will give the carrots enough space to grow. Use small scissors to snip the seedlings at the soil line, rather than pulling them out, which can disturb the roots of the remaining plants.
2. Water Regularly: Carrots need consistent moisture to grow properly. Water deeply and regularly, especially during dry spells. Aim for about 1 inch of water per week.
3. Weed Carefully: Keep the area around your carrot plants free of weeds. Weeds compete with carrots for water and nutrients, and they can also attract pests. Be careful when weeding, as you don’t want to disturb the carrot roots.
4. Fertilize Sparingly: Carrots don’t need a lot of fertilizer. If your soil is poor, you can apply a balanced fertilizer (such as 10-10-10) at half strength. Avoid over-fertilizing, as this can lead to excessive foliage growth and poor root development.
5. Protect from Pests: Carrots can be susceptible to pests such as carrot rust flies and nematodes. Cover your plants with row covers to protect them from these pests. You can also use organic pest control methods, such as neem oil or insecticidal soap.
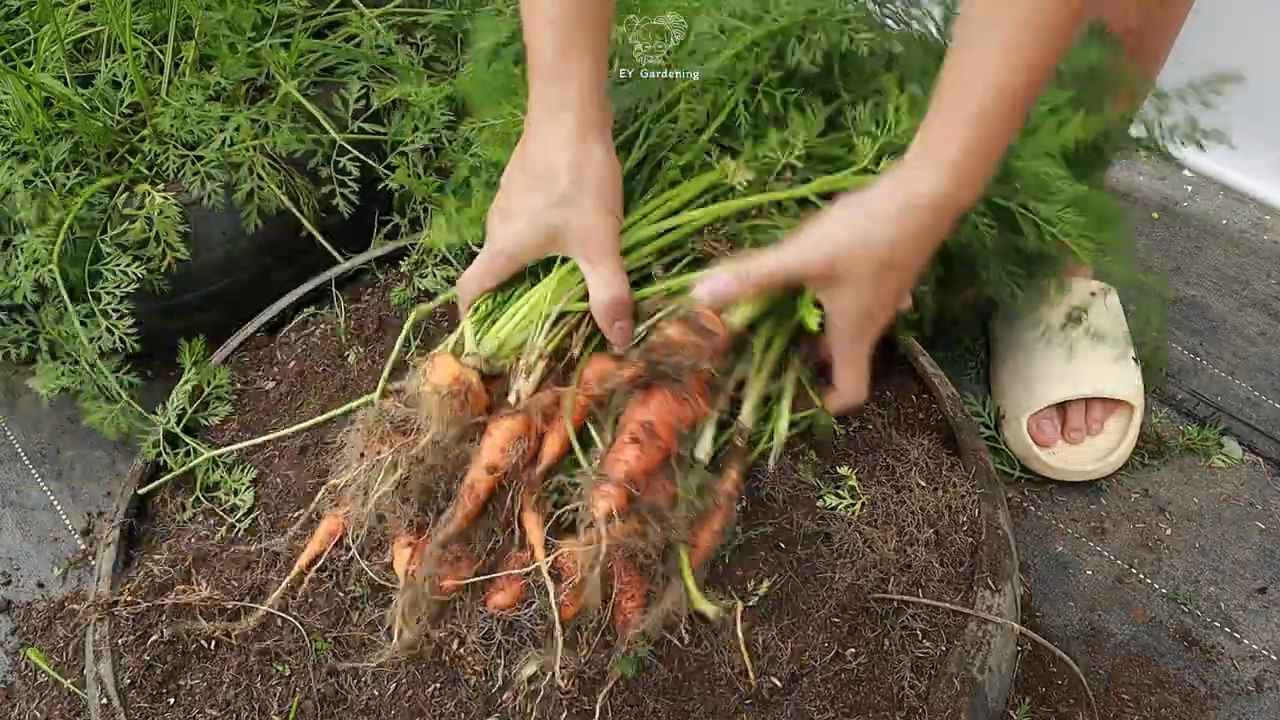
Harvesting Your Baby Carrots
The best part! Baby carrots are typically ready to harvest in 50-60 days, depending on the variety.
1. Check for Size: Gently brush away the soil around the base of a few carrots to check their size. Baby carrots are typically 2-4 inches long and about 1/2 inch in diameter.
2. Harvest Carefully: Gently pull the carrots out of the soil, being careful not to break them. If the soil is dry, you may need to loosen it with a garden fork before pulling the carrots.
3. Wash and Enjoy: Wash the carrots thoroughly and enjoy them fresh from the garden! They’re delicious raw, steamed, roasted, or added to salads and other dishes.
Succession Planting: To enjoy a continuous harvest of baby carrots, sow new seeds every 2-3 weeks throughout the growing season.
Troubleshooting Common Carrot Problems
Even with the best care, you may encounter some problems when growing carrots. Here are some common issues and how to address them:
* Forked or Split Carrots: This is usually caused by rocky or compacted soil. Make sure to prepare your soil properly before planting.
* Stunted Growth: This can be caused by poor soil, lack of water, or pests. Amend your soil with compost, water regularly, and protect your plants from pests.
* Bitter Taste: This can be caused by hot weather or inconsistent watering. Provide shade for your plants during the hottest part of the day and water regularly.
* Pests: Carrot rust flies and nematodes can damage carrot roots. Use row covers to protect your plants from these pests.
Storing Your Harvest
If you have more baby carrots than you can eat right away, you can store them in the refrigerator for up to 2 weeks.
1. Trim the Tops: Cut off the green tops of the carrots, leaving about 1/2 inch of stem.
2. Wash and Dry: Wash the carrots thoroughly and dry them completely.
3. Store in a Plastic Bag: Place the carrots in a plastic bag with a few paper towels to absorb excess moisture.
4. Refrigerate: Store the bag in the refrigerator crisper drawer.
Freezing Carrots: You can also freeze carrots for longer storage. Blanch them in boiling water for 2-3 minutes, then plunge them into ice water to stop the cooking process. Drain the carrots and freeze them in a single layer on a baking sheet. Once frozen, transfer them to a freezer bag or container.
Growing your own baby carrots is a rewarding experience that will provide you with fresh, delicious vegetables all season long. With a little bit of planning and care, you can enjoy a bountiful harvest of sweet and crunchy baby carrots right from your own garden. Happy gardening!
Conclusion
So, there you have it! Growing baby carrots at home is not only achievable but also incredibly rewarding. Forget the pre-packaged, often bland, baby carrots from the store. With a little planning and effort, you can cultivate a vibrant harvest of sweet, tender, and perfectly sized baby carrots right in your own backyard or even on your balcony.
Why is this DIY trick a must-try? Because it puts you in control. You control the soil, the water, and the nutrients, ensuring that your baby carrots are grown organically and without any unwanted chemicals. You also get the satisfaction of nurturing something from seed to table, a truly fulfilling experience. Plus, let’s be honest, freshly harvested baby carrots taste infinitely better than anything you can buy in a plastic bag. The sweetness is more pronounced, the texture is crisper, and the overall flavor is simply unmatched.
But the benefits don’t stop there. Growing your own baby carrots is also a fantastic way to reduce your carbon footprint. Think about all the resources that go into packaging, transporting, and storing commercially grown carrots. By growing your own, you’re cutting out all those unnecessary steps and contributing to a more sustainable lifestyle.
Looking for variations? Absolutely! Experiment with different carrot varieties to find your favorite flavor profile. Nantes carrots are known for their sweetness and smooth texture, while Chantenay carrots are more robust and hold their shape well. You can also try growing rainbow carrots for a visually stunning and nutrient-rich harvest. Consider companion planting with herbs like rosemary or sage to deter pests and enhance the flavor of your carrots. Another fun variation is to try growing your baby carrots in containers of different shapes and sizes. This can lead to some uniquely shaped and interesting looking carrots, perfect for adding a touch of whimsy to your salads and snacks.
Don’t be intimidated if you’re a beginner gardener. Growing baby carrots is a relatively easy process, and with a little patience and attention, you’ll be enjoying your own homegrown treats in no time. Remember to choose a sunny location, prepare your soil properly, and water regularly. And don’t be afraid to experiment and learn from your mistakes. Gardening is all about trial and error, and the more you practice, the better you’ll become.
We wholeheartedly encourage you to give this DIY trick a try. It’s a fun, rewarding, and delicious way to connect with nature and enjoy the fruits (or rather, vegetables) of your labor. Once you’ve harvested your first batch of homegrown baby carrots, we’d love to hear about your experience. Share your photos, tips, and tricks in the comments below. Let’s create a community of baby carrot enthusiasts and inspire others to grow their own food. So, grab your seeds, get your hands dirty, and get ready to enjoy the sweetest, most flavorful baby carrots you’ve ever tasted! Embrace the joy of growing your own and discover the magic of homegrown goodness.
Frequently Asked Questions (FAQ)
What is the best time of year to plant baby carrots?
The best time to plant baby carrots depends on your climate. In general, baby carrots are a cool-season crop, meaning they thrive in cooler temperatures. For most regions, the ideal planting times are early spring (as soon as the ground can be worked) or late summer/early fall. Planting in the spring allows you to harvest before the summer heat sets in, which can cause the carrots to become bitter. Planting in late summer/early fall allows you to harvest throughout the fall and even into the early winter in milder climates. Check your local frost dates to determine the best planting times for your specific area. Aim to plant about 2-3 weeks before the last expected frost in spring or 8-10 weeks before the first expected frost in fall.
What kind of soil is best for growing baby carrots?
Baby carrots need loose, well-drained soil that is free of rocks and clumps. Rocky or compacted soil can cause the carrots to become misshapen or stunted. The ideal soil pH for carrots is between 6.0 and 6.8. Before planting, amend your soil with plenty of compost or other organic matter to improve drainage and fertility. If your soil is heavy clay, consider adding sand or other coarse materials to improve drainage. Raised beds or containers are also a great option for growing baby carrots, as they provide excellent drainage and allow you to control the soil composition.
How often should I water my baby carrots?
Baby carrots need consistent moisture to thrive. Water deeply and regularly, especially during dry periods. Aim to keep the soil consistently moist but not waterlogged. Overwatering can lead to root rot, while underwatering can cause the carrots to become dry and tough. A good rule of thumb is to water when the top inch of soil feels dry to the touch. Mulching around your carrot plants can help to retain moisture and suppress weeds.
How do I prevent pests from damaging my baby carrots?
Several pests can attack baby carrots, including carrot rust flies, aphids, and nematodes. To prevent pest problems, practice good garden hygiene. Remove any weeds or debris that can harbor pests. Companion planting with herbs like rosemary, sage, or marigolds can also help to deter pests. If you notice signs of pest infestation, you can try using organic pest control methods, such as insecticidal soap or neem oil. Row covers can also be used to protect your carrots from pests.
How do I know when my baby carrots are ready to harvest?
Baby carrots are typically ready to harvest about 50-70 days after planting, depending on the variety. You can tell if your carrots are ready by gently pulling back the soil around the top of the carrot to check its size. Baby carrots are usually harvested when they are about 3-4 inches long and about ½ inch in diameter. You can also harvest them earlier if you prefer smaller carrots. To harvest, gently loosen the soil around the carrot and pull it straight up.
Can I grow baby carrots in containers?
Yes, you can definitely grow baby carrots in containers! In fact, container gardening is a great option for those with limited space or poor soil conditions. Choose a container that is at least 6-8 inches deep and has drainage holes. Fill the container with a well-draining potting mix. Sow the carrot seeds directly into the container, following the same spacing guidelines as for in-ground planting. Water regularly and fertilize as needed. Place the container in a sunny location that receives at least 6 hours of sunlight per day.
What are some common problems when growing baby carrots and how can I fix them?
Some common problems include:
* **Forked or misshapen carrots:** This is often caused by rocky or compacted soil. Make sure to prepare your soil properly before planting and remove any rocks or clumps.
* **Bitter carrots:** This can be caused by hot weather or inconsistent watering. Try to plant your carrots in a cooler location and water them regularly.
* **Slow growth:** This can be caused by poor soil fertility or lack of sunlight. Amend your soil with compost or fertilizer and make sure your carrots are getting enough sunlight.
* **Pest damage:** As mentioned earlier, several pests can attack baby carrots. Use organic pest control methods or row covers to protect your plants.
How do I store my harvested baby carrots?
To store your harvested baby carrots, remove the green tops and gently wash the carrots. Pat them dry and store them in a plastic bag or container in the refrigerator. They should last for several weeks. You can also freeze baby carrots for longer storage. To freeze, blanch the carrots in boiling water for 2-3 minutes, then transfer them to an ice bath to stop the cooking process. Drain the carrots and store them in freezer bags or containers.
Leave a Comment