
Grow Bitter Gourd at Home? Absolutely! Imagine stepping into your backyard and harvesting fresh, vibrant bitter gourds, ready to add a unique and healthy twist to your meals. Forget those bland, store-bought options 鈥?with a few simple tricks, you can cultivate your own thriving bitter gourd patch, right in your own backyard.
For centuries, bitter gourd, also known as karela, has been a staple in Asian and African cuisines and traditional medicine. Its distinctive bitter flavor is prized for its health benefits, believed to aid in digestion and boost immunity. But let’s be honest, the taste can be a bit…acquired. That’s where growing your own comes in! When you grow bitter gourd at home, you have complete control over the growing conditions, resulting in a potentially less bitter and more flavorful harvest.
This DIY guide is your secret weapon to successfully cultivating this fascinating vegetable. I’ll share my tried-and-true tips and tricks, from seed selection to pest control, ensuring you enjoy a bountiful harvest. Why rely on expensive and often less-than-fresh produce when you can easily grow your own? Let’s ditch the grocery store and get our hands dirty! Get ready to transform your garden into a bitter gourd paradise!
Grow Your Own Bitter Gourd: A Complete DIY Guide
Hey there, fellow gardening enthusiasts! Ever thought about growing your own bitter gourd? It might sound intimidating, but trust me, it’s totally doable, even if you’re a beginner. Bitter gourd, also known as bitter melon or karela, is packed with nutrients and has a unique, slightly bitter flavor that’s delicious in stir-fries, curries, and even juices. Plus, there’s nothing quite like the satisfaction of harvesting something you’ve grown yourself. So, let’s dive in and learn how to cultivate this amazing vegetable right in your own backyard!
Choosing the Right Variety and Starting Seeds
Before we get our hands dirty, let’s talk about selecting the right bitter gourd variety and getting those seeds started.
* Variety Selection: There are several varieties of bitter gourd available, each with slightly different characteristics. Some are longer and thinner, while others are shorter and rounder. Some are more bitter than others. Do some research and choose a variety that suits your taste and growing conditions. Local nurseries are a great resource for finding varieties that thrive in your area. I personally love the ‘Long Green’ variety because it’s prolific and relatively easy to grow.
* Seed Starting vs. Direct Sowing: You can either start your bitter gourd seeds indoors or directly sow them in the ground. Starting seeds indoors gives you a head start, especially if you live in a region with a shorter growing season. Direct sowing is simpler, but the germination rate might be lower, and the plants will take longer to mature. I prefer starting my seeds indoors to get a jump on the season.
* Seed Soaking: Bitter gourd seeds have a tough outer shell, so soaking them before planting can significantly improve germination rates.
1. Soak the seeds: Place the seeds in a bowl of warm water for 24 hours. This helps soften the seed coat and encourages sprouting.
2. Prepare your seed starting tray: Fill a seed starting tray or small pots with a well-draining seed starting mix.
3. Plant the seeds: Make a small hole (about 1/2 inch deep) in each cell or pot and place one seed in each hole. Cover the seeds with soil and gently water.
4. Provide warmth and moisture: Keep the soil consistently moist but not waterlogged. Place the tray or pots in a warm location (around 75-85掳F) or use a heat mat to speed up germination.
5. Wait for germination: Germination usually takes about 7-14 days. Once the seedlings emerge, provide them with plenty of light. A sunny windowsill or a grow light works well.
Preparing the Soil and Planting Seedlings
Now that our seedlings are sprouting, it’s time to get the garden bed ready for transplanting.
* Choosing the Right Location: Bitter gourd needs plenty of sunlight (at least 6-8 hours per day) and well-drained soil. Choose a location in your garden that meets these requirements.
* Soil Preparation: Bitter gourd thrives in rich, fertile soil. Amend your garden soil with plenty of organic matter, such as compost or well-rotted manure. This will improve drainage, aeration, and nutrient content.
1. Clear the area: Remove any weeds, rocks, or debris from the planting area.
2. Amend the soil: Spread a 2-3 inch layer of compost or manure over the soil surface.
3. Till or dig: Use a garden fork or tiller to incorporate the organic matter into the soil to a depth of about 12 inches.
4. Create mounds or rows: Bitter gourd vines need space to spread, so create mounds or rows that are about 3-4 feet apart.
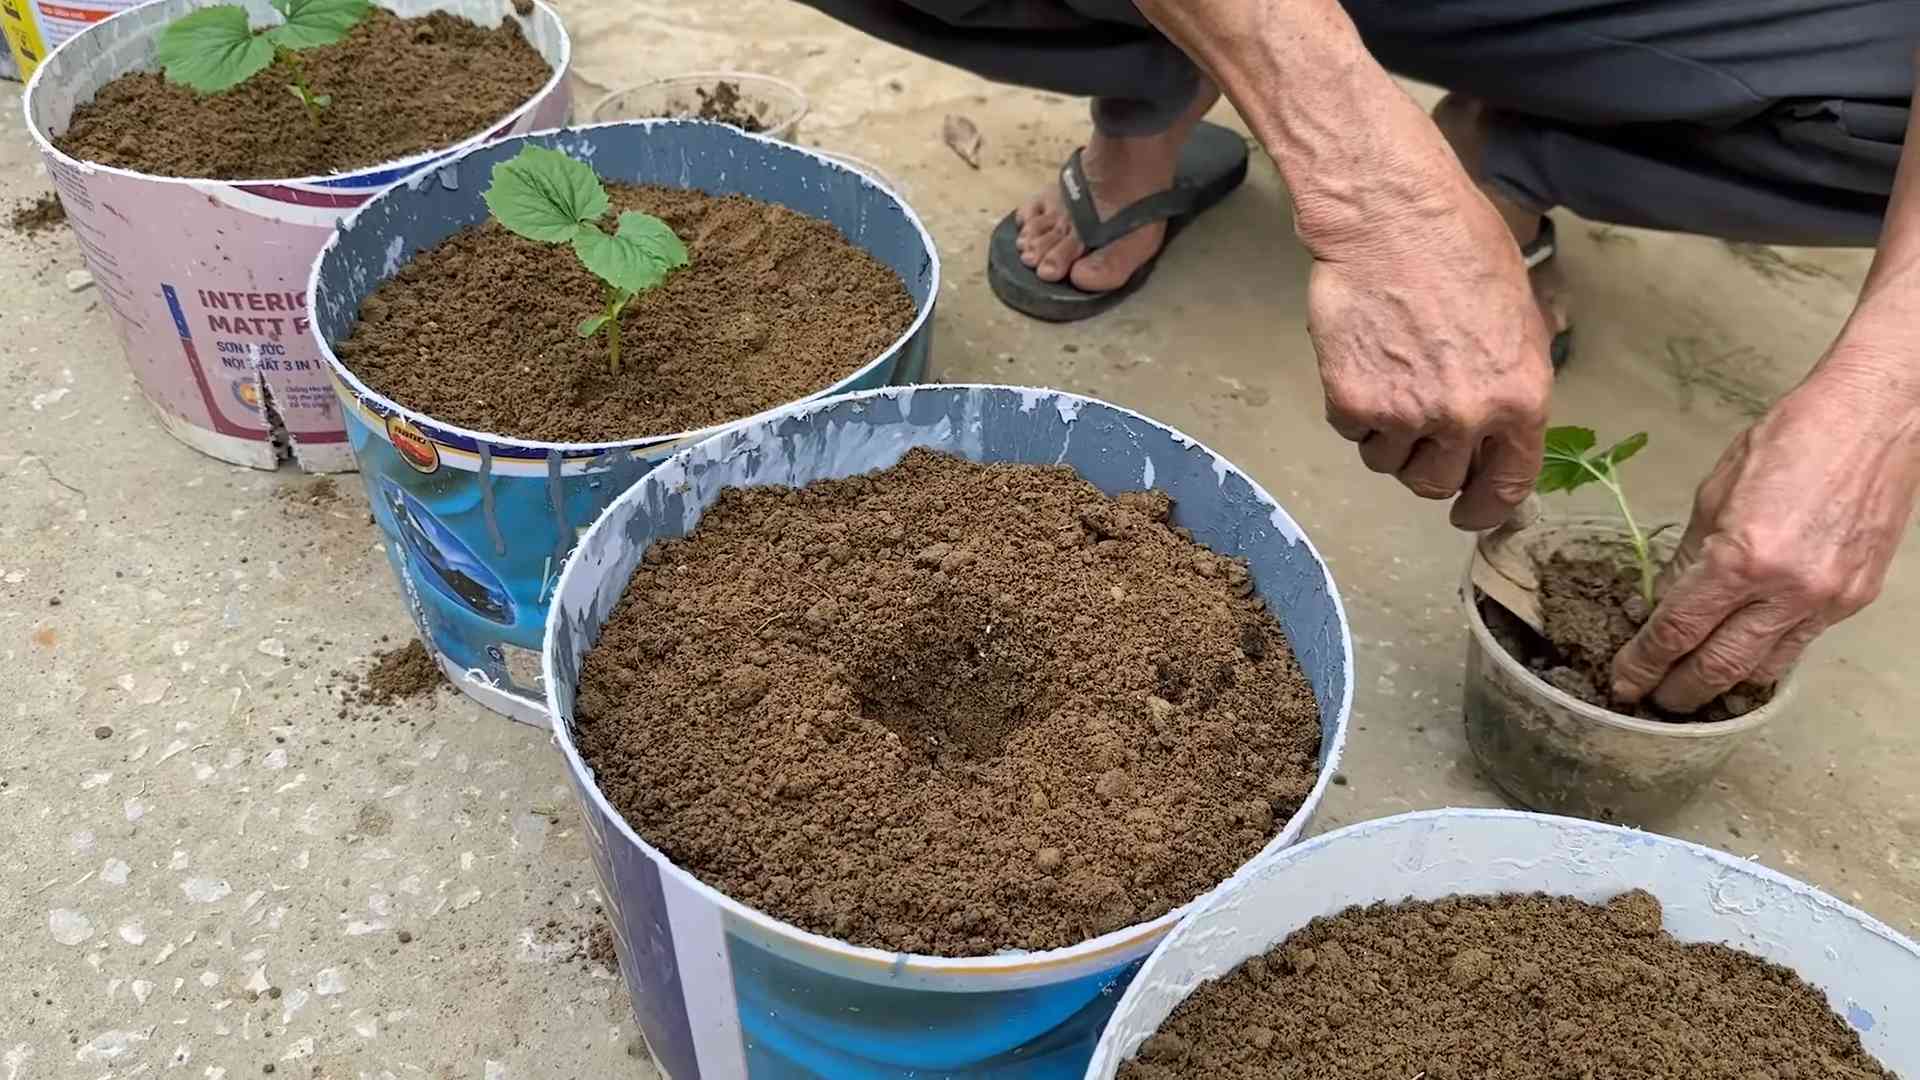
* Transplanting Seedlings: Once the seedlings have developed a few sets of true leaves and the weather has warmed up (soil temperature above 60掳F), they’re ready to be transplanted into the garden.
1. Harden off the seedlings: Before transplanting, gradually acclimate the seedlings to outdoor conditions by placing them outside for a few hours each day, increasing the time each day for about a week. This process is called “hardening off” and helps prevent transplant shock.
2. Dig holes: Dig holes in the prepared mounds or rows that are slightly larger than the root balls of the seedlings.
3. Carefully remove seedlings: Gently remove the seedlings from their pots, being careful not to damage the roots.
4. Plant the seedlings: Place the seedlings in the holes and backfill with soil, gently firming around the base of the plants.
5. Water thoroughly: Water the newly transplanted seedlings thoroughly to help them settle in.
Providing Support and Training the Vines
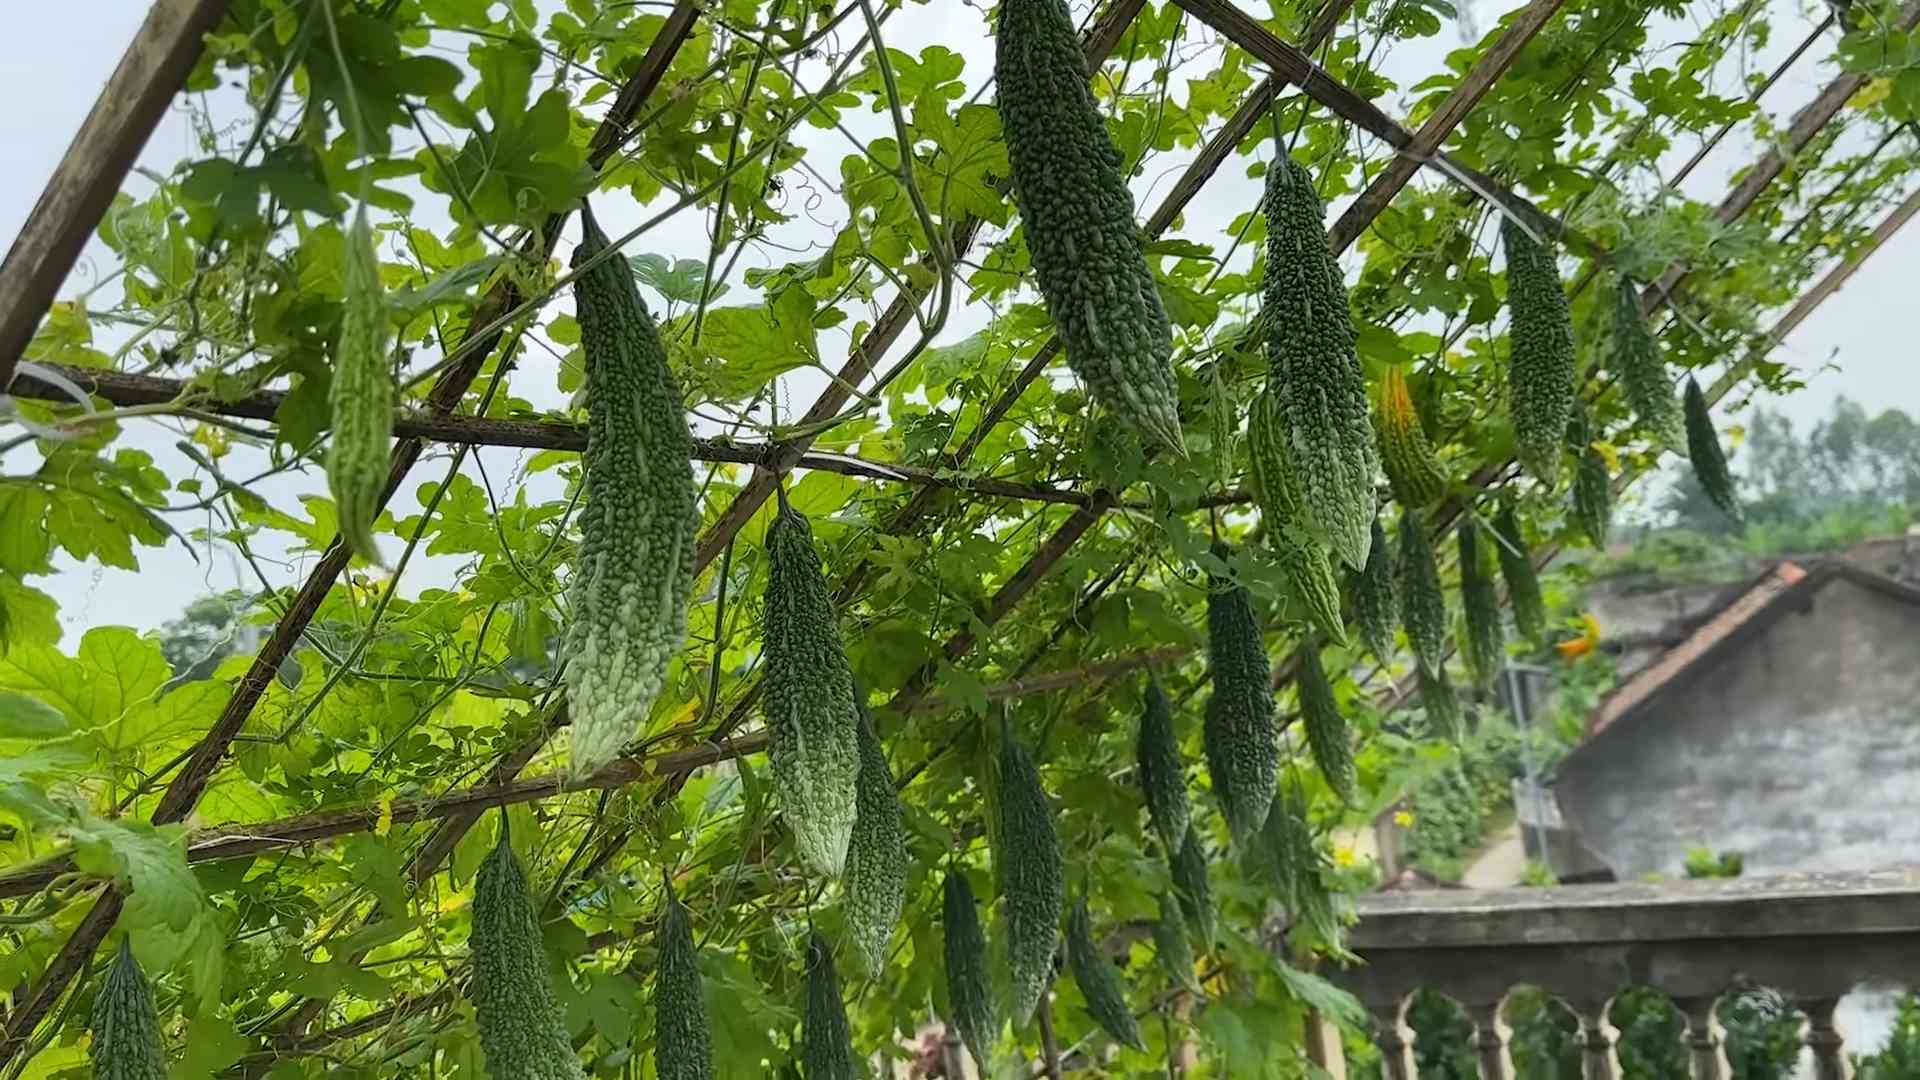
Bitter gourd is a vining plant, so it needs a strong support structure to climb on. This not only keeps the fruits off the ground but also improves air circulation and makes harvesting easier.
* Choosing a Support System: There are several options for supporting bitter gourd vines, including trellises, fences, and arbors. Choose a support system that is sturdy and tall enough to accommodate the mature vines. I personally prefer using a trellis made of sturdy wire mesh.
* Installing the Support System: Install the support system near the newly transplanted seedlings. Make sure it’s securely anchored in the ground.
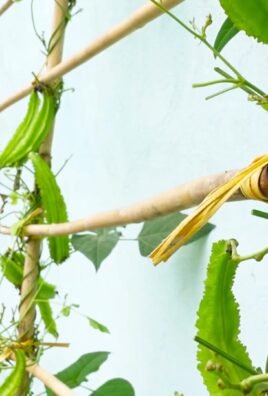
* Training the Vines: As the vines grow, gently guide them onto the support structure. You can use plant ties or twine to secure the vines to the trellis. Regularly check the vines and redirect them as needed.
1. Start early: Begin training the vines as soon as they are long enough to reach the support structure.
2. Gently guide the vines: Use your hands to gently guide the vines onto the trellis.
3. Secure with ties: Use plant ties or twine to secure the vines to the trellis. Be careful not to tie the vines too tightly, as this can restrict growth.
4. Prune as needed: Prune away any side shoots or excessive foliage to improve air circulation and encourage fruit production.
Watering, Fertilizing, and Pest Control
Proper watering, fertilization, and pest control are essential for healthy bitter gourd plants and a bountiful harvest.
* Watering: Bitter gourd needs consistent moisture, especially during hot, dry weather. Water deeply and regularly, aiming to keep the soil consistently moist but not waterlogged. Avoid overhead watering, as this can promote fungal diseases. Drip irrigation is an excellent option for providing consistent moisture directly to the roots.
* Fertilizing: Bitter gourd is a heavy feeder, so it benefits from regular fertilization. Use a balanced fertilizer (e.g., 10-10-10) or a fertilizer specifically formulated for vegetables. Apply fertilizer according to the package instructions. You can also supplement with organic fertilizers, such as compost tea or fish emulsion.
1. Apply fertilizer: Apply fertilizer every 2-3 weeks during the growing season.
2. Follow instructions: Follow the package instructions carefully to avoid over-fertilizing.
3. Water after fertilizing: Water the plants thoroughly after fertilizing to help the nutrients reach the roots.
* Pest and Disease Control: Bitter gourd can be susceptible to various pests and diseases, including aphids, spider mites, and powdery mildew. Regularly inspect your plants for signs of infestation or disease.
* Aphids: These tiny insects suck sap from the leaves and stems, causing them to become distorted and yellowed. Control aphids with insecticidal soap or neem oil.
* Spider Mites: These tiny pests create webs on the undersides of leaves and can cause significant damage. Control spider mites with insecticidal soap or horticultural oil.
* Powdery Mildew: This fungal disease appears as a white, powdery coating on the leaves. Prevent powdery mildew by providing good air circulation and avoiding overhead watering. Treat with a fungicide if necessary.
1. Regular inspection: Regularly inspect your plants for signs of pests or diseases.
2. Early intervention: Take action as soon as you notice any problems.
3. Organic solutions: Use organic pest control and disease control methods whenever possible.
4. Proper sanitation: Remove any diseased or infested plant material to prevent the spread of problems.
Harvesting and Enjoying Your Bitter Gourd
The moment we’ve all been waiting for 鈥?harvesting our homegrown bitter gourd!
* When to Harvest: Bitter gourd is typically ready to harvest about 2-3 months after planting. The fruits should be firm and green, with a slightly waxy coating. Harvest them before they turn yellow or orange, as they will become more bitter.
* How to Harvest: Use a sharp knife or pruners to cut the fruits from the vine, leaving a short stem attached.
* Storage: Bitter gourd can be stored in the refrigerator for up to a week.
*
Conclusion
So, there you have it! Growing bitter gourd at home is not only achievable, but it’s also incredibly rewarding. From the satisfaction of nurturing a plant from seed to the joy of harvesting your own fresh, healthy produce, this DIY project offers a unique connection to your food. We’ve walked you through the essential steps, from seed preparation and soil selection to trellising and pest control, providing you with the knowledge and confidence to embark on your own bitter gourd growing adventure.
But why is this DIY trick a must-try? Beyond the obvious benefit of having access to fresh, organic bitter gourd, growing your own allows you to control the entire process. You know exactly what goes into your plants 鈥?no harmful pesticides, no questionable fertilizers, just pure, natural goodness. This is especially important for bitter gourd, as commercially grown varieties can sometimes be treated with chemicals to enhance their appearance or prolong their shelf life.
Moreover, growing bitter gourd at home is a fantastic way to connect with nature, reduce your carbon footprint, and even save money on your grocery bill. It’s a sustainable and fulfilling hobby that can bring joy and satisfaction to your life.
Ready to take your bitter gourd cultivation to the next level? Consider these variations and suggestions:
* Vertical Gardening: If you’re short on space, explore vertical gardening techniques. Bitter gourd vines thrive on trellises, fences, or even repurposed pallets. This is a great way to maximize your yield in a small area.
* Companion Planting: Experiment with companion planting to deter pests and improve soil health. Marigolds, basil, and nasturtiums are excellent companions for bitter gourd.
* Different Varieties: Don’t limit yourself to just one variety of bitter gourd. Explore different types, such as the Chinese bitter melon or the Indian karela, to discover your favorite flavor and texture.
* Seed Saving: Save seeds from your best-performing plants to ensure a continuous supply of high-quality seeds for future seasons. This is a great way to become more self-sufficient and preserve valuable genetic traits.
* Organic Fertilizers: Use organic fertilizers like compost tea, fish emulsion, or seaweed extract to nourish your plants and promote healthy growth. Avoid synthetic fertilizers, which can harm the environment and reduce the nutritional value of your produce.
We are confident that with a little effort and dedication, you can successfully grow bitter gourd at home and enjoy the many benefits it offers. So, grab your seeds, prepare your soil, and get ready to experience the joy of harvesting your own homegrown bitter gourd.
We encourage you to try this DIY trick and share your experience with us! Post photos of your bitter gourd plants, share your tips and tricks, and let us know what you’ve learned along the way. Together, we can create a community of passionate gardeners who are dedicated to growing their own healthy and delicious food. Happy growing!
Frequently Asked Questions (FAQs)
Q: How long does it take to grow bitter gourd from seed to harvest?
A: The time it takes to grow bitter gourd from seed to harvest typically ranges from 60 to 90 days, depending on the variety, climate, and growing conditions. You can expect to see flowers within 45-60 days after planting, and the fruits will be ready for harvest about 2-3 weeks after flowering. Providing optimal conditions, such as plenty of sunlight, well-drained soil, and regular watering, can help to shorten the growing time.
Q: What is the best time of year to plant bitter gourd?
A: Bitter gourd is a warm-season crop that thrives in temperatures between 75掳F and 90掳F (24掳C and 32掳C). The best time to plant bitter gourd is in late spring or early summer, after the last frost has passed and the soil has warmed up. In warmer climates, you can plant bitter gourd multiple times throughout the year, as long as the temperatures remain consistently warm.
Q: What kind of soil is best for growing bitter gourd?
A: Bitter gourd prefers well-drained, fertile soil that is rich in organic matter. The ideal soil pH is between 6.0 and 7.0. Before planting, amend the soil with compost, aged manure, or other organic materials to improve drainage, fertility, and water retention. Avoid heavy clay soils, which can become waterlogged and inhibit root growth.
Q: How much sunlight does bitter gourd need?
A: Bitter gourd requires at least 6-8 hours of direct sunlight per day to thrive. Choose a sunny location in your garden where the plants will receive ample sunlight throughout the day. If you live in a hot climate, provide some afternoon shade to protect the plants from scorching.
Q: How often should I water bitter gourd plants?
A: Bitter gourd plants need consistent moisture, especially during hot and dry weather. Water deeply and regularly, ensuring that the soil remains consistently moist but not waterlogged. Avoid overhead watering, which can promote fungal diseases. Instead, water at the base of the plants, using a soaker hose or drip irrigation system.
Q: How do I control pests and diseases in bitter gourd plants?
A: Bitter gourd plants can be susceptible to various pests and diseases, including aphids, spider mites, squash bugs, powdery mildew, and downy mildew. To prevent pest and disease problems, practice good garden hygiene, such as removing weeds and debris, and providing adequate air circulation. Use organic pest control methods, such as insecticidal soap, neem oil, or diatomaceous earth, to control pests. For fungal diseases, use a copper-based fungicide or a baking soda solution.
Q: How do I harvest bitter gourd?
A: Bitter gourd fruits are typically harvested when they are still green and slightly immature, about 2-3 weeks after flowering. The fruits should be firm and have a slightly waxy coating. Use a sharp knife or pruning shears to cut the fruits from the vine, leaving a short stem attached. Avoid harvesting overripe fruits, which can become bitter and seedy.
Q: How do I store bitter gourd?
A: Bitter gourd can be stored in the refrigerator for up to a week. Wrap the fruits in a paper towel or plastic bag to prevent them from drying out. You can also freeze bitter gourd for longer storage. Blanch the fruits in boiling water for 2-3 minutes, then cool them in ice water. Drain well and store in freezer bags or containers.
Q: Can I grow bitter gourd in containers?
A: Yes, you can grow bitter gourd in containers, as long as you choose a large enough container and provide adequate support for the vines. Use a container that is at least 12 inches in diameter and 12 inches deep. Fill the container with a well-draining potting mix and provide a trellis or other support for the vines to climb on. Water and fertilize regularly, and provide plenty of sunlight.
Q: Is bitter gourd good for my health?
A: Yes, bitter gourd is a highly nutritious vegetable that offers numerous health benefits. It is rich in vitamins, minerals, and antioxidants, and has been shown to help regulate blood sugar levels, lower cholesterol, boost immunity, and promote weight loss. Bitter gourd is also a good source of fiber, which can aid in digestion and prevent constipation. Incorporating bitter gourd into your diet can be a great way to improve your overall health and well-being.

Leave a Comment