
Grow Bok Choy Home? Absolutely! Imagine stepping into your backyard and harvesting fresh, crisp bok choy for a delicious stir-fry or a vibrant salad. No more trips to the grocery store, no more wondering about pesticides – just pure, homegrown goodness. For centuries, bok choy, also known as Chinese cabbage, has been a staple in Asian cuisine, revered not only for its taste but also for its nutritional benefits. It’s packed with vitamins, minerals, and antioxidants, making it a true superfood.
But let’s be honest, sometimes the idea of starting a garden can feel overwhelming. That’s where these simple DIY tricks and hacks come in! I’m here to show you that you don’t need a green thumb or acres of land to successfully grow bok choy home. Whether you have a sprawling garden or just a sunny balcony, these easy-to-follow tips will empower you to cultivate your own thriving bok choy patch.
Why do you need these DIY tricks? Because growing your own food is incredibly rewarding! It connects you to nature, reduces your carbon footprint, and ensures you’re eating the freshest, healthiest produce possible. Plus, there’s nothing quite like the satisfaction of nurturing a plant from seed to harvest. So, let’s dive in and unlock the secrets to growing beautiful, bountiful bok choy right in your own backyard!
Growing Bok Choy at Home: A Beginner’s Guide
Hey there, fellow gardening enthusiasts! I’m so excited to share my experience with growing bok choy at home. It’s surprisingly easy, even if you’re a complete newbie like I was. Bok choy, also known as pak choi, is a delicious and nutritious leafy green that’s perfect for stir-fries, soups, and salads. Plus, it grows relatively quickly, so you’ll be enjoying your homegrown harvest in no time!
What You’ll Need
Before we dive in, let’s gather everything you’ll need. This will make the whole process smoother and more enjoyable.
* Bok Choy Seeds: Choose a variety that suits your climate and preferences. I personally love the ‘Mei Qing Choi’ variety for its compact size and mild flavor.
* Seed Starting Trays or Small Pots: These are essential for starting your seeds indoors.
* Seed Starting Mix: This is a light and airy soil mix that’s perfect for delicate seedlings.
* Larger Pots or a Garden Bed: Once your seedlings are big enough, you’ll need a place to transplant them.
* Potting Soil or Garden Soil: Choose a well-draining soil that’s rich in organic matter.
* Watering Can or Hose: For keeping your bok choy plants hydrated.
* Fertilizer: A balanced fertilizer will help your plants grow strong and healthy. I prefer using an organic fertilizer.
* Gardening Gloves: To keep your hands clean and protected.
* Trowel or Small Shovel: For transplanting your seedlings.
* Optional: Row Covers or Netting: To protect your plants from pests.
Starting Your Seeds Indoors (Optional but Recommended)
Starting your seeds indoors gives them a head start, especially if you live in an area with a short growing season. I highly recommend this method!
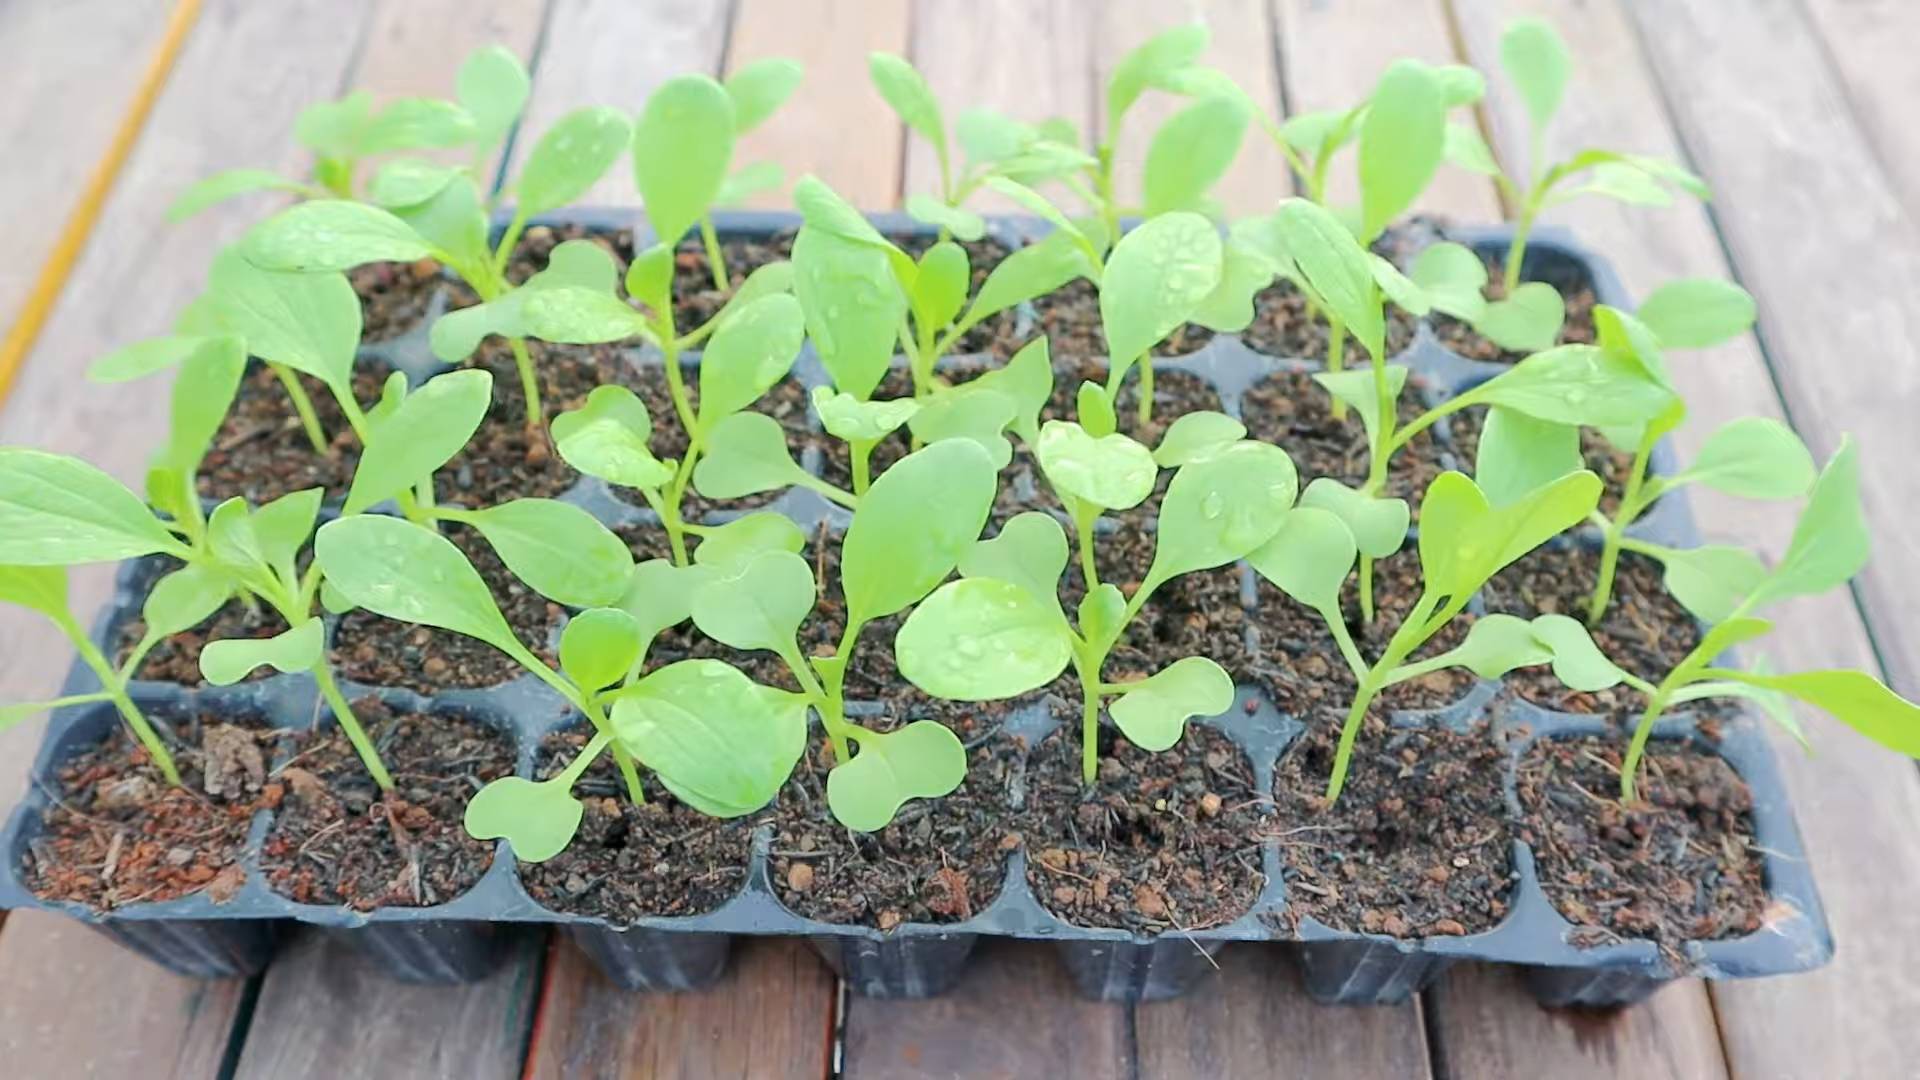
1. Prepare Your Seed Starting Trays: Fill your seed starting trays or small pots with seed starting mix. Gently pat down the soil to remove any air pockets.
2. Sow the Seeds: Sow 2-3 bok choy seeds per cell or pot, about ¼ inch deep.
3. Water Gently: Water the soil gently using a watering can or spray bottle. Avoid overwatering, as this can lead to damping off, a fungal disease that can kill seedlings.
4. Provide Light: Place the trays or pots in a warm, sunny location or under grow lights. Bok choy seedlings need at least 6 hours of sunlight per day. If you’re using grow lights, keep them on for 14-16 hours per day.
5. Keep the Soil Moist: Keep the soil consistently moist, but not soggy. Check the soil moisture daily and water as needed.
6. Thin the Seedlings: Once the seedlings have emerged and have a few true leaves (the second set of leaves), thin them to one seedling per cell or pot. Choose the strongest and healthiest seedling and gently snip off the others at the soil line.
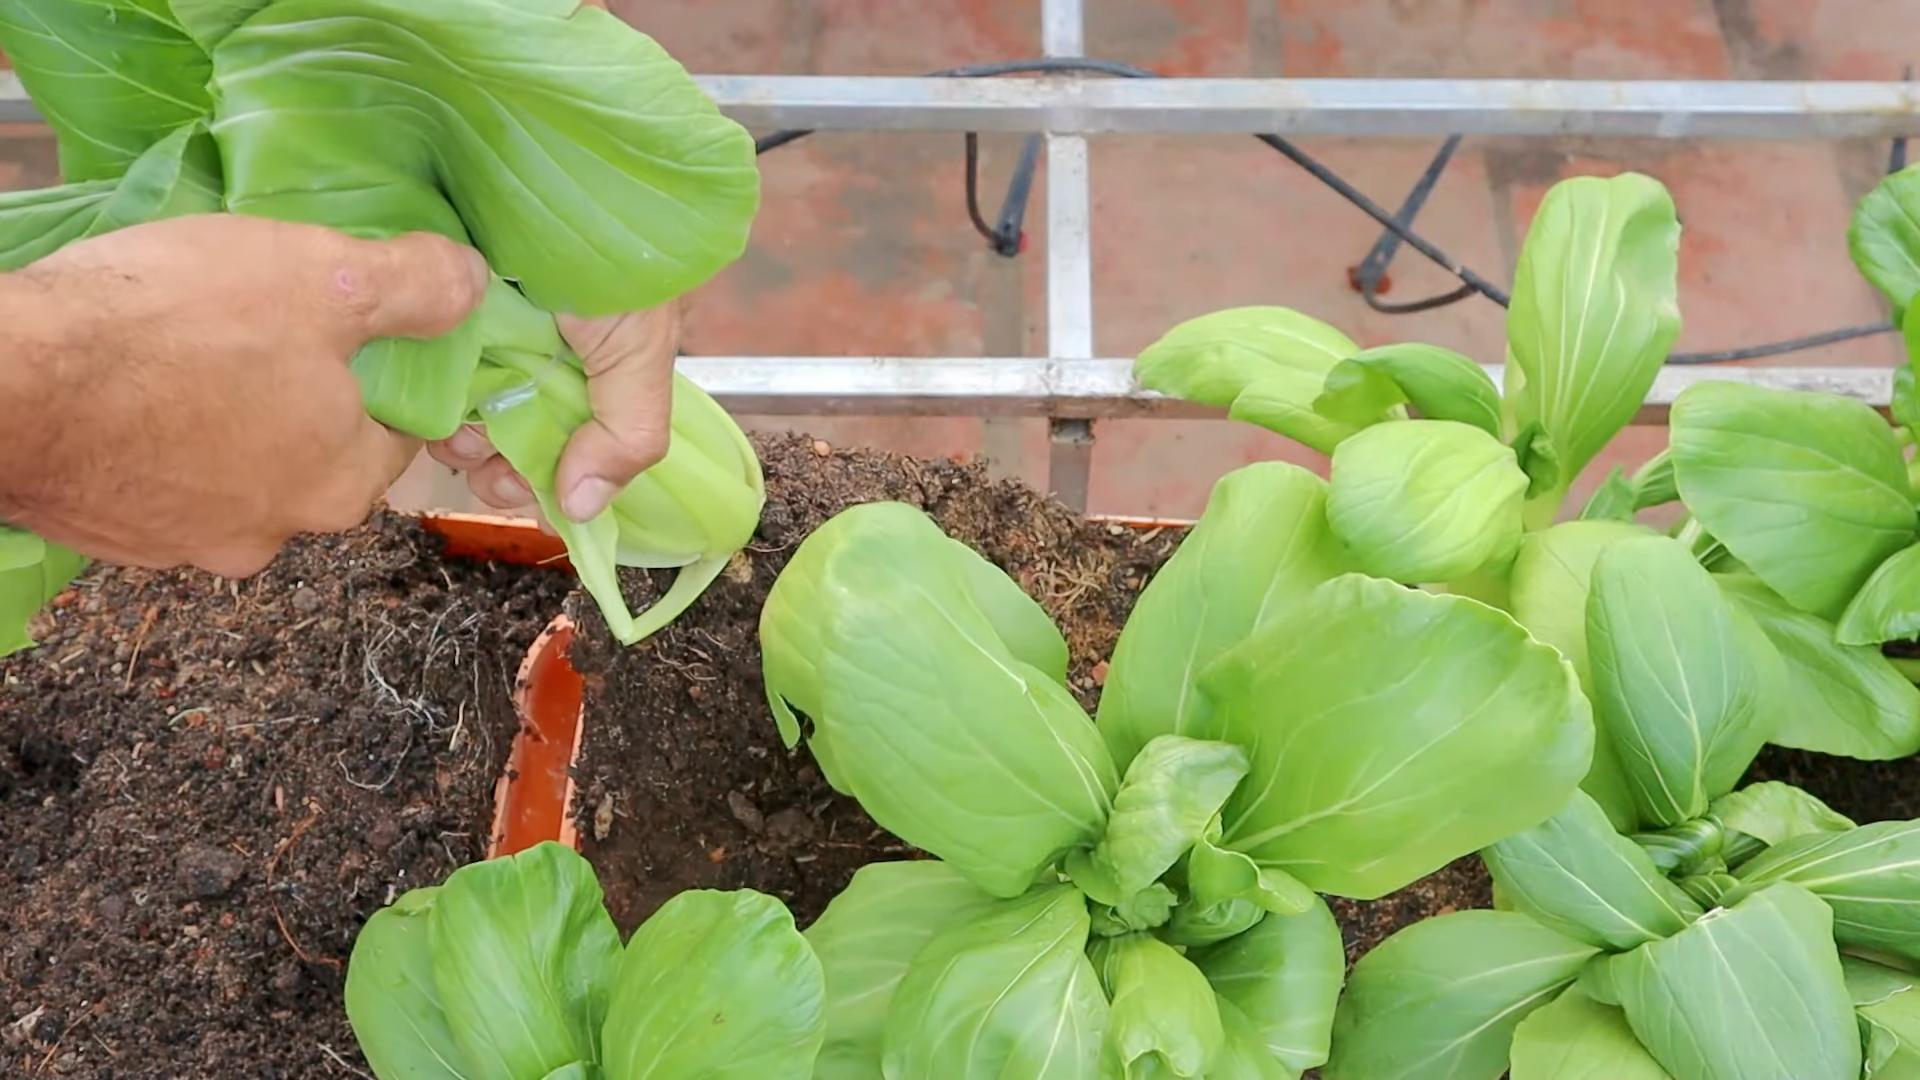
Transplanting Your Seedlings
Once your seedlings are big enough (about 4-6 inches tall) and the weather is warm enough, it’s time to transplant them to their permanent home.
1. Harden Off the Seedlings: Before transplanting, you’ll need to harden off the seedlings. This process gradually acclimates them to outdoor conditions. Start by placing the trays or pots outdoors in a sheltered location for a few hours each day, gradually increasing the amount of time they spend outdoors over the course of a week.
2. Prepare the Soil: Choose a location that receives at least 6 hours of sunlight per day. Bok choy prefers well-draining soil that’s rich in organic matter. Amend the soil with compost or other organic matter to improve its fertility and drainage.
3. Dig Holes: Dig holes that are slightly larger than the root balls of the seedlings. Space the holes about 6-8 inches apart.
4. Transplant the Seedlings: Gently remove the seedlings from their trays or pots and place them in the holes. Make sure the top of the root ball is level with the surrounding soil.
5. Fill in the Holes: Fill in the holes with soil and gently pat it down around the seedlings.
6. Water Thoroughly: Water the seedlings thoroughly after transplanting.
Direct Sowing (Alternative to Starting Indoors)
If you prefer, you can also sow bok choy seeds directly into the garden. This is a good option if you live in an area with a mild climate and a long growing season.
1. Prepare the Soil: Choose a location that receives at least 6 hours of sunlight per day. Bok choy prefers well-draining soil that’s rich in organic matter. Amend the soil with compost or other organic matter to improve its fertility and drainage.
2. Sow the Seeds: Sow the seeds about ¼ inch deep and 1-2 inches apart.
3. Water Gently: Water the soil gently using a watering can or spray bottle. Avoid overwatering.
4. Thin the Seedlings: Once the seedlings have emerged and have a few true leaves, thin them to 6-8 inches apart.
Caring for Your Bok Choy Plants
Once your bok choy plants are established, it’s important to provide them with the care they need to thrive.
1. Water Regularly: Bok choy needs consistent moisture to grow well. Water the plants regularly, especially during dry periods. Aim to keep the soil consistently moist, but not soggy.
2. Fertilize Regularly: Bok choy is a heavy feeder, so it’s important to fertilize it regularly. Use a balanced fertilizer according to the package directions. I like to use an organic fertilizer every few weeks.
3. Weed Regularly: Keep the area around your bok choy plants free of weeds. Weeds can compete with the plants for nutrients and water.
4. Protect from Pests: Bok choy can be susceptible to pests such as aphids, flea beetles, and cabbage worms. Inspect your plants regularly for signs of pests and take action to control them if necessary. I’ve found that row covers or netting can be very effective in preventing pest infestations. You can also use organic pest control methods, such as insecticidal soap or neem oil.
5. Protect from Bolting: Bolting is when a plant prematurely flowers and goes to seed. This can happen when bok choy is exposed to hot weather or stress. To prevent bolting, try to plant your bok choy in a location that receives some afternoon shade. You can also use shade cloth to protect the plants from the sun. Make sure to water regularly to prevent stress.
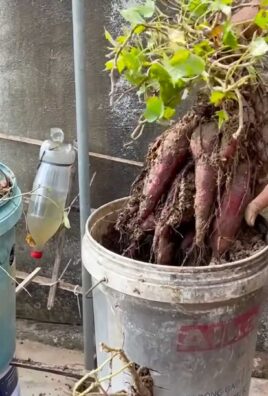
Harvesting Your Bok Choy
Bok choy is ready to harvest when the leaves are about 6-8 inches long. You can harvest the entire plant at once, or you can harvest individual leaves as needed.
1. Harvest the Entire Plant: To harvest the entire plant, simply cut it off at the base with a sharp knife.
2. Harvest Individual Leaves: To harvest individual leaves, simply cut them off at the base of the plant. Start with the outer leaves and work your way inwards.
3. Wash and Store: Wash the bok choy thoroughly and store it in the refrigerator. It will keep for several days.
Troubleshooting
Even with the best care, you might encounter some problems while growing bok choy. Here are a few common issues and how to address them:
* Aphids: These tiny pests can suck the sap from your bok choy leaves, causing them to become distorted and yellow. Spray the plants with insecticidal soap or neem oil to control aphids.
* Flea Beetles: These small, jumping beetles can chew holes in your bok choy leaves. Cover the plants with row covers or netting to prevent flea beetle infestations. You can also use diatomaceous earth to control flea beetles.
* Cabbage Worms: These green caterpillars can devour your bok choy leaves. Inspect your plants regularly for cabbage worms and handpick them off. You can also use Bacillus thuringiensis (Bt), a natural insecticide, to control cabbage worms.
* Bolting: As mentioned earlier, bolting is when a plant prematurely flowers and goes to seed. This can happen when bok choy is exposed to hot weather or stress. To prevent bolting, try to plant your bok choy in a location that receives some afternoon shade. You can also use shade cloth to protect the plants from the sun. Make sure to water regularly to prevent stress.
* Yellowing Leaves: Yellowing leaves can be a sign of nutrient deficiency, overwatering, or underwatering. Check the soil moisture and adjust your watering schedule accordingly. Fertilize the plants with a balanced fertilizer to provide them with the nutrients they need.
Enjoying Your Homegrown Bok Choy
Now that you’ve successfully grown your own bok choy,
Conclusion
So, there you have it! Growing your own Bok Choy at home is not only achievable, but it’s also incredibly rewarding. Forget those wilted, overpriced heads at the grocery store. With a little effort and this simple DIY trick, you can have a constant supply of fresh, crisp Bok Choy right at your fingertips.
Why is this a must-try? Because it puts you in control. You control the quality, the freshness, and even the variety. Imagine the satisfaction of harvesting your own Bok Choy for a stir-fry, a soup, or a vibrant salad. It’s a connection to your food that you just can’t get from buying it pre-packaged. Plus, it’s a fantastic way to reduce your carbon footprint and support sustainable living.
Beyond the basic method, there are so many ways to customize your Bok Choy growing experience. Experiment with different varieties! Did you know there’s baby Bok Choy, Shanghai Bok Choy, and even purple Bok Choy? Each offers a slightly different flavor and texture, adding exciting variety to your meals. You can also try growing your Bok Choy in containers if you’re short on garden space. A sunny balcony or patio can easily become a thriving Bok Choy farm.
Consider companion planting to further enhance your Bok Choy’s growth. Planting it alongside herbs like dill or chamomile can help deter pests and attract beneficial insects. You can also interplant with radishes, which mature quickly and help break up the soil.
Don’t be afraid to get your hands dirty and experiment. Gardening is a journey of learning and discovery, and there’s no better way to learn than by doing. This DIY trick for growing Bok Choy at home is your starting point.
We are confident that once you taste the difference between homegrown and store-bought Bok Choy, you’ll be hooked. The vibrant flavor and satisfying crunch are simply unmatched. So, gather your supplies, follow the steps, and prepare to be amazed.
We encourage you to embark on this Bok Choy growing adventure. And most importantly, we want to hear about your experience! Share your photos, tips, and challenges in the comments below. Let’s build a community of home gardeners who are passionate about fresh, delicious, and sustainable food. Let us know if this DIY trick helped you grow Bok Choy successfully! Happy gardening!
Frequently Asked Questions (FAQ)
1. What is the best time of year to plant Bok Choy?
Bok Choy is a cool-season crop, meaning it thrives in cooler temperatures. The best time to plant Bok Choy is either in early spring or late summer/early fall. For a spring crop, start seeds indoors 4-6 weeks before the last expected frost. For a fall crop, sow seeds directly into the garden in late summer, about 6-8 weeks before the first expected frost. Avoid planting during the hottest months of summer, as high temperatures can cause Bok Choy to bolt (go to seed prematurely), resulting in bitter-tasting leaves.
2. What kind of soil does Bok Choy need?
Bok Choy prefers well-drained, fertile soil that is rich in organic matter. Amend your garden soil with compost or well-rotted manure before planting to improve drainage and fertility. A slightly acidic to neutral soil pH of 6.0 to 7.5 is ideal. You can test your soil pH with a home testing kit or by sending a sample to your local agricultural extension office.
3. How much sunlight does Bok Choy need?
Bok Choy needs at least 4-6 hours of sunlight per day to grow well. While it can tolerate some shade, especially during the hottest part of the day, insufficient sunlight can result in leggy growth and reduced yields. Choose a planting location that receives ample sunlight, particularly in the morning.
4. How often should I water Bok Choy?
Bok Choy needs consistent moisture to thrive. Water deeply and regularly, especially during dry periods. Aim to keep the soil consistently moist but not waterlogged. Mulching around the plants can help retain moisture and suppress weeds. Check the soil moisture regularly by sticking your finger into the soil. If the top inch feels dry, it’s time to water.
5. What are some common pests and diseases that affect Bok Choy?
Common pests that can affect Bok Choy include aphids, cabbage worms, flea beetles, and slugs. To control these pests, you can use organic methods such as handpicking, insecticidal soap, or diatomaceous earth. Row covers can also be used to protect plants from pests. Diseases that can affect Bok Choy include downy mildew and clubroot. To prevent these diseases, ensure good air circulation, avoid overhead watering, and practice crop rotation.
6. How do I harvest Bok Choy?
You can harvest Bok Choy at any stage of growth, depending on your preference. For baby Bok Choy, harvest when the leaves are about 4-6 inches long. For mature Bok Choy, harvest when the heads are firm and compact. You can harvest the entire head at once by cutting it off at the base, or you can harvest individual leaves as needed, starting with the outer leaves.
7. Can I grow Bok Choy in containers?
Yes, Bok Choy can be successfully grown in containers. Choose a container that is at least 12 inches deep and wide to allow enough room for the roots to grow. Use a well-draining potting mix and ensure the container has drainage holes. Water regularly and fertilize every few weeks with a balanced liquid fertilizer. Place the container in a location that receives at least 4-6 hours of sunlight per day.
8. How do I prevent Bok Choy from bolting?
Bolting, or premature flowering, can occur when Bok Choy is exposed to high temperatures or stress. To prevent bolting, plant Bok Choy at the appropriate time of year (early spring or late summer/early fall), provide consistent moisture, and protect plants from extreme heat. You can also choose bolt-resistant varieties of Bok Choy.
9. What are some good companion plants for Bok Choy?
Good companion plants for Bok Choy include herbs like dill, chamomile, and mint, which can help deter pests. Other beneficial companion plants include radishes, which mature quickly and help break up the soil, and legumes like beans and peas, which can fix nitrogen in the soil. Avoid planting Bok Choy near members of the brassica family, such as cabbage, broccoli, and cauliflower, as they can attract the same pests and diseases.
10. How do I store harvested Bok Choy?
To store harvested Bok Choy, wrap it loosely in a damp paper towel and place it in a plastic bag in the refrigerator. It will typically last for about a week. Avoid washing the Bok Choy before storing it, as this can promote spoilage. Wash it just before you are ready to use it.
Leave a Comment