
Grow Broccoli at Home – imagine harvesting crisp, vibrant broccoli florets right from your backyard! It’s not just a dream; it’s an achievable reality with a few simple tricks and a dash of DIY spirit. For centuries, broccoli has been a culinary staple, tracing its roots back to ancient Roman civilization, where it was prized for its nutritional value and unique flavor. Today, this superfood remains a favorite, and growing your own offers a rewarding connection to nature and a guaranteed supply of fresh, organic goodness.
But let’s be honest, store-bought broccoli can sometimes be disappointing – bland, expensive, and often lacking that just-picked freshness. That’s where our DIY guide comes in! I’m going to share some easy-to-follow tips and hacks that will empower you to grow broccoli at home successfully, even if you’re a complete beginner. We’ll cover everything from seed starting to pest control, ensuring you enjoy a bountiful harvest of delicious, homegrown broccoli. Get ready to roll up your sleeves and transform your garden into a broccoli paradise!
Growing Broccoli at Home: A Beginner’s Guide
Hey there, fellow gardening enthusiasts! I’m so excited to share my experience with growing broccoli at home. It’s surprisingly rewarding, and nothing beats the taste of freshly harvested broccoli from your own garden. This guide will walk you through every step, from choosing the right variety to dealing with pesky pests. Let’s get started!
Choosing the Right Broccoli Variety
Before you even think about planting, you need to pick the right broccoli variety for your climate and growing season. Here are a few popular options:
* Calabrese: This is a classic, reliable variety that produces large, central heads. It’s a great choice for beginners.
* Waltham 29: Another popular option, Waltham 29 is known for its cold hardiness, making it suitable for cooler climates.
* DiCicco: This variety produces smaller, more numerous side shoots after the main head is harvested, giving you a longer harvest period.
* Purple Sprouting Broccoli: If you’re looking for something a little different, try purple sprouting broccoli. It’s incredibly nutritious and has a slightly sweeter flavor.
Consider your local climate and the length of your growing season when making your choice. Check with your local nursery or agricultural extension office for recommendations specific to your area.
Starting Broccoli Seeds Indoors (Optional but Recommended)
Starting broccoli seeds indoors gives you a head start on the growing season, especially if you live in a region with short summers. I highly recommend this method!
1. Gather Your Supplies: You’ll need seed starting trays or small pots, seed starting mix (not regular potting soil!), broccoli seeds, a spray bottle, and a grow light (optional, but helpful).
2. Sow the Seeds: Fill your seed starting trays or pots with seed starting mix. Moisten the mix thoroughly with the spray bottle. Sow 2-3 broccoli seeds per cell or pot, about ¼ inch deep.
3. Provide Warmth and Light: Broccoli seeds germinate best in warm conditions (around 70-75°F). Place the trays or pots in a warm location, such as on top of a refrigerator or near a heat vent. If you’re using a grow light, position it a few inches above the trays.
4. Keep the Soil Moist: Use the spray bottle to keep the soil consistently moist, but not soggy. Overwatering can lead to damping off, a fungal disease that can kill seedlings.
5. Thin the Seedlings: Once the seedlings emerge (usually within 5-10 days), thin them to one seedling per cell or pot. Choose the strongest, healthiest-looking seedling and snip off the others at the soil line. Don’t pull them out, as this can disturb the roots of the remaining seedling.
6. Harden Off the Seedlings: About a week before you plan to transplant the seedlings outdoors, you’ll need to “harden them off.” This process gradually acclimates the seedlings to outdoor conditions. Start by placing the trays or pots outdoors in a sheltered location for a few hours each day, gradually increasing the amount of time they spend outside. Protect them from direct sunlight and strong winds.
Preparing the Garden Bed
Broccoli needs well-drained, fertile soil to thrive. Here’s how I prepare my garden bed:
1. Choose a Sunny Location: Broccoli needs at least 6 hours of sunlight per day. Choose a location in your garden that receives plenty of sun.
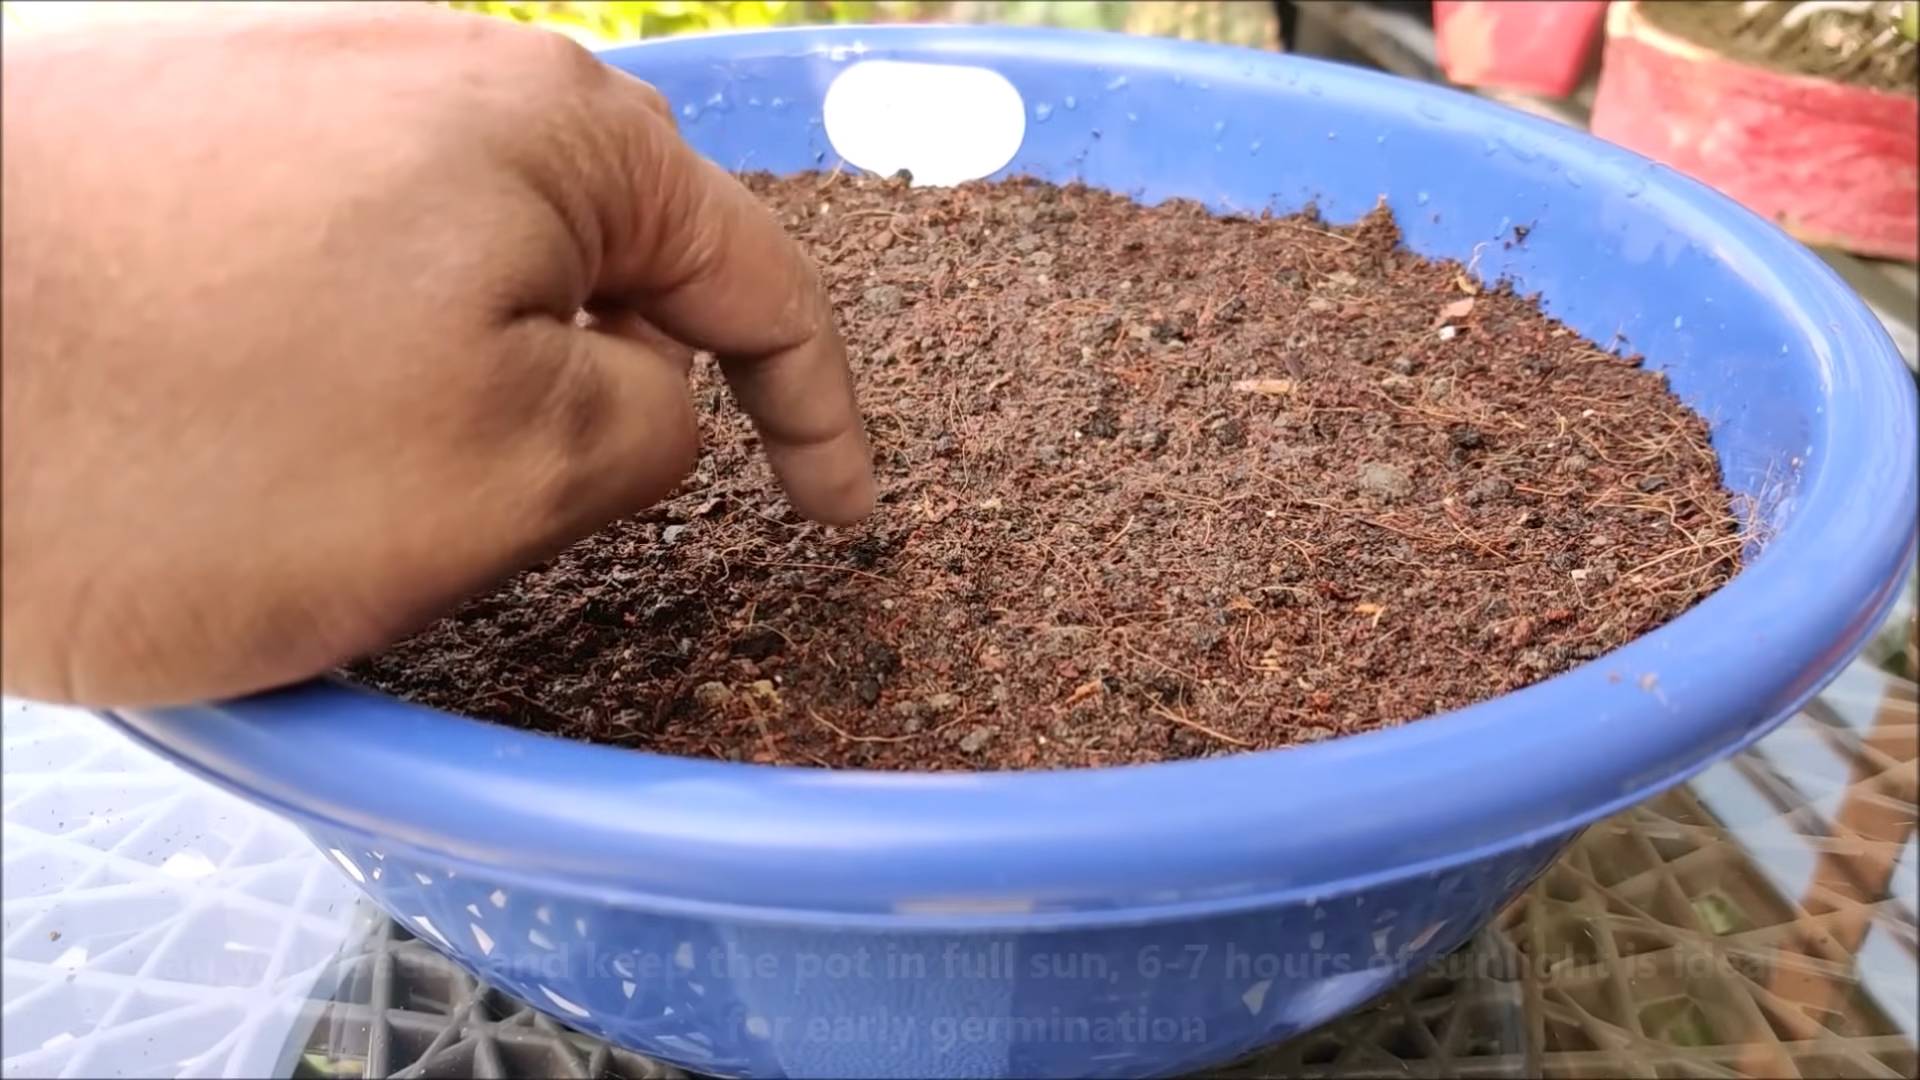
2. Amend the Soil: Broccoli is a heavy feeder, so it needs soil that is rich in organic matter. Amend the soil with compost, well-rotted manure, or other organic amendments. I usually add a few inches of compost to my garden bed before planting.
3. Check the Soil pH: Broccoli prefers a soil pH between 6.0 and 7.0. Use a soil testing kit to check the pH of your soil. If the pH is too low (acidic), add lime to raise it. If the pH is too high (alkaline), add sulfur to lower it.
4. Ensure Good Drainage: Broccoli doesn’t like to sit in soggy soil. Make sure your garden bed has good drainage. If the soil is heavy clay, consider adding sand or other drainage amendments.
Transplanting Broccoli Seedlings Outdoors
Once your seedlings are hardened off and the weather is right, it’s time to transplant them into the garden.
1. Choose the Right Time: Transplant broccoli seedlings outdoors after the last expected frost. The soil temperature should be at least 50°F.
2. Space the Seedlings: Space the seedlings 18-24 inches apart in rows that are 24-36 inches apart. This gives them enough room to grow and prevents overcrowding.
3. Dig the Holes: Dig holes that are slightly larger than the root balls of the seedlings.
4. Plant the Seedlings: Gently remove the seedlings from their trays or pots. Loosen the roots slightly and place the seedlings in the holes. Make sure the top of the root ball is level with the soil surface.
5. Fill the Holes: Fill the holes with soil and gently firm the soil around the seedlings.
6. Water Thoroughly: Water the seedlings thoroughly after planting. This helps to settle the soil and encourages root growth.
7. Mulch: Apply a layer of mulch around the seedlings to help retain moisture, suppress weeds, and regulate soil temperature. I like to use straw or shredded leaves.
Caring for Your Broccoli Plants
Once your broccoli plants are in the ground, they need regular care to thrive.
1. Water Regularly: Broccoli needs consistent moisture, especially during hot, dry weather. Water deeply and regularly, aiming to keep the soil consistently moist but not soggy.
2. Fertilize: Broccoli is a heavy feeder and benefits from regular fertilization. Use a balanced fertilizer or side-dress with compost or well-rotted manure. I usually fertilize my broccoli plants every 2-3 weeks.
3. Weed Regularly: Weeds can compete with broccoli plants for nutrients and water. Weed your garden bed regularly to keep weeds under control.
4. Protect from Pests: Broccoli is susceptible to a variety of pests, including cabbage worms, aphids, and flea beetles. I’ll cover pest control in more detail in the next section.
5. Monitor for Diseases: Broccoli can also be affected by diseases, such as black rot and clubroot. Monitor your plants regularly for signs of disease and take appropriate action if necessary.
Dealing with Pests and Diseases
Pests and diseases can be a major challenge when growing broccoli. Here are some common problems and how to deal with them:
* Cabbage Worms: These green caterpillars can quickly devour broccoli leaves. Handpicking them off the plants is effective for small infestations. For larger infestations, use Bacillus thuringiensis (Bt), a natural insecticide that is safe for humans and beneficial insects.
* Aphids: These tiny insects suck sap from broccoli leaves, causing them to curl and distort. Spraying the plants with a strong stream of water can dislodge aphids. You can also use insecticidal soap or neem oil.
* Flea Beetles: These small, jumping beetles can create tiny holes in broccoli leaves. Covering the plants with row covers can prevent flea beetles from reaching them. You can also use insecticidal soap or diatomaceous earth.
* Black Rot: This bacterial disease causes yellow, V-shaped lesions on broccoli leaves. Remove and destroy infected plants. Avoid overhead watering and practice crop rotation to prevent black rot.
* Clubroot: This fungal disease causes swollen, distorted roots. Raise the soil pH to 7.0 or higher and practice crop rotation to prevent clubroot.
Prevention is key! Regularly inspect your plants for signs of pests and diseases. Remove any infected leaves or plants promptly.
Harvesting Your Broccoli
Harvesting broccoli at the right time is crucial for getting the best flavor and texture.
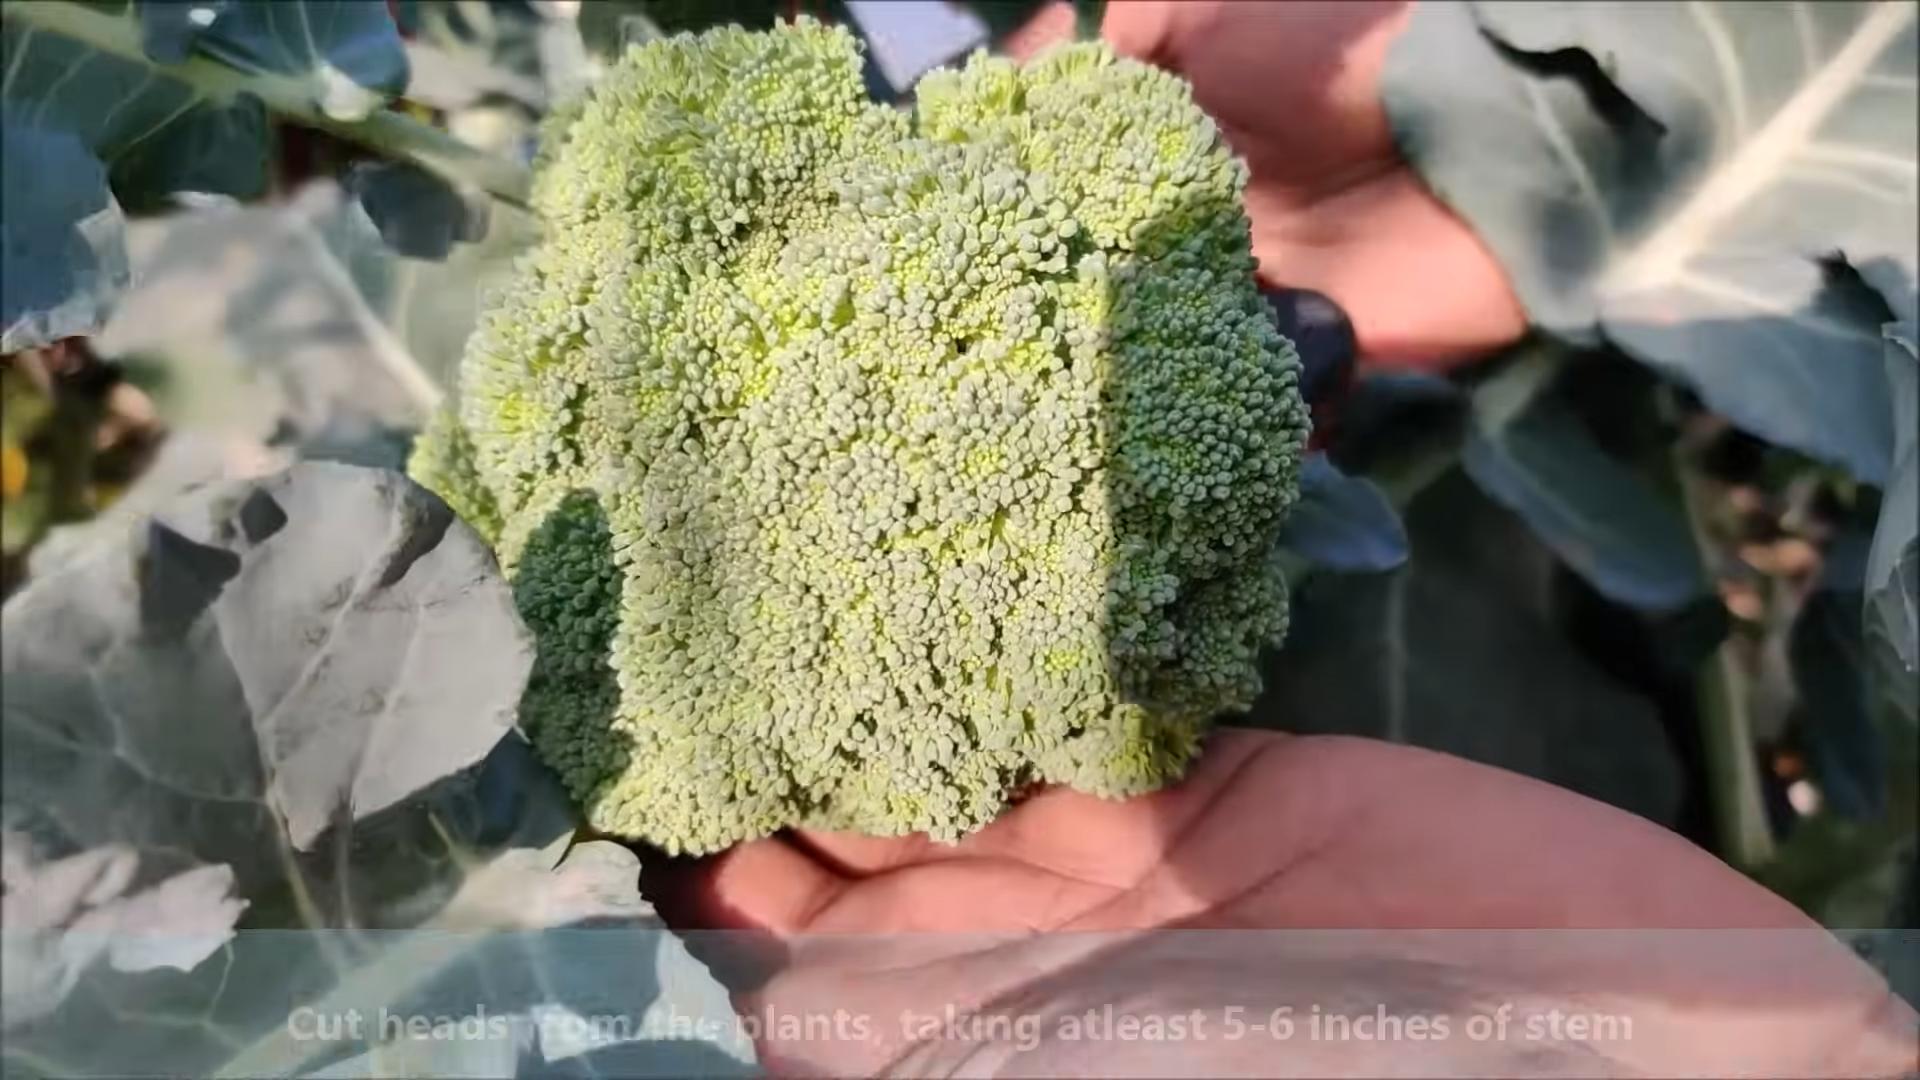
1. Harvest When the Buds are Tight: Harvest broccoli when the central head is firm and the buds are tight and green. If the buds start to open and turn yellow, the broccoli is past its prime.
2. Cut the Head: Use a sharp knife to cut the head from the plant, leaving a few inches of stem.
3. Encourage Side Shoots: After harvesting the main head, the plant will often produce smaller side shoots. These can be harvested as they mature, giving you a longer harvest period.
4. Store Properly: Store broccoli in the refrigerator for up to a week. To keep it fresh, wrap it loosely in a damp paper towel and place it in a plastic bag.
Troubleshooting Common Broccoli Growing Problems
Even with the best care, you might encounter some problems when growing broccoli. Here are a few common issues and how to fix them:
* Small Heads: Small heads can be caused by a variety of factors, including poor soil, insufficient sunlight, and inadequate watering. Make sure your soil is fertile,
Conclusion
So, there you have it! Growing broccoli at home is not only achievable, but it’s also incredibly rewarding. From the satisfaction of nurturing a tiny seed into a vibrant, edible plant to the unparalleled freshness and flavor of homegrown produce, the benefits are undeniable. We’ve walked you through the essential steps, from selecting the right variety and preparing your soil to protecting your precious plants from pests and diseases.
But why is this DIY trick a must-try? Beyond the obvious advantages of cost savings and access to organic, pesticide-free broccoli, growing your own allows you to connect with nature in a tangible way. It’s a therapeutic activity that can reduce stress and boost your mood. Plus, you’ll have the freshest, most delicious broccoli imaginable right at your fingertips. Imagine the vibrant green florets gracing your dinner plate, knowing you cultivated them with your own two hands. That’s a feeling you can’t buy at the grocery store.
Don’t be afraid to experiment with different varieties of broccoli to find your favorites. Consider trying sprouting broccoli for a continuous harvest of tender shoots, or perhaps Romanesco broccoli with its stunning fractal patterns. You can also adapt the growing methods to suit your space and climate. If you have limited space, try growing broccoli in containers on your patio or balcony. For those in colder climates, starting your seeds indoors and using row covers can extend your growing season.
And remember, growing broccoli at home is a learning process. Don’t be discouraged if you encounter challenges along the way. Every mistake is an opportunity to learn and improve your skills. The key is to be patient, observant, and persistent.
We wholeheartedly encourage you to give this DIY project a try. It’s a fantastic way to enhance your gardening skills, enjoy fresh, healthy food, and connect with nature. Once you’ve harvested your first head of homegrown broccoli, you’ll understand why we’re so enthusiastic about it.
We’d love to hear about your experiences! Share your tips, successes, and challenges in the comments below. Let’s create a community of home broccoli growers and learn from each other. Don’t forget to post pictures of your beautiful broccoli plants! Happy gardening!
Frequently Asked Questions (FAQ)
Q: What is the best time of year to start growing broccoli?
A: The best time to start growing broccoli depends on your climate. In general, broccoli is a cool-season crop, so it thrives in temperatures between 60°F and 70°F (15°C and 21°C). For spring harvests, start seeds indoors 6-8 weeks before the last expected frost. For fall harvests, start seeds outdoors in mid-summer. In warmer climates, you can grow broccoli throughout the winter. Check your local frost dates to determine the optimal planting time for your region.
Q: What kind of soil is best for growing broccoli?
A: Broccoli prefers well-drained, fertile soil that is rich in organic matter. The ideal soil pH is between 6.0 and 7.0. Before planting, amend your soil with compost or well-rotted manure to improve its fertility and drainage. You can also add a slow-release fertilizer to provide essential nutrients to your broccoli plants. If your soil is heavy clay, consider adding sand or perlite to improve drainage.
Q: How much sunlight does broccoli need?
A: Broccoli needs at least 6 hours of direct sunlight per day to thrive. Choose a sunny location in your garden where your broccoli plants will receive ample sunlight. If you are growing broccoli indoors, use grow lights to supplement natural sunlight. Insufficient sunlight can result in leggy plants with small heads.
Q: How often should I water my broccoli plants?
A: Broccoli plants need consistent moisture to grow properly. Water deeply and regularly, especially during dry periods. Aim to keep the soil consistently moist but not waterlogged. Mulching around your broccoli plants can help retain moisture and suppress weeds. Check the soil moisture regularly by sticking your finger into the soil. If the top inch of soil feels dry, it’s time to water.
Q: What are some common pests and diseases that affect broccoli?
A: Broccoli is susceptible to several pests and diseases, including cabbage worms, aphids, flea beetles, clubroot, and downy mildew. To prevent pest infestations, inspect your plants regularly and remove any pests you find. You can also use row covers to protect your plants from pests. To prevent diseases, choose disease-resistant varieties, practice crop rotation, and ensure good air circulation around your plants. If you encounter serious pest or disease problems, consult with your local agricultural extension office for advice on appropriate control measures.
Q: How do I know when my broccoli is ready to harvest?
A: Broccoli is ready to harvest when the head is firm and the florets are tightly closed. The size of the head will vary depending on the variety, but generally, you should harvest when the head is about 4-7 inches in diameter. Use a sharp knife to cut the head from the plant, leaving a few inches of stem. After harvesting the main head, your broccoli plant may produce smaller side shoots that you can also harvest.
Q: Can I grow broccoli in containers?
A: Yes, you can grow broccoli in containers, but you’ll need to choose a large container that is at least 12 inches in diameter and 12 inches deep. Use a well-draining potting mix and provide your broccoli plants with plenty of sunlight and water. Container-grown broccoli may require more frequent fertilization than broccoli grown in the ground.
Q: What are some good companion plants for broccoli?
A: Good companion plants for broccoli include herbs like rosemary, thyme, and sage, which can help repel pests. Other beneficial companion plants include marigolds, nasturtiums, and onions. Avoid planting broccoli near other members of the brassica family, such as cabbage, cauliflower, and kale, as they can attract the same pests and diseases.
Q: How can I store harvested broccoli?
A: To store harvested broccoli, wrap it loosely in a damp paper towel and place it in a plastic bag in the refrigerator. Broccoli can be stored in the refrigerator for up to a week. You can also freeze broccoli for longer storage. To freeze broccoli, blanch it in boiling water for 3-5 minutes, then plunge it into ice water to stop the cooking process. Drain the broccoli well and freeze it in a single layer on a baking sheet. Once frozen, transfer the broccoli to a freezer bag or container.
Q: Is growing broccoli at home worth the effort?
A: Absolutely! While it requires some effort and attention, growing broccoli at home is a rewarding experience that offers numerous benefits. You’ll enjoy fresh, delicious, and organic broccoli, save money on groceries, and connect with nature. Plus, you’ll have the satisfaction of knowing that you grew your own food. So, grab some seeds, get your hands dirty, and start growing broccoli at home today!
Leave a Comment