
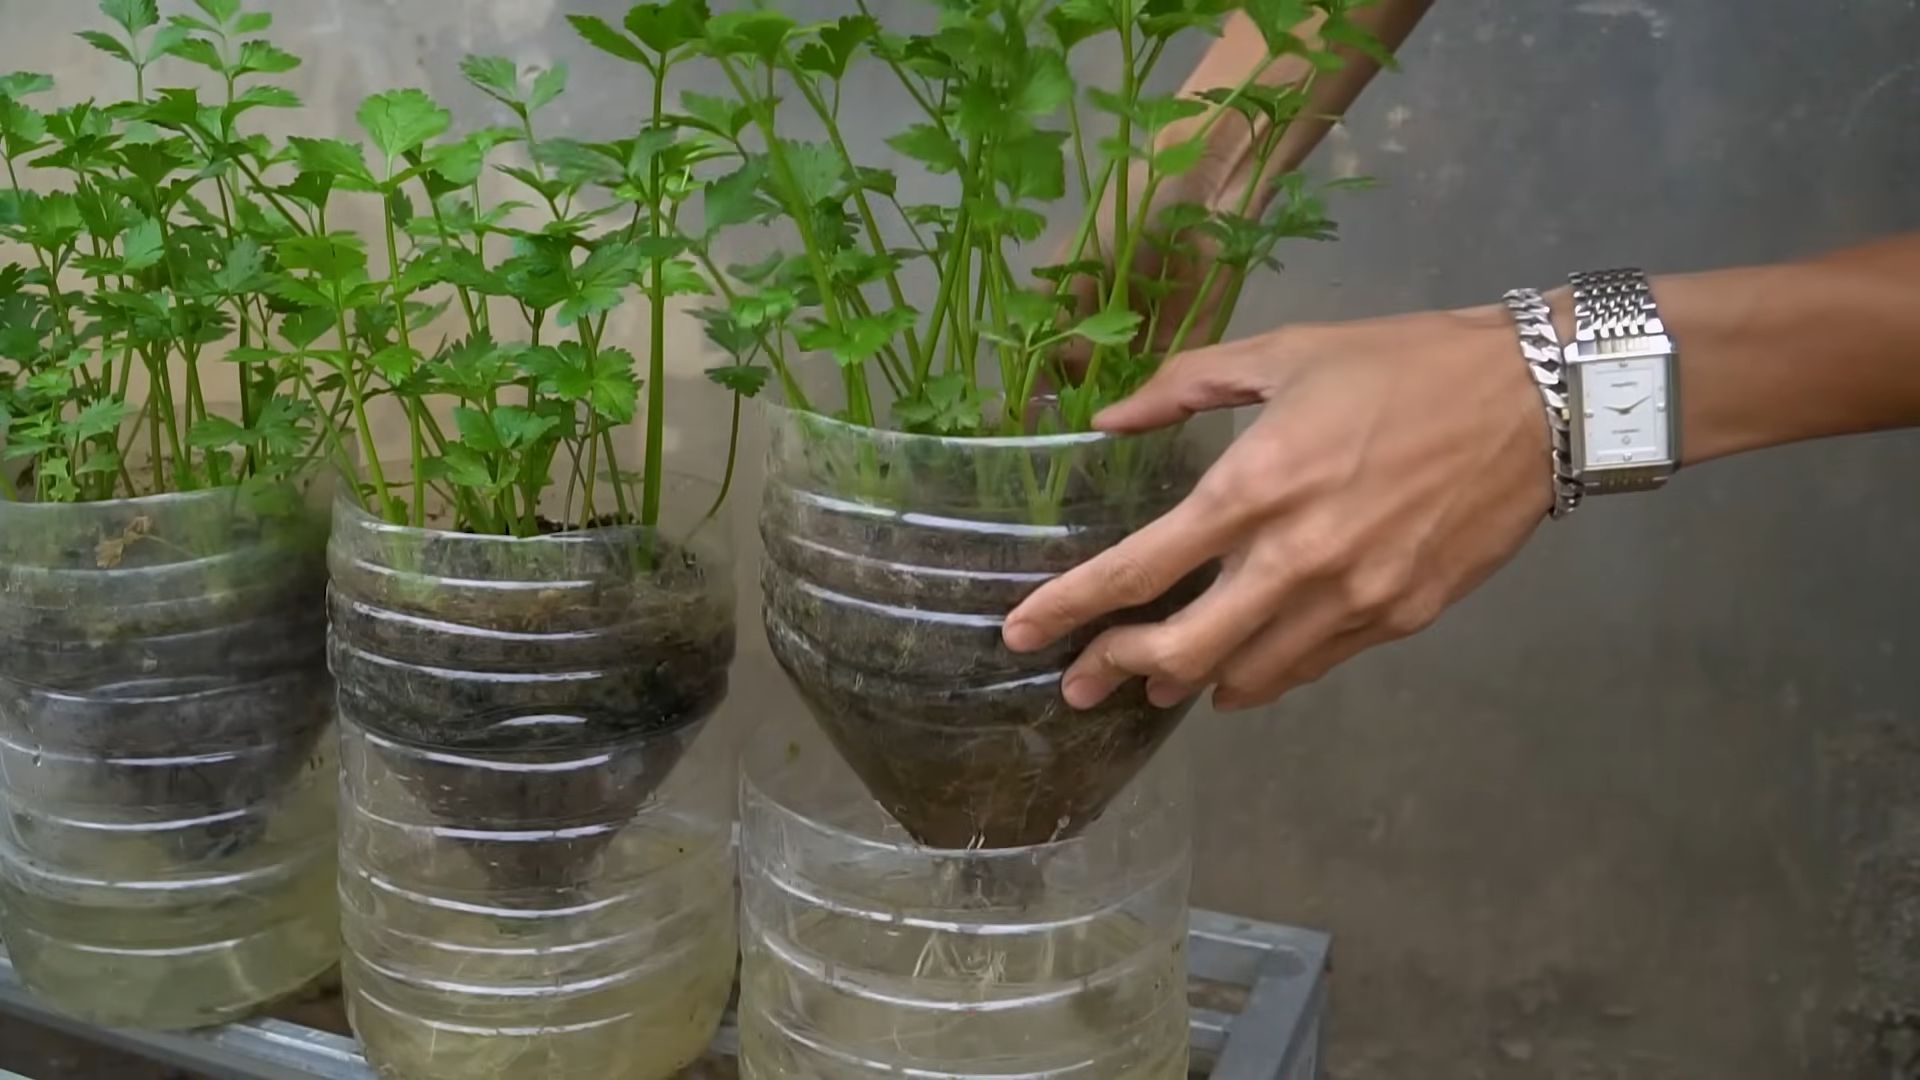
Growing Celery at Home might seem like a challenge reserved for seasoned gardeners, but I’m here to tell you it’s totally achievable, even if you’re a beginner! Forget those bland, watery stalks from the grocery store. Imagine crisp, flavorful celery, bursting with freshness, straight from your own backyard (or even your windowsill!).
Celery has a fascinating history, dating back to ancient times where it was valued more for its medicinal properties than its culinary uses. The ancient Greeks and Romans used it in wreaths and as a flavoring, a far cry from the crunchy snack we know and love today. But now, we can cultivate this amazing plant in our own homes.
Why bother with the effort of growing celery at home? Well, for starters, you’ll have access to a superior product. Homegrown celery is often more flavorful and less bitter than store-bought varieties. Plus, you’ll know exactly what went into growing it – no mystery pesticides or chemicals! More importantly, in these times of rising food costs and a desire for sustainable living, learning to grow your own food, even something as simple as celery, can be incredibly empowering and rewarding. I’m excited to share some simple DIY tricks and hacks that will make growing celery at home a breeze. Let’s get started!

Growing Butternut Squash: A Comprehensive DIY Guide
Hey there, fellow gardening enthusiasts! I’m so excited to share my tried-and-true method for growing beautiful, bountiful butternut squash right in your own backyard. Butternut squash is a fantastic addition to any fall harvest, and trust me, the flavor of homegrown squash is unbeatable. This guide will walk you through every step, from seed to table, ensuring you have a successful and delicious harvest.
Choosing the Right Butternut Squash Variety
Before we dive into the nitty-gritty, let’s talk varieties. While ‘Waltham Butternut’ is a classic and reliable choice, don’t be afraid to explore other options! ‘Butterscotch PMR’ is known for its powdery mildew resistance, which can be a lifesaver in humid climates. ‘Early Butternut’ matures a bit faster, perfect if you have a shorter growing season. Consider your local climate and pest pressures when making your selection. I personally love ‘Waltham Butternut’ for its consistent size and flavor, but I’ve also had great success with ‘Butterscotch PMR’ in years when powdery mildew was rampant.
Starting Your Butternut Squash Journey
There are two main ways to get started: direct sowing and starting seeds indoors. I usually opt for starting seeds indoors, especially if I want a head start on the growing season.
Starting Seeds Indoors:
* Timing is Key: Start your seeds about 3-4 weeks before the last expected frost in your area. This gives them a good head start without getting too leggy before transplanting.
* Gather Your Supplies: You’ll need seed starting trays or small pots (I prefer biodegradable peat pots to minimize transplant shock), seed starting mix (not regular potting soil!), butternut squash seeds, and a spray bottle.
* Sowing the Seeds: Fill your pots with seed starting mix, leaving about half an inch of space at the top. Moisten the soil gently with your spray bottle – you want it damp, not soggy. Plant 1-2 seeds per pot, about 1 inch deep.
* Creating the Ideal Environment: Cover the pots loosely with plastic wrap or a humidity dome to retain moisture. Place them in a warm location (around 70-75°F) – a heat mat can be incredibly helpful.
* Light it Up: Once the seeds germinate (usually within 5-10 days), remove the plastic wrap and provide plenty of light. A sunny windowsill might work, but I highly recommend using grow lights for consistent and strong seedlings. Keep the lights a few inches above the seedlings and adjust as they grow.
* Watering Wisely: Keep the soil consistently moist, but avoid overwatering. Water from the bottom by placing the tray in a shallow dish of water and allowing the soil to absorb it.
* Hardening Off: About a week before you plan to transplant, start hardening off your seedlings. This means gradually exposing them to outdoor conditions. Start by placing them outside for an hour or two in a sheltered location, and gradually increase the time each day. This will help them acclimate to the sun, wind, and temperature changes.
Direct Sowing:
* Wait for Warmth: Direct sowing is best done when the soil temperature is consistently above 60°F. Butternut squash needs warm soil to germinate properly.
* Prepare the Soil: Choose a sunny spot with well-drained soil. Amend the soil with compost or well-rotted manure to improve fertility and drainage.
* Planting the Seeds: Sow the seeds about 1 inch deep and 2-3 feet apart. Plant 2-3 seeds per hill and thin to the strongest seedling once they emerge.
* Watering and Protection: Water gently after planting and keep the soil consistently moist until the seedlings emerge. You might want to use row covers to protect the young seedlings from pests and cool temperatures.
Preparing the Garden Bed
Butternut squash are heavy feeders, so soil preparation is crucial!
1. Choose a Sunny Spot: Butternut squash needs at least 6-8 hours of direct sunlight per day.
2. Soil Testing: Ideally, get your soil tested to determine its pH and nutrient levels. Butternut squash prefers a slightly acidic to neutral pH (6.0-7.0).
3. Amend the Soil: Regardless of your soil test results, amending the soil with plenty of organic matter is always a good idea. I like to add a generous amount of compost, well-rotted manure, and leaf mold. This will improve drainage, fertility, and water retention.
4. Consider Raised Beds: If you have heavy clay soil, consider growing your butternut squash in raised beds. This will improve drainage and prevent root rot.
5. Spacing: Butternut squash vines can get quite large, so give them plenty of space. I recommend spacing plants 2-3 feet apart in rows that are 4-6 feet apart.
Transplanting Your Seedlings (If Applicable)
1. Choose a Cloudy Day: Transplanting on a cloudy day will minimize stress on the seedlings.
2. Dig the Holes: Dig holes that are slightly larger than the root balls of your seedlings.
3. Gently Remove Seedlings: Carefully remove the seedlings from their pots, being careful not to damage the roots. If you used peat pots, you can plant the entire pot directly into the ground.
4. Planting Depth: Plant the seedlings at the same depth they were growing in their pots.
5. Water Thoroughly: Water the seedlings thoroughly after transplanting to help them settle in.
6. Mulch: Apply a layer of mulch around the plants to help retain moisture, suppress weeds, and regulate soil temperature. I like to use straw or shredded leaves.
Caring for Your Butternut Squash Plants
Now comes the fun part – watching your plants grow!
1. Watering: Butternut squash needs consistent watering, especially during hot, dry weather. Water deeply and regularly, aiming for about 1 inch of water per week. Avoid overhead watering, as this can promote fungal diseases. Drip irrigation or soaker hoses are ideal.
2. Fertilizing: Butternut squash are heavy feeders, so regular fertilization is important. I like to use a balanced organic fertilizer every 2-3 weeks. You can also side-dress with compost or well-rotted manure.
3. Weeding: Keep the garden bed free of weeds, as they can compete with your butternut squash plants for nutrients and water. Mulching will help suppress weeds.
4. Pest Control: Keep an eye out for common pests like squash bugs, squash vine borers, and aphids. Handpicking pests is often effective for small infestations. For larger infestations, you can use insecticidal soap or neem oil. Row covers can also help prevent pests from reaching your plants.
5. Pollination: Butternut squash requires pollination to produce fruit. If you’re not seeing any fruit set, you may need to hand-pollinate the flowers. To do this, use a small paintbrush to transfer pollen from the male flowers (which have a long, thin stem) to the female flowers (which have a small fruit behind the flower).
6. Pruning (Optional): While not essential, pruning can help improve air circulation and fruit production. Remove any yellowing or diseased leaves. You can also prune the vines to encourage the plant to focus its energy on fruit development.
Dealing with Common Problems
* Powdery Mildew: This fungal disease can be a common problem, especially in humid climates. Look for white, powdery spots on the leaves. To prevent powdery mildew, ensure good air circulation, avoid overhead watering, and choose resistant varieties. If you see signs of powdery mildew, you can treat it with a fungicide or a homemade solution of baking soda and water.
* Squash Vine Borers: These pests can be devastating to butternut squash plants. The larvae bore into the stems and feed on the plant tissue, causing the plant to wilt and die. To prevent squash vine borers, use row covers early in the season. You can also wrap the stems with aluminum foil or pantyhose to prevent the borers from laying their eggs. If you see signs of squash vine borers, you can try to remove them by slitting the stem and extracting the larvae.
* Squash Bugs: These pests suck the sap from the leaves, causing them to wilt and turn brown. Handpicking squash bugs is often effective for small infestations. You can also use insecticidal soap or neem oil.
Harvesting Your Butternut Squash
The moment you’ve been waiting for! Knowing when to harvest is key to getting the best flavor and storage life.
1. Timing: Butternut squash is typically ready to harvest in the fall, about 90-100 days after planting.
2. Indicators: Look for these signs that your butternut squash is ready to harvest:
* The skin is hard and tough. You shouldn’t be able to easily puncture it with your fingernail.
* The
Conclusion
So, there you have it! Growing celery at home isn’t just a whimsical gardening project; it’s a practical, rewarding, and surprisingly simple way to enjoy fresh, crisp celery whenever you desire. Forget those limp, pre-cut stalks from the grocery store that have lost their vibrancy and flavor. With a little patience and our easy-to-follow guide, you can cultivate your own supply of this versatile vegetable, bursting with flavor and packed with nutrients.
Why is this DIY trick a must-try? Because it puts you in control. You control the quality of the soil, the amount of sunlight, and the watering schedule, ensuring that your celery is grown organically and without harmful pesticides. You also drastically reduce food waste by only harvesting what you need, when you need it. Plus, there’s an undeniable satisfaction in nurturing a plant from its humble beginnings to a thriving, edible crop.
But the benefits don’t stop there. Growing your own celery allows for exciting variations. Experiment with different celery varieties! Try ‘Utah Tall’ for its classic flavor, or ‘Golden Self-Blanching’ for a milder, sweeter taste. You can even try growing celery from the base of a store-bought stalk, giving new life to what would otherwise be kitchen scraps. Consider companion planting with onions, garlic, or marigolds to deter pests and enhance the flavor of your celery.
Beyond the practical advantages, growing celery at home is a fantastic way to connect with nature, learn about the growing process, and appreciate the effort that goes into producing the food we eat. It’s a project that can be enjoyed by the whole family, teaching children about gardening and healthy eating habits.
We understand that gardening can sometimes feel daunting, but we’ve broken down the process into manageable steps, providing you with all the information you need to succeed. Don’t be afraid to experiment, adapt, and learn from your experiences. Every garden is unique, and the joy of discovery is part of the fun.
So, what are you waiting for? Grab a celery stalk, prepare your soil, and embark on this exciting gardening adventure. We’re confident that you’ll be amazed by the results. And most importantly, we want to hear about your experience! Share your tips, tricks, and triumphs in the comments below. Let’s build a community of home gardeners, sharing our knowledge and inspiring each other to grow our own food. Let us know how your **growing celery** journey unfolds! We can’t wait to see your thriving celery stalks!
Frequently Asked Questions (FAQ)
1. What is the best time of year to start growing celery?
The best time to start growing celery depends on your climate. Celery thrives in cooler temperatures, so it’s generally recommended to start seeds indoors 10-12 weeks before the last expected frost in spring. If you live in a warmer climate with mild winters, you can also start celery in the fall for a winter harvest. The key is to avoid extreme heat, as it can cause celery to bolt (go to seed) prematurely.
2. What kind of soil is best for growing celery?
Celery requires rich, well-draining soil that is high in organic matter. Amend your soil with compost or well-rotted manure before planting to improve its fertility and drainage. Celery also prefers a slightly acidic to neutral soil pH, ideally between 6.0 and 7.0. You can test your soil pH with a home testing kit and adjust it accordingly.
3. How much sunlight does celery need?
Celery needs at least 6 hours of sunlight per day to thrive. Choose a location in your garden that receives full sun, especially in the morning. In hotter climates, providing some afternoon shade can help prevent the celery from bolting.
4. How often should I water my celery plants?
Celery is a water-loving plant and requires consistent moisture to grow properly. Water your celery plants deeply and regularly, especially during hot, dry weather. Aim to keep the soil consistently moist but not waterlogged. Mulching around the plants can help retain moisture and suppress weeds.
5. How do I blanch celery?
Blanching celery involves excluding sunlight from the stalks to make them paler, more tender, and less bitter. There are several ways to blanch celery. One method is to mound soil around the stalks, leaving the tops exposed. Another method is to wrap the stalks with newspaper, cardboard, or cloth. Blanching typically takes about two to three weeks before harvest. However, some varieties are self-blanching and do not require this process.
6. What are some common pests and diseases that affect celery?
Celery can be susceptible to several pests and diseases, including aphids, celery leaf miners, slugs, snails, and fungal diseases like early blight and late blight. Regularly inspect your plants for signs of pests or diseases and take appropriate action. Organic pest control methods, such as insecticidal soap or neem oil, can be effective for controlling aphids and other pests. Proper watering and good air circulation can help prevent fungal diseases.
7. When is celery ready to harvest?
Celery is typically ready to harvest when the stalks are at least 6-8 inches long and have reached the desired thickness. You can harvest individual stalks as needed or harvest the entire plant at once. To harvest, simply cut the stalks at the base of the plant with a sharp knife.
8. Can I grow celery from the base of a store-bought stalk?
Yes, you can! This is a great way to recycle kitchen scraps and grow your own celery. Cut off the base of the celery stalk, leaving about 2 inches of the root end intact. Place the base in a shallow dish of water, with the cut side facing up. Change the water every day or two. After a few days, you should see new roots and leaves starting to grow. Once the roots are well-developed, you can transplant the celery base into a pot or directly into your garden.
9. How do I store harvested celery?
To store harvested celery, wrap the stalks in a damp paper towel and place them in a plastic bag in the refrigerator. This will help keep them crisp and fresh for up to two weeks. You can also store celery stalks in a container of water in the refrigerator, changing the water every few days.
10. Is growing celery at home difficult?
While celery can be a bit more demanding than some other vegetables, it’s not overly difficult to grow, especially if you provide it with the right conditions. With proper soil preparation, consistent watering, and adequate sunlight, you can successfully grow celery at home and enjoy fresh, flavorful stalks. Don’t be discouraged if your first attempt isn’t perfect. Gardening is a learning process, and with each attempt, you’ll gain more experience and knowledge.
Leave a Comment