
Fast Potato Growing Guide
Have you ever dreamed of enjoying fresh, homegrown potatoes practically overnight? Well, while true overnight potatoes are a bit of a fantasy, a Fast Potato Growing Guide can significantly speed up the process, getting you delicious spuds much sooner than you might think! This isn’t just about throwing a potato in the ground and hoping for the best; it’s about harnessing simple, yet effective techniques to maximize your harvest. I’ve been gardening for years, and I’ve learned that even the most seemingly simple vegetables like potatoes benefit from a little know-how.
The history of potato cultivation is fascinating, stretching back centuries to the Andes Mountains. These humble tubers have become a global staple, feeding billions and playing a crucial role in countless cultures. But growing your own potatoes offers a unique connection to this rich history, allowing you to appreciate the effort and care that goes into producing your food. And let’s be honest, there’s nothing quite like the taste of a potato you’ve grown yourself!
Why You Need This Guide
In today’s fast-paced world, we often crave convenience. A Fast Potato Growing Guide provides just that – a shortcut to enjoying the rewards of home gardening without the lengthy wait. This guide isn’t just about speed; it’s about efficiency. By learning these simple tricks, you’ll maximize your yield and minimize wasted space and effort. Whether you have a large garden or just a small container on your balcony, this Fast Potato Growing Guide will empower you to grow your own delicious potatoes quickly and easily. So, let’s get started and unlock the secrets to a faster, more bountiful potato harvest!

Easy Home Vegetable Gardening: A Beginner’s Guide
I’ve always wanted a garden bursting with fresh, homegrown vegetables, but I never thought I had the space or the green thumb. Turns out, I was wrong! With a little planning and these simple steps, you can too. Let’s get growing!
Phase 1: Planning Your Garden
- Choose your vegetables: Start small! Don’t overwhelm yourself. Pick 2-3 vegetables you love and that are relatively easy to grow. Tomatoes, lettuce, and zucchini are great beginner choices. Consider your climate and the amount of sunlight your space receives.
- Select your location: Most vegetables need at least 6-8 hours of sunlight per day. Find a sunny spot in your yard, on your balcony, or even a sunny windowsill. Make sure the area is accessible for watering and harvesting.
- Assess your space: Measure the area you’ll be using for your garden. This will help you determine how many plants you can fit and what type of containers or garden beds you’ll need.
- Choose your containers or garden beds: You can use anything from repurposed buckets and containers to raised garden beds. Make sure your containers have drainage holes to prevent root rot. If using raised beds, ensure they are deep enough for your chosen vegetables’ root systems.
- Gather your supplies: You’ll need potting mix (not garden soil!), seeds or seedlings, watering can, gardening gloves, small trowel or hand shovel, and possibly fertilizer.
Phase 2: Preparing Your Garden Beds or Containers
- Clean your containers: If using repurposed containers, wash them thoroughly with soap and water to remove any residue. Let them dry completely.
- Fill your containers: Fill your containers or garden beds with high-quality potting mix. Don’t use garden soil, as it’s often too dense and can compact, hindering root growth. Leave about an inch of space at the top of the container.
- Optional: Add fertilizer: A slow-release fertilizer can provide your plants with essential nutrients throughout the growing season. Follow the instructions on the fertilizer packaging carefully.
- Water thoroughly: Before planting, water the potting mix thoroughly. This helps it settle and ensures the soil is moist for planting.
Phase 3: Planting Your Vegetables
- Prepare your seeds or seedlings: If using seeds, follow the instructions on the seed packet for planting depth and spacing. If using seedlings, gently remove them from their containers, being careful not to damage the roots.
- Plant your vegetables: Create small holes in the potting mix using your trowel or fingers. Gently place your seeds or seedlings in the holes, covering them with soil according to the instructions. Space your plants according to the recommendations on the seed packet or seedling label. This ensures they have enough room to grow.
- Water gently: After planting, water gently to settle the soil around your plants. Avoid overwatering, which can lead to root rot.
Phase 4: Ongoing Care
- Watering: Water regularly, keeping the soil consistently moist but not soggy. The frequency of watering will depend on your climate and the type of container you’re using. Smaller containers will dry out faster than larger ones.
- Sunlight: Ensure your plants receive adequate sunlight. Rotate containers if necessary to ensure even sunlight exposure.
- Weeding: Regularly remove any weeds that may compete with your vegetables for nutrients and water. This is crucial for healthy growth.
- Fertilizing: If you didn’t use a slow-release fertilizer, you may need to fertilize your plants every few weeks with a liquid fertilizer. Follow the instructions on the fertilizer packaging.
- Pest and disease control: Regularly inspect your plants for pests and diseases. Take action promptly if you notice any problems. Organic pest control methods are often effective and safer for your plants and the environment.
- Harvesting: Harvest your vegetables when they are ripe. This will vary depending on the type of vegetable you’re growing. Check the seed packet or seedling label for harvesting instructions.
Phase 5: Troubleshooting
Common Problems and Solutions
- Yellowing leaves: This could indicate overwatering, underwatering, nutrient deficiency, or pest infestation. Check the soil moisture, adjust your watering schedule, and inspect for pests.
- Wilting plants: This could be due to underwatering, heat stress, or root rot. Check the soil moisture, provide shade if necessary, and ensure proper drainage.
- Poor growth: This could be due to insufficient sunlight, nutrient deficiency, or overcrowding. Ensure adequate sunlight, fertilize as needed, and thin out plants if necessary.
- Pest infestation: Identify the pest and use appropriate control methods. Organic methods are often preferred.
Remember:
Patience is key! Gardening takes time and effort, but the reward of fresh, homegrown vegetables is well worth it. Don’t be discouraged if you encounter some challenges along the way. Learn from your mistakes, and keep experimenting. Happy gardening!
Conclusion
This fast potato growing guide isn’t just about getting potatoes quicker; it’s about experiencing the unparalleled satisfaction of harvesting your own homegrown spuds in record time. By following these simple steps, you’ve unlocked the secret to a bountiful potato harvest, even if you have limited space or gardening experience. The techniques outlined, from choosing the right seed potatoes to optimizing soil conditions and employing clever growing methods, are designed to maximize yield and minimize effort. This DIY approach is a must-try because it empowers you to control the entire process, from planting to plate, resulting in potatoes that are fresher, tastier, and far more rewarding than anything you could buy from a store. The speed and efficiency of this method make it ideal for both seasoned gardeners and enthusiastic beginners alike. Imagine the joy of digging up your own potatoes, knowing you’ve nurtured them from tiny sprouts to plump, delicious tubers.
Beyond the core techniques, there’s a world of possibilities for experimentation and customization. Consider trying different potato varieties to discover your favorites – some are better suited for baking, while others excel in frying or boiling. Experiment with different container sizes and materials; from repurposed buckets to specialized grow bags, the options are endless. You can also explore companion planting, incorporating herbs or other vegetables that benefit potato growth. For instance, marigolds are known to deter pests, while beans can help enrich the soil with nitrogen. Don’t be afraid to get creative and adapt the techniques to your specific environment and preferences. The beauty of this fast potato growing guide lies in its adaptability.
Ultimately, the success of your potato harvest depends on your dedication and willingness to experiment. We encourage you to try this fast potato growing guide and share your experiences with us! Post pictures of your thriving potato plants and your bountiful harvest on social media using #FastPotatoGrowing. Let’s build a community of home gardeners who are passionate about growing their own food quickly and efficiently. Share your tips, tricks, and challenges – learning from each other is a crucial part of the gardening journey. Your success story could inspire others to embark on their own potato-growing adventure. Remember, even small successes are significant steps towards a more self-sufficient and rewarding lifestyle. So, grab your seed potatoes, get your hands dirty, and prepare to be amazed by the speed and ease of this incredible method. Happy growing!
Frequently Asked Questions
What type of potatoes are best for this fast growing method?
Early-season potato varieties are ideal for this fast potato growing method. These varieties mature quickly, making them perfect for achieving a rapid harvest. Look for varieties specifically labeled as “early” or “early-season” at your local garden center or online retailer. Some popular examples include ‘Red Pontiac’, ‘Yukon Gold’, and ‘Norland’. However, you can experiment with other varieties, keeping in mind that later-season potatoes will naturally take longer to mature.
How much sunlight do potatoes need?
Potatoes thrive in full sun, meaning at least six to eight hours of direct sunlight per day. Choose a location in your garden or on your patio that receives ample sunlight. If you’re growing potatoes in containers, ensure they are placed in a sunny spot. Insufficient sunlight can lead to reduced yields and smaller potatoes.
What kind of soil is best for growing potatoes quickly?
Well-drained soil is crucial for fast potato growth. Potatoes don’t tolerate soggy conditions, which can lead to rot. Amend heavy clay soils with organic matter like compost to improve drainage. Sandy soils may require the addition of organic matter to retain moisture. Ideally, aim for a slightly acidic to neutral pH level (around 6.0-7.0).
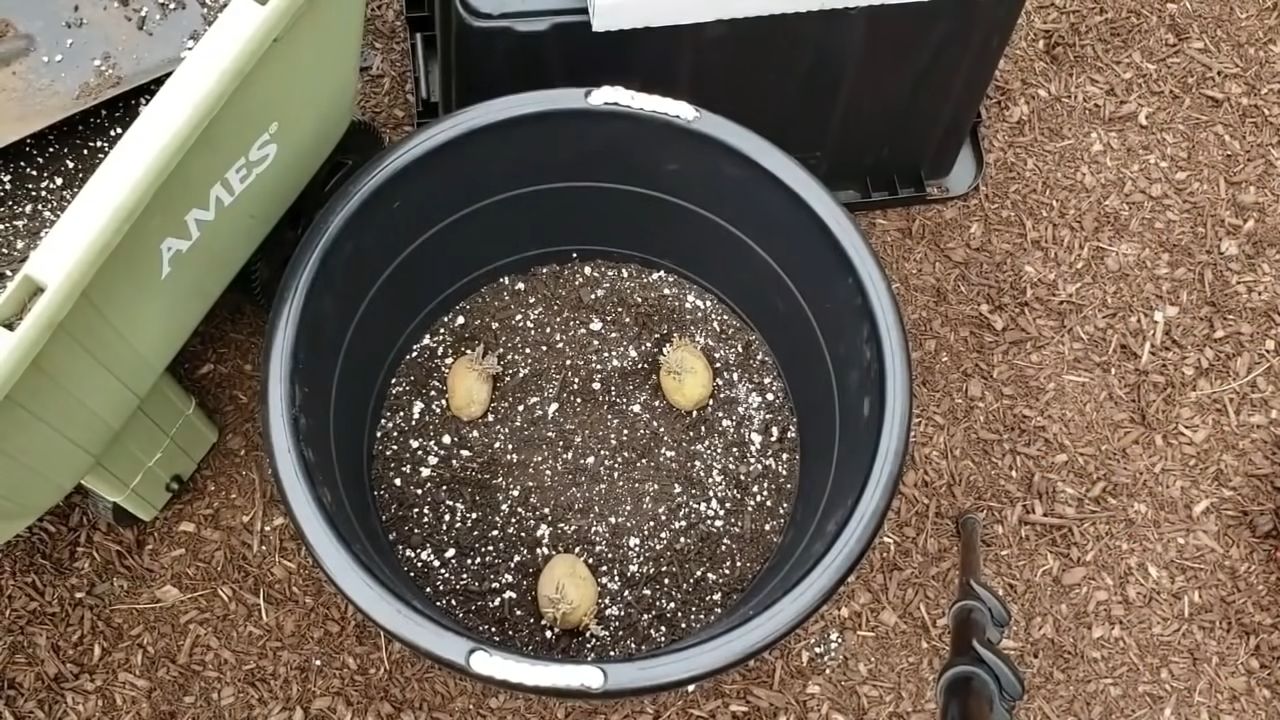
Can I grow potatoes in containers?
Absolutely! Container gardening is a fantastic option for this fast potato growing method, especially if you have limited space. Use large containers – at least 15 gallons – to allow for sufficient root development. Ensure the containers have drainage holes to prevent waterlogging. You can use various containers, including plastic pots, grow bags, or even repurposed buckets.
What should I do if my potato plants show signs of disease or pests?
Regularly inspect your potato plants for signs of disease or pests. Common problems include blight, aphids, and Colorado potato beetles. Address any issues promptly. For diseases, consider using appropriate fungicides. For pests, you can try natural methods like handpicking or introducing beneficial insects. Early detection and intervention are key to preventing widespread damage.
How often should I water my potatoes?
Water your potatoes regularly, especially during dry periods. Aim to keep the soil consistently moist but not waterlogged. Overwatering can lead to root rot, while underwatering can stunt growth. The frequency of watering will depend on your climate, soil type, and container size. Check the soil moisture regularly by sticking your finger a couple of inches into the soil. Water when the top inch or two feels dry.
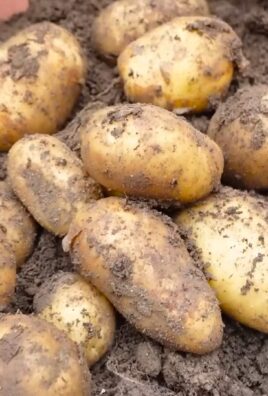
When are my potatoes ready to harvest?
The harvesting time depends on the potato variety and the growing method. For early-season potatoes grown using this fast potato growing guide, you can typically start harvesting after about 60-80 days from planting. The plants will show signs of maturity, such as yellowing leaves and wilting. Gently dig around the plants to check for mature potatoes. You can harvest some potatoes early for new potatoes, leaving others to mature fully for a larger yield.
What can I do with my harvested potatoes?
The possibilities are endless! Enjoy your freshly harvested potatoes in a variety of ways. Boil them, mash them, roast them, fry them, or use them in your favorite recipes. The taste and texture of homegrown potatoes are unmatched. Consider storing your potatoes in a cool, dark, and dry place to extend their shelf life.
Leave a Comment