
Grow Celery Water Saving is more than just a catchy phrase; it’s a lifeline for your garden and your wallet! Are you tired of watching your precious celery plants wither under the summer sun, guzzling water like there’s no tomorrow? I know I was! It felt like I was constantly battling the elements, trying to keep my celery happy and hydrated without emptying my bank account. But what if I told you there’s a way to cultivate crisp, delicious celery while drastically reducing your water consumption?
Celery, with its refreshing crunch and subtle flavor, has been enjoyed for centuries. Originating in the Mediterranean, it was initially valued for its medicinal properties before becoming a culinary staple. Today, it’s a key ingredient in soups, salads, and countless other dishes. However, traditional celery cultivation can be incredibly water-intensive, posing a challenge for gardeners in arid climates or those simply looking to be more eco-conscious.
That’s where these DIY water-saving tricks come in! I’m going to share some simple, yet effective, methods that will revolutionize the way you grow celery water saving. These hacks are designed to minimize water waste, maximize plant health, and ultimately, help you enjoy a bountiful harvest without the guilt of excessive water usage. Get ready to ditch the wasteful watering habits and embrace a greener, more sustainable approach to growing your own celery!
Grow Celery From Kitchen Scraps: A Water-Saving DIY Guide
Hey there, fellow gardeners! I’m so excited to share this super easy and rewarding DIY project with you: growing celery from kitchen scraps! Not only is it a fantastic way to reduce food waste, but it’s also a surprisingly simple way to get fresh celery without constantly buying it from the store. Plus, this method is much more water-efficient than traditional celery farming, making it a win-win for your garden and the environment. Let’s dive in!
What You’ll Need
Before we get started, let’s gather our supplies. This is a pretty low-key project, so you probably have most of these things already:
* Celery Stalk Base: This is the most important part! After you’ve used the celery stalks for cooking or snacking, save the base (the part where all the stalks are attached). Make sure it’s firm and healthy-looking, without any signs of rot.
* Shallow Dish or Bowl: Something that can hold water and the celery base. A pie plate, a small plastic container, or even a saucer will work perfectly.
* Water: Tap water is fine!
* Spray Bottle (Optional): For misting the celery leaves later on.
* Potting Soil: Once the celery has sprouted roots, we’ll need to transplant it into soil.
* Pot or Garden Bed: Choose a pot that’s at least 6 inches in diameter or a spot in your garden that gets plenty of sunlight.
* Gardening Gloves (Optional): To keep your hands clean.
Phase 1: Rooting Your Celery Base
This is where the magic happens! We’re going to coax that celery base into growing new roots.
1. Prepare the Celery Base: Using a sharp knife, trim the bottom of the celery base so it’s nice and flat. This will help it sit evenly in the water. Don’t remove too much, just enough to freshen it up.
2. Place in Water: Put the celery base in your shallow dish or bowl. Add enough water so that the bottom inch or two of the base is submerged. Be careful not to completely cover the entire base, as this can lead to rot.
3. Find a Sunny Spot: Place the dish in a bright, sunny location. A windowsill is ideal. Celery loves sunlight, so the more light it gets, the better it will grow.
4. Change the Water Regularly: This is crucial! Change the water every day or every other day to prevent bacteria growth and keep the water fresh. This will also provide the celery with a fresh supply of oxygen.
5. Be Patient: It usually takes about 5-7 days for roots to start appearing. You’ll see small, white roots emerging from the bottom of the celery base. Keep the water fresh and the celery in a sunny spot, and you’ll be rewarded with roots in no time!
6. Misting (Optional): If you notice the top of the celery base drying out, you can lightly mist it with water using a spray bottle. This will help keep it hydrated.
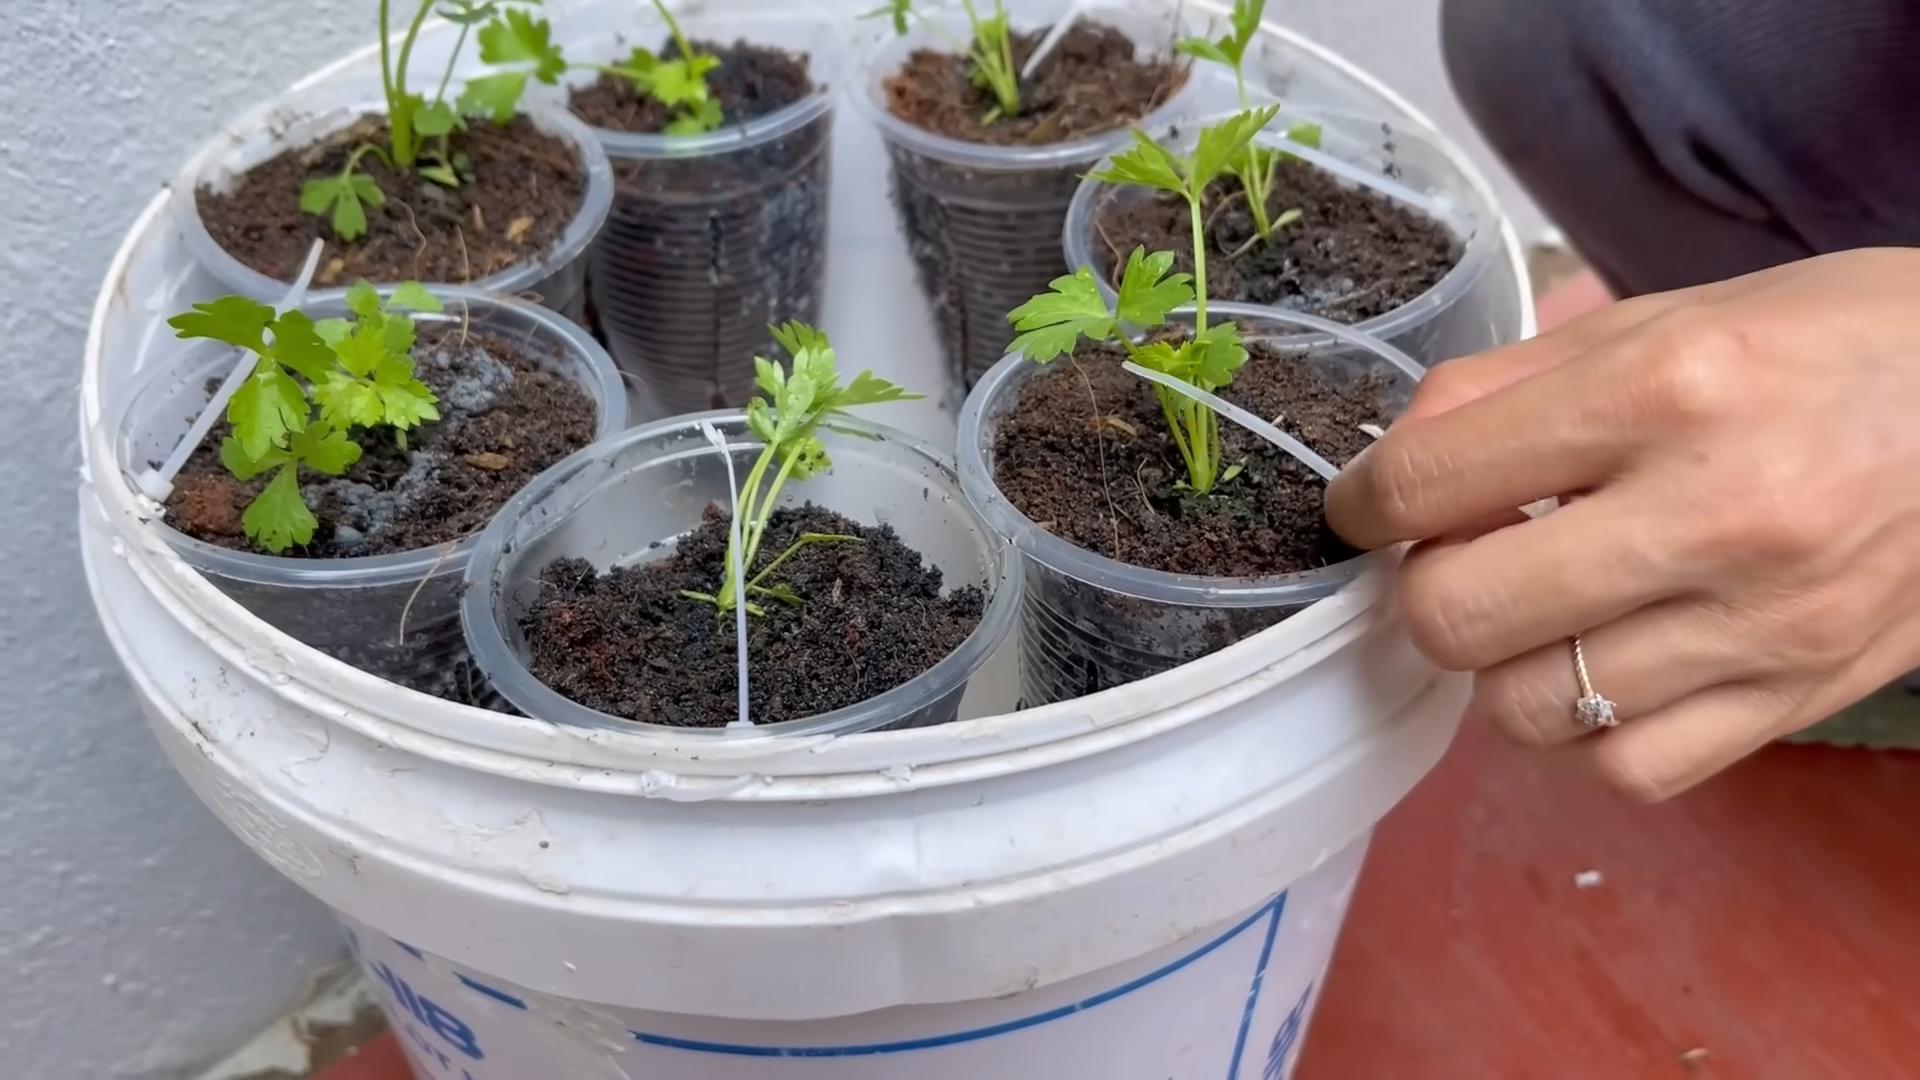
Phase 2: Transplanting to Soil
Once your celery has developed a good set of roots (about an inch or two long), it’s time to move it to soil.
1. Prepare Your Pot or Garden Bed: If you’re using a pot, fill it with good-quality potting soil. If you’re planting in your garden, choose a spot that gets at least 6 hours of sunlight per day and has well-draining soil. Celery prefers slightly acidic soil, so you can amend the soil with compost or peat moss if needed.
2. Dig a Hole: Dig a hole in the soil that’s large enough to accommodate the celery base and its roots.
3. Carefully Remove the Celery: Gently lift the celery base out of the water, being careful not to damage the roots.
4. Plant the Celery: Place the celery base in the hole and cover the roots with soil. Make sure the top of the celery base is still exposed.
5. Water Thoroughly: Water the soil well after planting. This will help settle the soil around the roots and provide the celery with the moisture it needs to get established.
Phase 3: Caring for Your Celery Plant
Now that your celery is planted in soil, it’s time to give it the care it needs to thrive.
Hey there, fellow gardeners! I’m so excited to share this super easy and rewarding DIY project with you: growing celery from kitchen scraps! Not only is it a fantastic way to reduce food waste, but it’s also a surprisingly simple way to get fresh celery without constantly buying it from the store. Plus, this method is much more water-efficient than traditional celery farming, making it a win-win for your garden and the environment. Let’s dive in!
What You’ll Need
Before we get started, let’s gather our supplies. This is a pretty low-key project, so you probably have most of these things already:
* Celery Stalk Base: This is the most important part! After you’ve used the celery stalks for cooking or snacking, save the base (the part where all the stalks are attached). Make sure it’s firm and healthy-looking, without any signs of rot.
* Shallow Dish or Bowl: Something that can hold water and the celery base. A pie plate, a small plastic container, or even a saucer will work perfectly.
* Water: Tap water is fine!
* Spray Bottle (Optional): For misting the celery leaves later on.
* Potting Soil: Once the celery has sprouted roots, we’ll need to transplant it into soil.
* Pot or Garden Bed: Choose a pot that’s at least 6 inches in diameter or a spot in your garden that gets plenty of sunlight.
* Gardening Gloves (Optional): To keep your hands clean.
Phase 1: Rooting Your Celery Base
This is where the magic happens! We’re going to coax that celery base into growing new roots.
1. Prepare the Celery Base: Using a sharp knife, trim the bottom of the celery base so it’s nice and flat. This will help it sit evenly in the water. Don’t remove too much, just enough to freshen it up.
2. Place in Water: Put the celery base in your shallow dish or bowl. Add enough water so that the bottom inch or two of the base is submerged. Be careful not to completely cover the entire base, as this can lead to rot.
3. Find a Sunny Spot: Place the dish in a bright, sunny location. A windowsill is ideal. Celery loves sunlight, so the more light it gets, the better it will grow.
4. Change the Water Regularly: This is crucial! Change the water every day or every other day to prevent bacteria growth and keep the water fresh. This will also provide the celery with a fresh supply of oxygen.
5. Be Patient: It usually takes about 5-7 days for roots to start appearing. You’ll see small, white roots emerging from the bottom of the celery base. Keep the water fresh and the celery in a sunny spot, and you’ll be rewarded with roots in no time!
6. Misting (Optional): If you notice the top of the celery base drying out, you can lightly mist it with water using a spray bottle. This will help keep it hydrated.
Phase 2: Transplanting to Soil
Once your celery has developed a good set of roots (about an inch or two long), it’s time to move it to soil.
1. Prepare Your Pot or Garden Bed: If you’re using a pot, fill it with good-quality potting soil. If you’re planting in your garden, choose a spot that gets at least 6 hours of sunlight per day and has well-draining soil. Celery prefers slightly acidic soil, so you can amend the soil with compost or peat moss if needed.
2. Dig a Hole: Dig a hole in the soil that’s large enough to accommodate the celery base and its roots.
3. Carefully Remove the Celery: Gently lift the celery base out of the water, being careful not to damage the roots.
4. Plant the Celery: Place the celery base in the hole and cover the roots with soil. Make sure the top of the celery base is still exposed.
5. Water Thoroughly: Water the soil well after planting. This will help settle the soil around the roots and provide the celery with the moisture it needs to get established.
Phase 3: Caring for Your Celery Plant
Now that your celery is planted in soil, it’s time to give it the care it needs to thrive.
1. Water Regularly: Celery needs consistent moisture to grow well. Water the plant whenever the top inch of soil feels dry to the touch. Avoid overwatering, as this can lead to root rot.
2. Fertilize (Optional): To give your celery a boost, you can fertilize it every few weeks with a balanced liquid fertilizer. Follow the instructions on the fertilizer label.
3. Sunlight: Ensure your celery plant continues to receive plenty of sunlight. At least 6 hours a day is ideal.
4. Pest Control: Keep an eye out for pests like aphids and slugs. If you notice any pests, you can try spraying the plant with insecticidal soap or hand-picking them off.
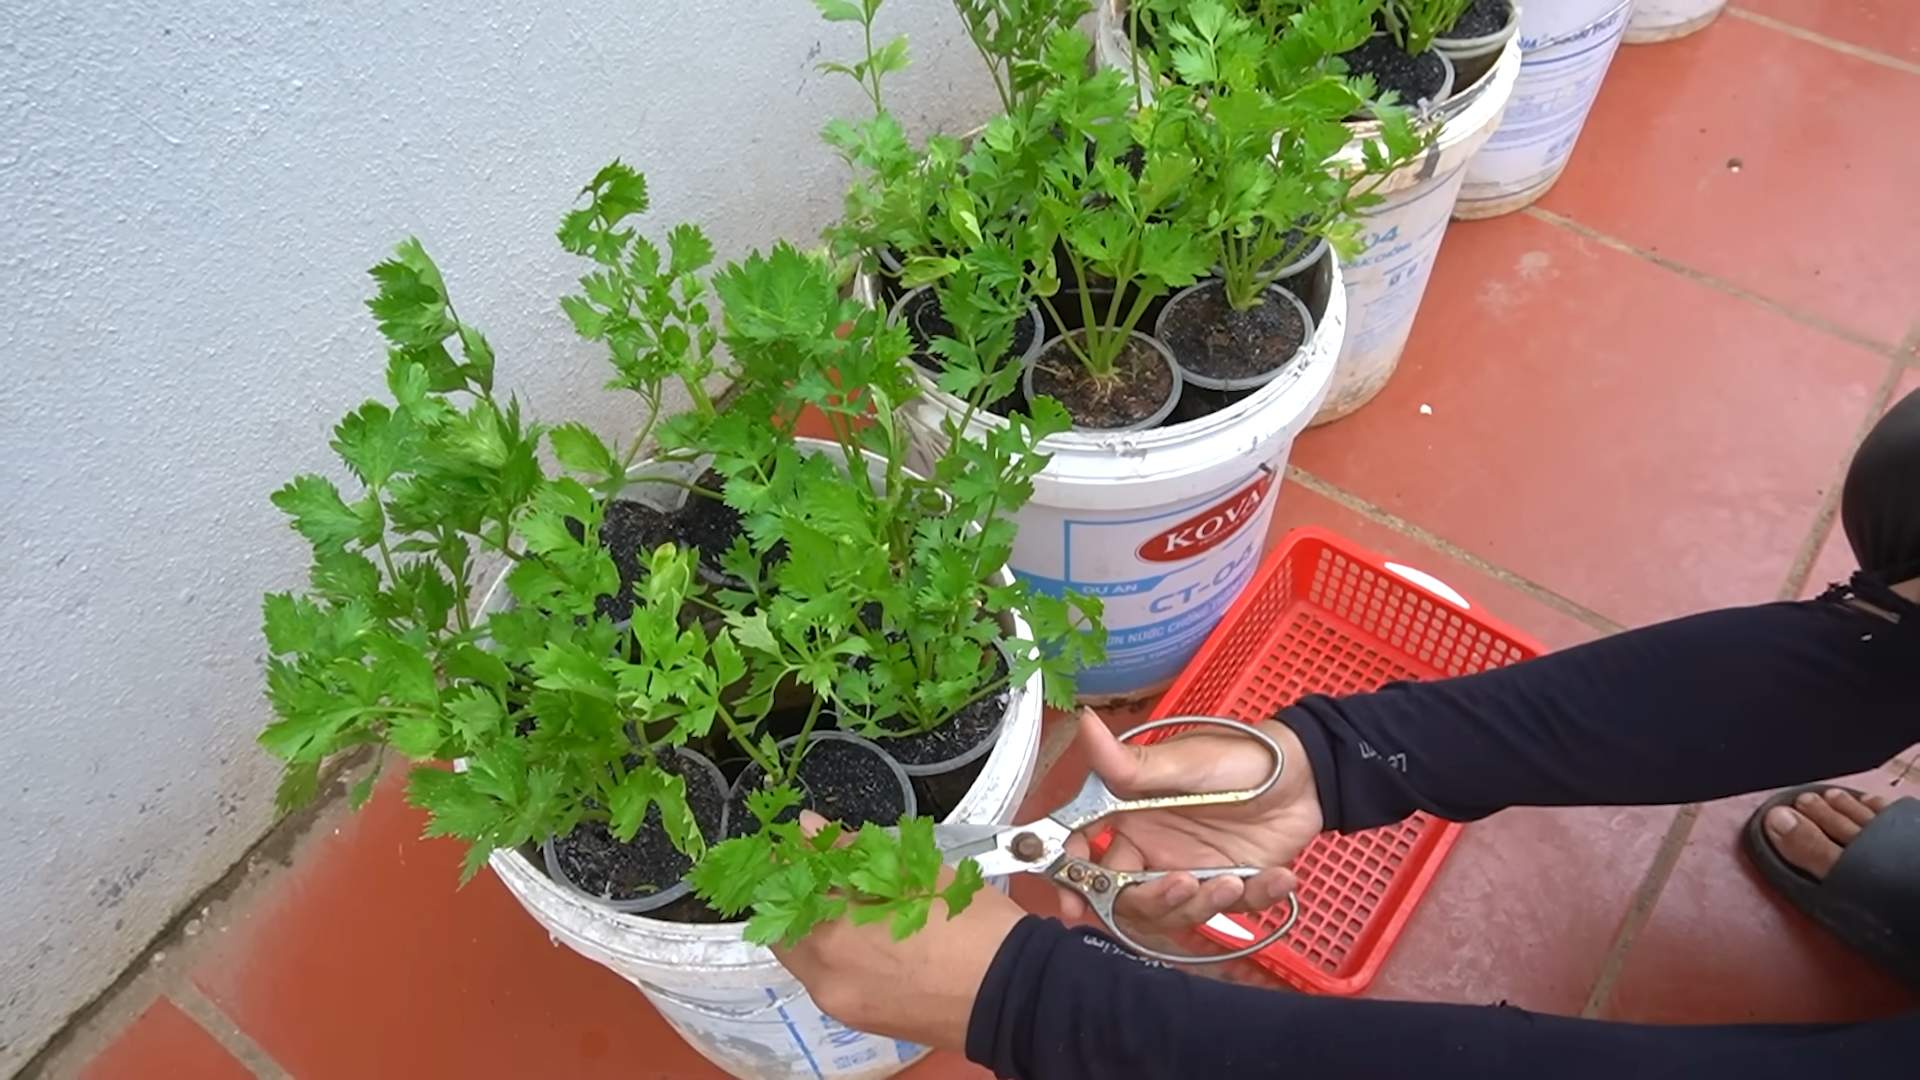
5. Harvesting: You can start harvesting celery stalks once they’re about 6-8 inches long. Simply cut off the stalks you need, leaving the rest of the plant to continue growing. The inner stalks will continue to grow and mature.
Troubleshooting
Sometimes things don’t go exactly as planned. Here are a few common issues you might encounter and how to fix them:
* Celery Base Rotting: If your celery base starts to rot, it’s usually due to overwatering or not changing the water frequently enough. Make sure to change the water every day or every other day and avoid submerging the entire base in water.
* Slow Root Growth: If your celery isn’t growing roots, it could be due to lack of sunlight or poor water quality. Make sure the celery is in a sunny spot and that you’re using fresh, clean water.
* Yellowing Leaves: Yellowing leaves can be a sign of overwatering or nutrient deficiency. Make sure you’re not overwatering the plant and consider fertilizing it with a balanced liquid fertilizer.
* Pests: Aphids, slugs, and other pests can sometimes attack celery plants. Inspect your plant regularly and take action if you notice any pests. Insecticidal soap or hand-picking can be effective solutions.
Water-Saving Tips for Celery Growing
Growing celery from scraps is already a water-saving method compared to traditional farming, but here are a few extra tips to conserve even more water:
* Water deeply but less frequently: Instead of watering a little bit every day, water deeply when the top inch of soil feels dry. This encourages the roots to grow deeper, making the plant more drought-tolerant.
* Use mulch: Apply a layer of mulch around the base of the plant to help retain moisture in the soil. Straw, wood chips, or shredded leaves are all good options.
* Collect rainwater: Use a rain barrel to collect rainwater and use it to water your celery plant. This is a great way to conserve water and provide your plant with a natural source of hydration.
* Water in the morning: Water your celery plant in the morning to minimize water loss due to evaporation.
* Group plants with similar water needs: Plant your celery alongside other plants that have similar water requirements. This will make it easier to water efficiently.
Enjoy Your Homegrown Celery!
And that’s it! You’ve successfully grown celery from kitchen scraps. Now you can enjoy fresh, homegrown celery in your salads, soups, and snacks. It’s a rewarding feeling to know that you’ve reduced food waste, saved water, and grown your own food. Happy gardening!
Conclusion
So, there you have it! Growing celery from scraps using this water-saving method is more than just a fun experiment; it’s a sustainable way to reduce food waste, enjoy fresh celery, and conserve precious water resources. It’s a win-win-win!
This simple DIY trick transforms what would normally be tossed in the compost bin into a thriving celery plant, ready to add a crisp, refreshing crunch to your salads, soups, and snacks. Think about it: no more buying celery from the store, only to use a few stalks and watch the rest wilt away in the crisper drawer. This method allows you to grow exactly what you need, when you need it, minimizing waste and maximizing freshness.
But the benefits don’t stop there. By regrowing celery from scraps, you’re actively participating in a more sustainable food system. Traditional celery farming can be water-intensive. This method, however, significantly reduces your water footprint. You’re essentially recycling water already used to grow the initial celery stalk, making it an incredibly eco-friendly approach.
Ready to take your celery growing to the next level? Consider these variations:
* **Experiment with different celery varieties:** Try regrowing different types of celery, such as Pascal celery or Chinese celery, to see which ones thrive best in your climate and growing conditions.
* **Hydroponic celery:** Once your celery base has established roots, you can transfer it to a hydroponic system for even more efficient water usage and faster growth.
* **Companion planting:** Plant your regrown celery alongside other vegetables that benefit from its presence, such as tomatoes or onions. Celery is known to repel certain pests, making it a valuable addition to your garden.
* **Celery Seed Harvesting:** Allow some of your regrown celery plants to bolt (flower) and harvest the seeds for future planting. This creates a truly self-sustaining cycle.
* **Fertilizer Boost:** While celery can regrow with just water, adding a diluted liquid fertilizer every few weeks can provide essential nutrients and promote stronger, healthier growth. Look for a balanced fertilizer specifically formulated for vegetables.
This water-saving celery growing method is incredibly rewarding, and we encourage you to give it a try. It’s a fantastic project for gardeners of all levels, from beginners to seasoned pros. It’s also a great way to get kids involved in gardening and teach them about sustainability and food waste reduction.
Don’t be afraid to experiment and adapt the method to suit your specific needs and preferences. The key is to provide your celery base with consistent moisture, sunlight, and a little bit of patience.
We’re confident that you’ll be amazed at how easy and rewarding it is to grow your own celery from scraps. So, grab that leftover celery base, follow our simple steps, and get ready to enjoy fresh, homegrown celery in no time!
We’d love to hear about your experiences! Share your photos, tips, and tricks in the comments below. Let’s build a community of water-conscious gardeners who are passionate about reducing food waste and growing their own food. What are you waiting for? Start your celery growing adventure today!
Frequently Asked Questions (FAQ)
1. How long does it take to regrow celery from a base?
The time it takes to regrow celery from a base can vary depending on several factors, including the variety of celery, the growing conditions (sunlight, temperature, water quality), and whether you’re using fertilizer. Generally, you can expect to see new growth within 5-7 days. Within 2-3 weeks, you should have a noticeable cluster of new stalks emerging from the center of the base. It typically takes around 3-4 months to grow a full-sized celery plant suitable for harvesting. Remember that regrown celery may not be as large or robust as celery grown from seed, but it will still provide you with delicious, fresh stalks.
2. What kind of water is best for regrowing celery?
The best type of water for regrowing celery is clean, fresh water. Tap water is generally suitable, but if your tap water is heavily chlorinated, it’s best to let it sit out for 24 hours before using it to allow the chlorine to dissipate. Alternatively, you can use filtered water or rainwater. Avoid using softened water, as it can contain high levels of sodium, which can be harmful to plants. It’s also important to change the water every 1-2 days to prevent the growth of bacteria and algae.
3. How much sunlight does regrowing celery need?
Regrowing celery requires plenty of sunlight. Aim for at least 6-8 hours of direct sunlight per day. If you’re growing your celery indoors, place it near a sunny window, preferably one that faces south or west. If you don’t have access to enough natural light, you can supplement with a grow light. A grow light will provide the necessary light spectrum for healthy growth, especially during the winter months or in areas with limited sunlight.
4. Can I plant the celery base directly in soil instead of water?
Yes, you can plant the celery base directly in soil, but it’s generally recommended to start it in water first. Starting in water allows the base to develop roots more quickly and efficiently. Once the roots are about 1-2 inches long, you can transplant the celery base into a pot filled with well-draining potting soil. When transplanting, be careful not to damage the delicate roots. Water thoroughly after planting and continue to provide plenty of sunlight and moisture.
5. What kind of soil is best for growing regrown celery?
The best kind of soil for growing regrown celery is a well-draining, nutrient-rich potting mix. Celery prefers soil that is slightly acidic to neutral, with a pH between 6.0 and 7.0. You can amend your potting soil with compost or other organic matter to improve its fertility and drainage. Avoid using heavy clay soil, as it can retain too much moisture and lead to root rot.
6. How often should I water the celery after transplanting it to soil?
After transplanting your celery to soil, water it thoroughly and keep the soil consistently moist, but not waterlogged. Check the soil moisture level daily and water when the top inch of soil feels dry to the touch. During hot, dry weather, you may need to water more frequently. Avoid overwatering, as this can lead to root rot.
7. How do I know when the regrown celery is ready to harvest?
Regrown celery is ready to harvest when the stalks are about 6-8 inches long and have a firm, crisp texture. You can harvest individual stalks as needed, or you can harvest the entire plant at once. To harvest, simply cut the stalks at the base of the plant with a sharp knife.
8. Can I regrow celery multiple times from the same base?
While it’s possible to get a second or even a third harvest from the same celery base, the subsequent growth will likely be less vigorous and produce smaller stalks. The initial regrowth is usually the most productive. After the first harvest, the base may become depleted of nutrients and energy.
9. Is regrown celery as nutritious as celery grown from seed?
Regrown celery is generally as nutritious as celery grown from seed. It contains the same vitamins, minerals, and antioxidants as conventionally grown celery. However, the nutrient content may vary slightly depending on the growing conditions and the health of the plant.
10. What are some common problems when regrowing celery and how can I fix them?
Some common problems when regrowing celery include:
* **Yellowing leaves:** This can be caused by overwatering, underwatering, or a lack of nutrients. Adjust your watering schedule and consider adding a diluted liquid fertilizer.
* **Root rot:** This is caused by overwatering and poor drainage. Make sure your soil is well-draining and avoid overwatering.
* **Pests:** Celery can be susceptible to pests such as aphids and spider mites. Inspect your plants regularly and treat any infestations with insecticidal soap or neem oil.
* **Bolting (flowering):** This can happen if the celery is exposed to extreme temperatures or stress. Once celery bolts, the stalks become bitter and less palatable. Try to provide consistent growing conditions and avoid exposing your celery to extreme temperatures.
11. How does this method save water compared to traditional celery growing?
Traditional celery farming often involves extensive irrigation to ensure the plants receive enough water. This DIY method, however, significantly reduces water consumption in several ways:
* **Recycling Water:** You’re essentially reusing water that was already used to grow the initial celery stalk.
* **Targeted Watering:** You’re only watering the celery base, rather than an entire field.
* **Reduced Evaporation:** Growing celery indoors or in a container can reduce water loss through evaporation compared to growing it in an open field.
* **Smaller Scale:** You’re growing only what you need, minimizing the overall water footprint associated with celery consumption.
By adopting this water-saving celery growing method, you’re contributing to a more sustainable and environmentally friendly food system.

Leave a Comment