
Grow Corn in Bags? Absolutely! Imagine sinking your teeth into sweet, juicy corn you’ve grown yourself, even if you don’t have a sprawling backyard. That’s the magic we’re unlocking today with this simple, yet incredibly rewarding DIY project. For centuries, corn has been a staple crop, deeply woven into the fabric of countless cultures, providing sustenance and playing a vital role in traditions. From the ancient civilizations of Mesoamerica to modern-day barbecues, corn’s journey is a testament to its enduring appeal.
But what if you’re short on space? That’s where this clever hack comes in. Many people dream of fresh, homegrown produce but are limited by apartment living or small patios. This DIY method allows you to grow corn in bags, bringing the farm-to-table experience right to your doorstep. I’m going to show you how to bypass the need for a traditional garden and cultivate your own delicious corn crop with just a few simple supplies and a little bit of sunshine. Get ready to impress your friends and family with your green thumb – bag-style!
Grow Your Own Corn in Bags: A Beginner’s Guide
Hey there, fellow gardening enthusiasts! Ever dreamt of having fresh, sweet corn right outside your door, even if you don’t have a sprawling field? Well, I’m here to tell you it’s totally possible, and surprisingly easy, to grow corn in bags! This method is perfect for small spaces, balconies, patios, or even just to get a head start on the season. I’ve been doing this for a few years now, and I’m excited to share my secrets with you.
Why Grow Corn in Bags?
Before we dive in, let’s talk about why this method is so awesome:
* Space-Saving: This is the biggest advantage! You don’t need a huge garden plot. Bags can be placed almost anywhere.
* Portability: Need to move your corn to a sunnier spot? No problem! Just pick up the bag and relocate it.
* Soil Control: You have complete control over the soil composition, ensuring your corn gets the nutrients it needs.
* Weed Control: Bags minimize weed competition, making your life much easier.
* Early Start: You can start your corn indoors in bags and then move them outside when the weather warms up.
* Fun and Educational: It’s a great project for kids and adults alike, teaching about plant growth and where our food comes from.
What You’ll Need
Okay, let’s gather our supplies. Here’s what you’ll need to get started:
* Large Bags: I recommend using heavy-duty polypropylene bags (like the kind used for animal feed or landscaping materials). Aim for bags that are at least 24 inches in diameter and 24 inches tall. The bigger, the better, as corn roots need space to spread. You can also use large grow bags specifically designed for plants.
* Potting Mix: Don’t use garden soil directly in the bags! It’s too heavy and doesn’t drain well. A good quality potting mix is essential. I like to use a mix of compost, peat moss (or coco coir), and perlite or vermiculite for good drainage.
* Corn Seeds: Choose a variety of sweet corn that’s suitable for your climate and growing season. Look for varieties that are known for their good flavor and disease resistance.
* Slow-Release Fertilizer: Corn is a heavy feeder, so a slow-release fertilizer will provide a steady supply of nutrients throughout the growing season. Look for a fertilizer with a balanced NPK ratio (nitrogen, phosphorus, potassium).
* Watering Can or Hose: You’ll need a way to water your corn regularly.
* Scissors or Knife: For cutting drainage holes in the bags.
* Optional: Stakes or cages for support, especially if you live in a windy area.
Step-by-Step Instructions: Planting Your Corn
Alright, let’s get our hands dirty! Here’s how to plant your corn in bags:
1. Prepare the Bags:
* First, find a suitable location for your bags. Corn needs at least 6-8 hours of direct sunlight per day.
* Next, if you’re using polypropylene bags, make sure they are clean.
* Now, cut drainage holes in the bottom of each bag. I usually make about 6-8 holes, spaced evenly around the bottom. This is crucial to prevent waterlogging, which can rot the roots.
* Fold down the top edges of the bags a few inches to create a more stable rim and make it easier to fill them with soil.
2. Fill the Bags with Potting Mix:
* Fill each bag with the potting mix, leaving about 4-6 inches of space at the top. This will give you room to water without the soil overflowing.
* Gently press down on the soil to compact it slightly.
3. Add Fertilizer:
* Sprinkle the slow-release fertilizer evenly over the surface of the soil in each bag. Follow the instructions on the fertilizer package for the correct amount to use.
* Gently mix the fertilizer into the top inch or two of the soil.
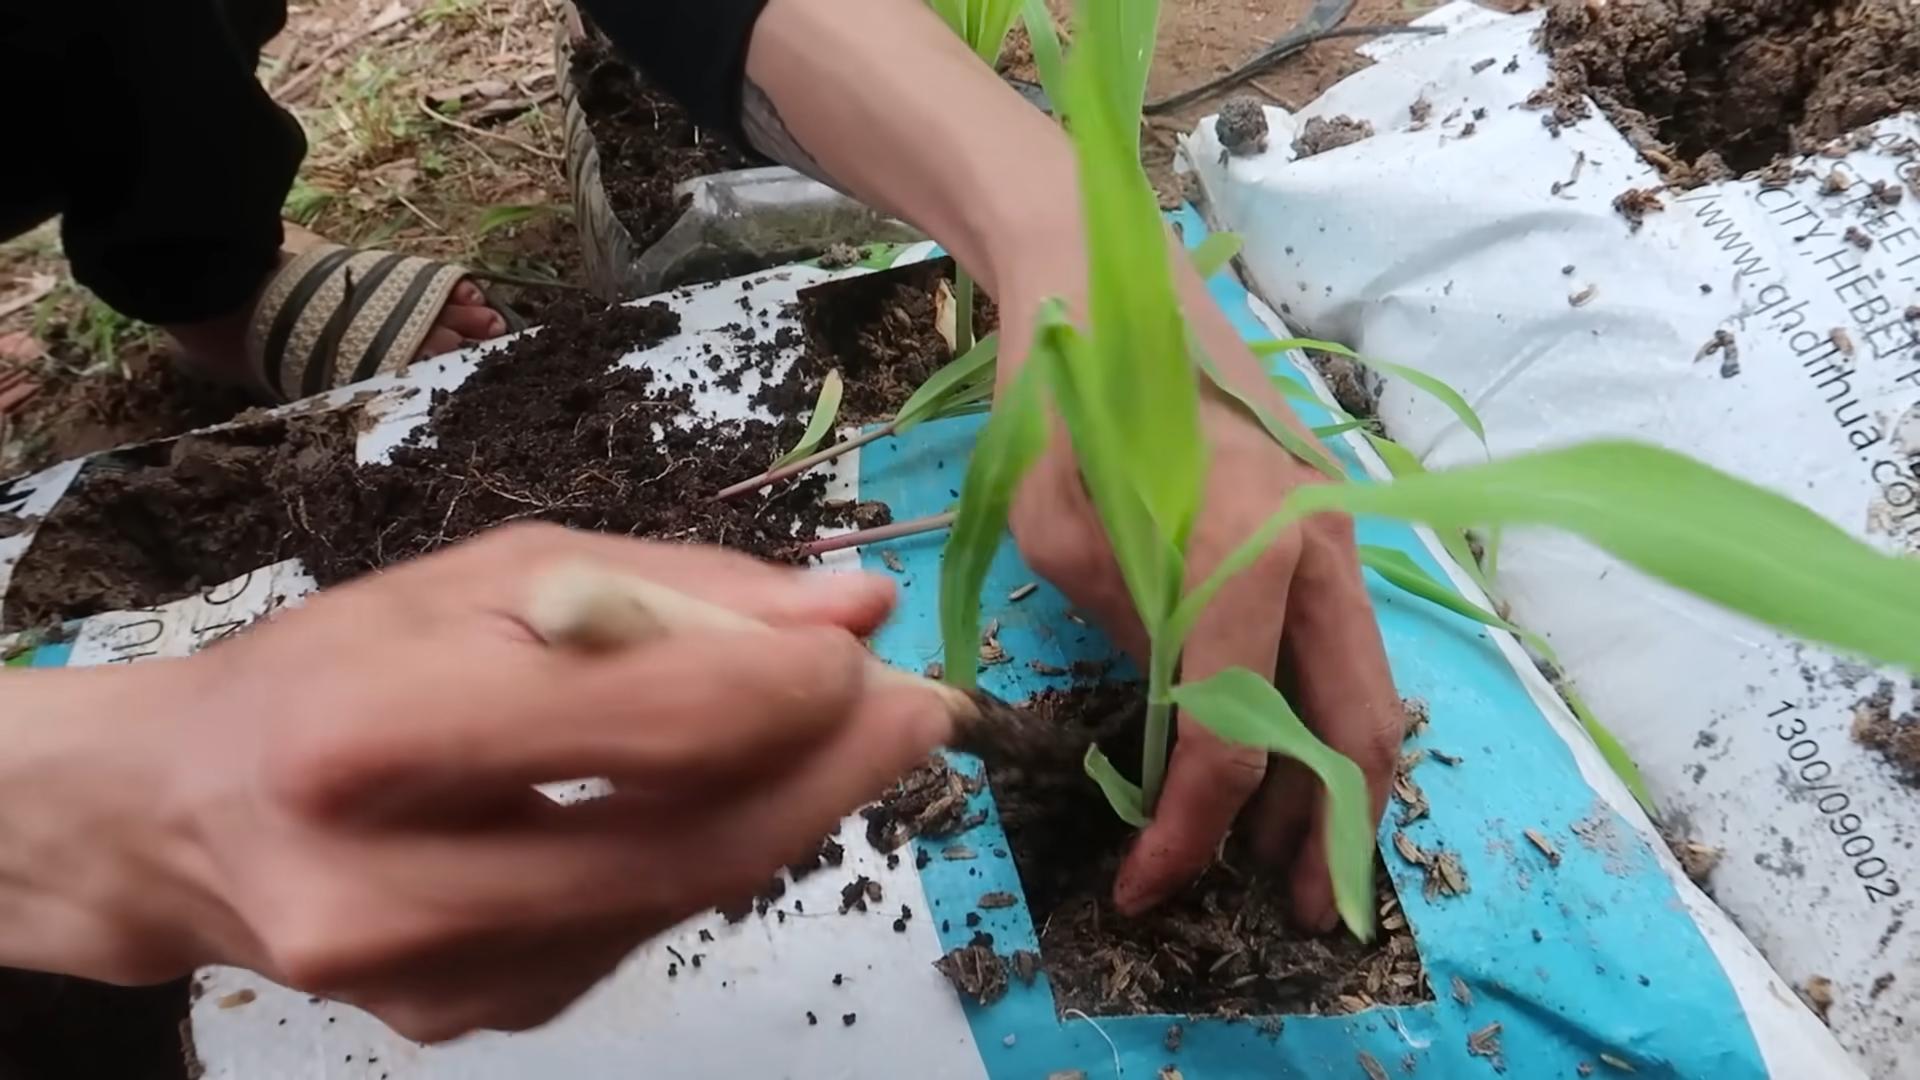
4. Plant the Corn Seeds:
* Corn needs to be planted in blocks rather than rows for proper pollination. This is because corn is wind-pollinated, and planting in a block increases the chances of the pollen reaching the silks of the ears.
* Sow the corn seeds about 1-2 inches deep and 4-6 inches apart in a grid pattern within the bag. I usually plant about 6-8 seeds per bag, depending on the size of the bag.
* Cover the seeds with soil and gently pat it down.
5. Water Thoroughly:
* Water the bags thoroughly until the water drains out of the drainage holes. This will help to settle the soil and ensure that the seeds have good contact with the moisture.
Caring for Your Corn Plants
Now that your corn is planted, it’s time to nurture it and watch it grow! Here’s what you need to do to keep your corn plants happy and healthy:
1. Watering:
* Corn needs consistent moisture, especially during germination and ear development. Water deeply whenever the top inch of soil feels dry to the touch.
* Avoid overwatering, as this can lead to root rot.
* Water in the morning to allow the foliage to dry before nightfall, which can help prevent fungal diseases.
2. Fertilizing:
* Even with slow-release fertilizer, corn may need additional feeding during the growing season.
* When the plants are about 12 inches tall, side-dress them with a nitrogen-rich fertilizer. You can use a liquid fertilizer or a granular fertilizer. Follow the instructions on the fertilizer package.
* Repeat the side-dressing every 2-3 weeks until the tassels appear.
3. Thinning:
* Once the seedlings are a few inches tall, thin them to the strongest 3-4 plants per bag. This will give the remaining plants enough space to grow and develop.
* Carefully snip off the unwanted seedlings at the soil line with scissors. Don’t pull them out, as this can disturb the roots of the remaining plants.
4. Pollination:
* Corn is wind-pollinated, so it’s important to ensure good air circulation around the plants.
* If you’re growing corn in a sheltered location, you may need to hand-pollinate the plants to ensure good ear development.
* To hand-pollinate, gently shake the tassels (the male flowers at the top of the plant) over the silks (the female flowers that emerge from the developing ears). Do this in the morning when the pollen is most active.
* You can also collect pollen from the tassels with a small brush and then dust it onto the silks.
5. Pest and Disease Control:
* Keep an eye out for common corn pests, such as corn earworms, aphids, and Japanese beetles.
* Inspect your plants regularly and take action if you see any signs of infestation.
* You can use insecticidal soap, neem oil, or other organic pest control methods to control pests.
* To prevent fungal diseases, ensure good air circulation around the plants and avoid overwatering.
* If you see any signs of disease, such as leaf spots or mildew, treat the plants with a fungicide.
6. Support:
* As the corn plants grow taller, they may need support, especially if you live in a windy area.
* You can use stakes or cages to support the plants.
* Drive the stakes into the ground near the plants and tie the stalks to the stakes with twine.
* Alternatively, you can use tomato cages to support the plants.
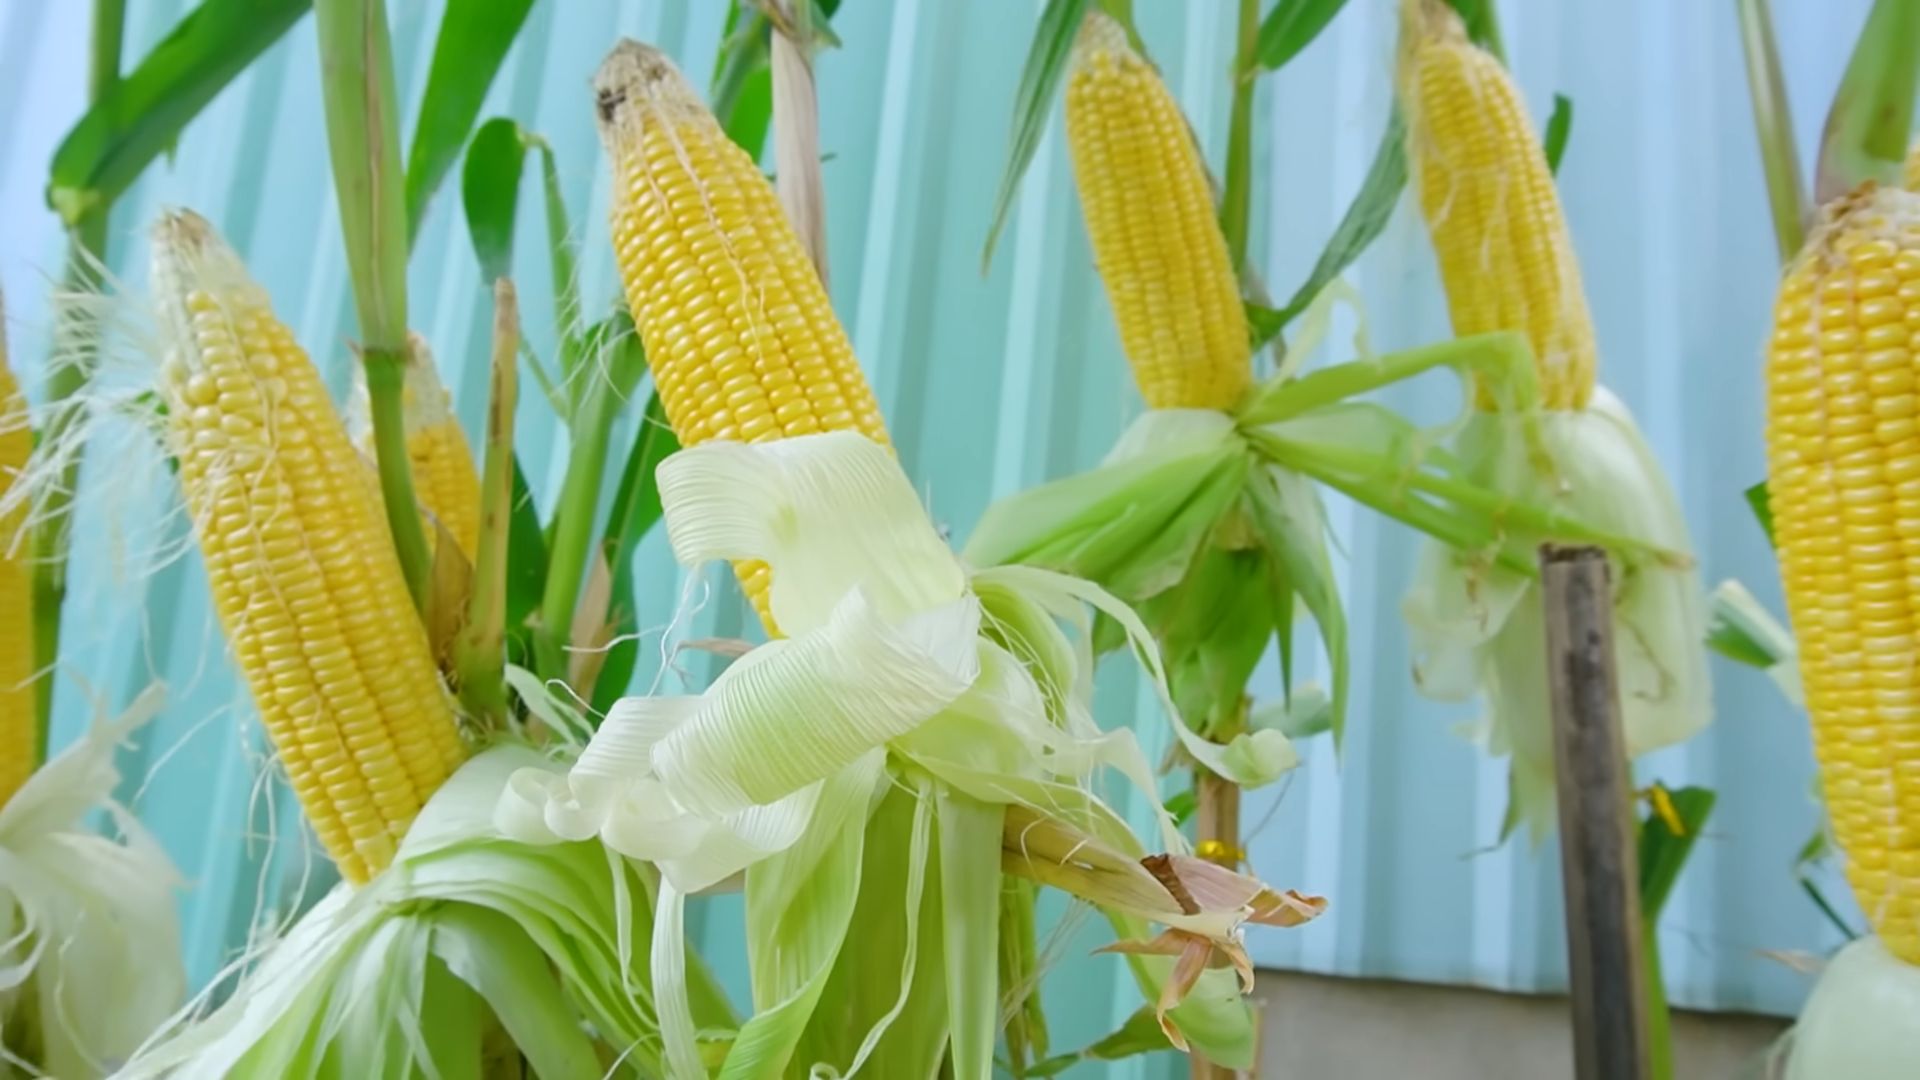
Harvesting Your Corn
The moment we’ve all been waiting for! Harvesting your homegrown corn is incredibly rewarding. Here’s how to know when your corn is ready to pick:
1. Check the Silks:
* The silks should be brown and dry. This indicates that the kernels have been pollinated.
2. Feel the Ears:
* Gently squeeze the ears. They should feel plump and full.
3. Peel Back the Husk:
* Carefully peel back a small portion of the husk to check the kernels. The kernels should be plump and milky.
4. Harvest:
* To harvest, grasp the ear firmly and twist it downward. It should snap off easily from the stalk.
5. Enjoy!
* Enjoy your fresh, homegrown corn as soon as possible after harvesting. The sugars in corn start to convert to starch soon after picking, so the sooner you eat it, the sweeter it will be.
Conclusion
So, there you have it! Growing corn in bags is not just a quirky gardening experiment; it’s a game-changer for anyone with limited space, challenging soil, or simply a desire for a more controlled growing environment. We’ve walked you through the process, highlighting the benefits and addressing potential hurdles. But why is this DIY trick a must-try?
Firstly, the sheer convenience is undeniable. Imagine fresh, sweet corn, grown right on your patio, balcony, or even a sunny driveway. No more trekking to the farmer’s market or relying on supermarket produce. You have complete control over the growing process, ensuring the corn is free from unwanted pesticides and herbicides.
Secondly, the yield can be surprisingly impressive. By providing the corn with optimal conditions – rich soil, consistent watering, and ample sunlight – you can often achieve a harvest comparable to, or even exceeding, that of traditional in-ground planting. This is especially true if your native soil is less than ideal.
Thirdly, it’s incredibly rewarding. There’s something deeply satisfying about nurturing a plant from seed to harvest, especially when that plant produces such a delicious and versatile food. Growing your own corn connects you to the natural world in a tangible and meaningful way.
But the beauty of this method lies in its adaptability. Feel free to experiment with different varieties of corn. While sweet corn is a popular choice, you could also try growing popcorn corn or even ornamental corn for a touch of autumn color. Consider adding companion plants to your bags, such as beans or squash, to create a mini-ecosystem and further enhance your yield. You can also adjust the size of the bags to suit your available space and desired harvest. For example, if you only want a small amount of corn, you can use smaller bags. If you want a larger harvest, you can use larger bags.
Don’t be afraid to get creative with your soil mix. While the recipe we provided is a great starting point, you can tailor it to your specific needs and preferences. Adding compost, aged manure, or other organic amendments will further enrich the soil and provide your corn with the nutrients it needs to thrive.
Growing corn in bags is a fantastic way to enjoy fresh, homegrown corn, regardless of your gardening experience or available space. It’s a simple, effective, and rewarding project that’s sure to bring a smile to your face.
Now, it’s your turn! We encourage you to give this DIY trick a try. Gather your supplies, follow the steps outlined in this article, and get ready to enjoy the taste of homegrown corn. And most importantly, share your experience with us! We’d love to hear about your successes, challenges, and any variations you’ve tried. Post photos of your corn plants, share your tips and tricks, and let’s create a community of bag-grown corn enthusiasts. Happy growing!
Frequently Asked Questions (FAQ)
What type of bag is best for growing corn?
The ideal bag for growing corn is a large, sturdy grow bag made from breathable fabric, such as felt or a similar material. These bags allow for good drainage and aeration, which are crucial for healthy root development. Aim for a bag that is at least 15-20 gallons in size to provide ample space for the corn roots to grow. Avoid using plastic bags, as they can trap moisture and lead to root rot. If you must use a plastic bag, ensure it has plenty of drainage holes. You can also use burlap sacks, but they may not last as long as fabric grow bags.
How many corn plants can I grow in one bag?
Generally, it’s best to plant 2-3 corn plants per 15-20 gallon bag. Corn plants need space to grow and access nutrients. Overcrowding can lead to stunted growth and reduced yields. If you’re using a smaller bag, reduce the number of plants accordingly. Remember that corn is wind-pollinated, so planting multiple stalks close together increases the chances of successful pollination.
What kind of soil mix should I use?
A well-draining and nutrient-rich soil mix is essential for growing corn in bags. A good starting point is a mix of equal parts:
* Potting soil: Provides a good base for drainage and aeration.
* Compost: Adds organic matter and essential nutrients.
* Aged manure: Provides slow-release nutrients and improves soil structure.
You can also add perlite or vermiculite to improve drainage and aeration further. Avoid using garden soil, as it can be too heavy and compact, hindering root growth.
How often should I water my corn plants in bags?
Corn plants need consistent moisture, especially during hot weather. Water deeply whenever the top inch of soil feels dry to the touch. This may mean watering daily or even twice a day during peak summer months. Ensure the bag has good drainage to prevent waterlogging, which can lead to root rot. A good way to check if your corn needs water is to stick your finger about an inch into the soil. If it feels dry, it’s time to water.
What kind of fertilizer should I use, and how often?
Corn is a heavy feeder, meaning it requires a lot of nutrients to grow and produce ears. Use a balanced fertilizer (e.g., 10-10-10) or a fertilizer specifically formulated for vegetables. Apply fertilizer every 2-3 weeks, following the instructions on the fertilizer package. You can also supplement with organic fertilizers, such as compost tea or fish emulsion. Avoid over-fertilizing, as this can burn the roots.
How much sunlight do corn plants need?
Corn plants need at least 6-8 hours of direct sunlight per day to thrive. Choose a location for your bags that receives plenty of sunlight throughout the day. If you live in a particularly hot climate, you may need to provide some afternoon shade to prevent the plants from overheating.
How do I know when my corn is ready to harvest?
There are several indicators that your corn is ready to harvest:
* The silks (the strands that emerge from the top of the ear) will turn brown and dry.
* The ear will feel plump and full.
* When you peel back a small portion of the husk and puncture a kernel with your fingernail, the liquid inside should be milky. If it’s clear, the corn is not ripe yet. If it’s pasty, the corn is overripe.
Harvest your corn in the morning for the best flavor.
What are some common pests and diseases that affect corn, and how can I prevent them?
Some common pests that affect corn include corn earworms, aphids, and Japanese beetles. Diseases include corn smut and rust. To prevent these problems:
* Inspect your plants regularly for signs of pests or diseases.
* Use organic pest control methods, such as insecticidal soap or neem oil.
* Practice good sanitation by removing any dead or diseased leaves.
* Ensure good air circulation around the plants.
* Choose disease-resistant varieties of corn.
Can I reuse the soil in the bags for the next growing season?
Yes, you can reuse the soil, but it’s important to amend it with fresh compost and other organic matter to replenish the nutrients that were used by the corn plants. You may also want to sterilize the soil to kill any potential pests or diseases. This can be done by baking the soil in the oven or solarizing it in the sun.
What if my corn plants don’t produce ears?
There are several reasons why your corn plants might not produce ears:
* Lack of pollination: Ensure that the plants are close enough together for wind pollination to occur. You can also hand-pollinate the plants by gently shaking the tassels (the male flowers at the top of the plant) over the silks (the female flowers on the ears).
* Insufficient nutrients: Corn is a heavy feeder, so make sure you’re providing enough fertilizer.
* Lack of sunlight: Corn needs at least 6-8 hours of direct sunlight per day.
* Water stress: Ensure that the plants are getting enough water, especially during hot weather.
By addressing these potential issues, you can increase your chances of a successful corn harvest.
Leave a Comment